

Icon, Name, and Description
Short descriptive information to identify the agent and describe how it works to other users. Workspace admins can also set a creator display name that is shown instead of the individual creator, for example a team name.Input Type
Agents support different input types that determine how they receive and process information.Prompt (Default)
The chat input field you already know from normal chat. This lets you send any message to the agent and receive a response. You can set conversation starters, which are saved prompts users can click instead of writing the first message. These help guide users and reduce the effort needed to get started.Form
Forms collect information in a structured way, similar to a survey tool. This helps guide users to understand how much context is necessary for a quality response and collects it in a standardized format that the model can process more easily.Instructions
Describe what you want to achieve with this agent and define clear instructions. Include as many relevant details and background information as possible. This enables the agent to answer better and more closely to your expectations. Check out our agent creation guide and our prompting guide for more details.Knowledge
Attach files to your Agent from your computer or from integrations in the Files row. You can also use Folder Sync to sync folders from SharePoint, Google Drive, OneDrive, or Confluence Cloud. Add Knowledge bases, Library Folders, and synced folders by selecting Add folders in the Folders row. An agent can attach up to 50 files, 5 Library Folders, and 5 synced folders. Library Folders stay read-only until you mark one as a working folder. See Folders for how to set this up.Source Access Restriction
By default, when your agent cites sources in its responses, users can click on those references to open and view the original documents. If you need to protect sensitive source content while still allowing the agent to reference it, you can enable source access restriction. When enabled, users see source references in responses but cannot click to open them. The agent still reads and searches these files to answer questions. It can’t pass the original files to integration actions or MCP tools that take a file input, or copy them into a Skill. This is useful when:- The agent needs access to confidential documents to provide accurate answers
- Users should receive information from sources without direct access to the underlying files
- You want to control document distribution while still leveraging the knowledge
This setting must first be enabled at the workspace level by an admin before it becomes available in the agent configuration. If you don’t see this option, contact your workspace admin.
Integrations
Connect your agent to external tools and services. Click Add integration in the Integrations row. Your agent can then perform actions like:- Create email drafts
- Update CRM entries
- Create support tickets
- Post messages to Slack
Skills
Attach Skills with Add skill in the Skills row. Attached Skills guide the agent in every conversation. The row appears when Skills are enabled for the workspace.Sub-agents
Attach other agents with Add sub-agent in the Sub-agents row. Your agent can call specialized agents to handle specific subtasks.Workflows
Attach workflows with Add workflow in the Workflows row so your agent can trigger multi-step automations during a conversation. See using workflows through agents for details.File templates
Attach file templates with Add template in the File templates row so your agent generates documents and presentations in a consistent format and style.Advanced
Turn on Web access under Advanced so the agent can search the web. Image generation follows the workspace default. Agents can create files, edit file content, and analyze tabular data when this is enabled in the workspace settings.Model
Choose which model this agent will use. When the model offers reasoning levels, the same selector sets Reasoning. Publish the draft with Update to apply it. See the model guide for the levels and for help choosing a model.Creativity
Controls the temperature parameter of the model, which affects how deterministic or creative responses are. The slider ranges from 0 (deterministic) to 1 (creative):- Lower values (0-0.3): More focused, consistent, and predictable responses. Best for factual tasks, coding, or when you need reliable outputs.
- Medium values (0.4-0.7): Balanced creativity and consistency. Good for general use cases. New agents start at 0.7 and change to 0.3 when you attach the first knowledge source or tool.
- Higher values (0.8-1.0): More varied and creative responses. Better for brainstorming, creative writing, or when you want diverse outputs.
When Limits Are Reached
Choose what happens when a user, workspace, or agent limit is reached. For a user limit, available Extra Usage is used before the fallback model. In BYOK and Dedicated Deployments, workspace limits take precedence over included usage. Switch model (default) lets the agent answer with the fallback model; Block usage makes the agent unavailable until the limit resets.Schedule
For a saved, non-template Agent, click Schedule in the top bar to create a scheduled task with the Agent preselected. The button appears when Scheduled is enabled and the Agent does not already have a scheduled task. It is disabled once you reach your limit of 10 scheduled tasks.Sharing
In the top right corner, you’ll find options to share and use the agent. You can share it with anyone in the workspace or assign editing and usage permissions to specific groups or individuals. Use agent appears after the agent is active and you have no draft changes. Share requires the relevant workspace permission. If the agent has subagents attached, Langdock checks whether the people you share it with can also access those subagents and offers to grant missing access.Publishing
Changes to an agent’s configuration are saved as a draft and do not affect users until you publish. Select Create in the top bar to create the first active version. After that, select Update to make a later draft the active version. Agent create and update endpoints save configuration changes to the draft. The publish endpoint makes that draft active. Access changes take effect immediately and do not require publishing. Agent get and chat completion endpoints use the active version, or the draft when no version has been published yet. When publishing a new version, you can add an optional update message describing what changed. Users then see a New version notice when they start a new chat with the agent. The notice disappears 7 days after publishing, or earlier once a user has started 3 chats with the agent since the release. You don’t see the notice for versions you published yourself, and the first published version never shows one.Analytics
Use the Analytics and Feedback tabs to review agent performance and user feedback. See Agent Analytics for the full Analytics and Feedback reference.Tracing and Logging
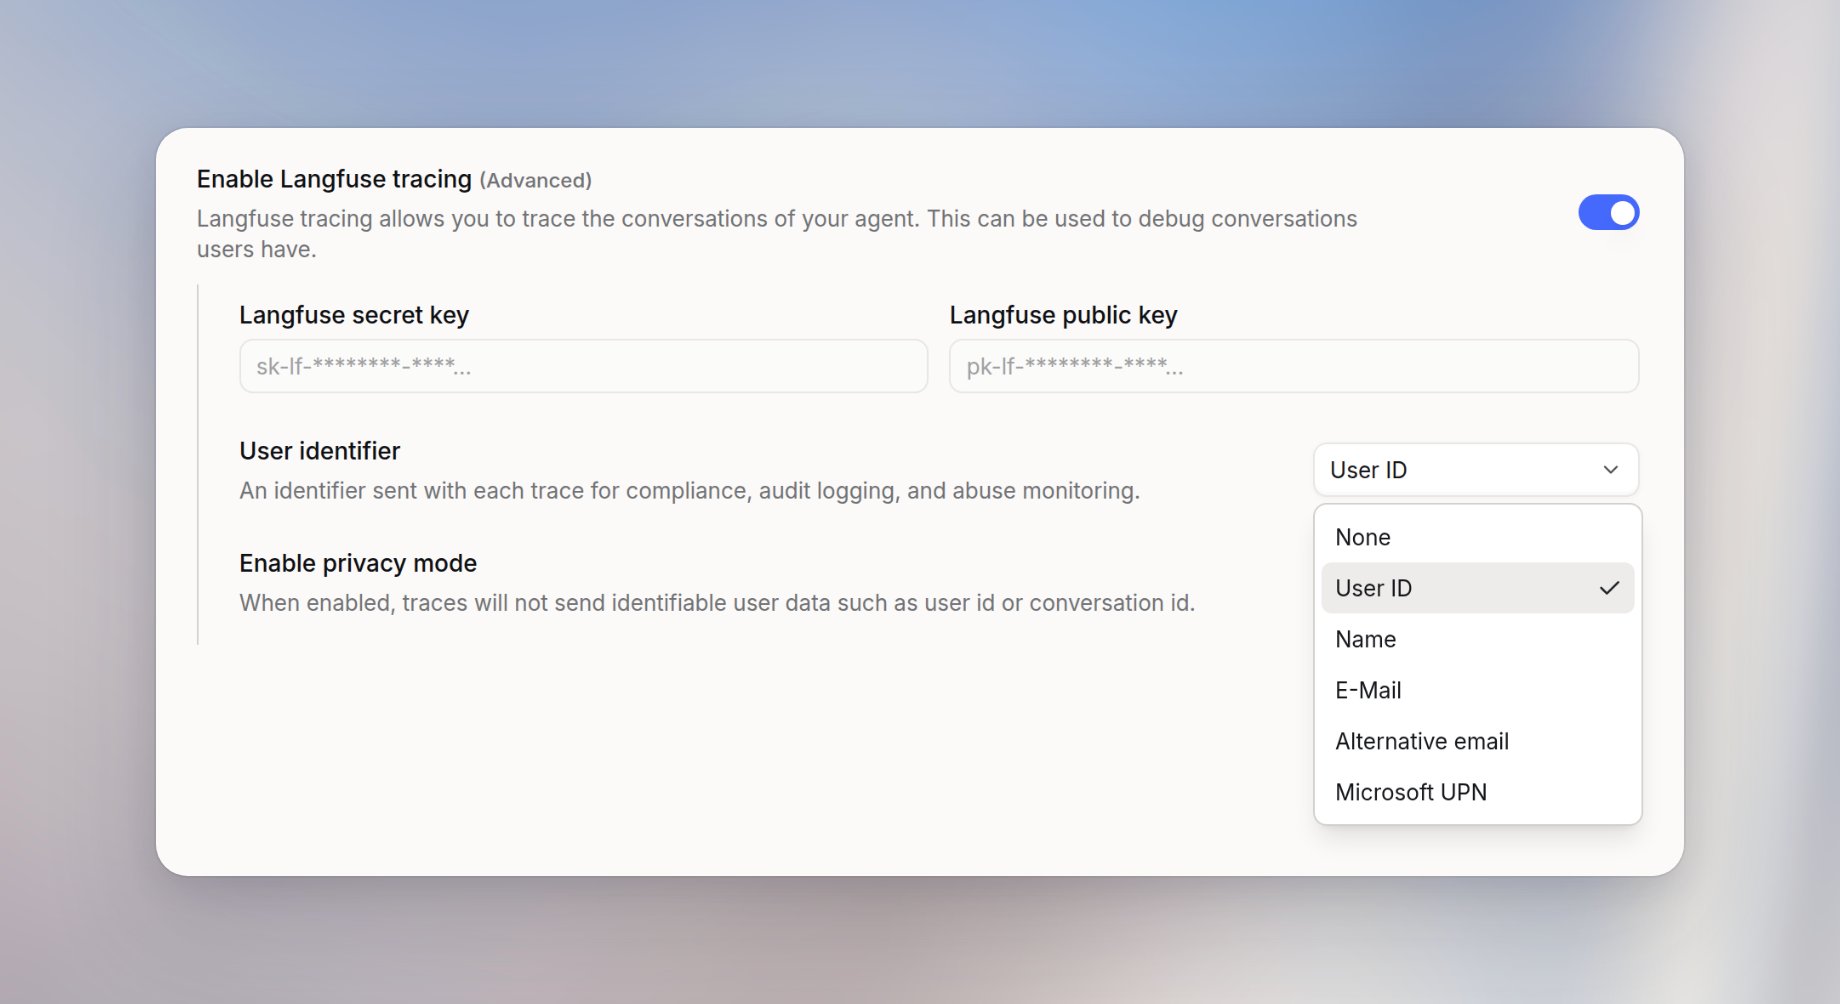
For deeper insights into your agent’s behavior and performance, you can enable tracing through Langfuse. How it works:- Workspace admins first enable agent logging in the workspace settings. This makes the feature available for agents in your workspace.
-
Agent editors can then configure logging for individual agents:
- Enable the Allow agent logs toggle in the agent configuration
- Set the Tracing cloud URL (defaults to
https://cloud.langfuse.com) - Choose the User identifier sent with each trace: None, User ID, Name, E-Mail, Alternative email, or Microsoft UPN. User ID is the default.
- Individual conversation traces
- Model inputs and outputs
- Performance metrics and latency
- Token usage per interaction
FAQ
What information counts toward an agent's context?
What information counts toward an agent's context?
An agent’s context can include the user’s message, previous conversation, agent instructions, attached files, retrieved knowledge, available tools, tool results, and system instructions. Complex agents can therefore fill context faster than a simple chat.
How should I decide which knowledge sources and tools to attach to an agent?
How should I decide which knowledge sources and tools to attach to an agent?
Attach only the knowledge and tools the agent needs for its specific job. Broad agents with many sources and tools are harder to control and can retrieve irrelevant information. For complex work, split responsibilities across focused agents or subagents.
Why does an agent not use an attached tool or knowledge source?
Why does an agent not use an attached tool or knowledge source?
An agent may skip a tool or source if the prompt does not make the need clear, if permissions are missing, if retrieval does not find relevant content, or if another instruction has higher priority. Make the expected workflow explicit in the agent instructions and test with representative examples.
How does attached knowledge affect an agent's answers?
How does attached knowledge affect an agent's answers?
Attached knowledge gives the agent reusable information to retrieve during a conversation. The agent usually receives relevant excerpts, not necessarily every attached document in full. The quality of the answer depends on retrieval, permissions, instructions, and the user’s question.
When should I use an agent-specific Knowledge base instead of direct files?
When should I use an agent-specific Knowledge base instead of direct files?
Use an agent-specific Knowledge base when the same documents should support repeated conversations or many users. Use direct files when the information is temporary, small enough for the current task, or only needed in one chat.
Why does an agent respond in the chat instead of creating a document?
Why does an agent respond in the chat instead of creating a document?
If an agent’s instructions require responding directly in the chat or forbid creating files, the Document Editor won’t open automatically. If workspace file tools are available, ask the agent to create a document. Normal agent chats don’t show the Tools menu or a Create document control.