

Roles
Pick a role for each person, group, or API key when you share a workflow.- Users run the deployed workflow. They only see the overview page, not the editor.
- Editors can also change the steps, deploy new versions, and share the workflow.
- Owners can also remove access and delete the workflow.
Shared and personal connections
Every step with an integration uses one of two kinds of connections.Personal connection
Each person uses their own account. The workflow only sees what they can access. This is the default when you share with users.
Shared connection
Everyone uses the connection you picked. This works well for a team Slack bot, for example.
When the workflow is shared with users, each person only sees their own runs. This also applies to owners and editors.
Share a workflow with users
1
Deploy a first version
If the workflow doesn’t have a name yet, enter one under Name first. Click Deploy in the editor. The Deploy first version popover creates version 1.0.
2
Add people with the User role
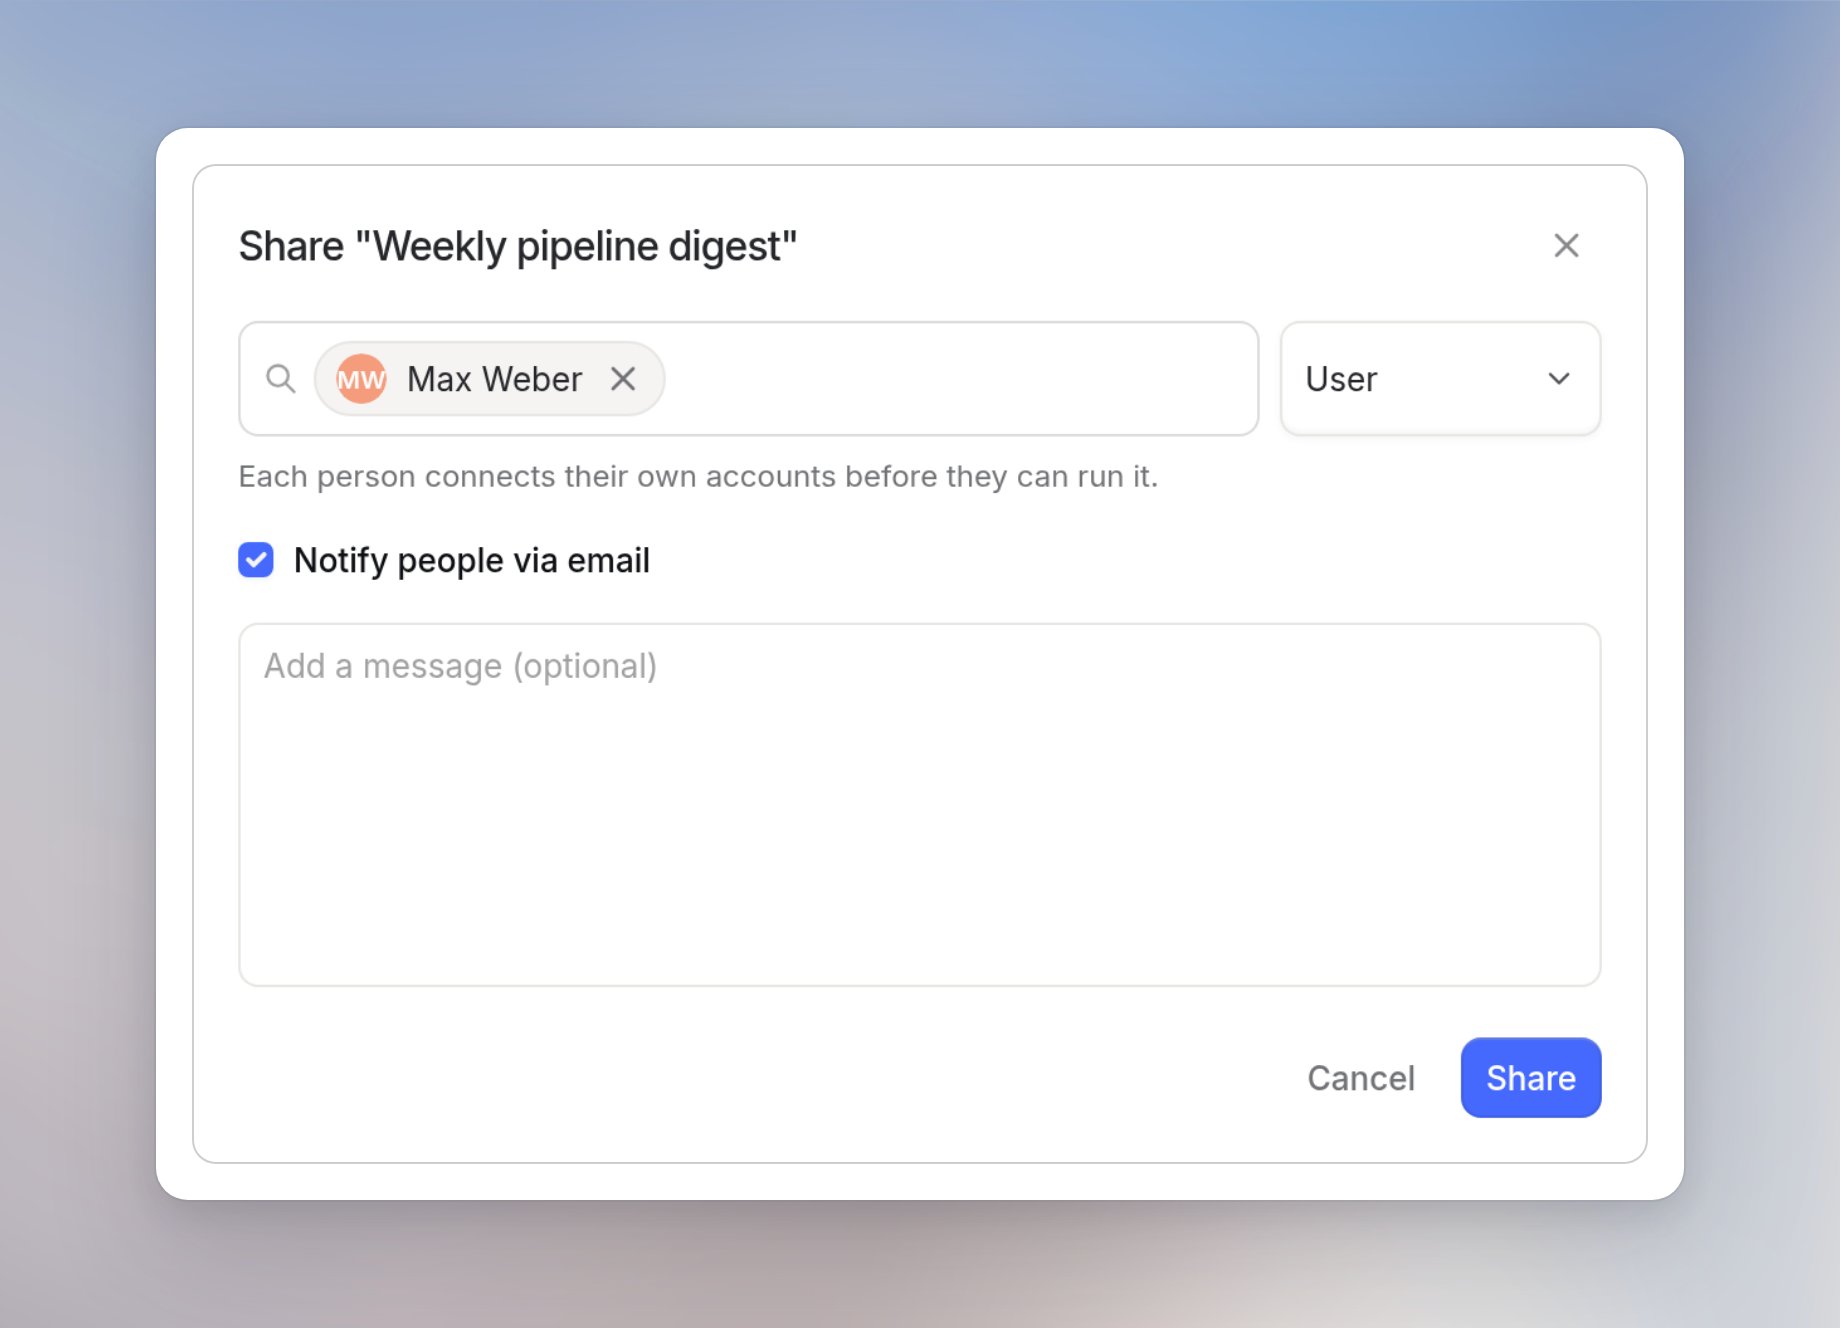
Click Share and search for people, groups, or API keys. Keep the User role. Check Notify people via email to let them know.
3
Review connections
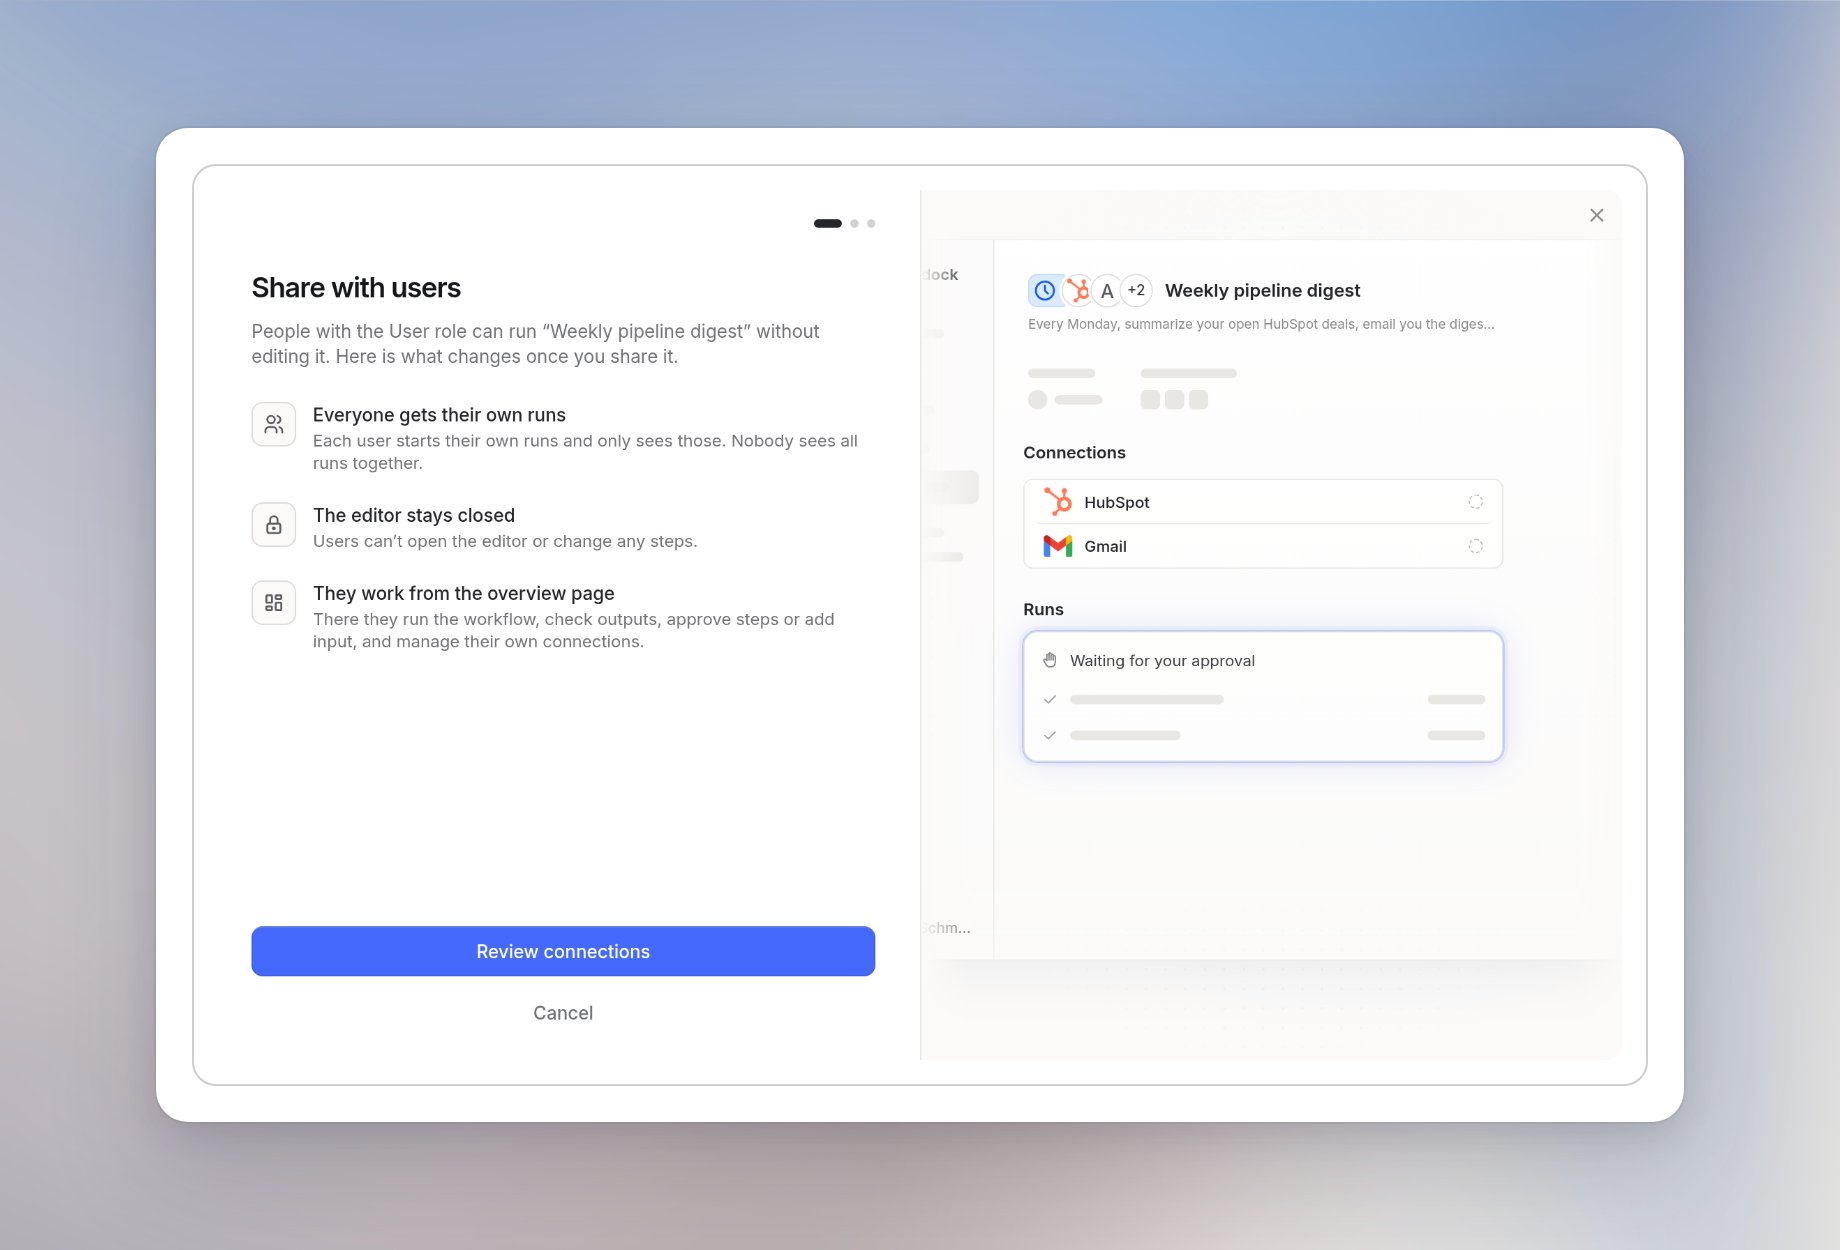
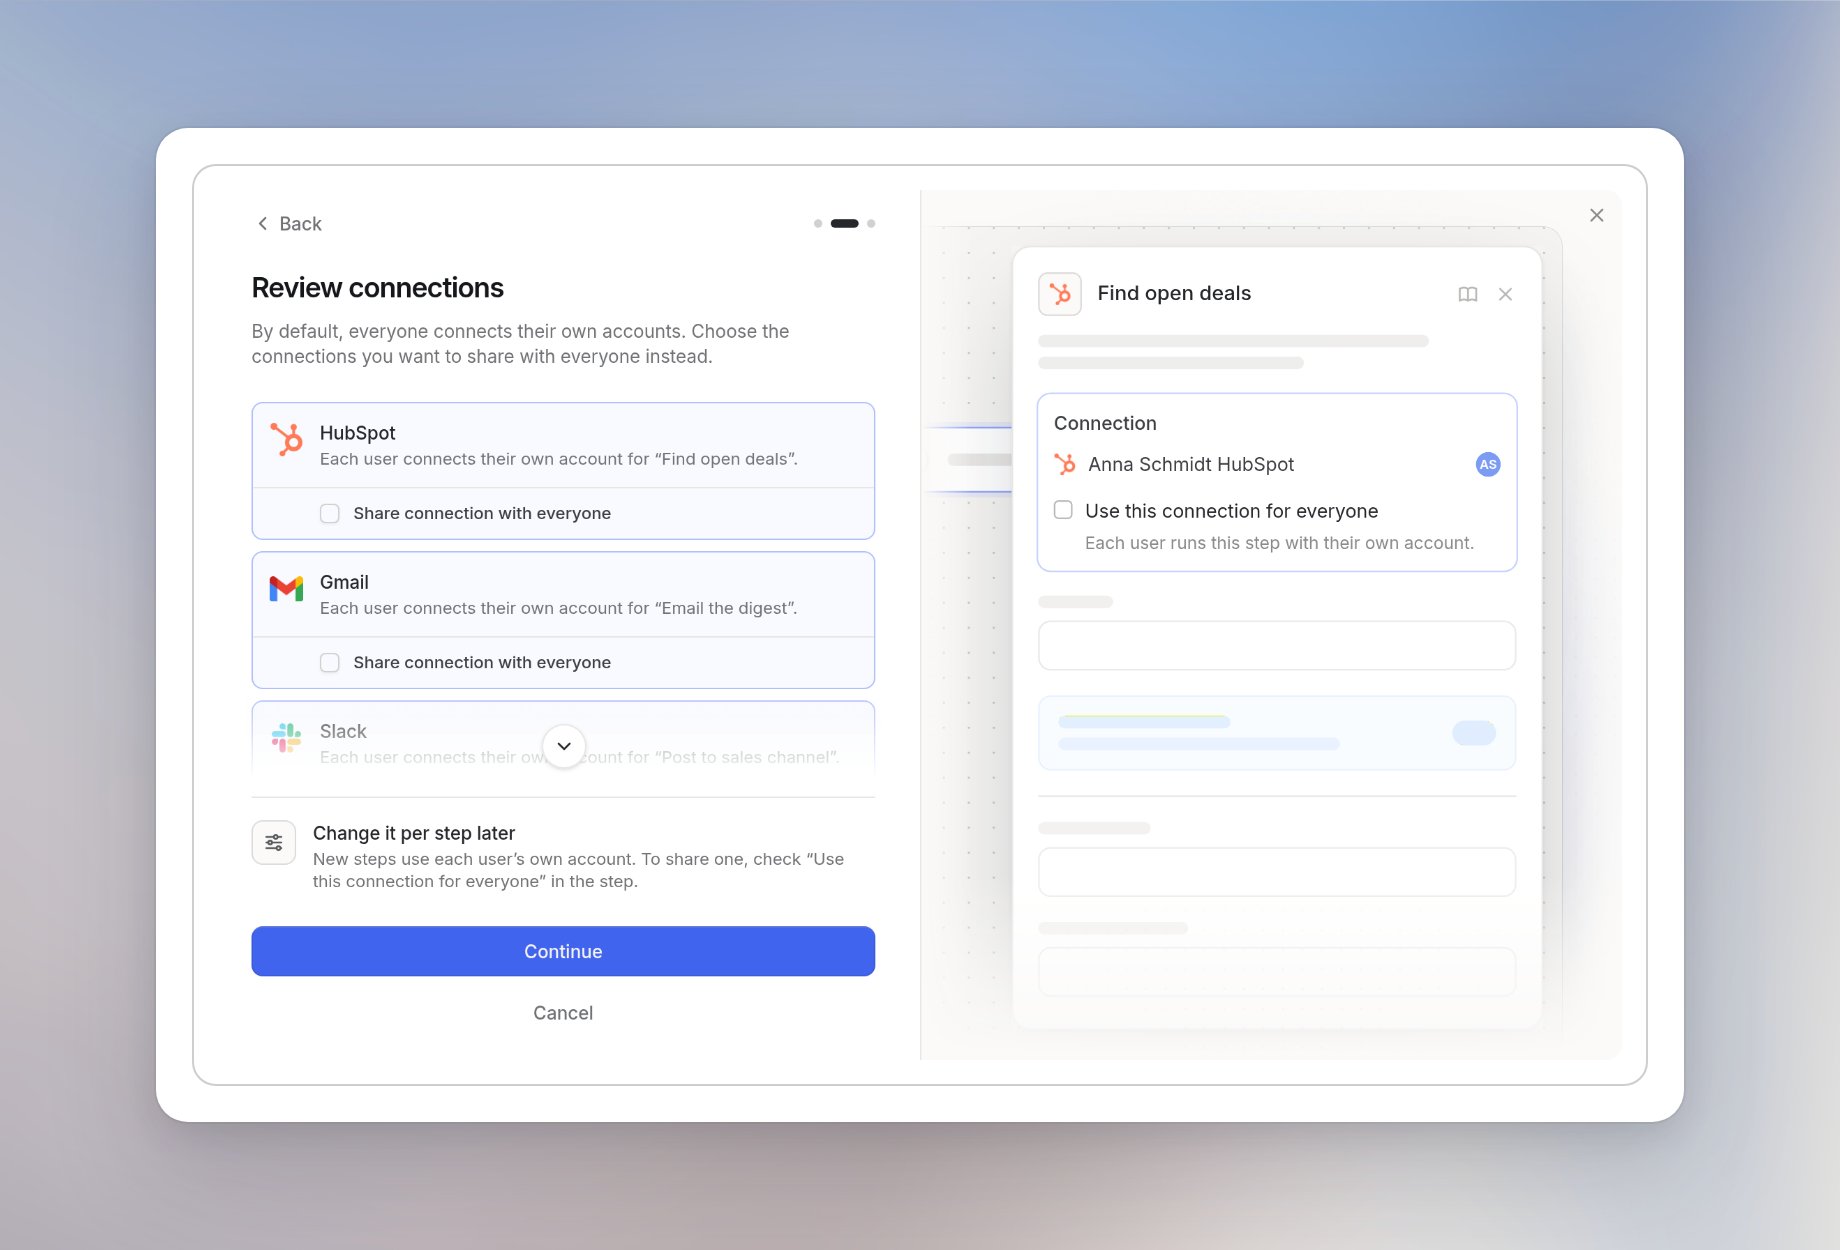
The first time you share with users, the Share with users dialog opens. Click Review connections. By default, each person connects their own account. Check Share connection with everyone to provide a connection for everyone. At least one connection has to come from the users themselves.
4
Deploy and share
Check the summary on Ready to share. Then click Deploy and share.
- Restricted: only people with access can use it.
- Anyone in the workspace: everyone in your workspace can find it under Discover and use it with their own accounts.
If you share a workflow with a Meeting End trigger
A Meeting End trigger starts the workflow when the notes of a meeting from Langdock Meetings are ready.- Before you share with users, it runs after the owner’s meetings.
- After that, it runs after each person’s own meetings. Every meeting starts a separate run.
- A person needs to have turned the workflow on for themselves and have access to Meetings. This applies to you too.
- When you deploy and your connections are ready, it’s turned on for you automatically.
- Each person only sees the runs from their own meetings.
- Here, every connection can be shared with everyone.
- If you stop sharing with users, it runs after the owner’s meetings again.
Use a workflow shared with you
Find workflows shared with you under Workflows > Discover. As a user, you see the workflow’s overview page, not the editor.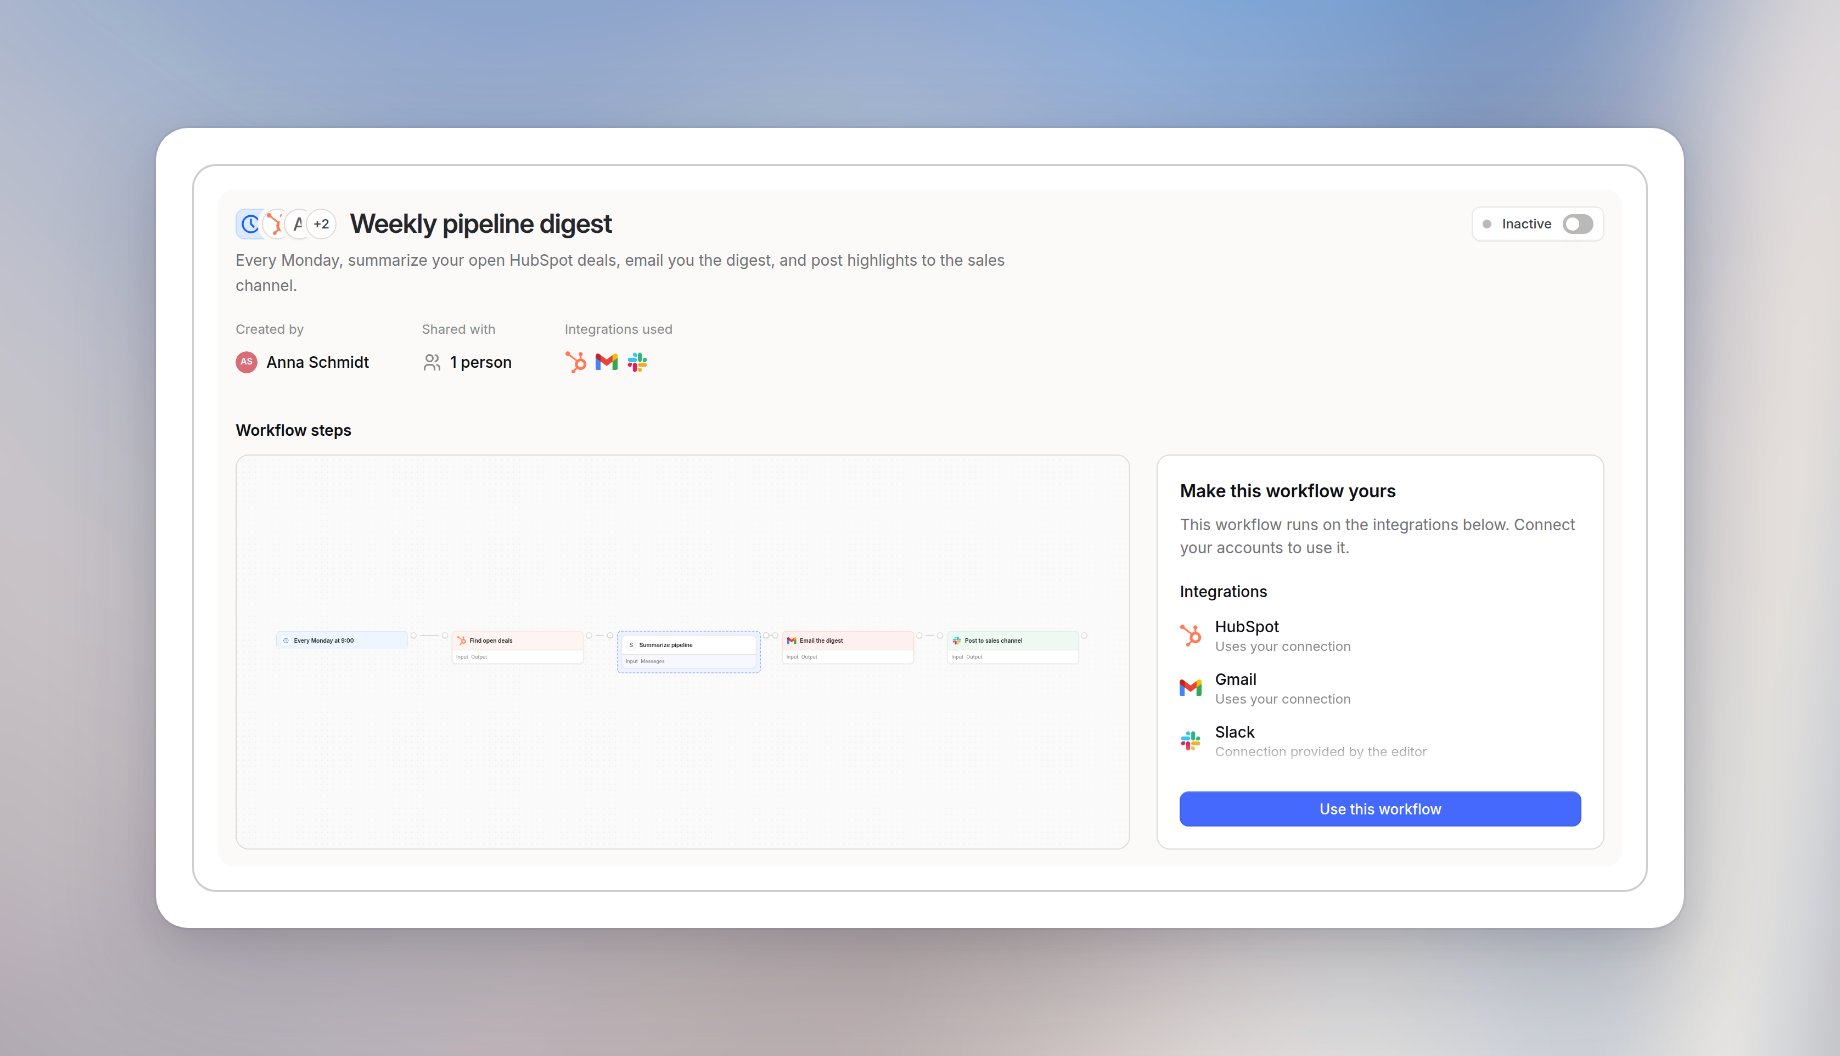
1
Click Use this workflow
The Make this workflow yours card lists each integration. Uses your connection means you connect your own account. Connection provided by the editor means there’s nothing to do.
2
Check what happens
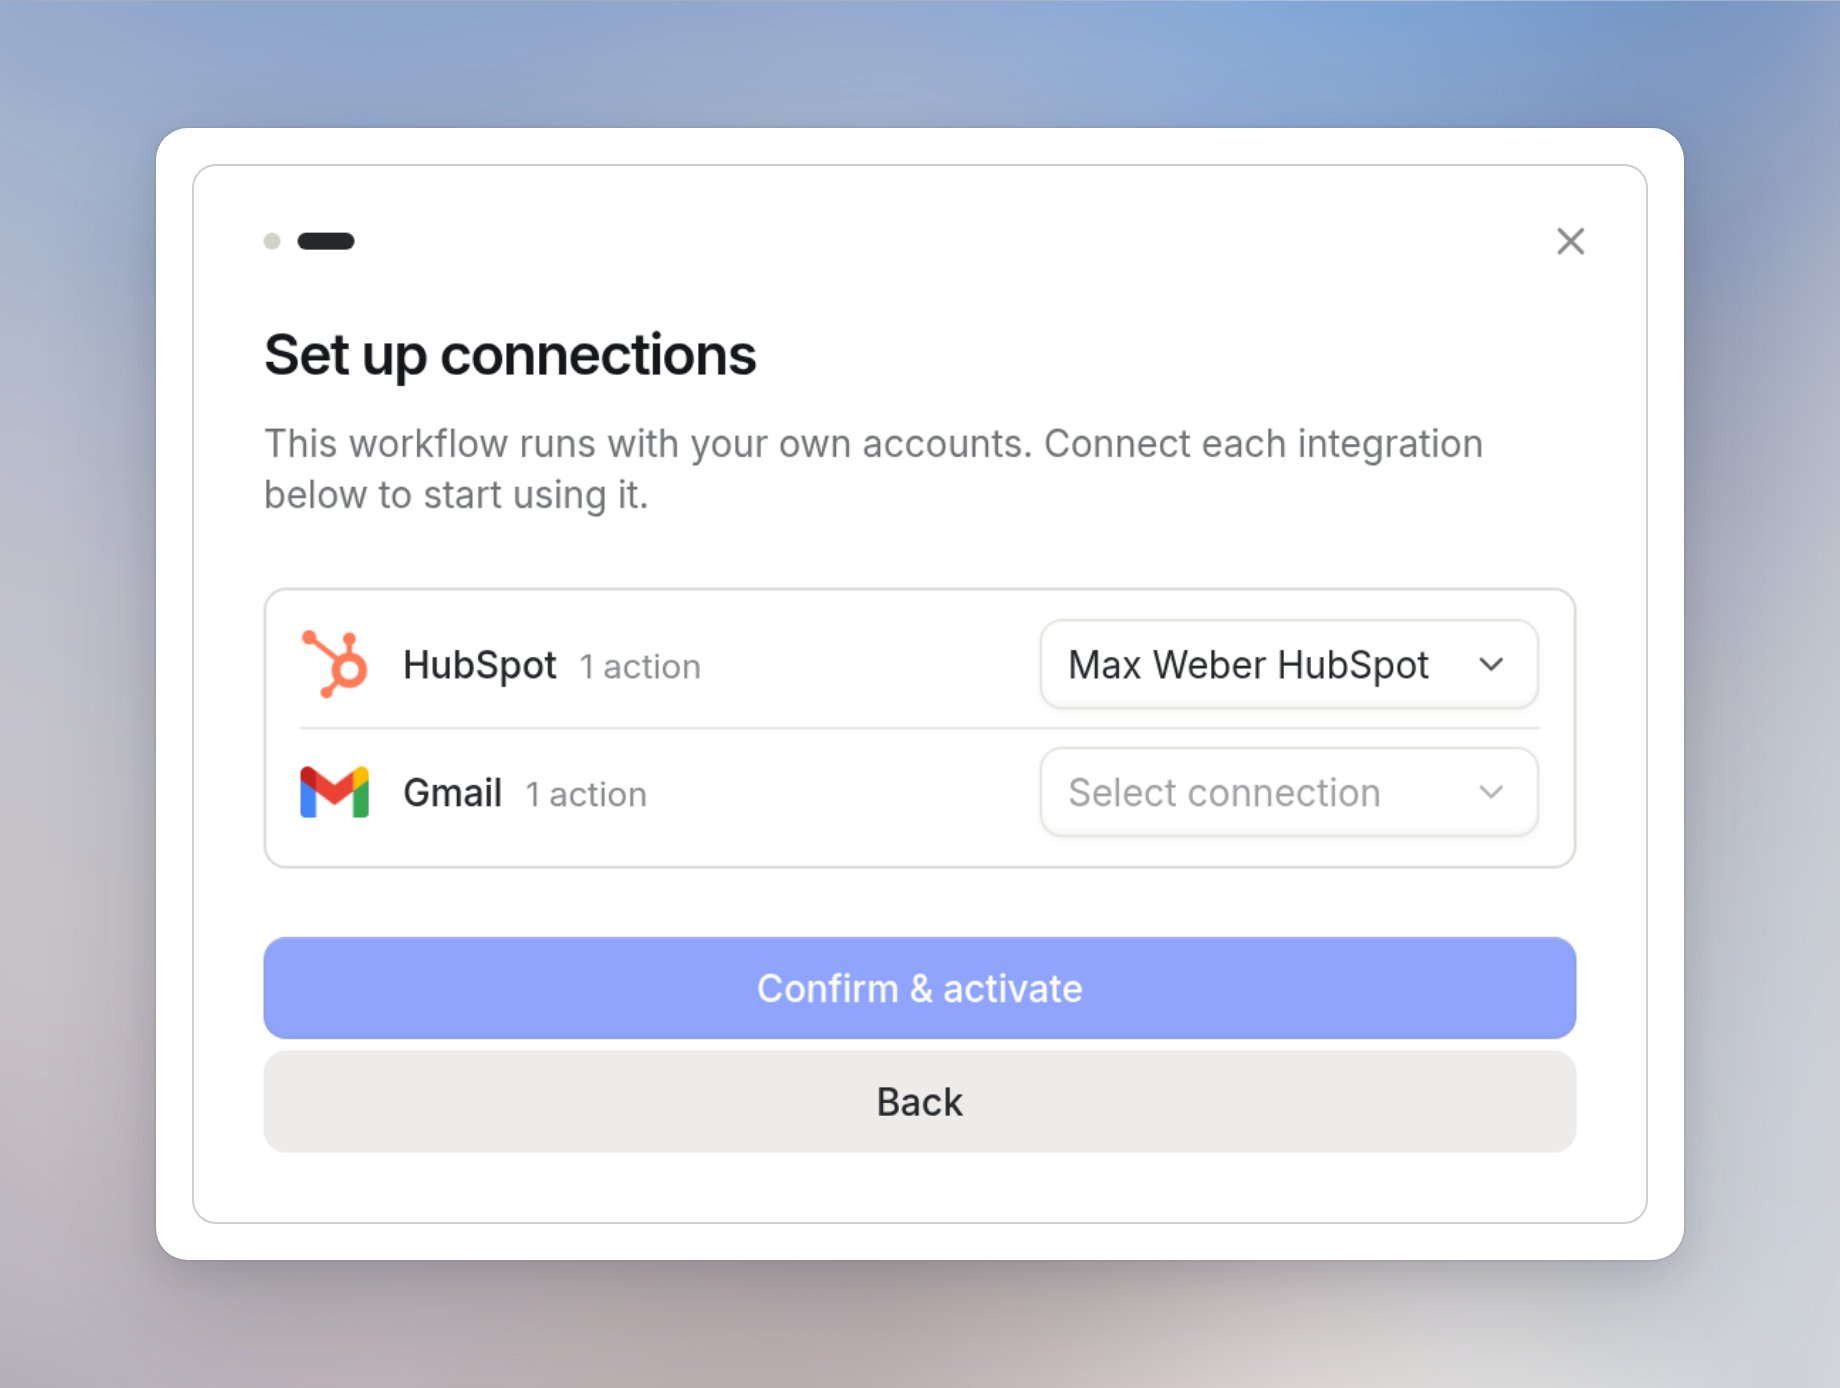
A short summary shows when the workflow runs and which accounts you connect. Click Set up connections.
3
Connect your accounts
Pick a connection for each integration. Then click Confirm & activate. This turns the workflow on for you.
The overview page
Owners and editors also see Edit and Share buttons at the top. The page shows who created the workflow and who it’s shared with. You also see its integrations and stats on runs and cost.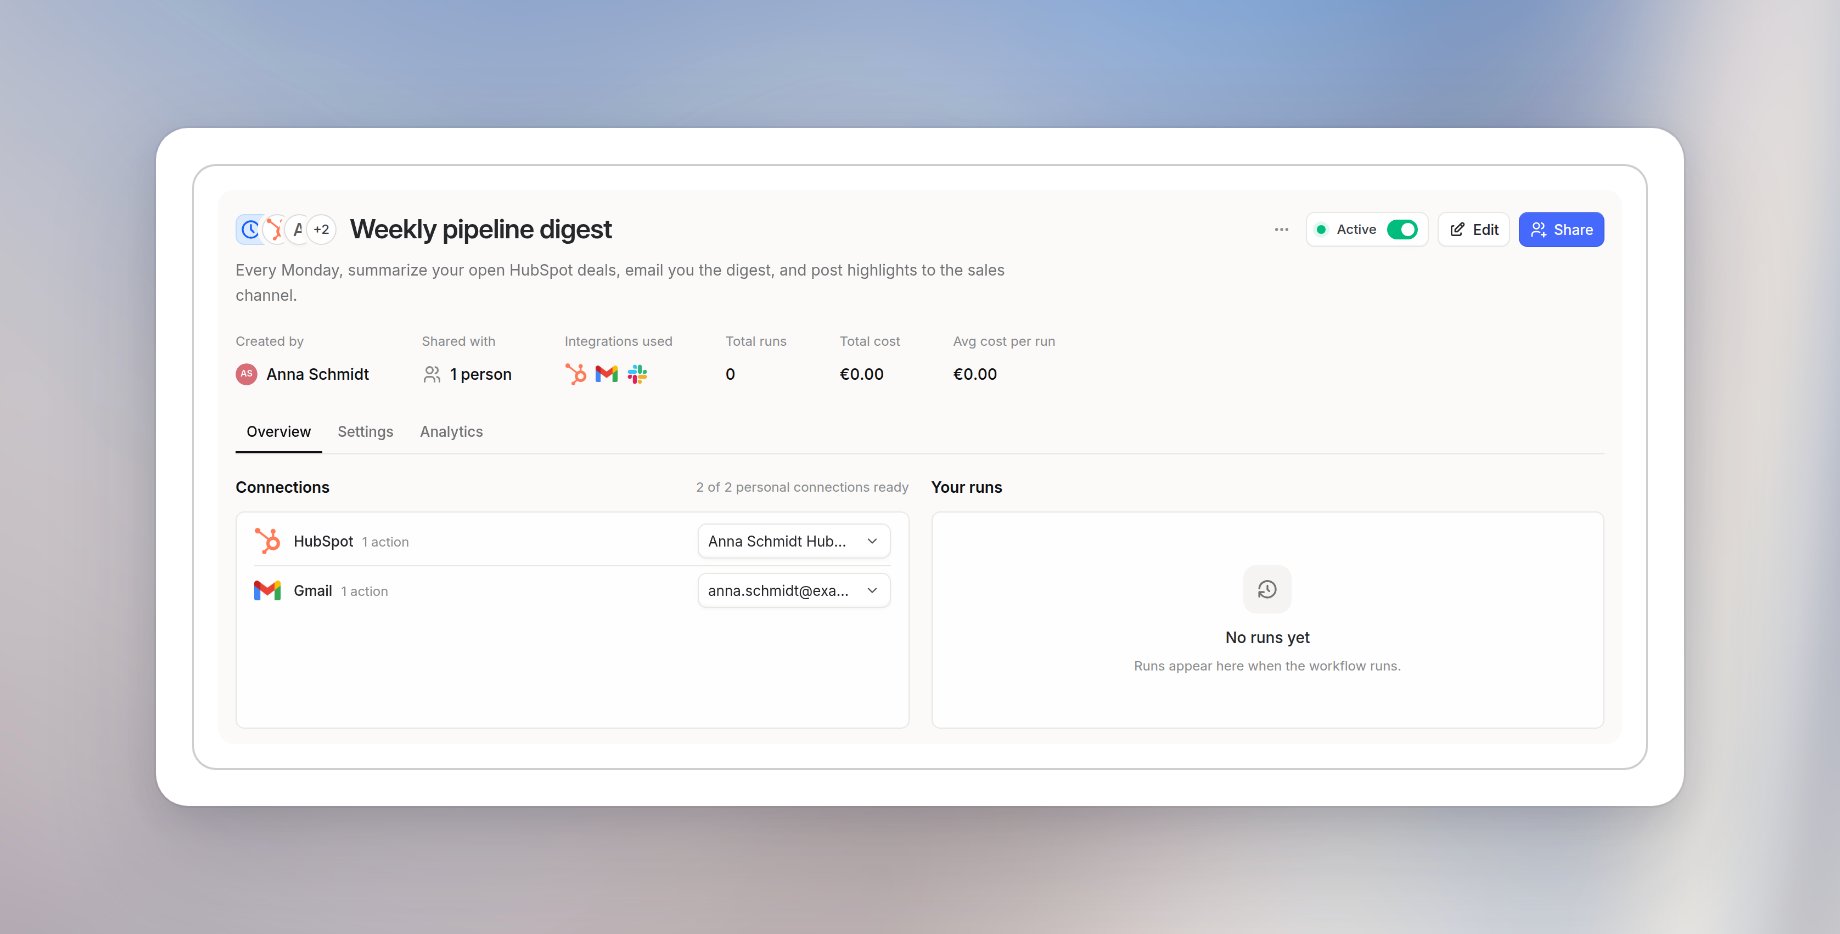
Analytics
Owners and editors also get an Analytics tab. It shows Runs, Active users, Success rate, Avg. run time, and cost for a time range. When the workflow is shared with users, it adds the Active users chart and the Adoption funnel. The funnel shows how many people with access ran the workflow.Versions and updates
Every deploy after the first one is an Addition or a Breaking change:- Addition: users get the change right away. The version number goes up, for example from v2.0 to v2.1.
- Breaking change: users update themselves. Until then, their current version keeps running. The version number goes up, for example from v2.1 to v3.0.
Stop sharing with users
Remove the last person or group with the User role. If General access is set to Anyone in the workspace, set it to Restricted. Then confirm Stop sharing. Owners and workspace admins can do this. Every step then uses your connections again, and a new version is deployed. If you’re missing an account for a step, pick one in the editor. If you share with users again later, you review the connections first.Limitations
- Workflows with a Form or Webhook trigger can’t be shared with the User role. These triggers would run on your accounts.
- At least one connection has to come from the users themselves. Otherwise you can’t deploy. The Meeting End trigger is the exception.
- Users need access to every agent, skill, and workflow the workflow uses. If they don’t have it, the share dialog shows Review access.
- Admins control who can share workflows in the role settings.
Related
Core Concepts
Learn how versions, runs, and deployments work.
Workflow API
Share, publish, and run workflows from your own code.