

Overview
This guide walks you through configuring SCIM provisioning with Okta. You connect the SAML application you already use for Langdock to Langdock’s SCIM endpoint, then turn on user and group synchronization. Once complete, Okta creates people, updates their name and email, deactivates them, and can push groups into the workspace.Setup Checklist
Confirm the items in the SCIM setup checklist, including:Turn on SCIM in Langdock
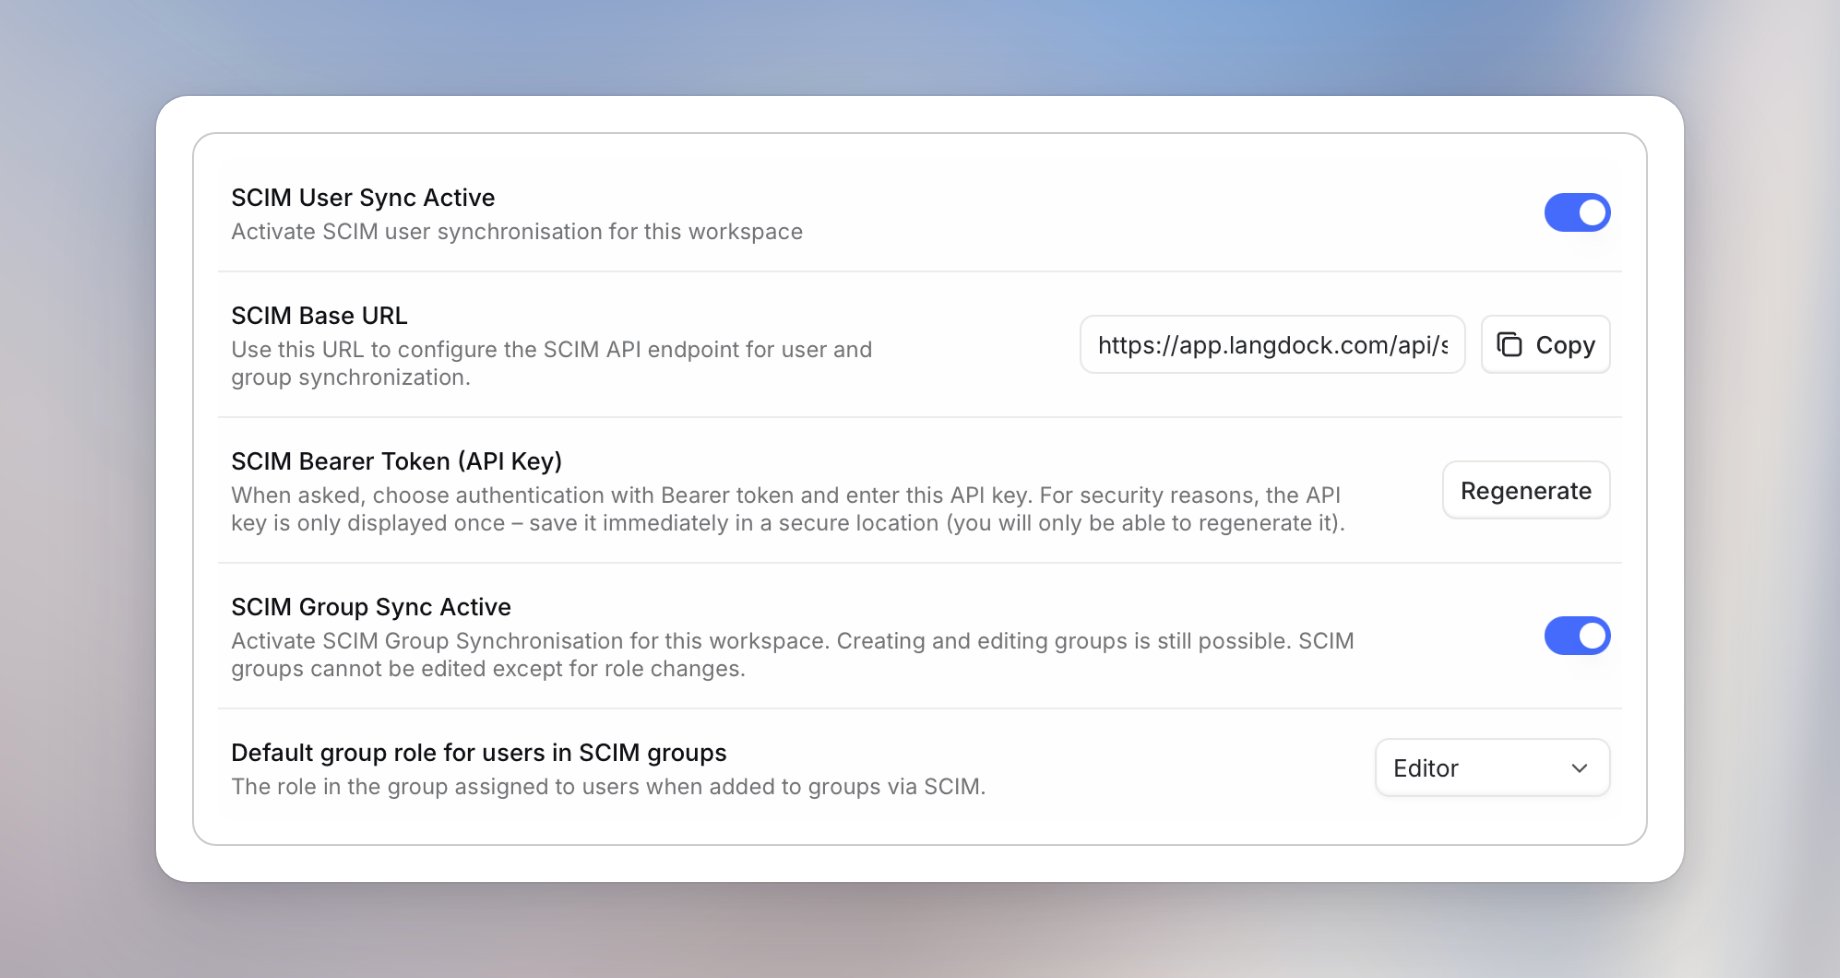
Open Security and find User provisioning (SCIM).- Turn on SCIM User Sync Active. Okta cannot call SCIM until this is on.
- Select Copy next to SCIM Base URL. The field does not show the full address, so use the copied value. It ends in
/api/scim/v2. On Cloud that ishttps://app.langdock.com/api/scim/v2. Do not append?aadOptscim062020. That parameter is only for Microsoft Entra ID. - Select Generate next to SCIM Bearer Token (API Key). Copy the token before you close the dialog. Langdock shows it once. Regenerate replaces the token, and the previous token stops working immediately.
- Turn on SCIM Group Sync Active when you want Okta to push groups. Leave it off if you only provision users. Group requests fail while it is off.
- Choose Member or Editor in Default group role for users in SCIM groups. People Okta adds to a group receive that role inside the group. The default is Editor. You can set a different role on a single group, and it applies only to people added afterwards. See Default roles for SCIM groups.
Connect Okta
Use the SAML app you already created for Langdock. In the Okta Admin Console: 1. Open the General tab. Under App Settings, select Edit. 2. Set Provisioning to SCIM, then Save. The Provisioning tab appears after you save. If SCIM is not in the list, Okta has not enabled SCIM provisioning for that app integration.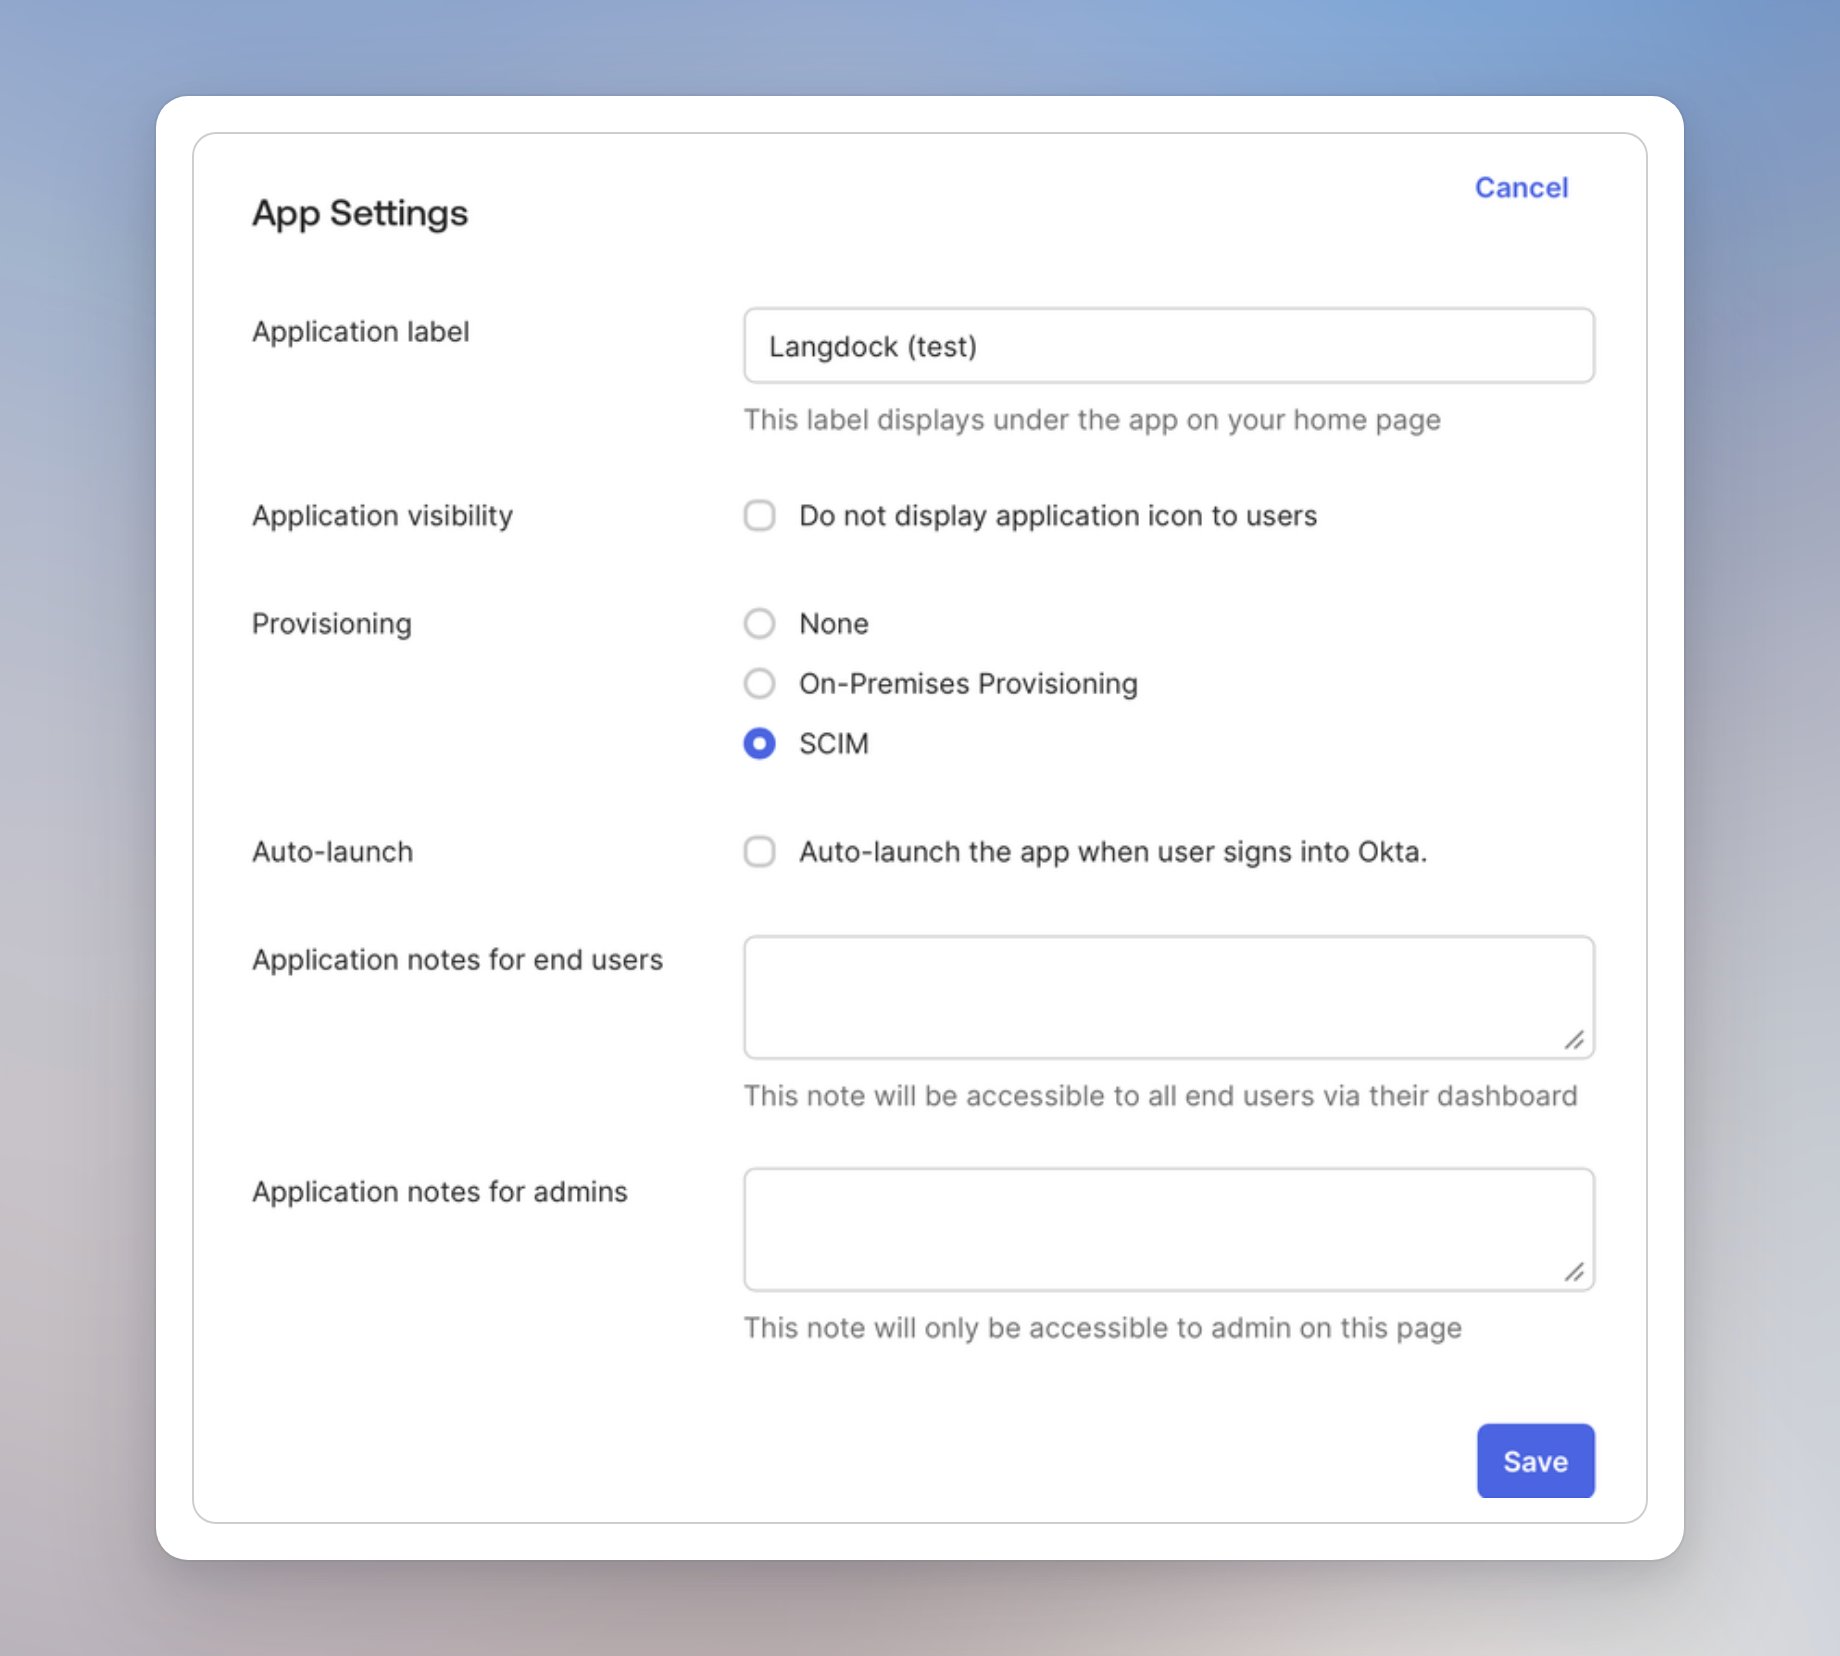
userName. Langdock treats userName as the person’s email address.
6. Under Supported provisioning actions, turn on Import New Users and Profile Updates, Push New Users, and Push Profile Updates. Turn on Push Groups when SCIM Group Sync Active is on. Leave Import Groups off.
7. Set Authentication Mode to HTTP Header.
8. In Authorization, Okta already shows Bearer. Paste only the token.
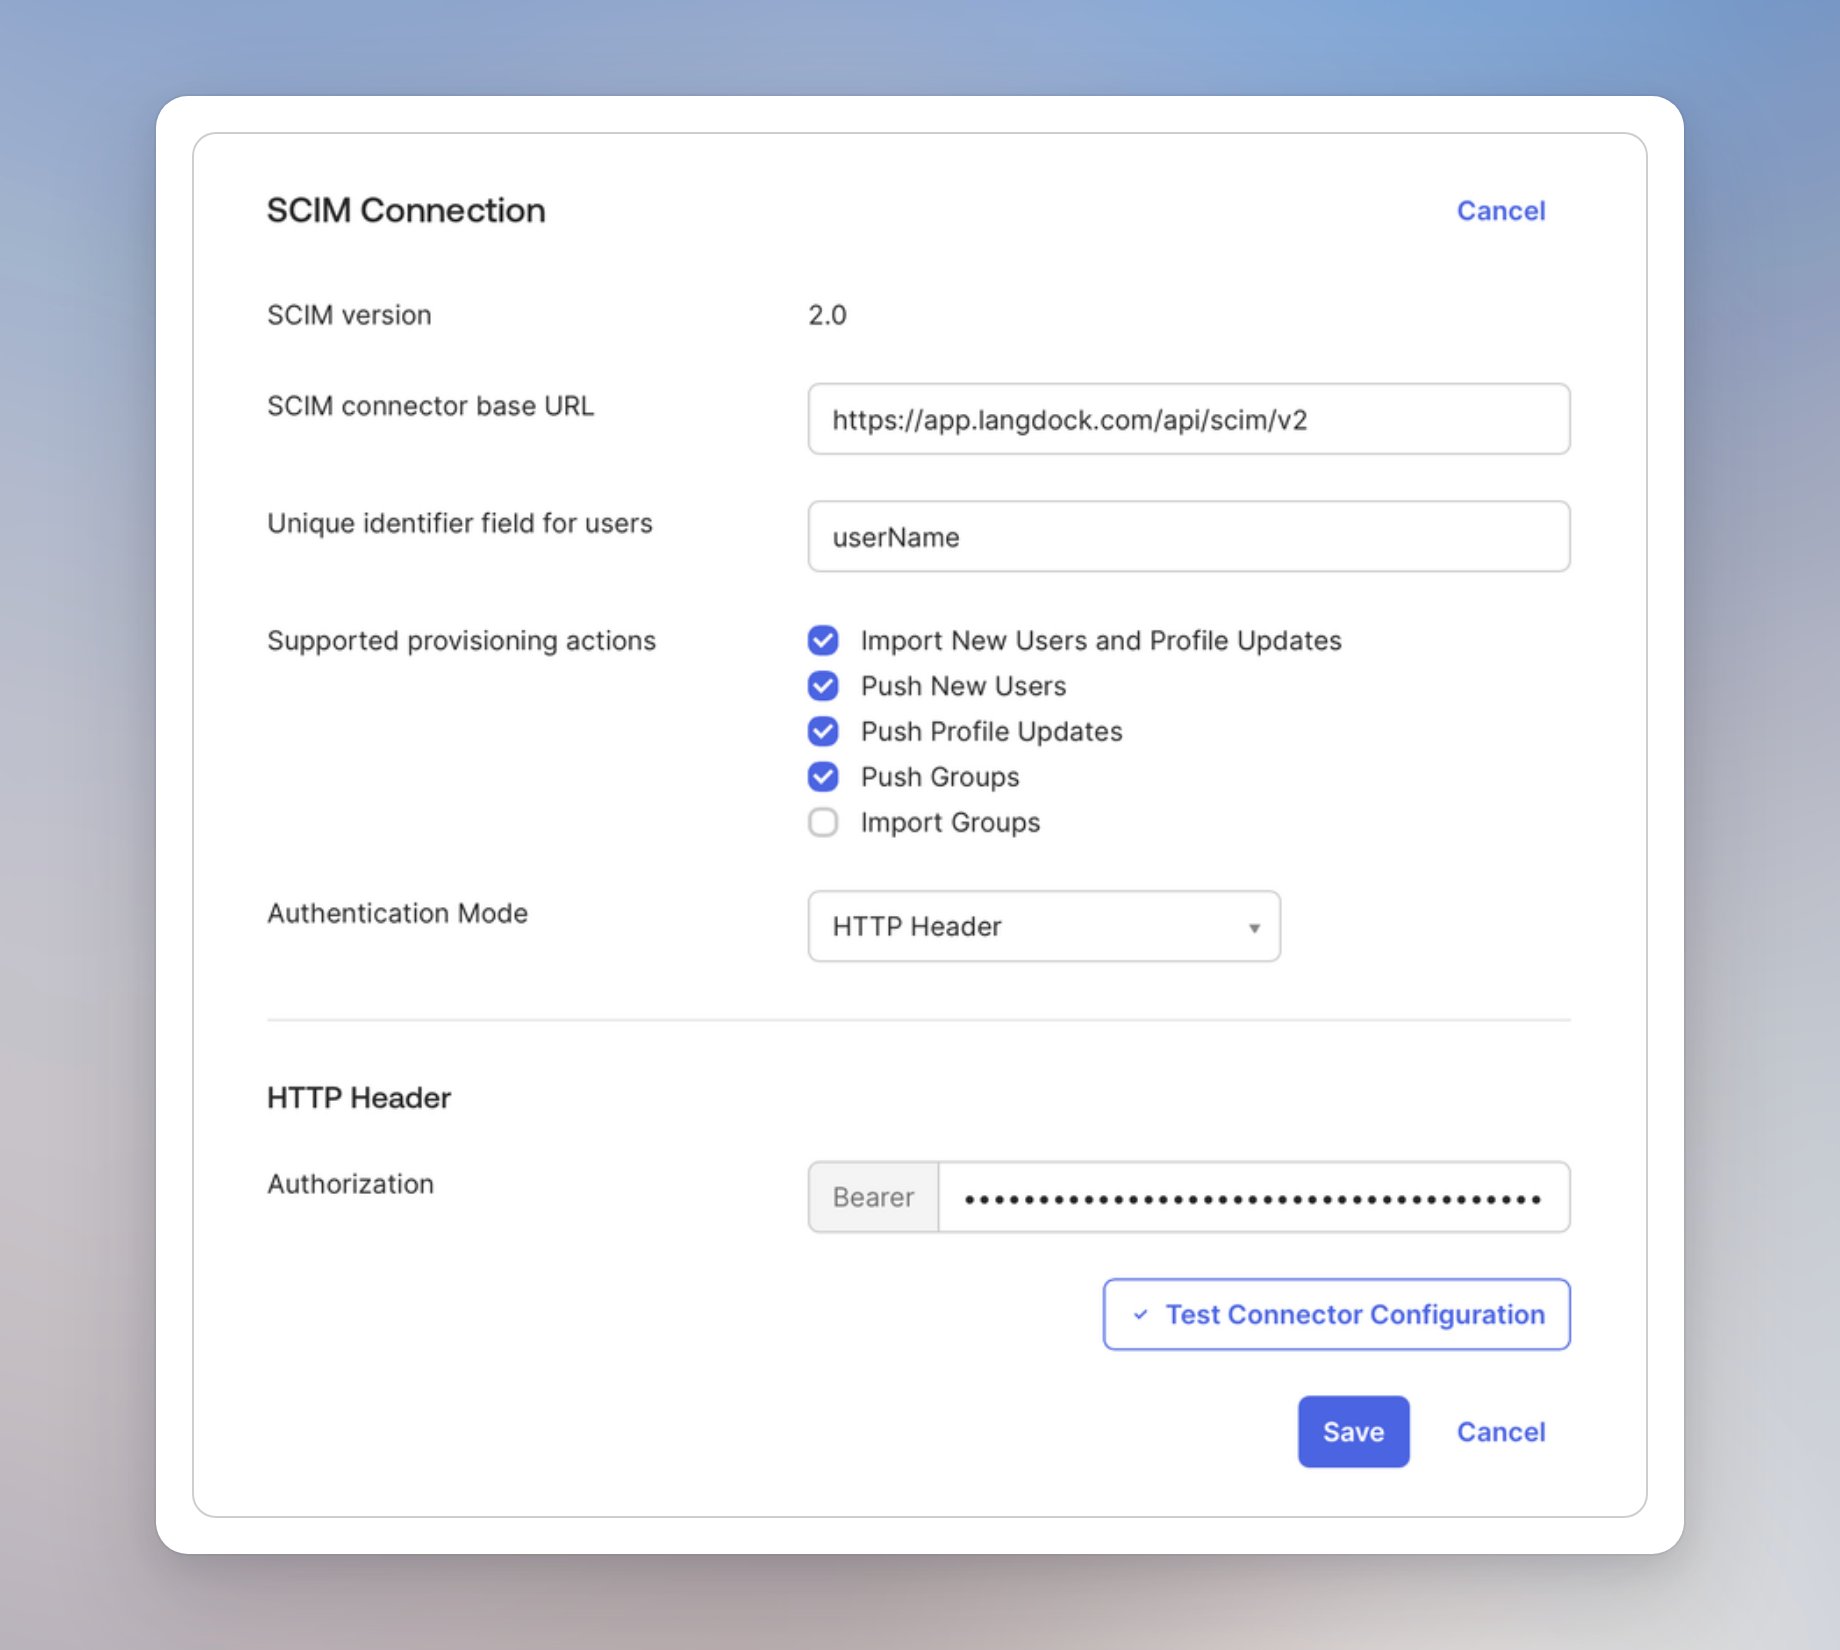
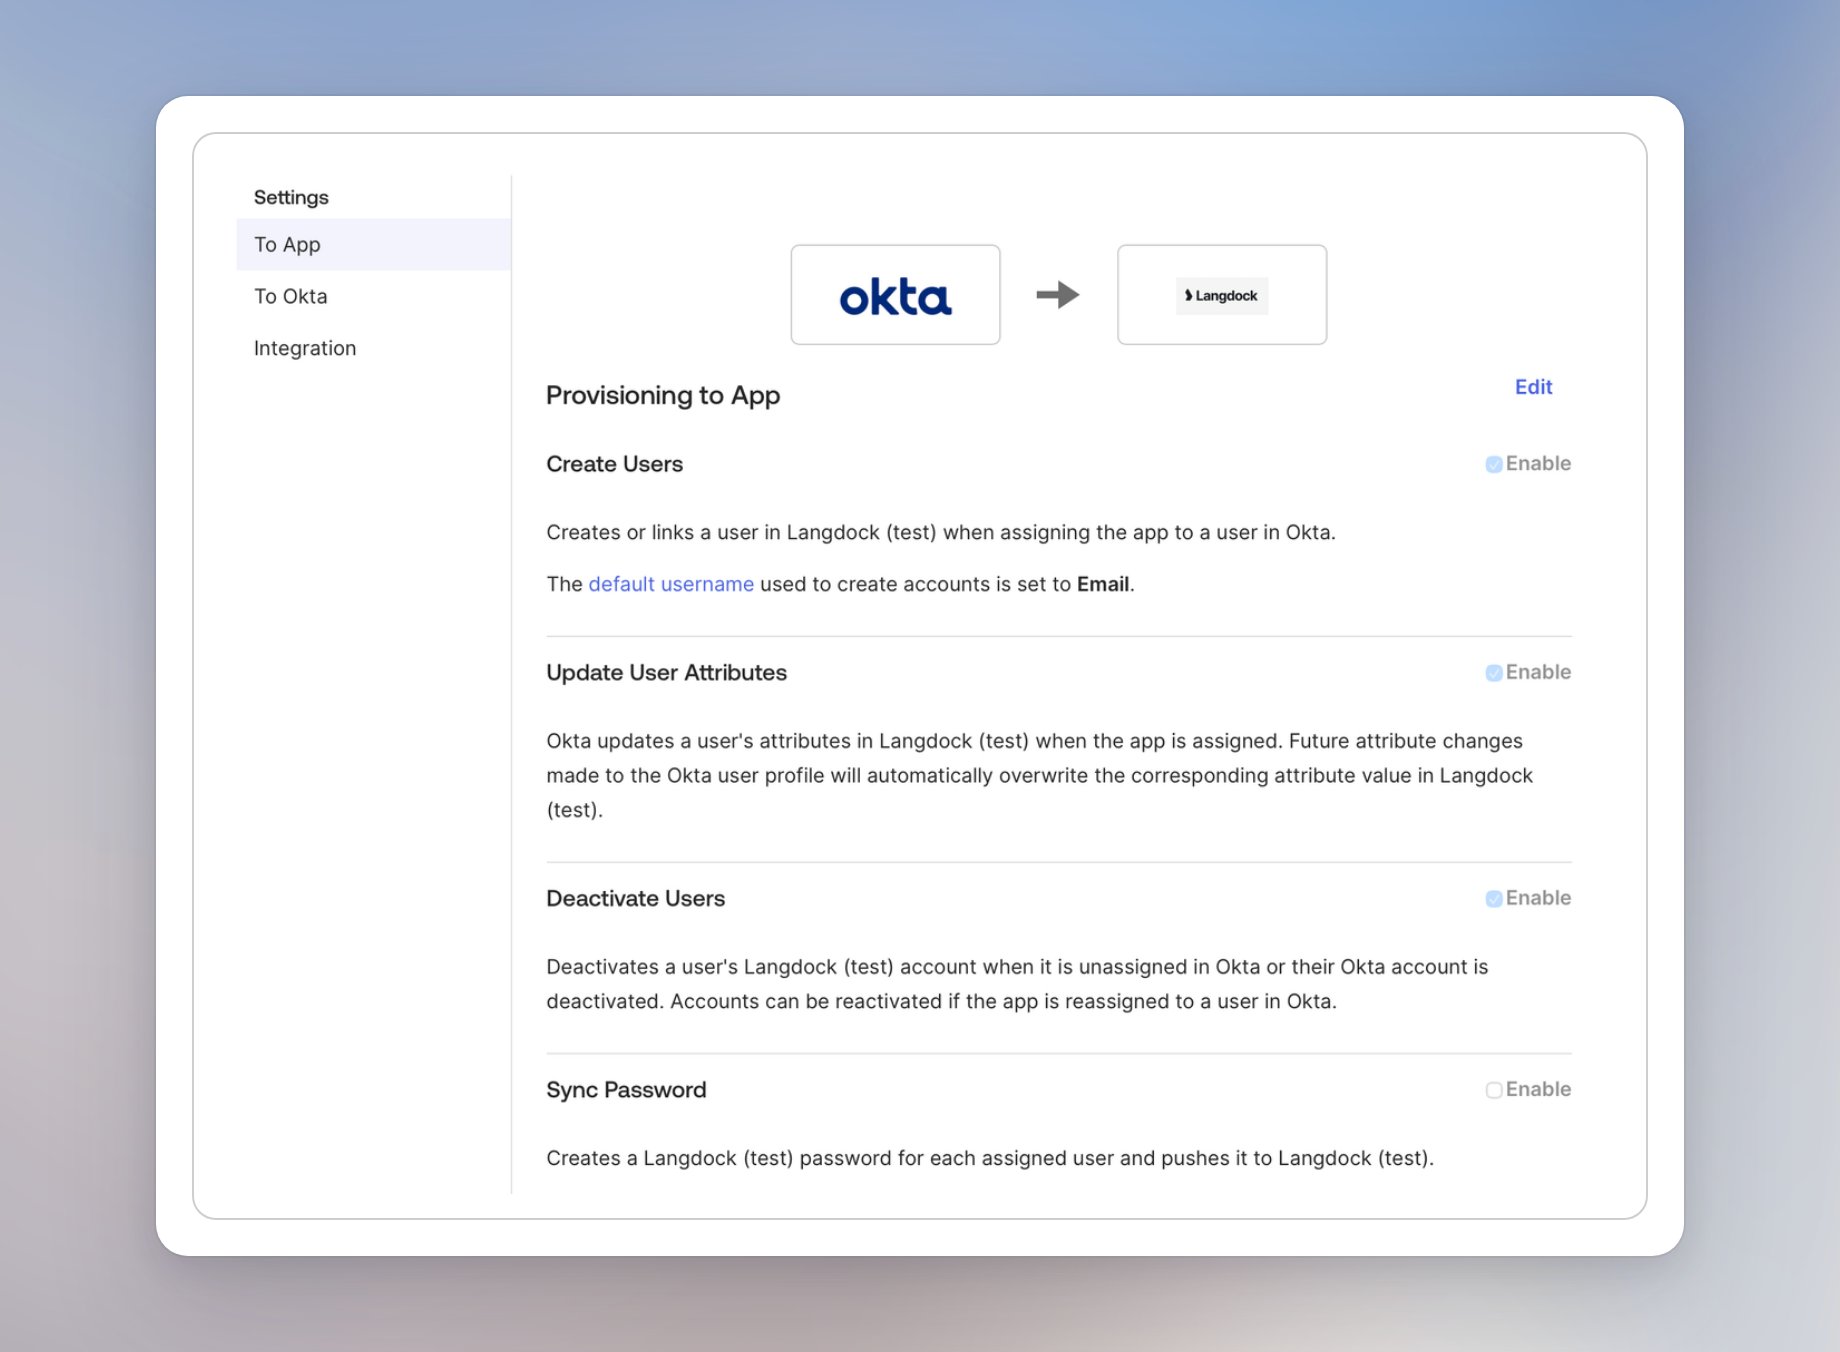
If a label in your Okta console differs, match it to the SCIM base URL, the bearer token, and the same create, update, deactivate, and group actions.
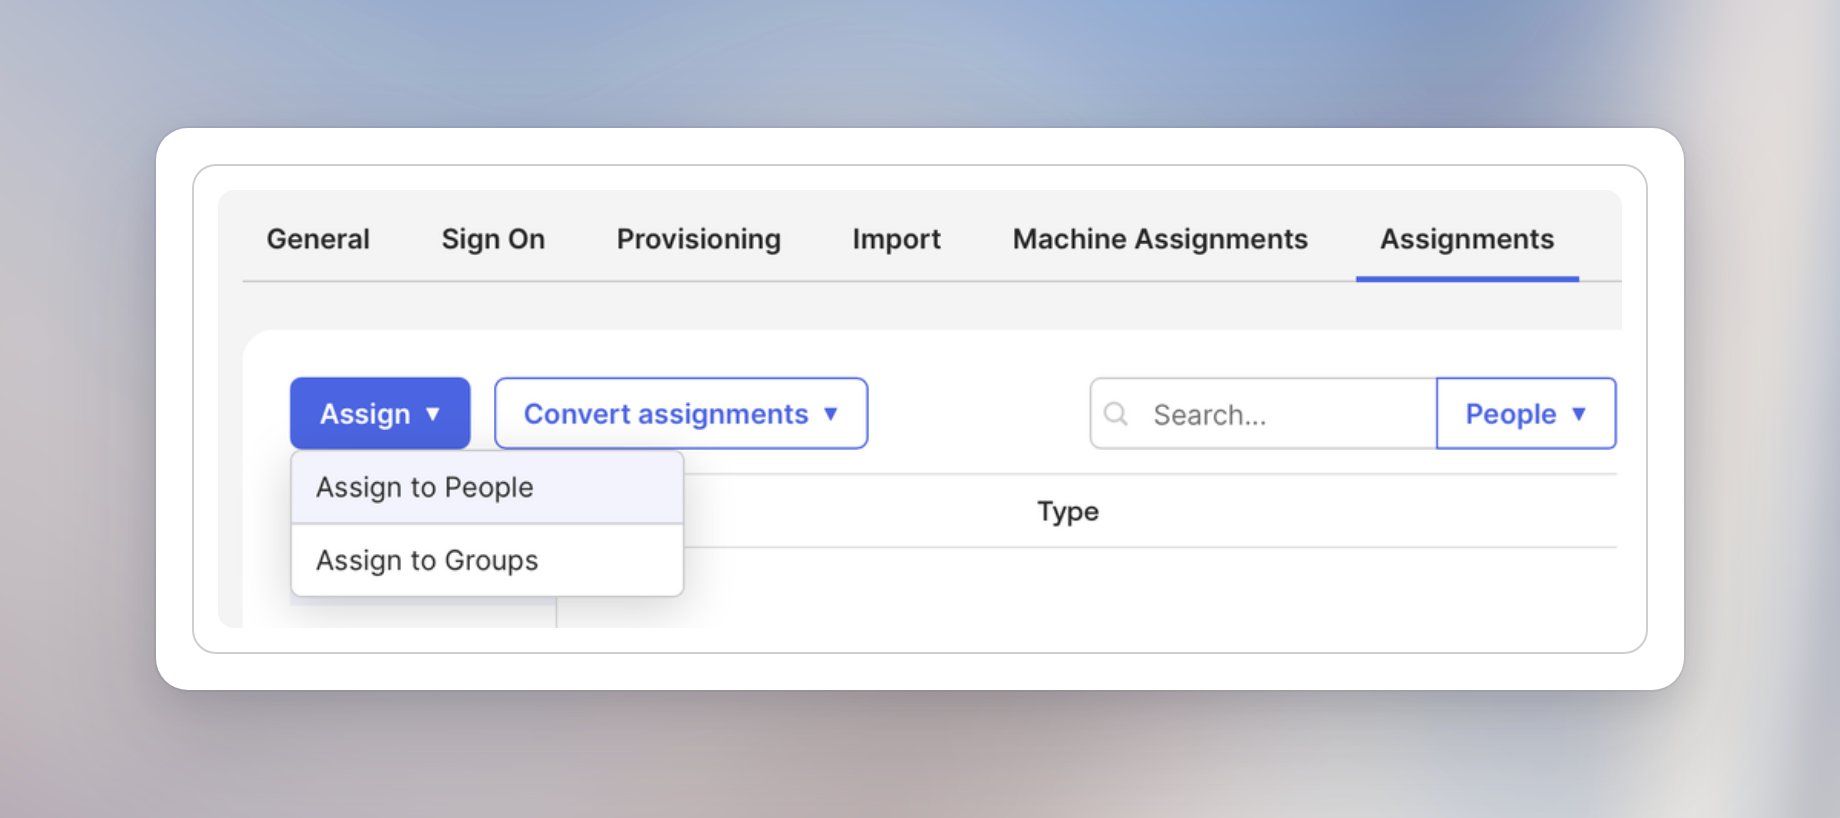
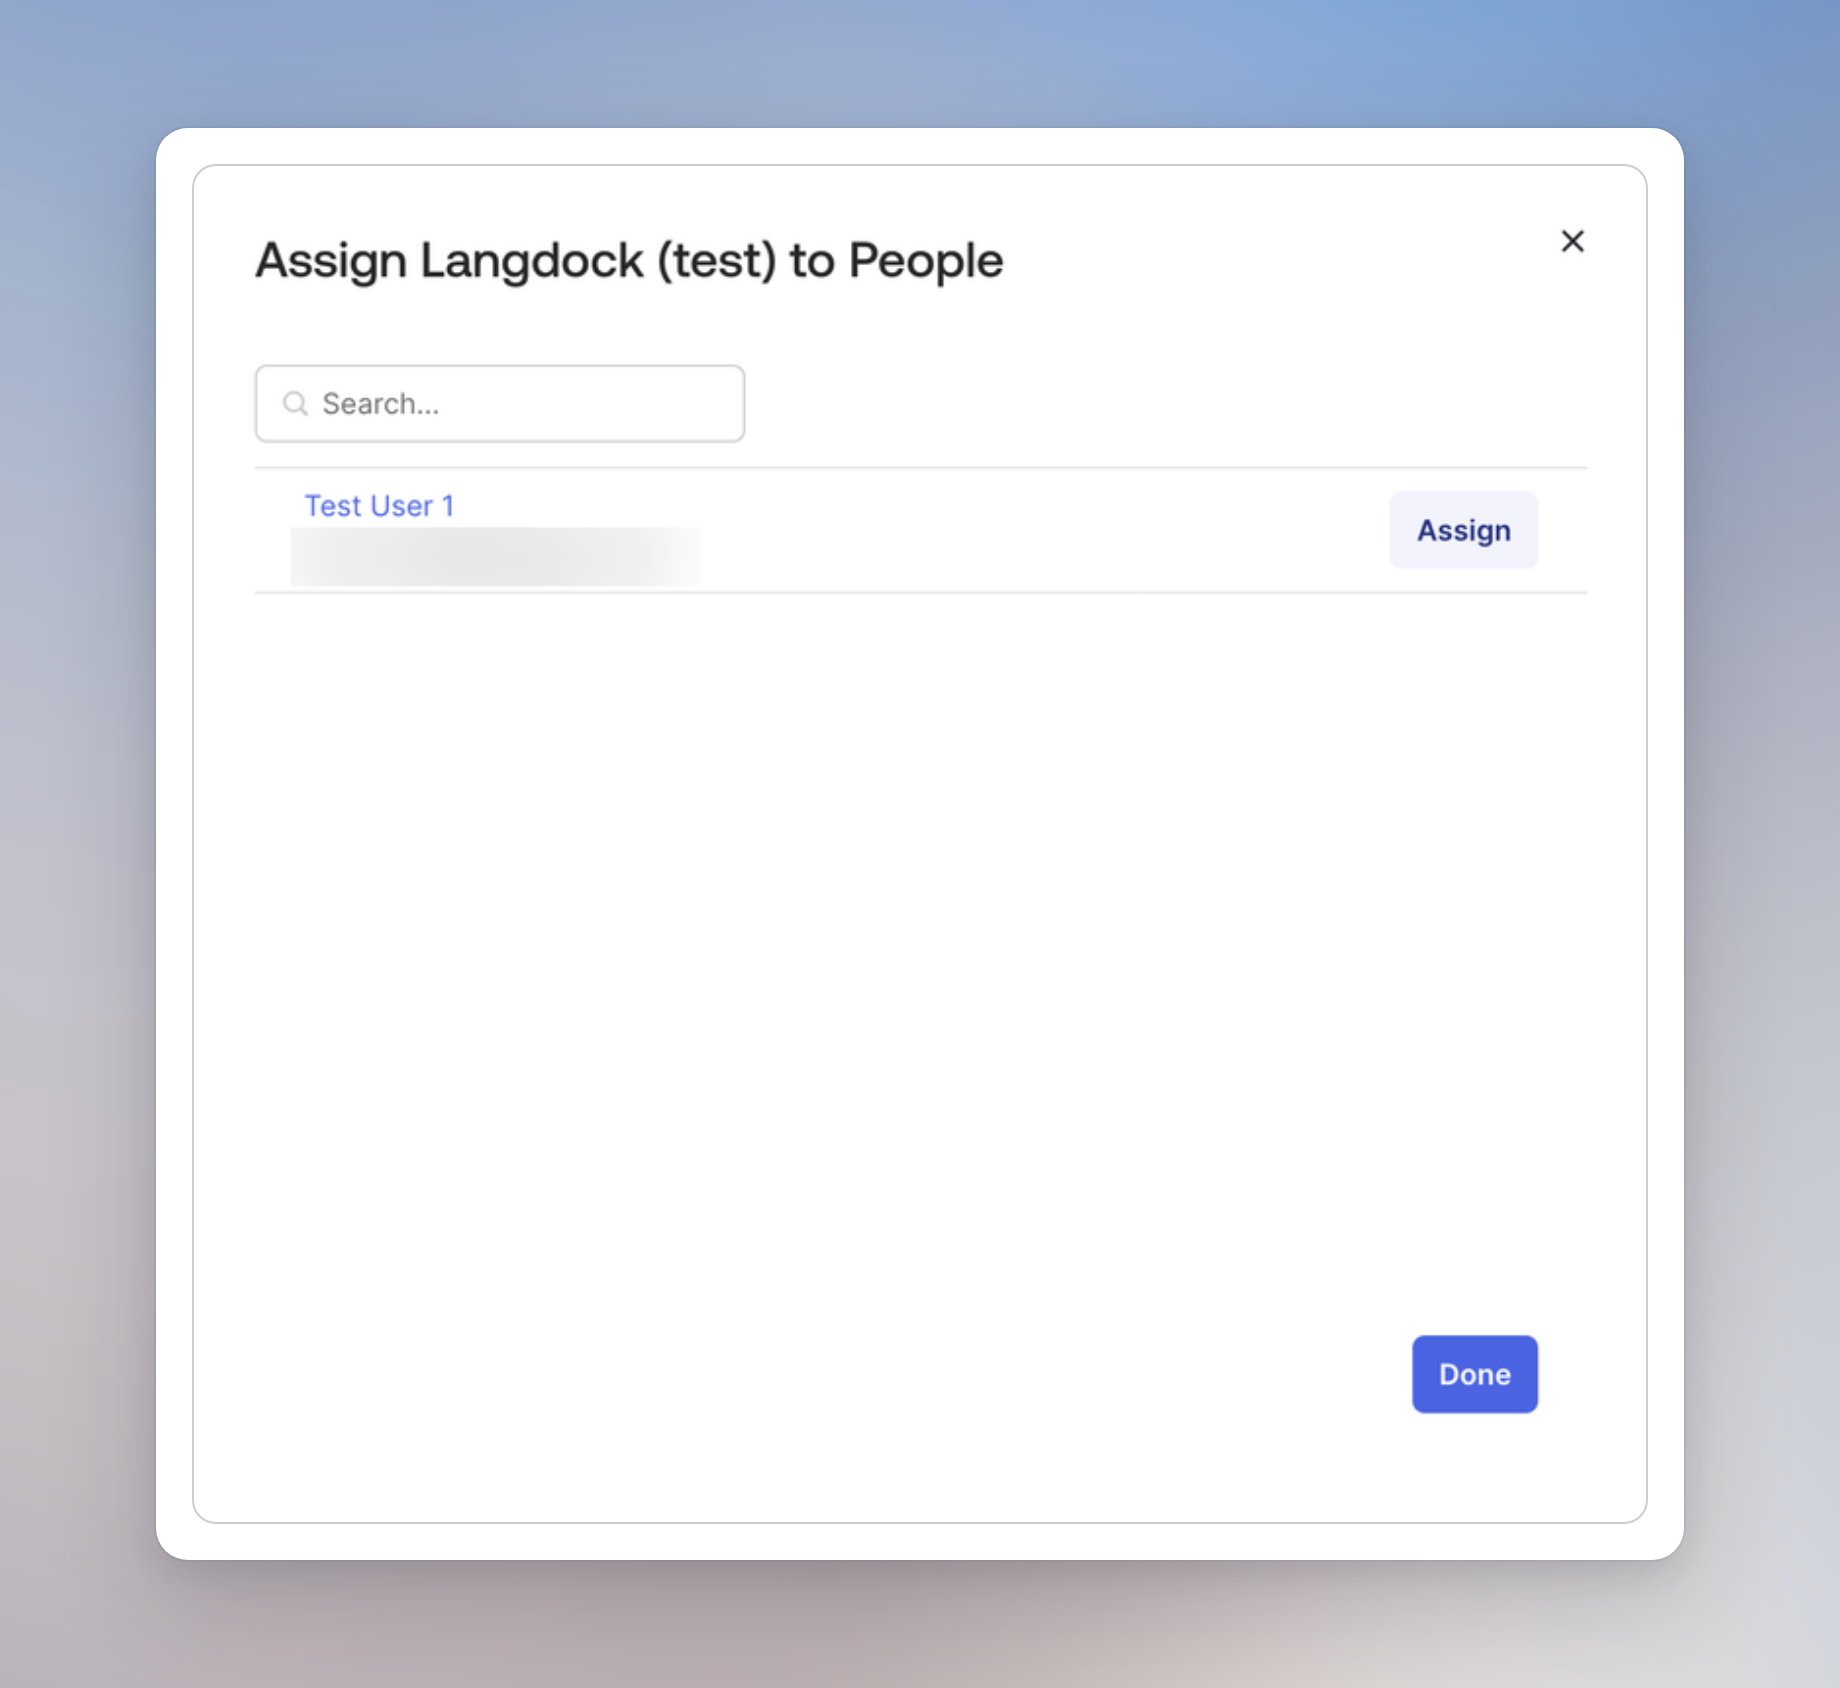
Push groups
In the same Okta app, push groups from the Push Groups tab, similar to assigning people above. Turn on Push Groups on the integration first:- Open Push Groups.
- Choose the Okta group by name and push it so Langdock creates the group.
- Confirm the group in Groups.
Group already exists. Found group with the same name. Use a group name that is not already in the workspace.
In Langdock you can still change the role of people in a SCIM group. Other edits to that group belong in Okta.
Check the result
The connector test does not add anyone to the workspace. A successful test looks like this: Connector configured successfully, with Import Groups marked with an x.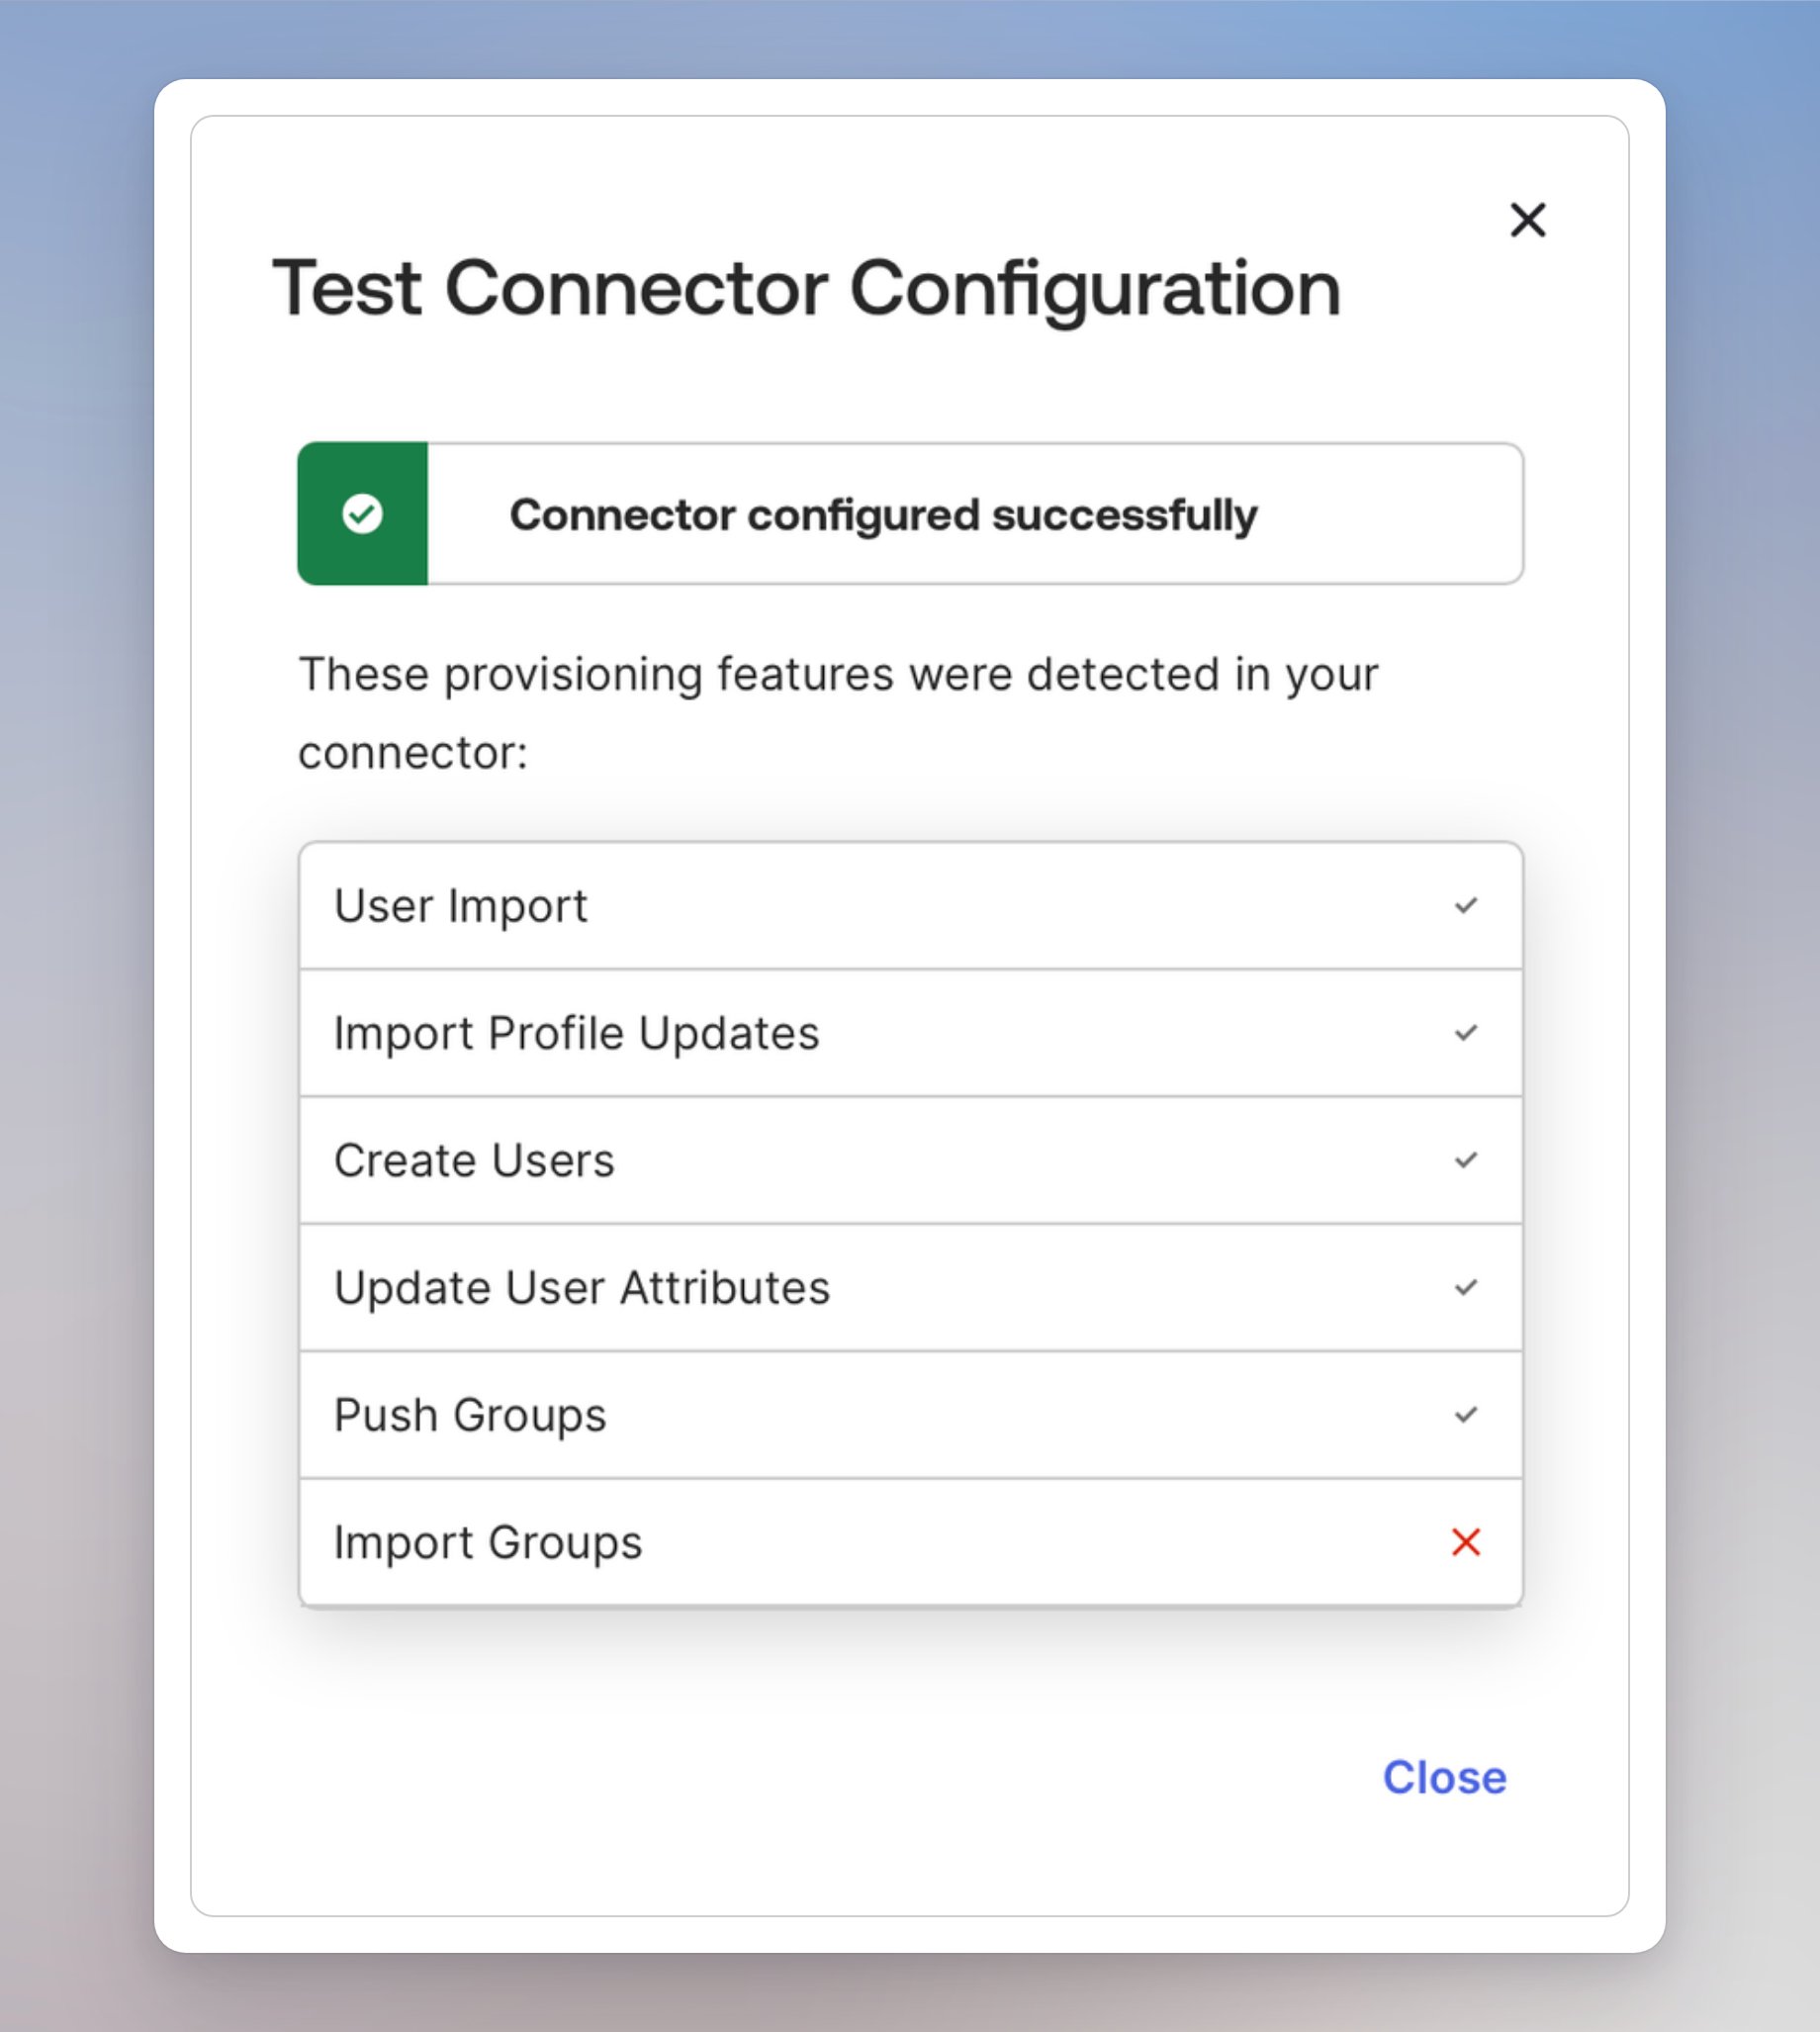
Limits
- Okta can find a person by email and a group by name. Any other search is rejected.
- Include a display name for every member when Okta creates or replaces a group. Okta sends that name. A group without it is rejected.
- Okta can add a person, remove a person, and replace the whole membership. Replacing one person with a filtered update fails. Add or remove that person instead.
- If Okta asks for a service provider configuration or a schema document, continue without it. Langdock provisions users and groups without those endpoints.
- Use an email on a verified domain. Add and verify a new domain in Langdock before Okta changes someone to that address.
- An email that already belongs to another person is rejected.
Troubleshooting
- 401. The value in Authorization is the current token, without a second Bearer. Regenerate invalidates the previous token.
- 403 on users. Turn on SCIM User Sync Active.
- 403 on groups. Turn on SCIM Group Sync Active. User provisioning can succeed while every group request fails.
- 400 on a user. The email domain is not verified, or
userNameis not a valid email address. - 409 on a user. That email already belongs to another person.
- 409 on a group. A group with that name already exists.
- One person fails while others succeed. Note the time of the attempt and contact support@langdock.com. Leave SAML Active as it is. Sign-in and provisioning are separate, and turning SAML on too early locks out anyone who still uses a password.