Select your provider below to see the setup steps.Documentation Index
Fetch the complete documentation index at: https://docs.langdock.com/llms.txt
Use this file to discover all available pages before exploring further.
Google Vertex AI / AI Studio
Google Vertex AI / AI Studio
Langdock supports two ways to connect Gemini models: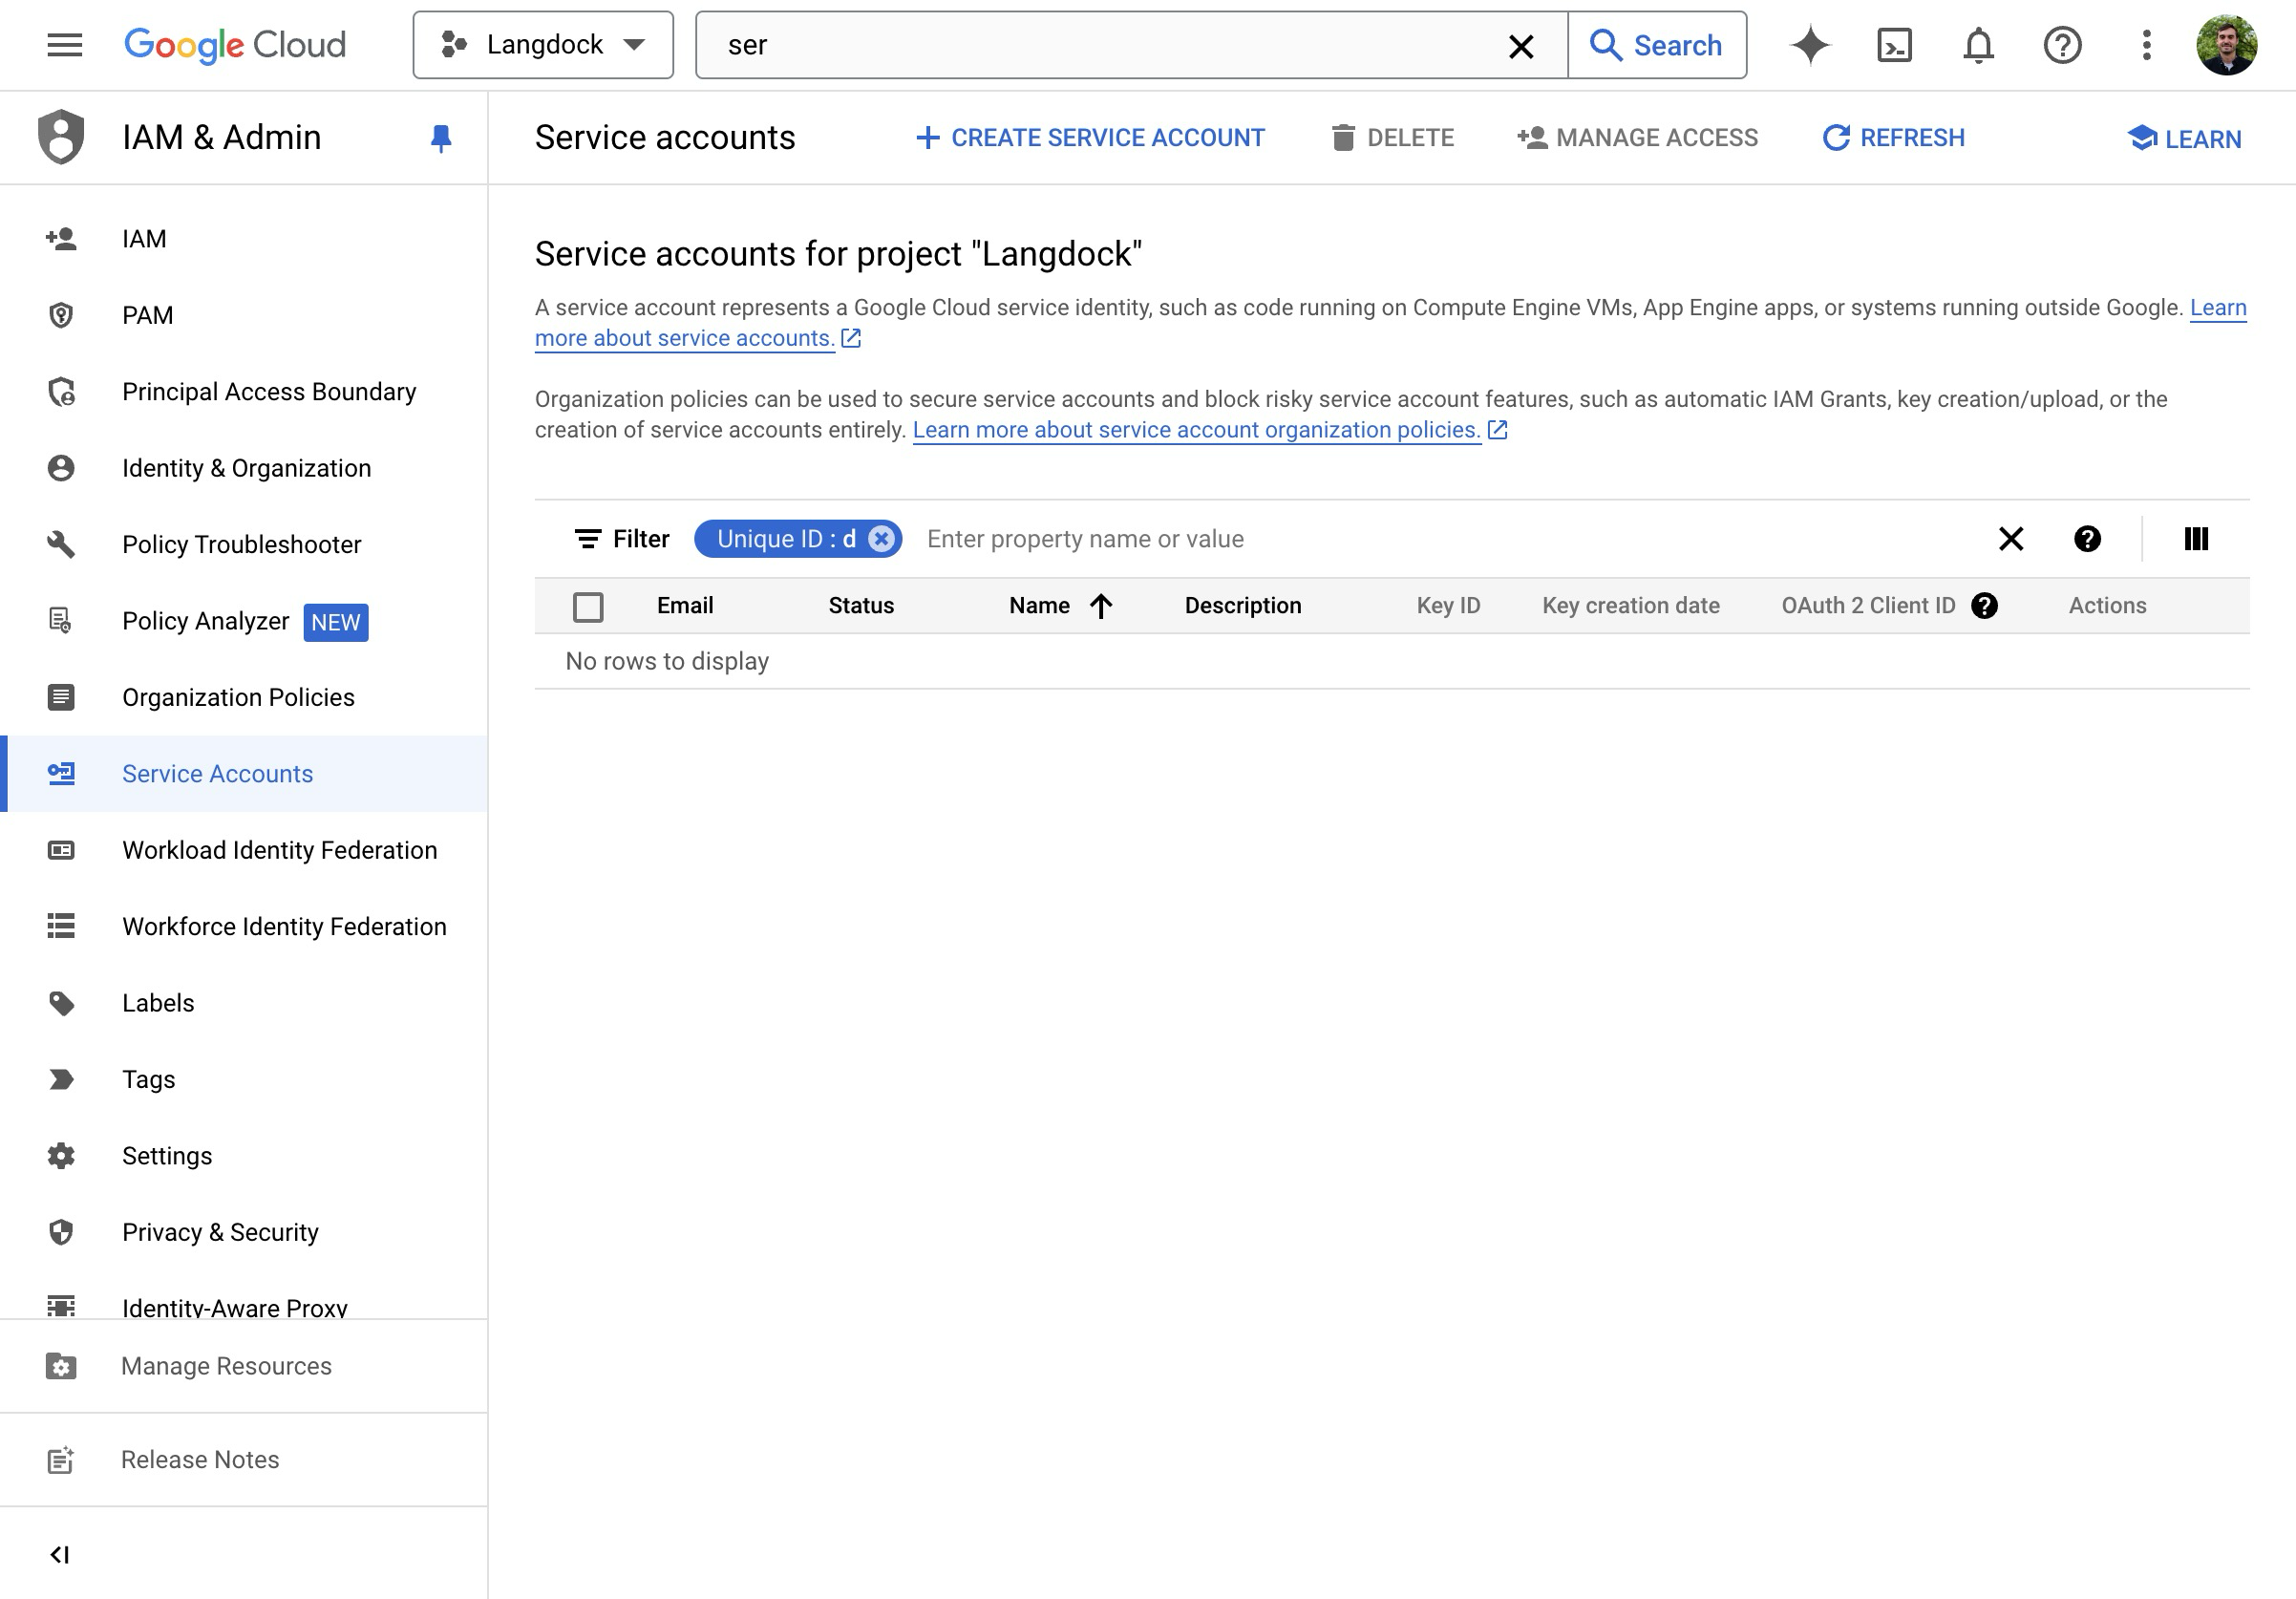

- Google Vertex AI: uses service account credentials. Best for enterprise setups with GCP infrastructure.
- Google AI Studio: uses a simple API key. Easier to set up.
Option 1: Google Vertex AI
Google Cloud Setup
- Enable the Vertex AI API in your Google Cloud Platform.
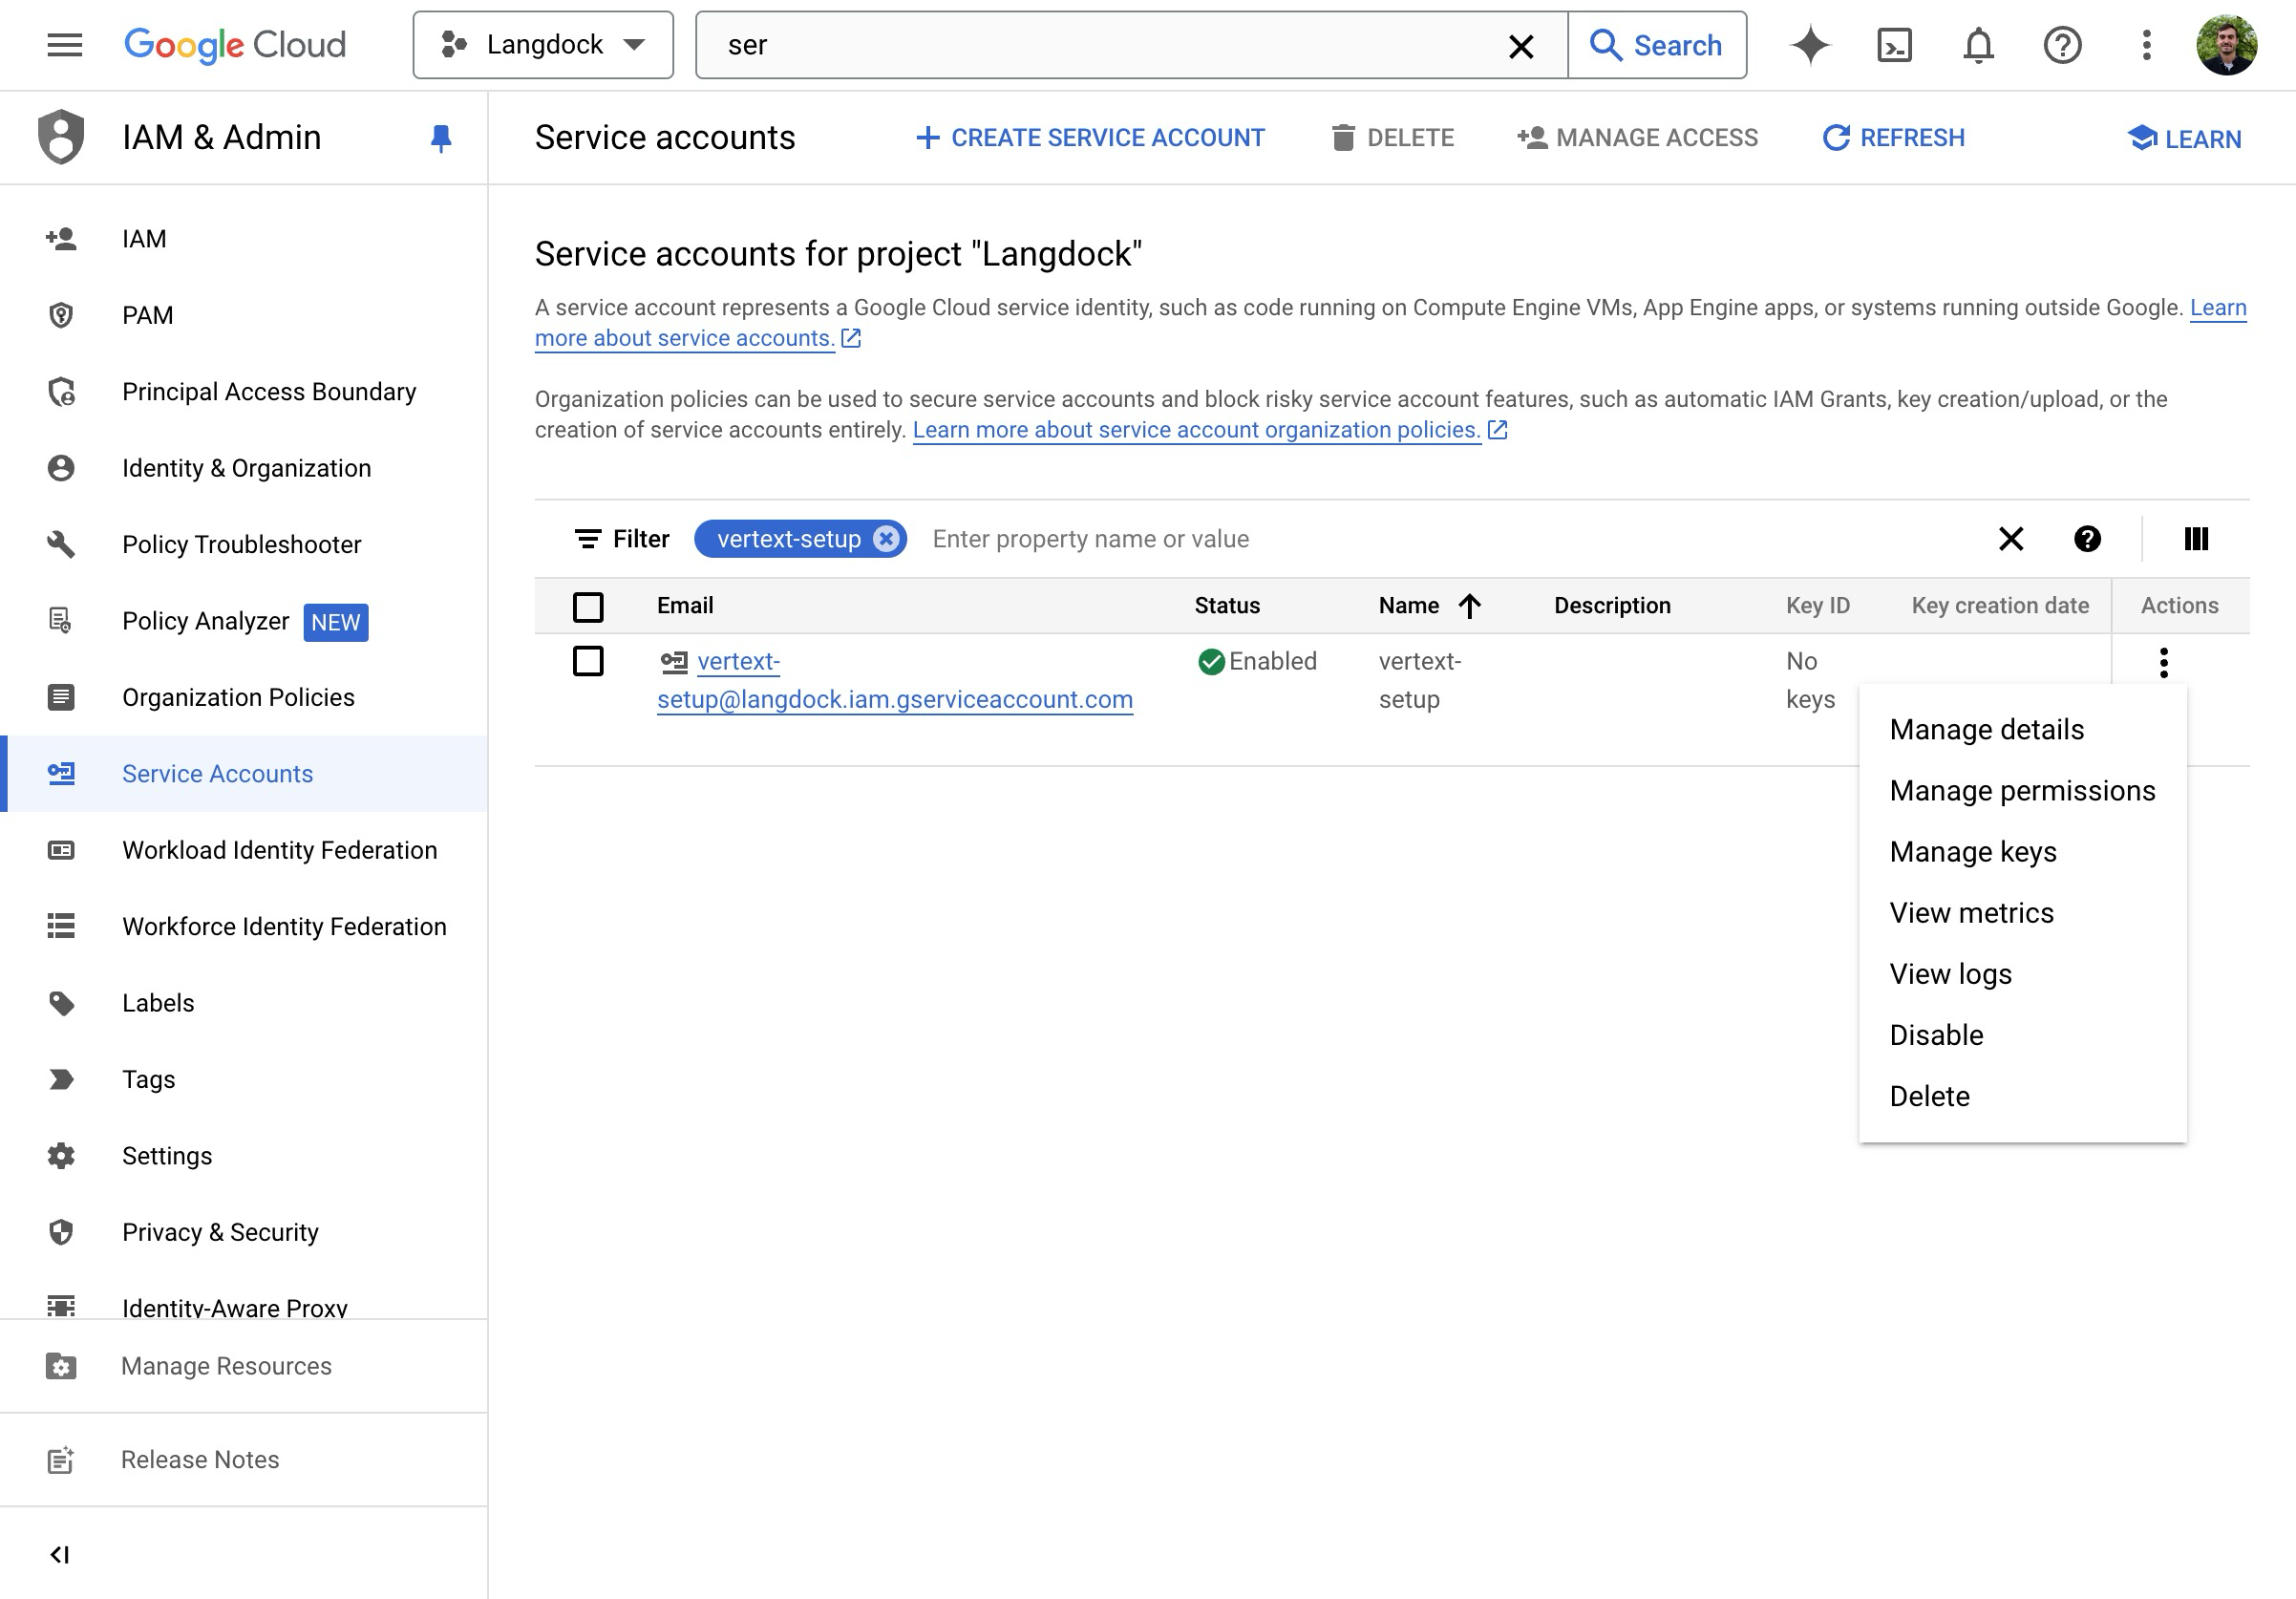
- Go to “Service Accounts” in the Google Cloud Console IAM Settings.
- Click on “Create Service Account”.
- Give the Service Account a name.
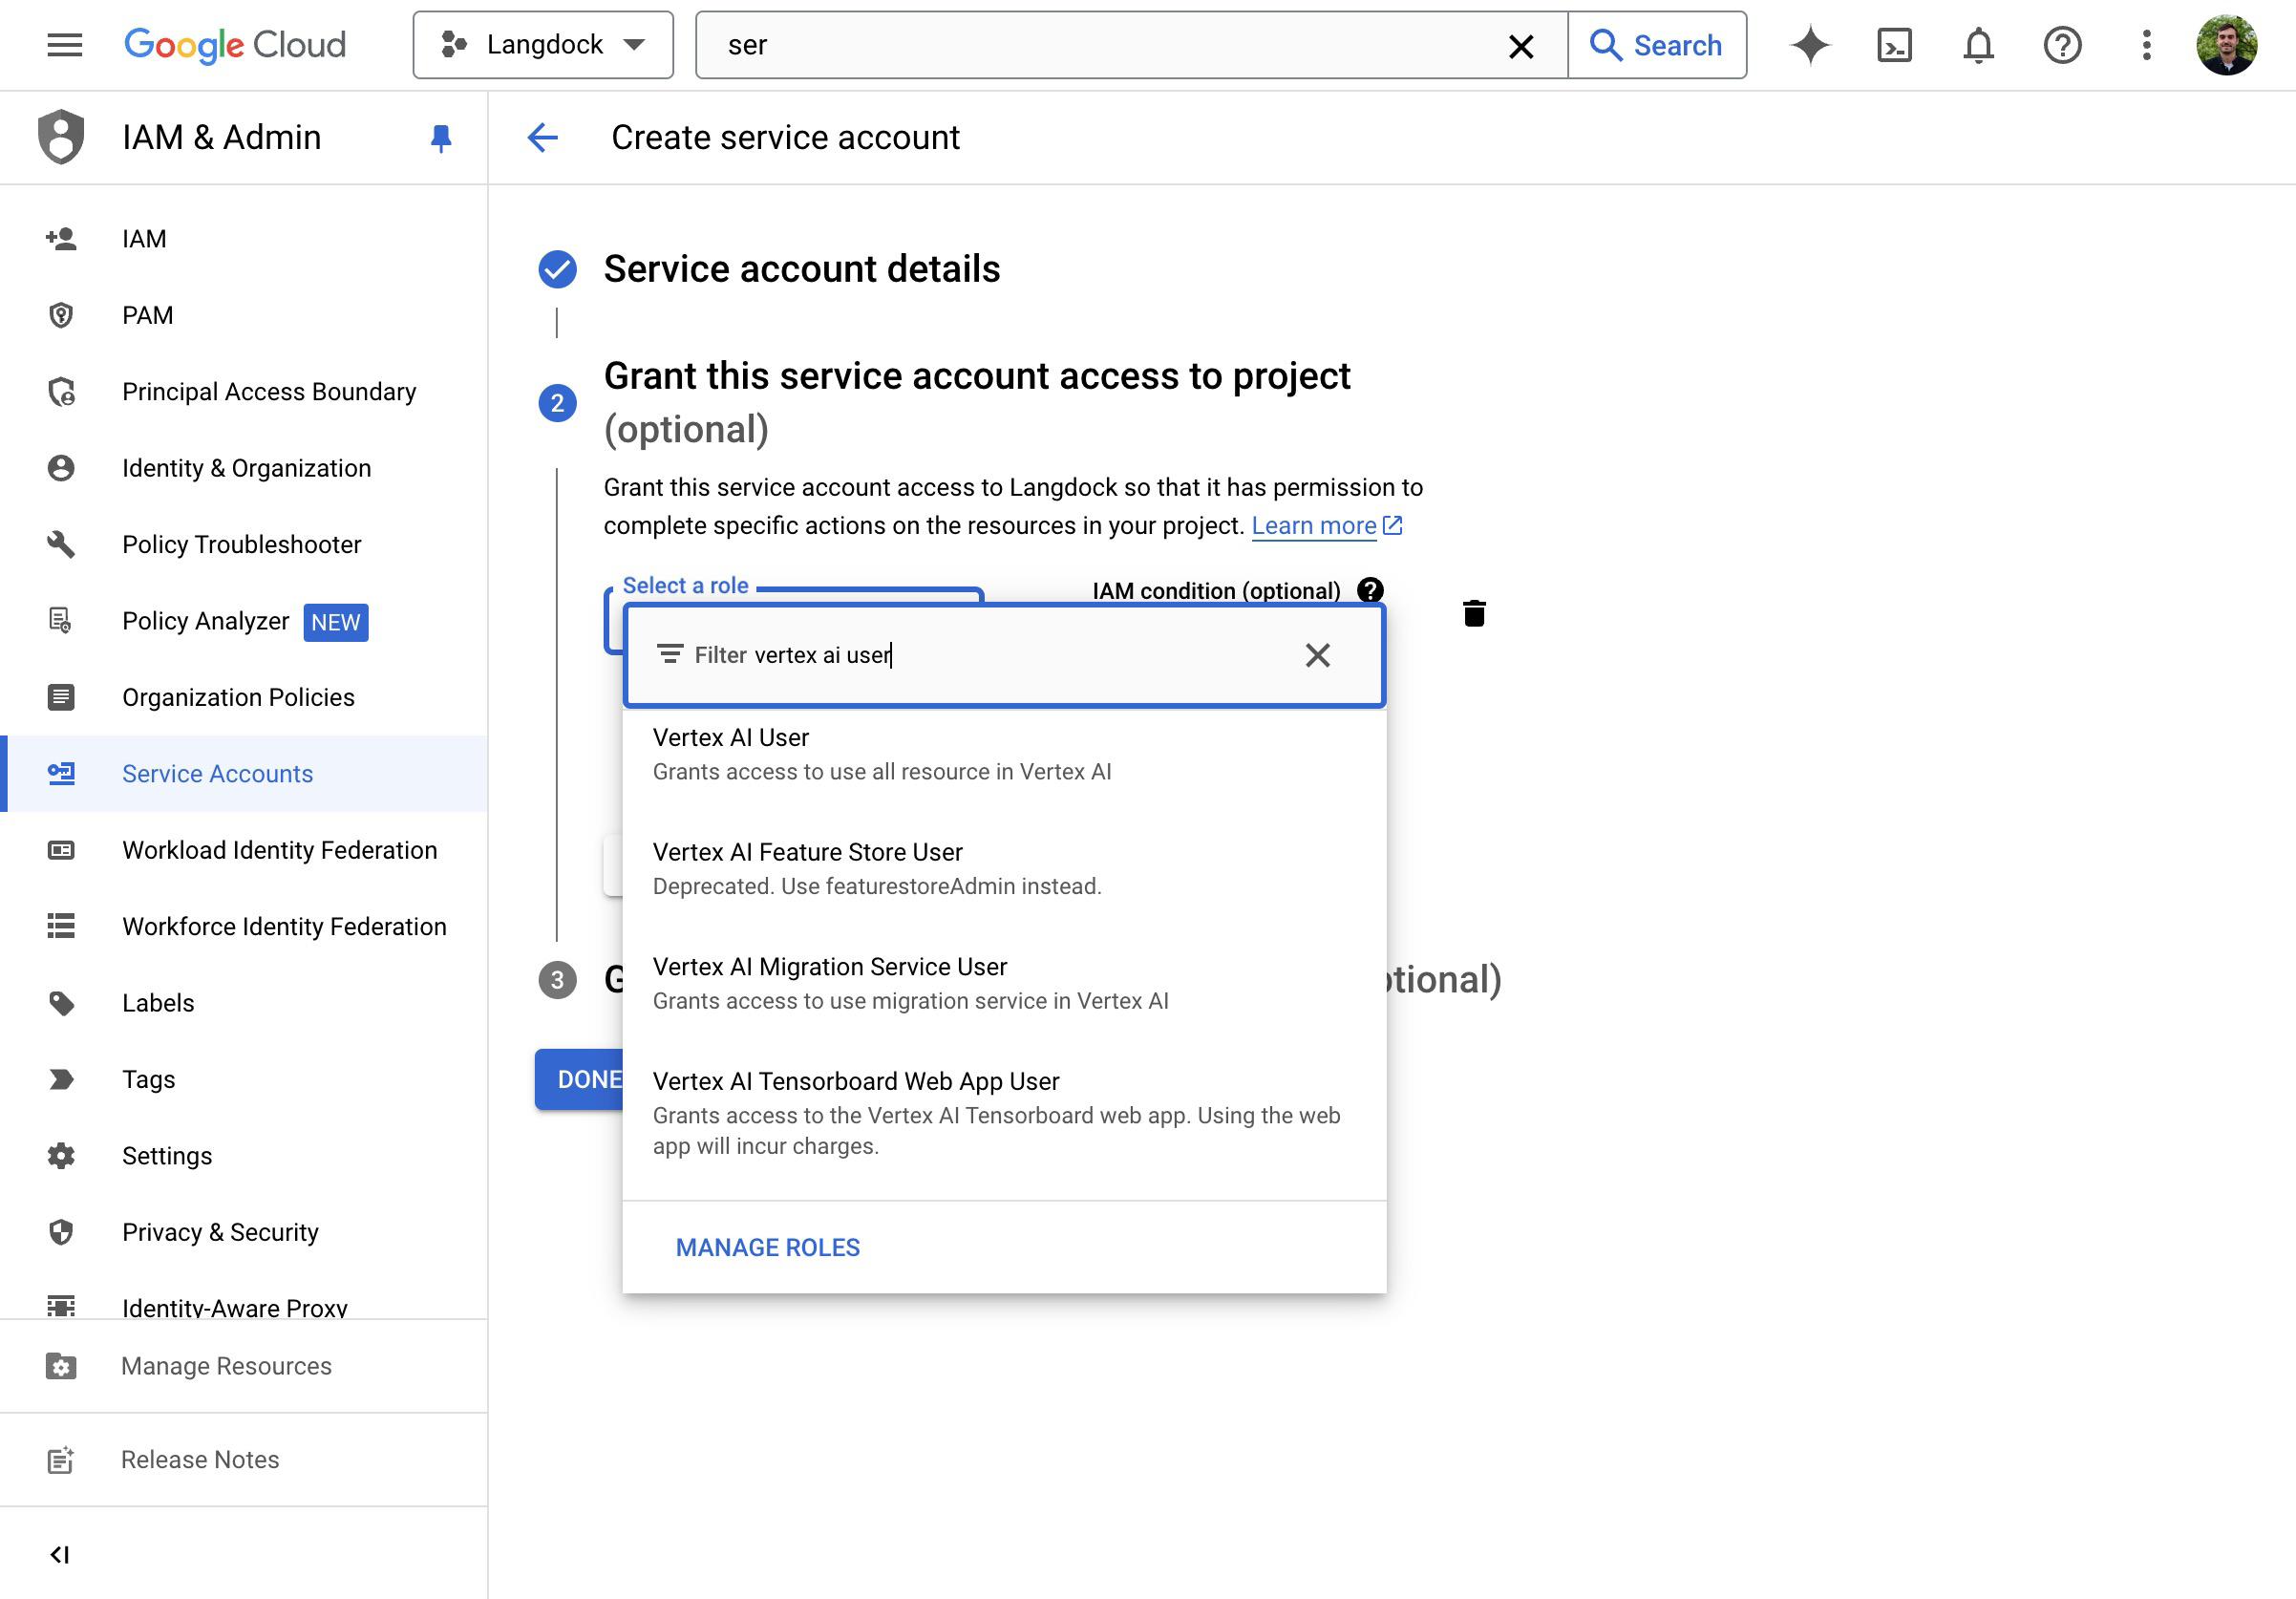
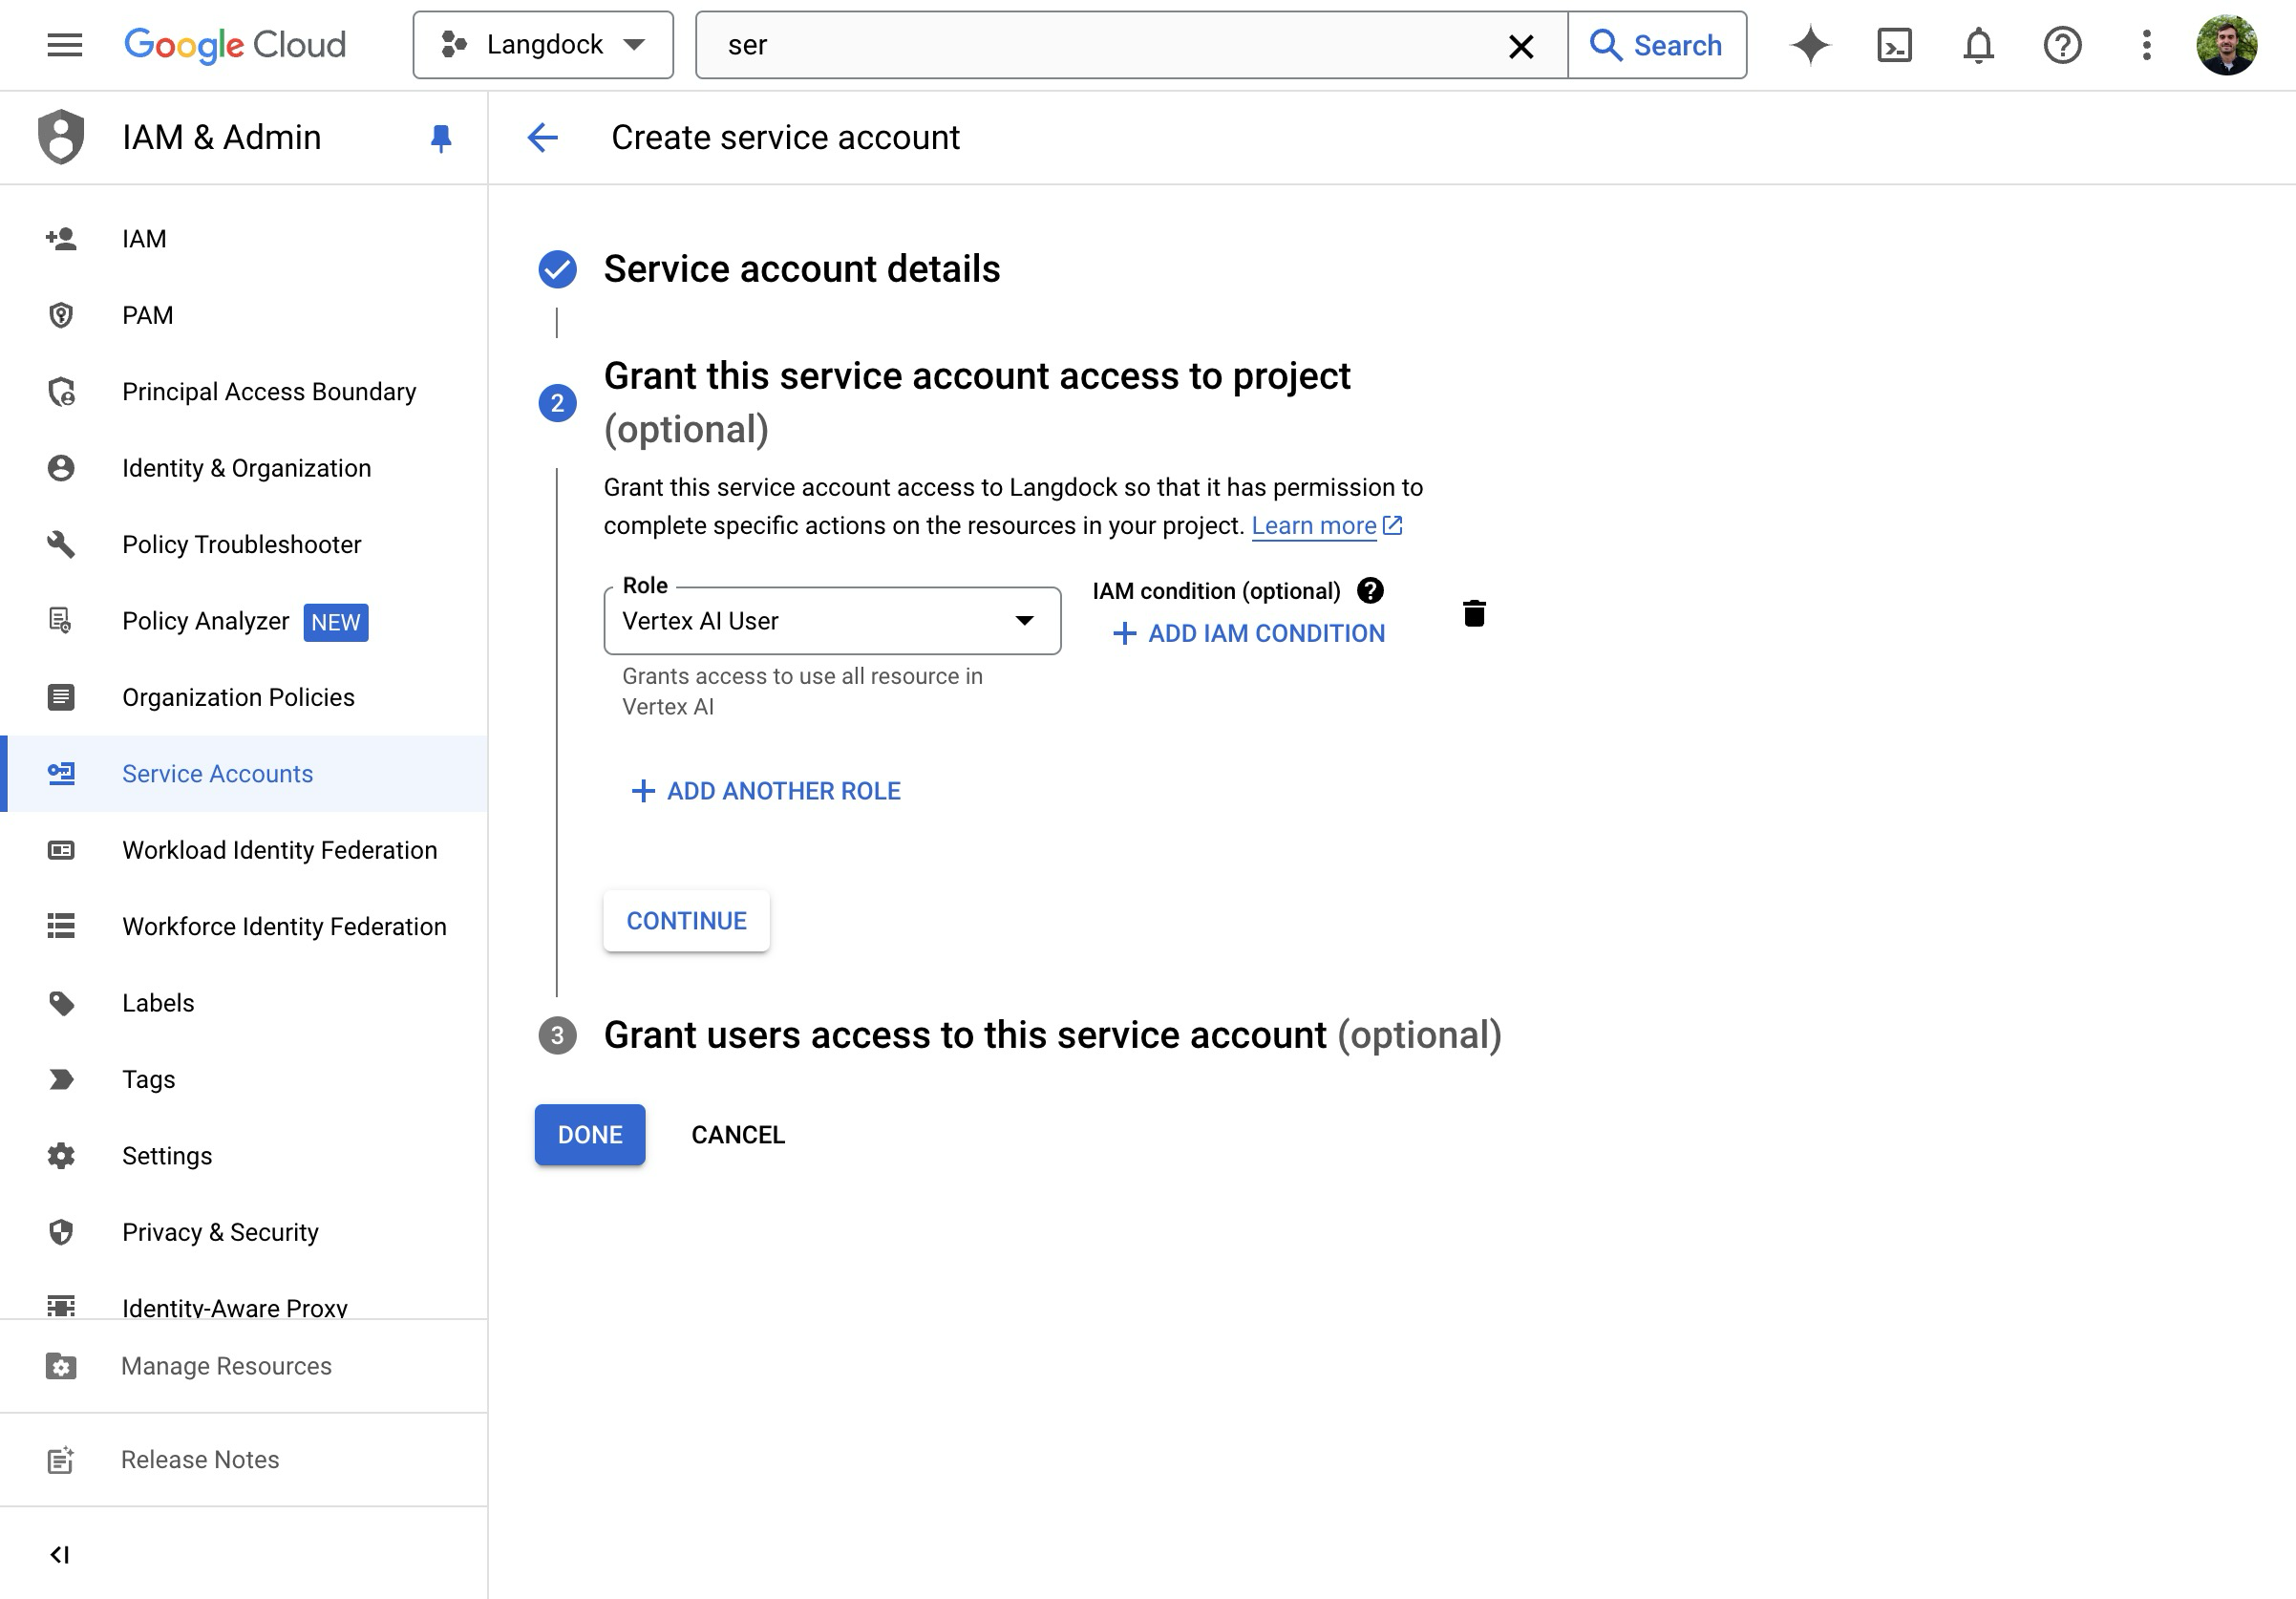
- Assign the “Vertex AI User” Role.
- Create the Service Account.
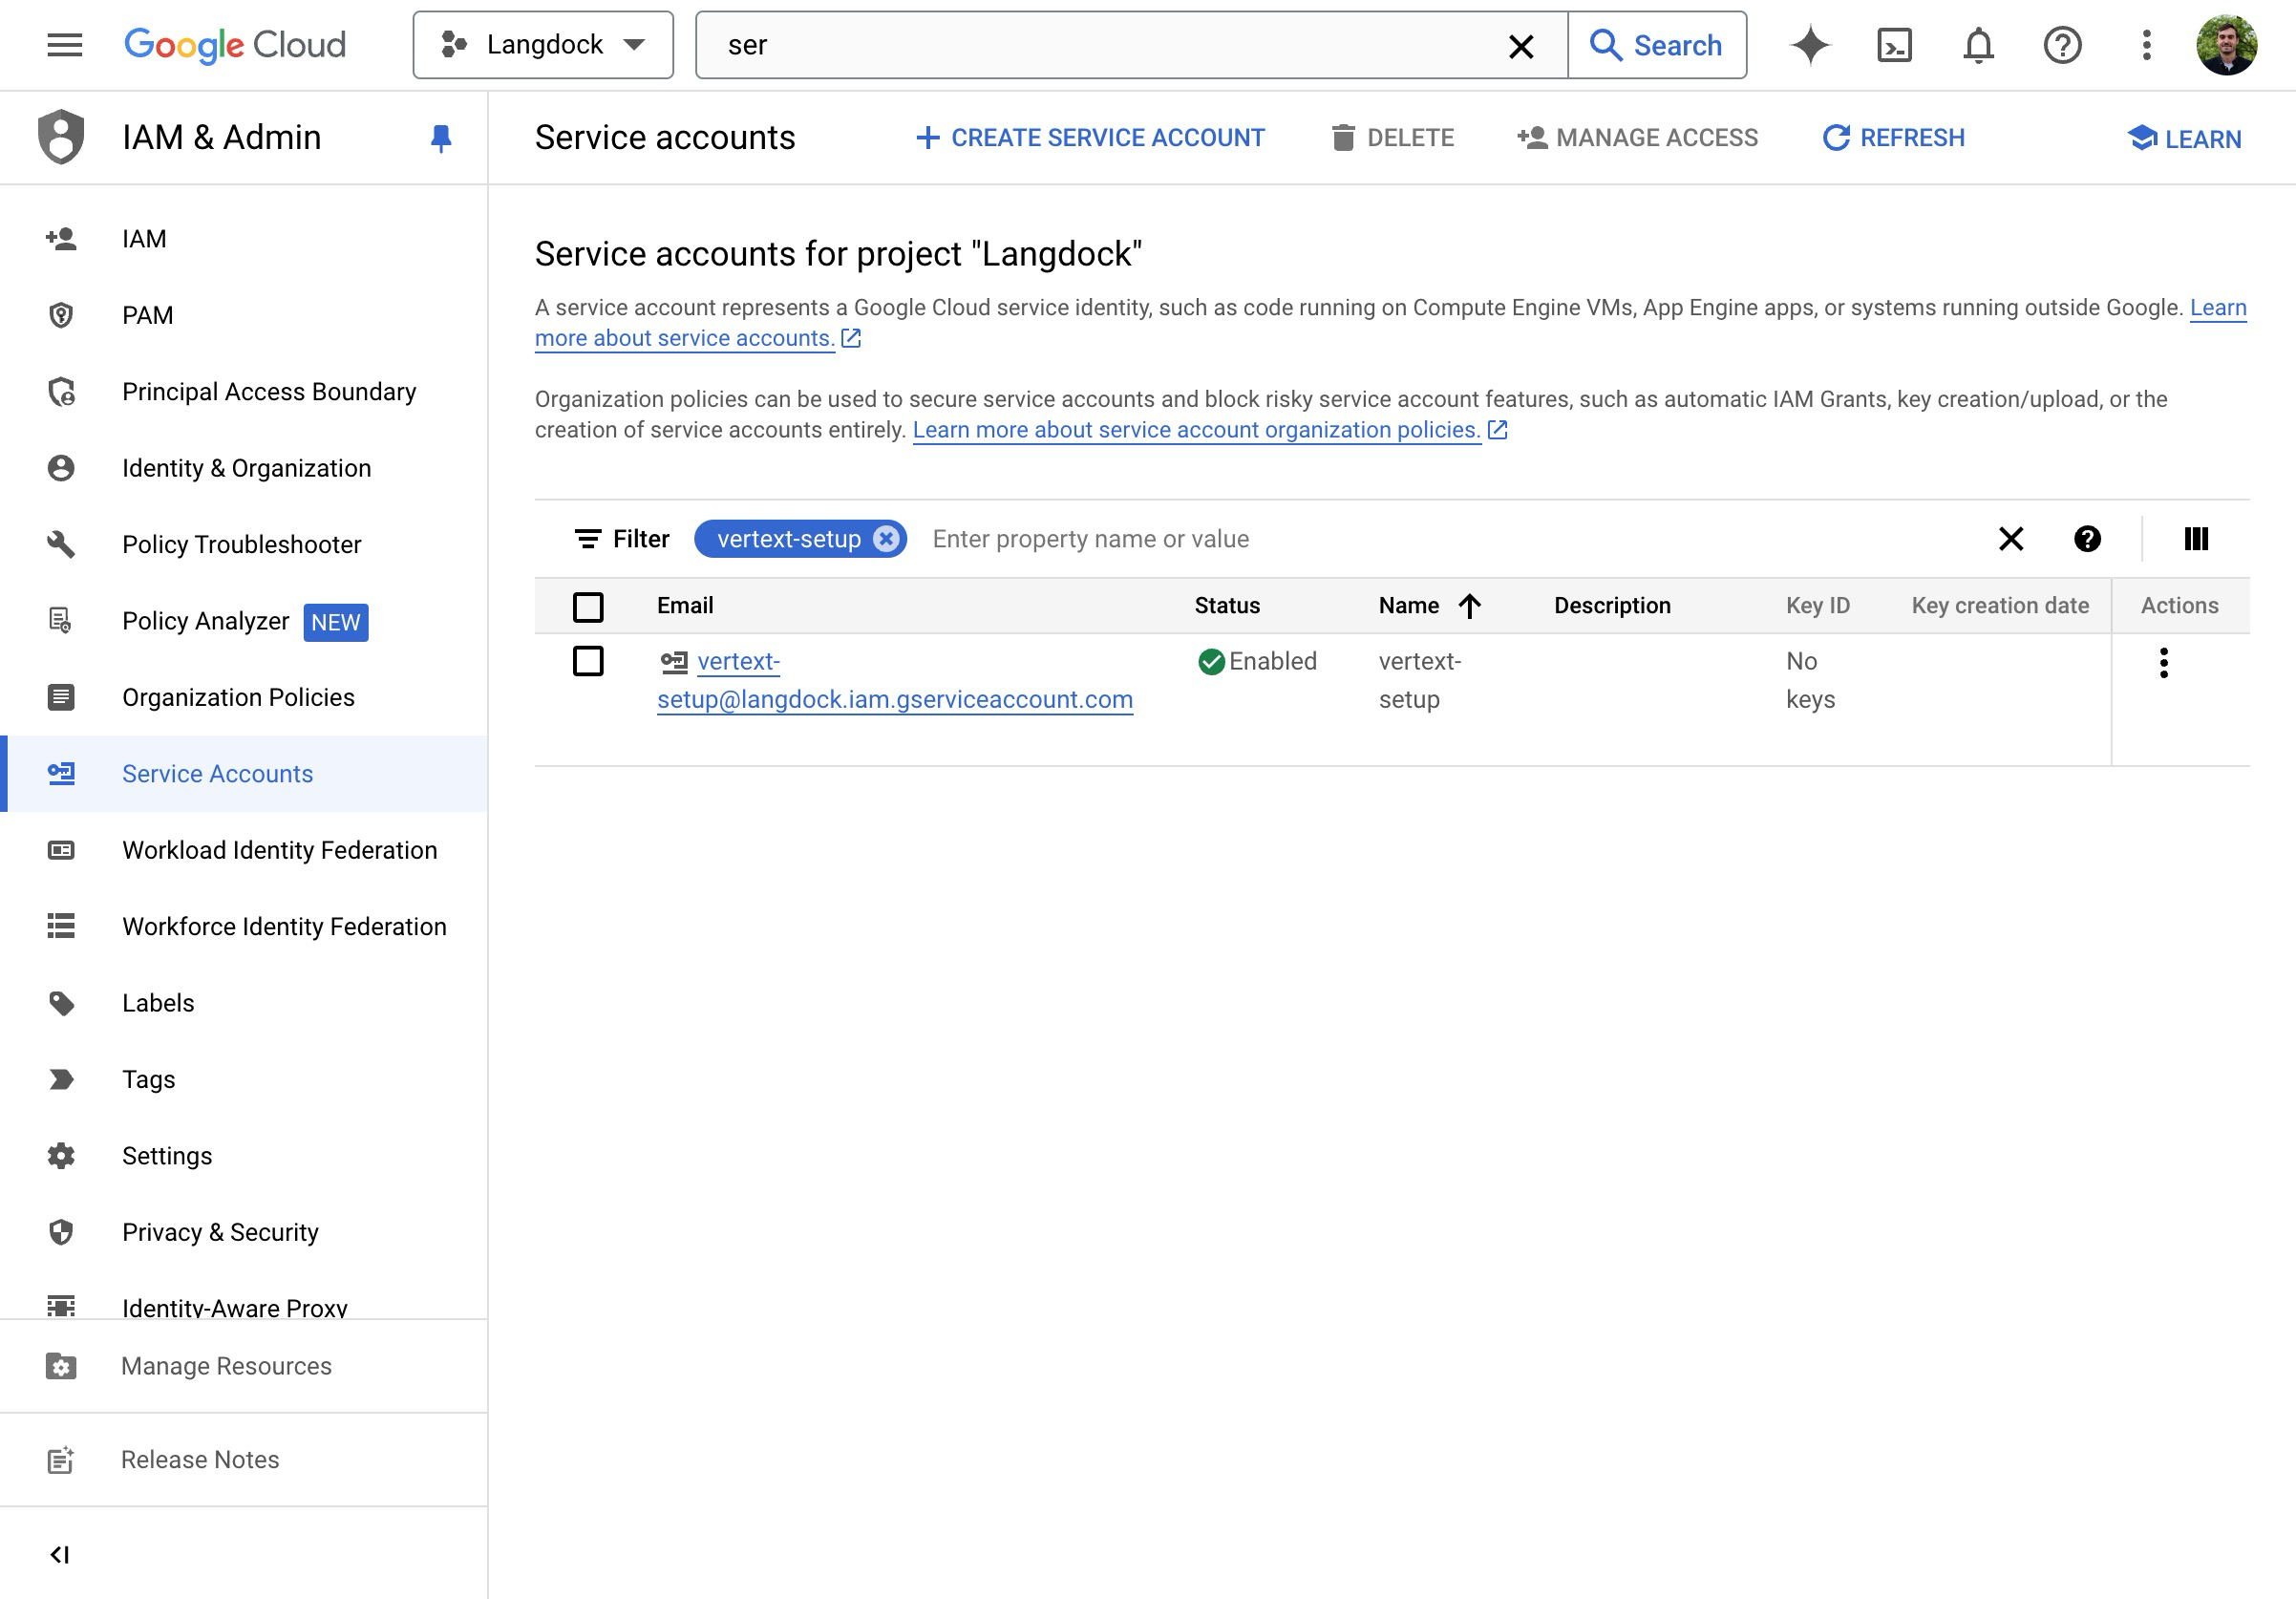
- You are brought back to the Service Account overview.
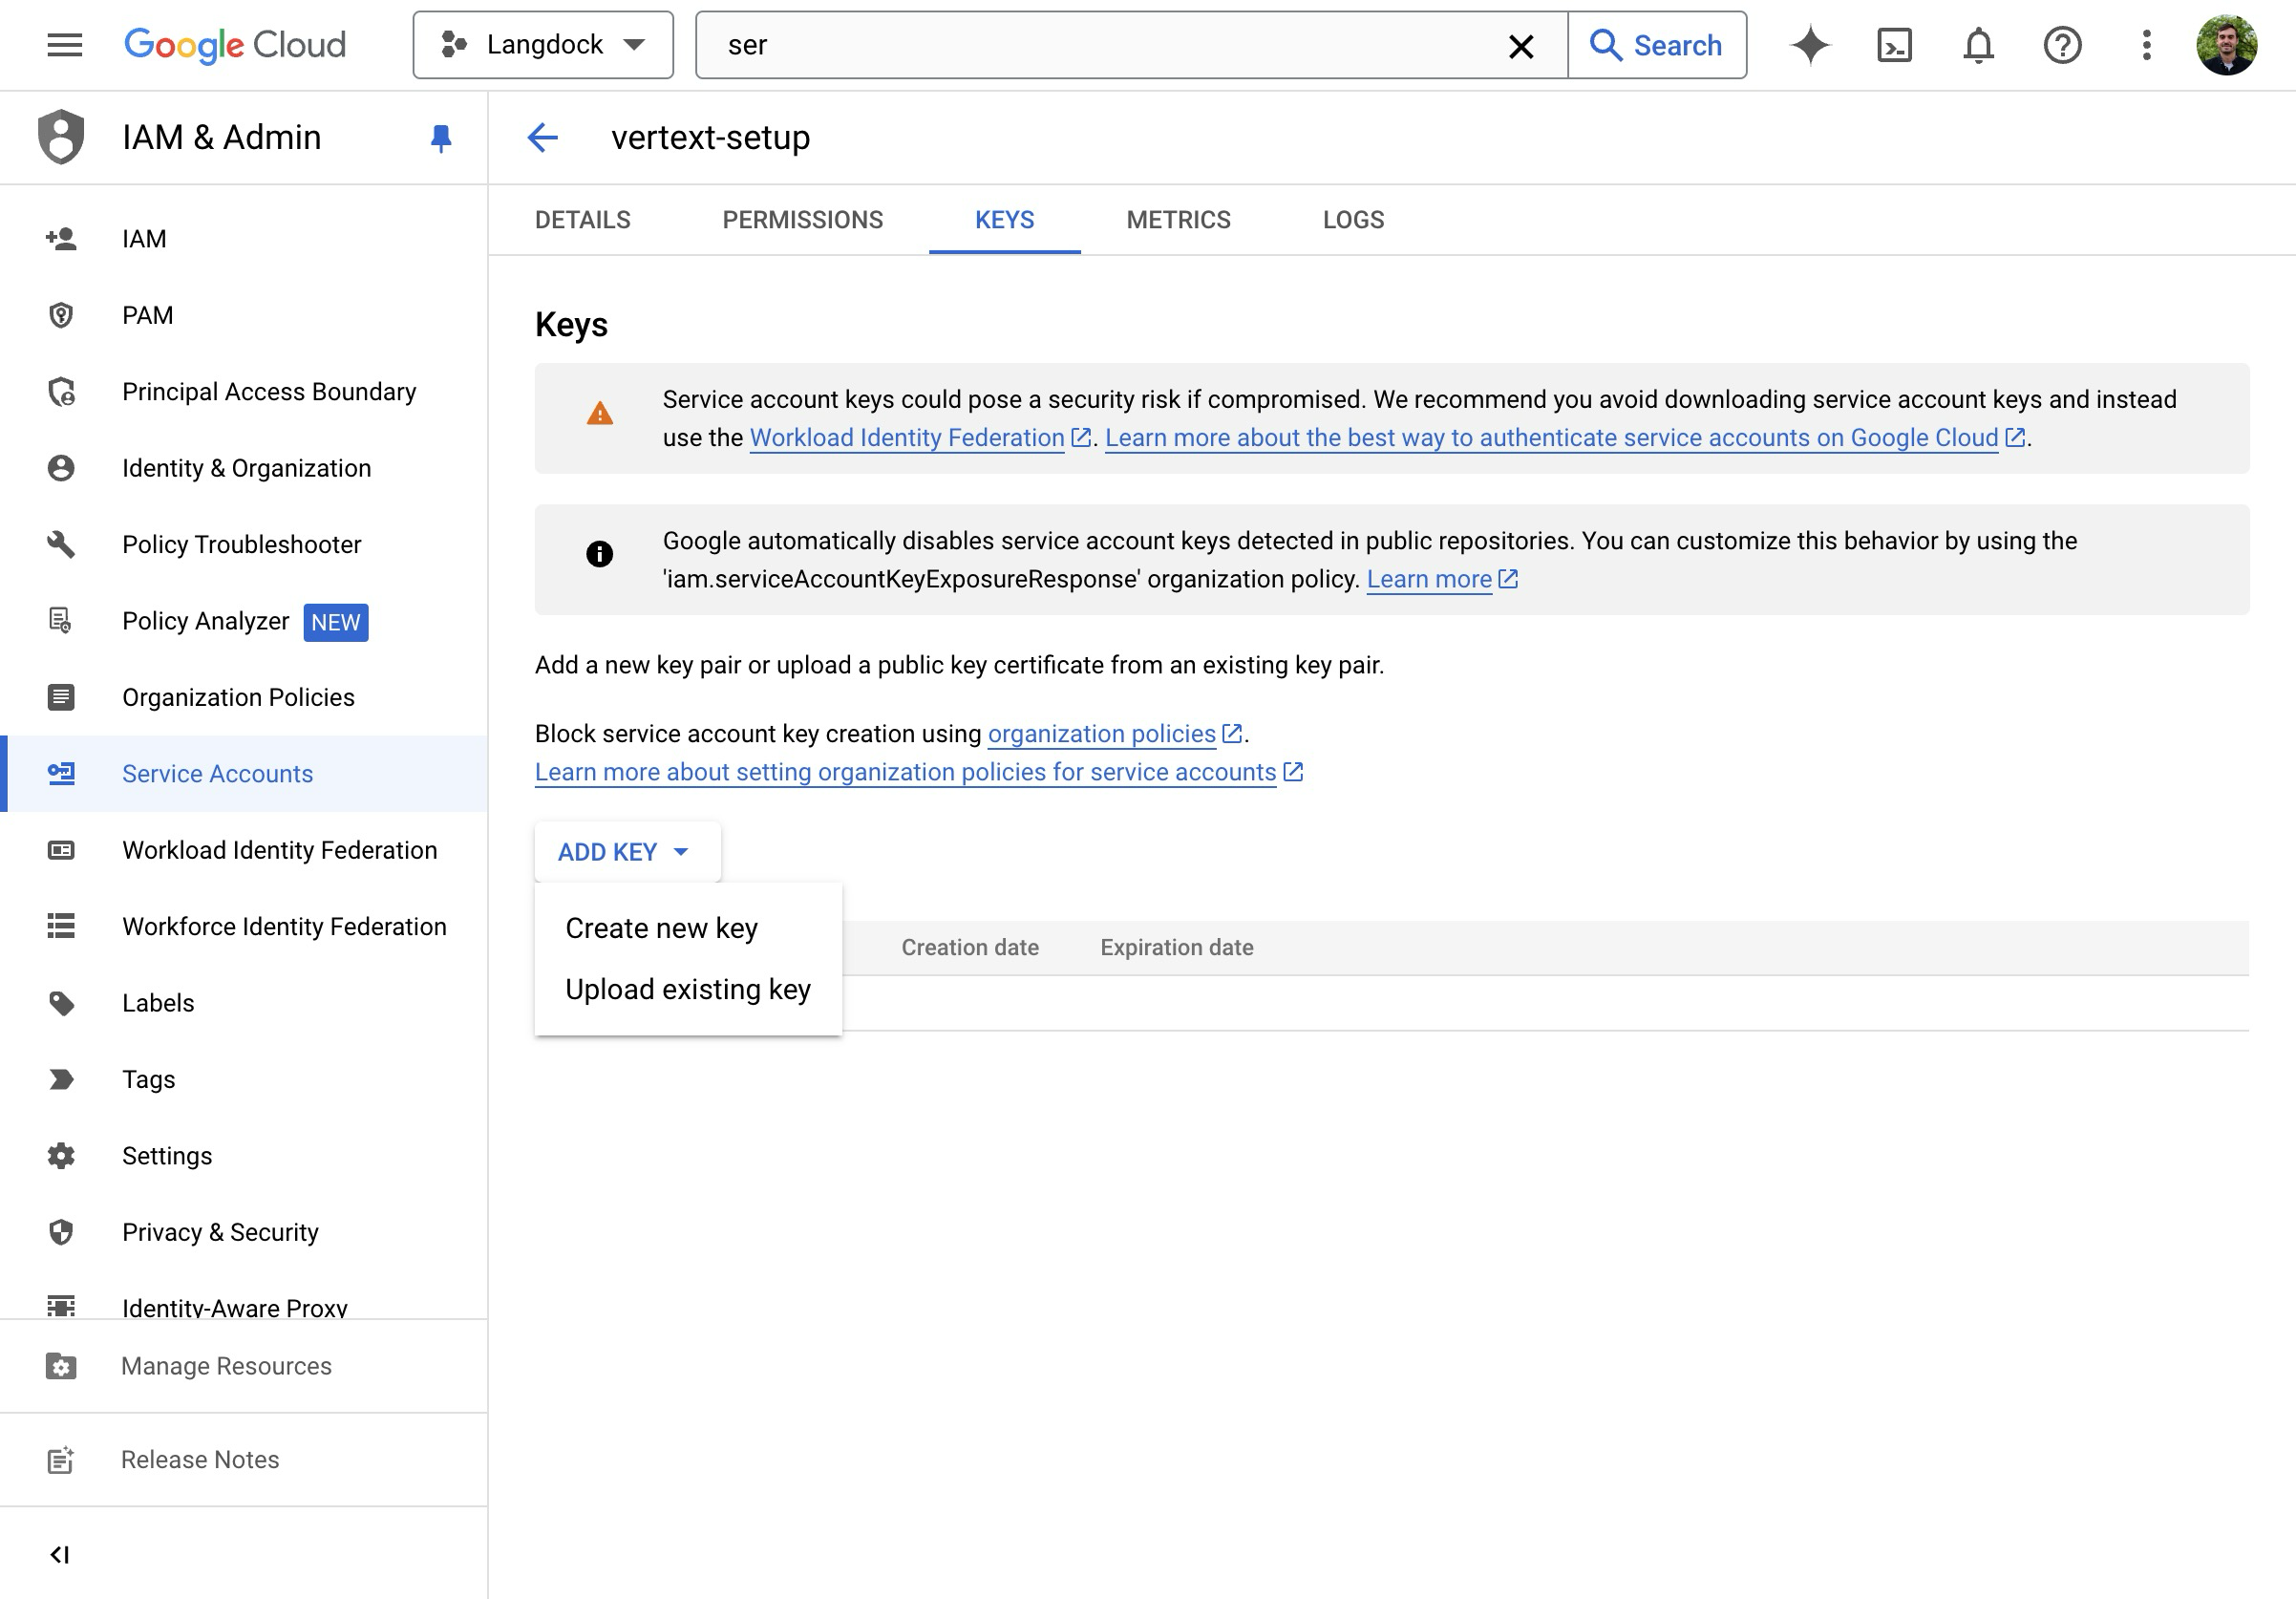
- On the overview page, click on “Manage keys”.
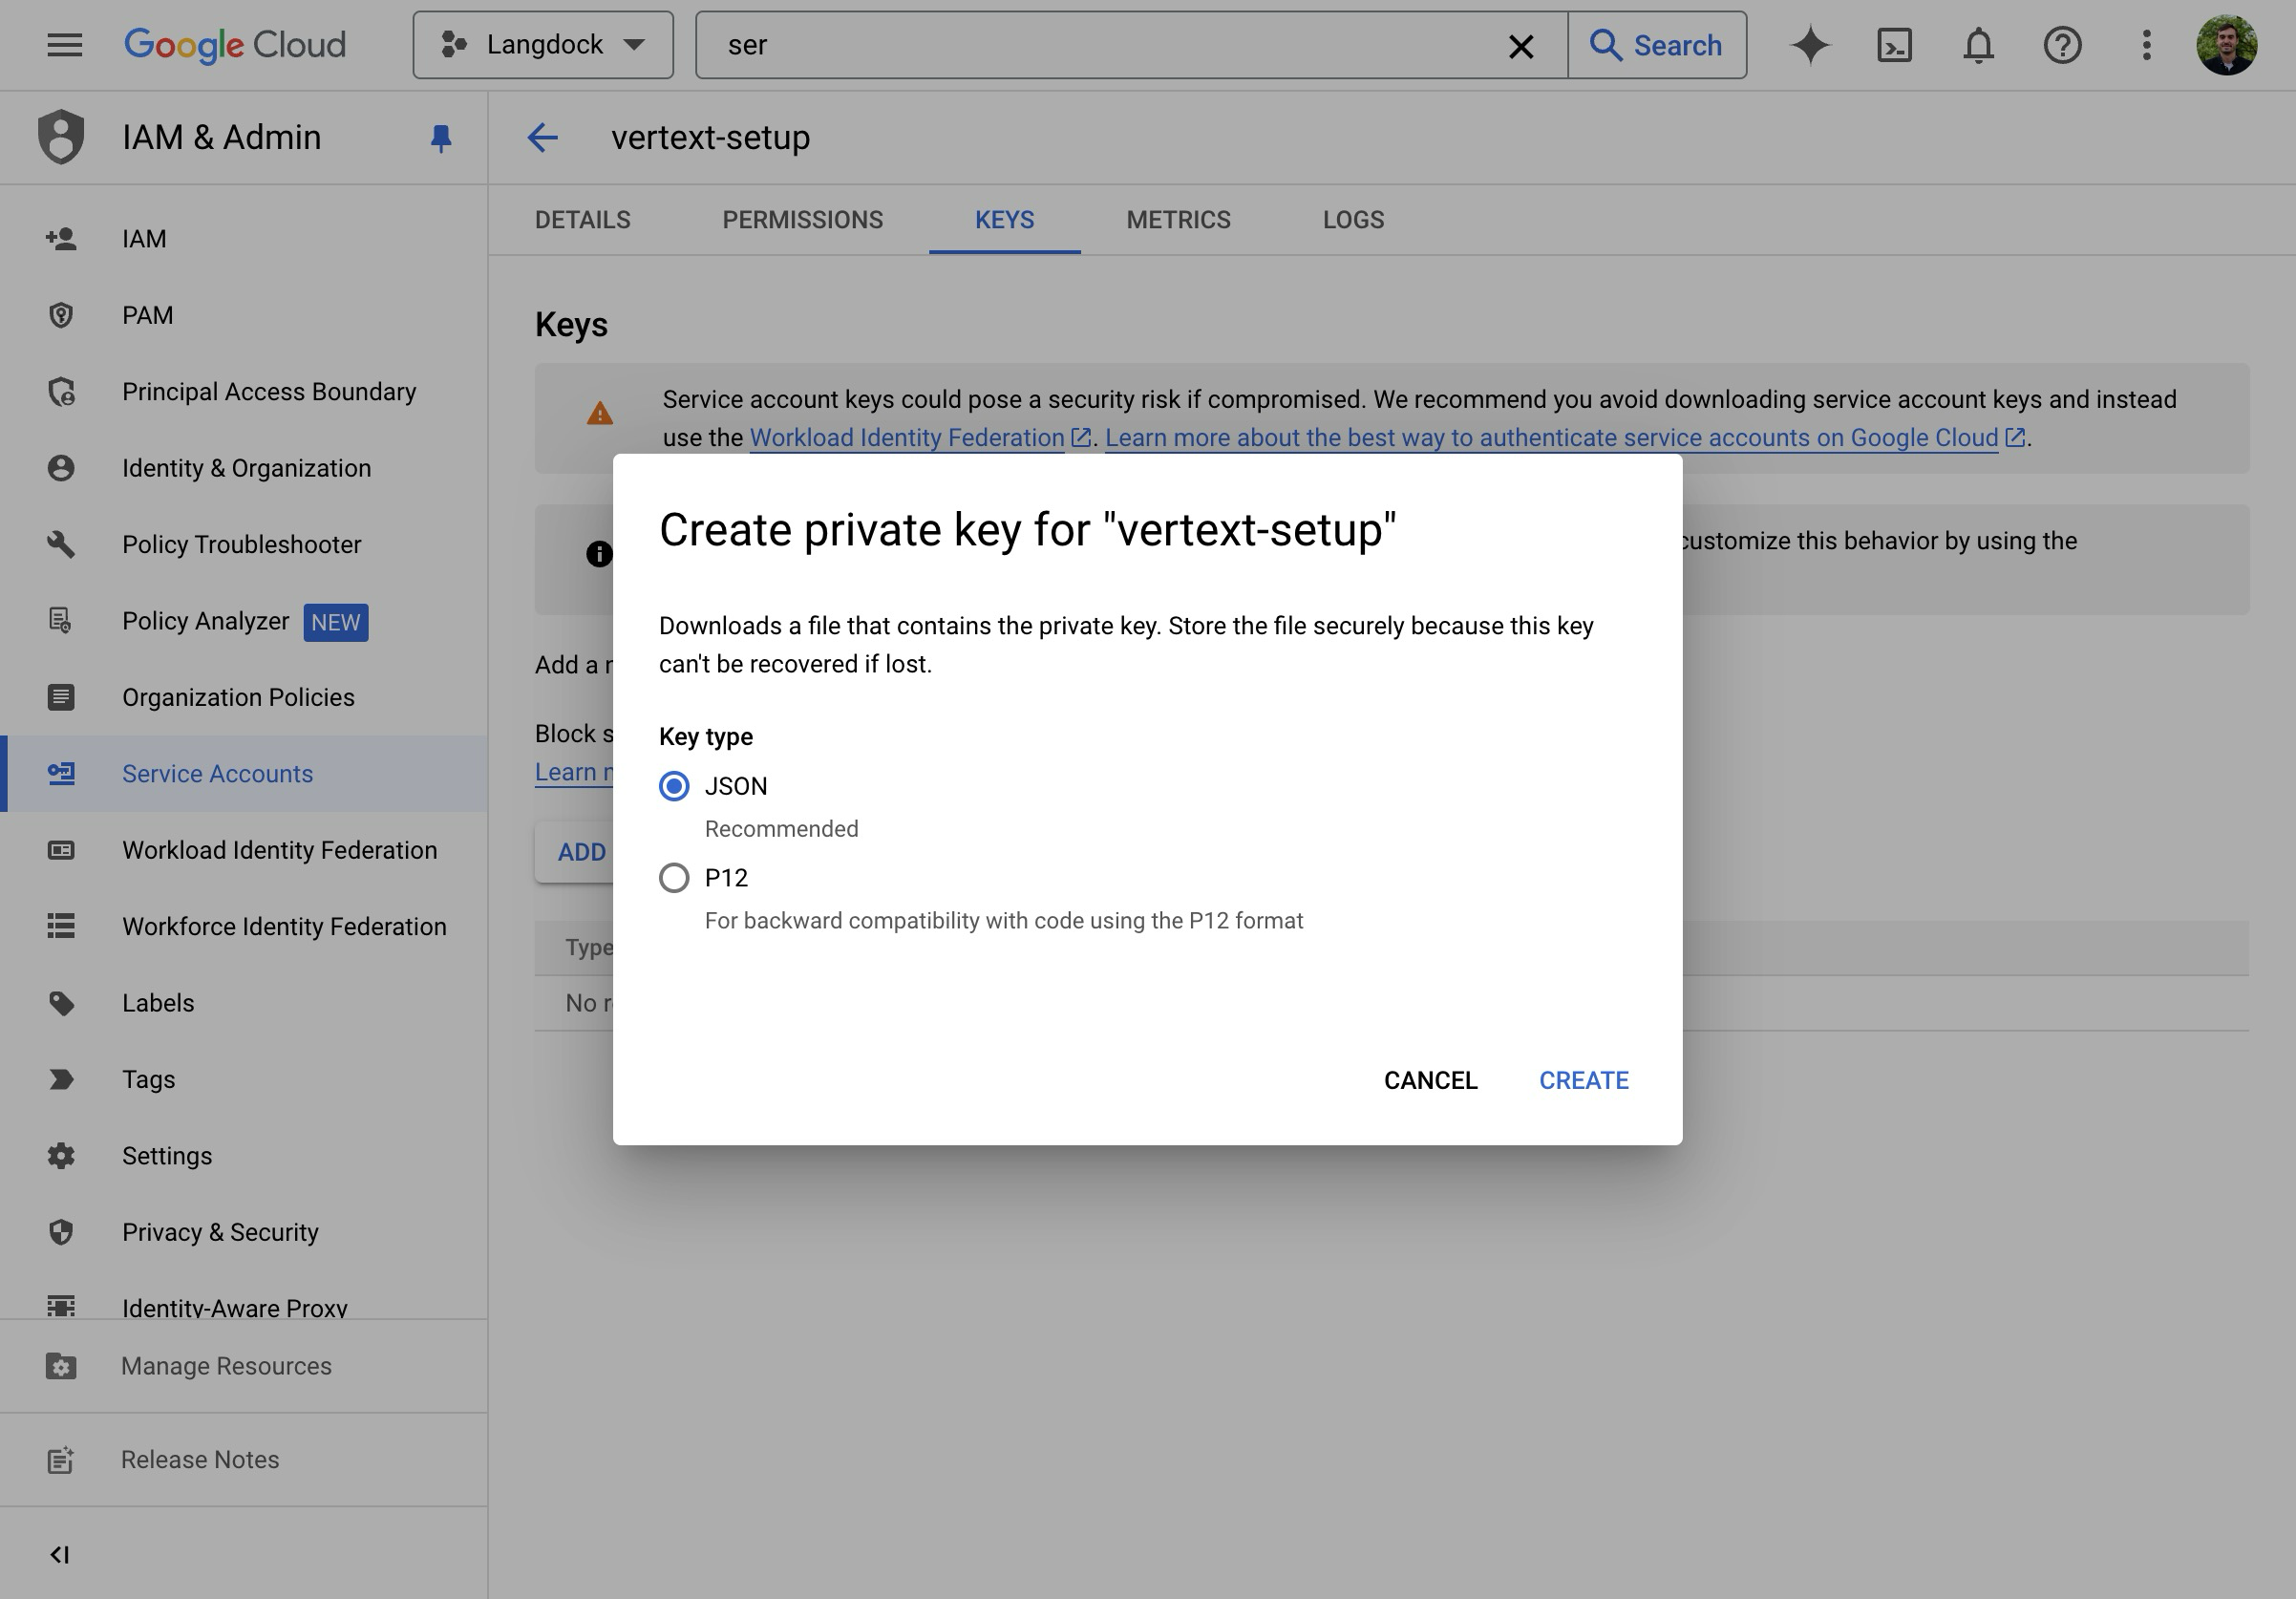
- Create a new JSON key.
- Download and open the JSON file.
Langdock Setup
- Go to Workspace Settings -> Models and click Add custom model.
- Use the prebuilt Langdock config or set up manually. Set the SDK to Google Vertex.
When you select the Google Vertex SDK, the UI relabels the fields: “Base URL” becomes Service Account Email and “API Key” becomes Service Account Private Key.
-
Fill in the connection fields:
- Service Account Email: paste the
client_emailvalue from your JSON key file (e.g.my-sa@my-project.iam.gserviceaccount.com) - Service Account Private Key: paste the
private_keyvalue from your JSON key file (including-----BEGIN PRIVATE KEY-----and-----END PRIVATE KEY-----) - Region: your Vertex AI region (e.g.
europe-west3,us-central1). This determines which Vertex AI endpoint is used. - Model ID: the model ID from the Vertex portal (e.g.
gemini-2.5-flash,gemini-2.5-pro)
- Service Account Email: paste the
- Click Test & continue, then click Save model after the test passes.
The GCP project ID is automatically extracted from your service account email. You don’t need to enter it separately.
Option 2: Google AI Studio
- Get an API key from Google AI Studio.
- Go to Workspace Settings -> Models and click Add custom model. Select Google AI Studio as the SDK.
- Paste your API key and set the Model ID.
- Click Test & continue, then click Save model after the test passes.
Imagen (Image Generation)
Follow the Vertex AI setup above, but set the model type to Image Generation and use an Imagen model ID (e.g.imagen-4.0-generate-001).AWS Bedrock
AWS Bedrock
AWS Bedrock allows you to access models like Claude through your own AWS infrastructure with enterprise-grade security and compliance.Prerequisites:
Example:
- An AWS account with Bedrock access enabled
- IAM credentials with Bedrock permissions
- Model access enabled in your AWS Bedrock console
- Admin access to your Langdock workspace
AWS Setup
1. Enable Model Access
- Go to the AWS Bedrock Console.
- Navigate to Model access in the left sidebar.
- Click Manage model access and enable the models you need.
- Wait for access to be granted (this may take a few minutes).
2. Create IAM Credentials
- Go to the AWS IAM Console.
- Navigate to Users and click Create user.
- Give the user a descriptive name (e.g.
langdock-bedrock-access). - Attach the
AmazonBedrockFullAccesspolicy, or create a custom policy with minimum required permissions:
- Go to the user’s Security credentials tab, click Create access key, select Third-party service, and save both the Access Key ID and Secret Access Key.
Langdock Setup
- Go to Workspace Settings -> Models and click Add custom model.
- Select Bedrock as the SDK.
-
Fill in the connection fields:
- Access Key ID: your AWS Access Key ID
- Secret Access Key: your AWS Secret Access Key
- Region: your AWS region (e.g.
us-east-1,eu-central-1) - Model ID: use the Bedrock model identifier (see below)
- Context Size: set according to the model (see the model configuration tables)
- Click Test & continue, then click Save model after the test passes.
Model IDs
| Provider | Format | Example |
|---|---|---|
| Anthropic | anthropic.{model-name} | anthropic.claude-sonnet-4-6 |
| Meta | meta.{model-name}-v1:0 | meta.llama4-maverick-17b-instruct-v1:0 |
| Amazon | amazon.{model-name}-v1:0 | amazon.nova-pro-v1:0 |
Check the AWS Bedrock supported models page for exact model IDs.
Cross-Region Inference Profiles
Prefix the model ID with a geographic code to route across regions automatically:| Prefix | Scope |
|---|---|
us. | US regions |
eu. | European regions |
global. | All commercial regions |
apac. | Asia-Pacific regions |
eu.anthropic.claude-sonnet-4-6Check the inference profiles documentation for available profiles per model.Supported Regions
- US East (N. Virginia):
us-east-1 - US West (Oregon):
us-west-2 - EU (Frankfurt):
eu-central-1 - EU (Ireland):
eu-west-1 - EU (Paris):
eu-west-3 - Asia Pacific (Tokyo):
ap-northeast-1 - Asia Pacific (Sydney):
ap-southeast-2
Network Configuration
If your organization uses network allowlisting, addbedrock.REGION.amazonaws.com to your allowlist (replace REGION with your AWS region, e.g. us-east-1).Troubleshooting
“Access Denied” errors: verify IAM permissions and that model access is enabled in the Bedrock console.Model not available: confirm the model is enabled in your AWS Bedrock model access settings and available in your selected region.Authentication failures: double-check that Access Key ID and Secret Access Key fields contain the correct values and that the region setting matches your Bedrock region.Slow responses or timeouts: consider using a region closer to your users. Check the AWS Service Health Dashboard for any ongoing issues. Verify your AWS account has sufficient quotas for the model.Mistral
Mistral
Mistral models connect via the Mistral API or via Azure (for Azure-hosted Mistral).Prerequisites:
- A Mistral account at console.mistral.ai
- An API key from the Mistral platform
- Admin access to your Langdock workspace
Setup
- Go to Workspace Settings -> Models and click Add custom model.
-
Fill in the connection fields:
- SDK: select Mistral
- Base URL: leave empty to use the default (
https://api.mistral.ai/v1) or specify a custom endpoint - Model ID: use the official model identifier (see below)
- API Key: paste your Mistral API key
- Click Test & continue, then click Save model after the test passes.
Model IDs
| Model ID | Use case |
|---|---|
mistral-large-latest | Flagship model — complex reasoning, multilingual, instruction following |
codestral-latest | Code-specialized — code generation, completion, and technical tasks |
mistral-small-latest | Fast and cost-effective — good for everyday tasks |
Check Mistral’s model documentation for the full list of available models.
Using Mistral from Azure
If you’re using Mistral models hosted on Azure (via Azure AI Models-as-a-Service), you still need to select “Mistral” as the SDK in Langdock. The SDK selection refers to the API format, not the hosting provider.Configuration Notes
- Mistral models support tool calling natively.
- The default API endpoint
https://api.mistral.ai/v1is used automatically when no custom Base URL is provided. - Mistral models are known for strong multilingual capabilities, particularly in European languages.
Troubleshooting
Model not responding: verify your API key is valid and that you have sufficient credits in your Mistral account. Ensure the model ID matches exactly (case-sensitive).Authentication errors with Azure: double-check that you’re using “Mistral” as the SDK, not “Azure OpenAI”. Verify your Azure endpoint URL is correct and accessible, and that your Azure API key has the necessary permissions.Slow responses: larger models may take longer for complex reasoning tasks. Consider using a smaller model for faster responses on simpler tasks.DeepSeek
DeepSeek
DeepSeek models connect via the DeepSeek API. All models are hosted in the US region.Prerequisites:
- A DeepSeek account at platform.deepseek.com
- An API key from the DeepSeek platform
- Admin access to your Langdock workspace
Setup
- Go to Workspace Settings -> Models and click Add custom model.
-
Fill in the connection fields:
- SDK: select DeepSeek
- Base URL:
https://api.deepseek.com/v1 - Model ID: see table below
- API Key: paste your DeepSeek API key
- Region: US
- For reasoning models (R1), enable Always show reasoning to surface the model’s thinking in the UI.
- Click Test & continue, then click Save model after the test passes.
Model IDs
| Model ID | Type |
|---|---|
deepseek-reasoner | Reasoning model (R1 series) — excels at step-by-step problem solving and coding |
deepseek-chat | General-purpose model (V3 series) — fast responses, good for everyday tasks |
Check DeepSeek’s API docs for the latest available models.
Configuration Notes
- DeepSeek models are hosted in the US region only.
- DeepSeek R1 is a reasoning model — enable Always show reasoning to see its reasoning steps in the UI. DeepSeek models do not support image analysis.
- The base URL must include the
/v1path:https://api.deepseek.com/v1.
Troubleshooting
Model not responding: verify your API key is valid and that you have sufficient credits. Ensure the model ID matches exactly (case-sensitive).Slow responses: DeepSeek R1 (reasoning model) may take longer due to its step-by-step reasoning process. Consider using DeepSeek V3 for faster responses on simpler tasks.Perplexity
Perplexity
Perplexity’s Sonar models combine LLM capabilities with real-time web search. All models are hosted in the US region.Prerequisites:
- A Perplexity account at perplexity.ai
- An API key from your Perplexity API settings
- Admin access to your Langdock workspace
Setup
- Go to Workspace Settings -> Models and click Add custom model.
-
Fill in the connection fields:
- SDK: select Perplexity
- Base URL: leave empty to use the default (
https://api.perplexity.ai) - Model ID: see table below
- API Key: paste your Perplexity API key
- Region: US
- Click Test & continue, then click Save model after the test passes.
Model IDs
| Model ID | Type |
|---|---|
sonar-pro | Advanced search-augmented generation — detailed responses with citations |
sonar | Fast search-augmented responses — good for general-purpose queries |
sonar-reasoning-pro | Deep analysis with search — multi-step reasoning with citations |
sonar-reasoning | Reasoning with search augmentation |
Check Perplexity’s model documentation for the full list of available models.
Configuration Notes
- Perplexity models include built-in web search capabilities, so they always have access to current information.
- The API endpoint
https://api.perplexity.aiis automatically used when no custom Base URL is provided. - Sonar Pro models provide more detailed responses with better source citations.
- Reasoning variants are best for complex analytical tasks that benefit from step-by-step thinking.
- Perplexity models do not support image analysis.
Troubleshooting
Missing citations: Perplexity models include citations automatically when web search is used. If citations are missing, the model answered from its base knowledge rather than a web search.Slow responses: Perplexity models perform web searches, which adds latency. Sonar (non-Pro) variants are faster than Pro versions. For time-sensitive tasks without search needs, consider using a different model.Model not responding: verify your API key is valid and that you have sufficient credits. Ensure the model ID matches exactly (case-sensitive).OpenAI-compatible endpoints
OpenAI-compatible endpoints
Use this for any API that follows the OpenAI spec — including vLLM, LiteLLM, Ollama, and self-hosted models.Many LLM inference solutions implement the OpenAI API specification as a standard interface. This means they accept requests and return responses in the same format as OpenAI’s API, making them interchangeable from an integration perspective.Common OpenAI-compatible solutions:
- vLLM: high-throughput inference server for large language models
- LiteLLM: proxy server providing a unified interface to 100+ LLM providers
- Ollama: run large language models locally
- Text Generation Inference (TGI): Hugging Face’s inference server
- LocalAI: self-hosted, OpenAI-compatible API
- Custom deployments: any service implementing the OpenAI chat completions API
- A running OpenAI-compatible inference endpoint accessible over HTTPS
- The base URL of your endpoint
- The model ID/name as configured in your inference server
- An API key (if your endpoint requires authentication)
- Admin access to your Langdock workspace
Setup
- Go to Workspace Settings -> Models and click Add custom model.
-
Fill in the connection fields:
- SDK: select OpenAI Compatible
- Base URL: your endpoint URL (e.g.
https://your-server.com/v1). Required. - Model ID: the exact model identifier as configured in your inference server
- API Key: your authentication key, or leave empty if not required
- Context Size: the context window size of your model in tokens
- Click Test & continue, then click Save model after the test passes.
Example Configurations
| Server | Base URL | Model ID |
|---|---|---|
| vLLM | https://your-server.com/v1 | Model name from vLLM startup (e.g. meta-llama/Llama-3.1-70B-Instruct) |
| LiteLLM proxy | https://your-litellm.com | Alias from your LiteLLM config |
| Ollama | https://your-ollama.com/v1 | Name from ollama list (e.g. llama3.1) |
For Azure OpenAI, use the dedicated Azure SDK instead. It handles API versioning and deployment-based URL routing automatically.
Common Use Cases
- Data privacy: run models on your own infrastructure so prompts and responses stay within your network.
- Cost optimization: running open-source models on your own hardware can significantly reduce costs for high-volume use cases.
- Custom fine-tuned models: deploy models fine-tuned for specific tasks or domains with vLLM or similar servers.
- Multi-provider abstraction: use LiteLLM as a proxy to route requests to different providers from a single interface.
Troubleshooting
Connection refused or timeout: verify the endpoint is accessible from external servers over HTTPS. Check that your firewall allows incoming connections. Ensure your inference server is running and healthy.Authentication errors: verify your API key and check if your endpoint expects a specificBearer token format.Model not found: ensure the Model ID matches exactly what your inference server expects (case-sensitive). Verify the model is loaded and available on your server.Responses are cut off: check the max output tokens setting in Langdock and verify your inference server’s generation length limits.Slow responses: check your server’s available GPU memory and compute resources. Consider using quantized model versions for faster inference. Monitor your server’s queue length and scaling configuration.Incompatible API format: not all “OpenAI-compatible” servers implement the full API specification. Verify your server supports the /v1/chat/completions endpoint and check if your server requires specific API version headers.