Overview
The overview serves as a brief overview of the workspace. It lists the different products you can use in the Langdock platform and shows which ones are activated. Below, you can see the current plan and access the subscription portal. At the bottom, you will see a summary of usage analytics in the last few days, the total number of users, and the total messages sent in the workspace. All these sections have a redirect to the individual section in the workspace settings with further insights and more detailed settings.General
The general workspace includes the most important customizations of the workspace. You can upload your company logo here, give the tool an adequate name, and enter a short description. This description is sent to the model with all prompts for every workspace user (like the custom instructions on a user level; here is a guide for custom instruction). Here, you also find the option to delete the workspace.Billing
The billing page shows the plan you are currently on and the other plans Langdock offers. For details and a pricing calculator, refer to our pricing page on our website. We have written a guide here if you have any questions regarding invoices.Usage
The usage section allows you to manage how users in your workspace work within their Usage Limits. You can assign more powerful plans, enable extra usage, and manage usage requests from users who need higher limits. This helps you support power users while keeping usage and costs predictable. Workspace admins can control usage in several ways:- Set a workspace-wide Extra Usage spend limit to control total extra usage costs.
- Define plan-based spend limits for Business and Business Max users.
- Set user-specific spend limits for granular control over individual users.
Security
You can add different security measures to manage who can access the space. At the top, you can define specific domains that are allowed to access the space. If you set it to “langdock.com”, only users with the email address @langdock.com can sign up for this space. This is overwritten if you manually invite the person with their email address (see user management below). Below, you can add SSO via SAML 2.0 and user synchronization via SCIM here. You can also configure IP restrictions to limit workspace access to specific IP addresses or CIDR ranges. This is useful for restricting access to your corporate network or VPN.You can find guides for SSO, SAML 2.0 and SCIM here. If you have any questions, please reach out to support@langdock.com.
User Management
Members
The members section in the user management shows a paginated list of everyone in your workspace. You can search members by name or email and filter the list by role, plan, or usage level. From here, you can invite new members, assign different roles to them, or remove members. You can also export the members list as a CSV. The export follows the active search and filters. When filters are active, the button shows the matching member count and is disabled when no members match. If usage is configured, the CSV includes aPlan column. This helps with internal rollout planning and communication, such as regularly sending an internal AI newsletter.
Groups
In October 2025, we changed the permissions for group users, editors, and admins. The new permissions are outlined below. More information on these changes can be found in our changelog.
- Groups can be defined by your SCIM tool for user synchronization
- Set up by workspace admins
- Set up by workspace users themselves
Group roles are different from workspace admins or editors. These roles apply only to the specific group and do not grant access to workspace settings. They are separate from the workspace roles shown on the Members page.
- See group name and description
- See all users of the group and their roles
- Use prompts of the group
- Use agents of the group
- Use folders of the group
- Leave the group
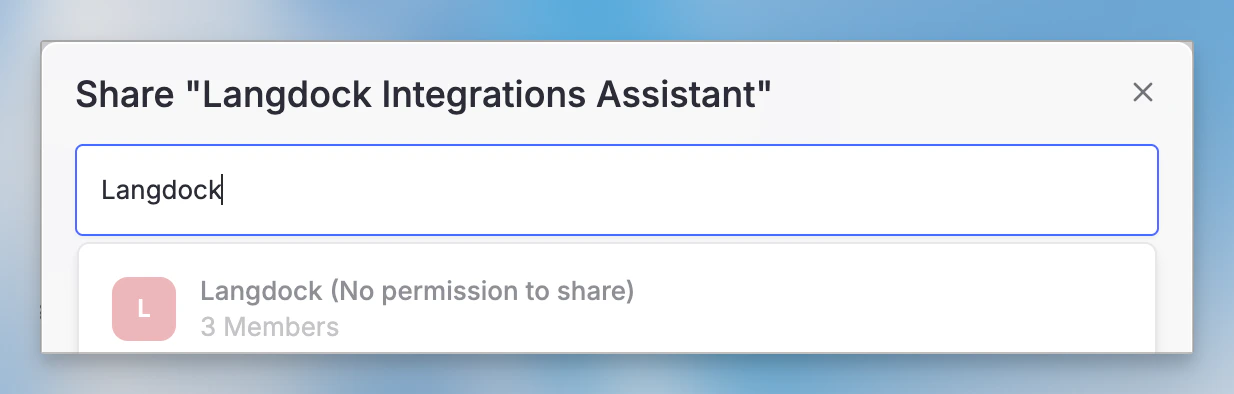
Group members can’t share resources with the group. Users who want to share resources with a group they are a member of will see that group greyed out, alongside the note below. To grant a user sharing permissions for a group, change their group role to editor.
- Everything members can do
- Share prompts with the group
- Share agents with the group
- Share folders with the group
- Everything editors can do
- Change group name and description
- Remove users from the group
- Add other users as admin/editor/member
- Change other users’ roles to admin/editor/member
- Delete group
Workspace Admin essentials for groups
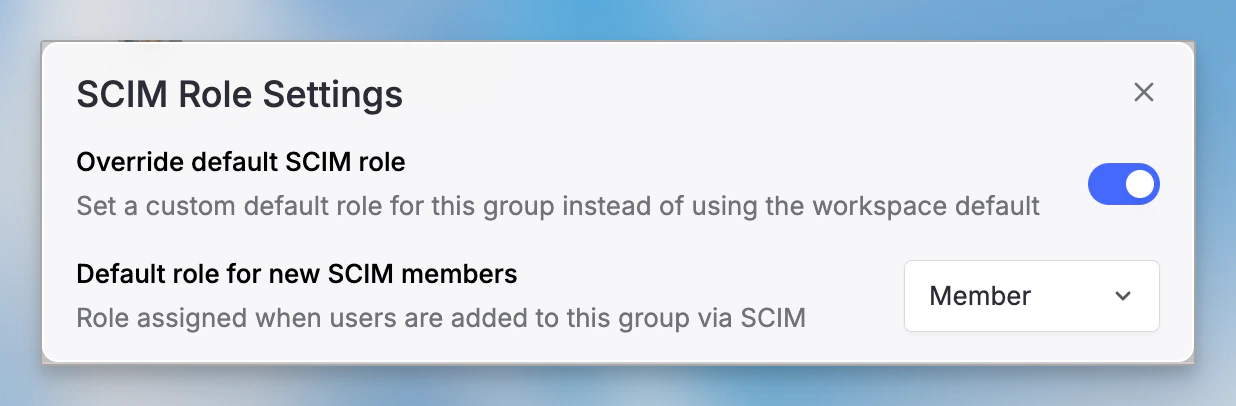
Default roles for SCIM groups In the Workspace Settings > Security > SCIM, when enabling SCIM Group Sync, you can set the default role assigned to users of newly synced SCIM groups. By default, we assign SCIM group members the Editor role.
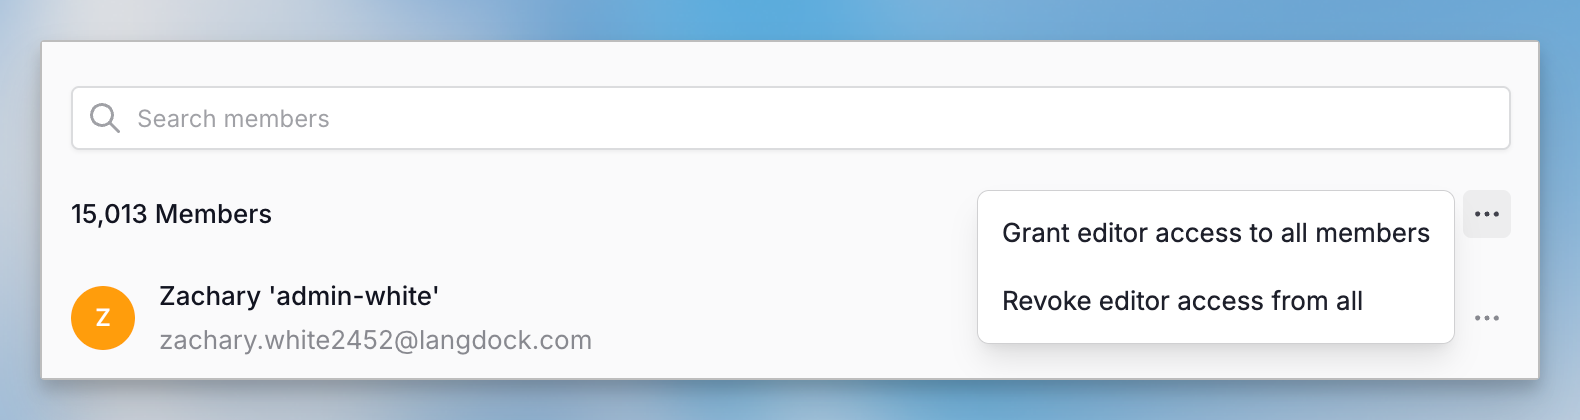
- “Change all members to editors” changes all users in this group who are currently members to editors.
- “Change all editors to members” changes all users in this group who are currently editors to members.
Roles
Admins can set up different permissions utilizing different roles in the workspace. There are three roles a user can have: Admins are allowed to do anything, the main difference is that they can access the workspace settings, the subscription portal, or other areas to manage the workspace setup. Editors and Members are different groups, and different permissions can be given to them. The permissions you can enable or disable for Members and Editors are about sharing intergrations, agents and prompts in the prompt library with everyone and whether the role is allowed to create private and public groups.A workspace editor differs from an editor in a group or an agent. The workspace editor role refers to these permissions but not to groups or agents. The permissions for these are managed in the according features.
Product Settings
Chat
Like on a user level, admins can enable or disable the capabilities for all users in the workspace. Simply toggle the settings for web search, image generation, or data analysis.Data Retention
As an admin, you can define how long chat data should be stored in Langdock. Set the data retention to the preferred duration (7 days, 1 month, 3 months, 12 months, forever). This defines how long chats that are not used anymore are stored. Once a day, it is checked which conversations have not been used in the selected period and deleted. This deletes all chat messages, including uploaded documents, and is irreversible.Agents
The Agents settings allow admins to configure how agents behave across the workspace and manage agent permissions. General access- Everyone can use agents - Toggle to enable or disable agent access for all workspace users.
- Allow web search - Enable agents to search the web for information.
- Allow image generation - Enable agents to generate images.
- Allow create & work with files - Enable agents to create files, edit file content, and analyze tabular data.
- Allow canvas - Enable the canvas feature for collaborative editing in agents.
- Share user info by default in agent feedback - When enabled, user information is shared by default when submitting feedback on agent responses.
- Allow restriction of source access - Agents can show the sources used to generate a response, just like a normal chat. If users click on the source, the source is opened. Enable this setting to allow agent creators to restrict users from clicking and opening sources.
- Allow agent logs - Enable Langfuse tracing support for agents. This allows you to track and analyze agent interactions.
- Tracing cloud URL - The URL for your Langfuse instance. Default:
https://cloud.langfuse.com
- Web search - Enable web search by default.
- Image generation - Enable image generation by default.
- Create & work with files - Enable file work by default.
- Canvas - Enable canvas by default.
- All Agents - View all agents across the workspace.
- Unassigned - View agents that are not assigned to any group or user.
- Verified - View agents that have been verified by workspace admins.
API
Admins can manage API keys in the workspace settings. You can generate new API keys, see their usage over time and revoke API keys again. When creating API keys, the key is only shown once, so be sure to save it securely. Please be aware that API usage is not included in the seat-based pricing, but has a usage-based pricing. You can find a pricing overview here and can download a cost breakdown in CSV-format in the API settings.Integrations
Langdock provides the opportunity to integrate AI in your existing toolstack. To do that, we provide native integration. In the settings, admins can enable or disable individual integrations you do not need. By default, all integrations are active. The individual integrations can be managed in more detail in the integration menu. In the role settings, you can define which user roles have access to the integration management. You can also configure the Slack bot in the integrations part of the workspace settings.Library
The Library section gives admins a central place to manage all Folders in the workspace. From here you can search and sort folders, view them by tab, and perform management actions like sharing a folder, changing its owner, or deleting it.Models
The model section in the workspace section allows you to manage the models available. You can see which models are available in Langdock and enable or disable the individual models. By default, only models hosted in the EU are enabled. You can also add your models at the bottom. To add your models, you can refer to our guides here. With the models you added and/or enabled, you can select a default model for all users in the workspace. This model is used in every new chat and agent by default. To exclusively use your models, please refer to this guide about BYOK (bring your own keys). Also, please reach out to the Langdock team. If BYOK is not enabled, Langdock still uses the models from Langdock in the background (for embeddings and image generation). Technically, BYOK needs to be manually enabled to switch to your keys.Extended data retention
Models with an Extended data retention label in the model list follow the model provider’s own data retention policy. Currently, this applies to Fable 5: Anthropic stores input and output data for up to 60 days, regardless of the data retention settings in your workspace. The data is used exclusively for abuse prevention, not for model training, and is deleted automatically afterwards. To enable such a model, accept the provider’s terms in the confirmation dialog. If the policy is not acceptable for your organization, leave the model disabled.Analytics
The analytics screen allows you to monitor the usage and adoption of AI in your company and take measures to improve the rollout. The purpose is to learn which measures help your organization adopt AI and which power users can help you share use cases and onboard team members to enable them in their daily work. The analytics are optional and, while helpful, can be turned off. Contact the Langdock team if you want to disabled this functionality. A guide on how to export the usage analytics can be found here. General insightsThe top insights show your workspace’s total number of users, agents, and groups. Usage analytics
Below, a diagram shows the number of active users for each day. Active users sent at least one message in a chat or an agent. Also, you can see the total number of messages for each day. This is split into different categories for the normal chat, for agents, and Bots in Slack and Teams. You can customize the timeframe to understand usage for any timeframe. Microsoft plugins
The Microsoft plugins tab shows adoption of the Langdock Office plugins in your workspace. You can see messages sent from each plugin over time, the models used, model costs when BYOK is enabled, and active plugin users for any timeframe. Leaderboards
At the bottom, you will see the lists of users and groups most active in the workspace. The first list shows the groups, ordered by the number of messages they sent. The second list shows all users, sorted by how active they were. You can set the product you want to monitor (agents or chat) and define a custom timeframe.
Customizations
You can customize Langdock to fit your branding and legal requirements. These are the options you have to customize your workspace: Custom colorChange the color of buttons to fit your brand colors. Use the hex color picker to select your brand color (e.g. #4469FC). We recommend not using white, light grey, black, dark blue, or dark grey. They might not be contrasting enough to the background color of the workspace in light and dark mode. Background image
Upload your own background image for the home screen. Greeting text color
After you set a background image, the Greeting text color options appear. Choose Default, White, or Black for Light theme and Dark theme. Show workspace logo in new chat
Toggle to control whether the logo and name of the workspace are shown when you open a new chat. Hide model logo in chat
Toggle this on if you want to display the workspace logo instead of the model logo when generating a response. Chat disclaimer
Chat disclaimers are displayed below the prompt input field and usually contain a legal disclaimer or the hint that models can make mistakes. Folder sharing disclaimer
Add a disclaimer that appears when users share folders. This field supports Markdown formatting for links and text styling. Prompt recommendations
To help new users get started with AI, you can add recommendations that randomly appear above the prompt input field in a new chat. We recommend adding prompts that are tailored to your company but general enough to help all departments understand what they can do with AI. Custom info boxes
You can add info boxes with hints and links above the prompt input field to give tips and recommendations. This only appears in new chats. Custom links
Add custom links to the navigation bar. For each link, you can configure:
- Icon - Select an icon to display next to the link.
- Name - The display name for the link.
- URL - The destination URL.