Overview
The Webhook Trigger provides a unique HTTP endpoint that external systems can call to start your workflow. It’s the bridge between Langdock Workflows and any external service or application that can send HTTP requests.Best for: Real-time integrations, external system events, API-driven
workflows, and connecting services without native integrations.
When to Use Webhook Trigger
Perfect for:- Receiving events from external services (GitHub, Stripe, custom apps)
- Real-time data processing from external systems
- Building custom integrations
- Connecting services that support webhooks (including other workflows)
- API-driven workflows initiated by other systems
- User-facing data collection (use Form Trigger)
- Scheduled recurring tasks (use Scheduled Trigger)
- Native integration events (use Integration Trigger)
Configuration
Basic Setup
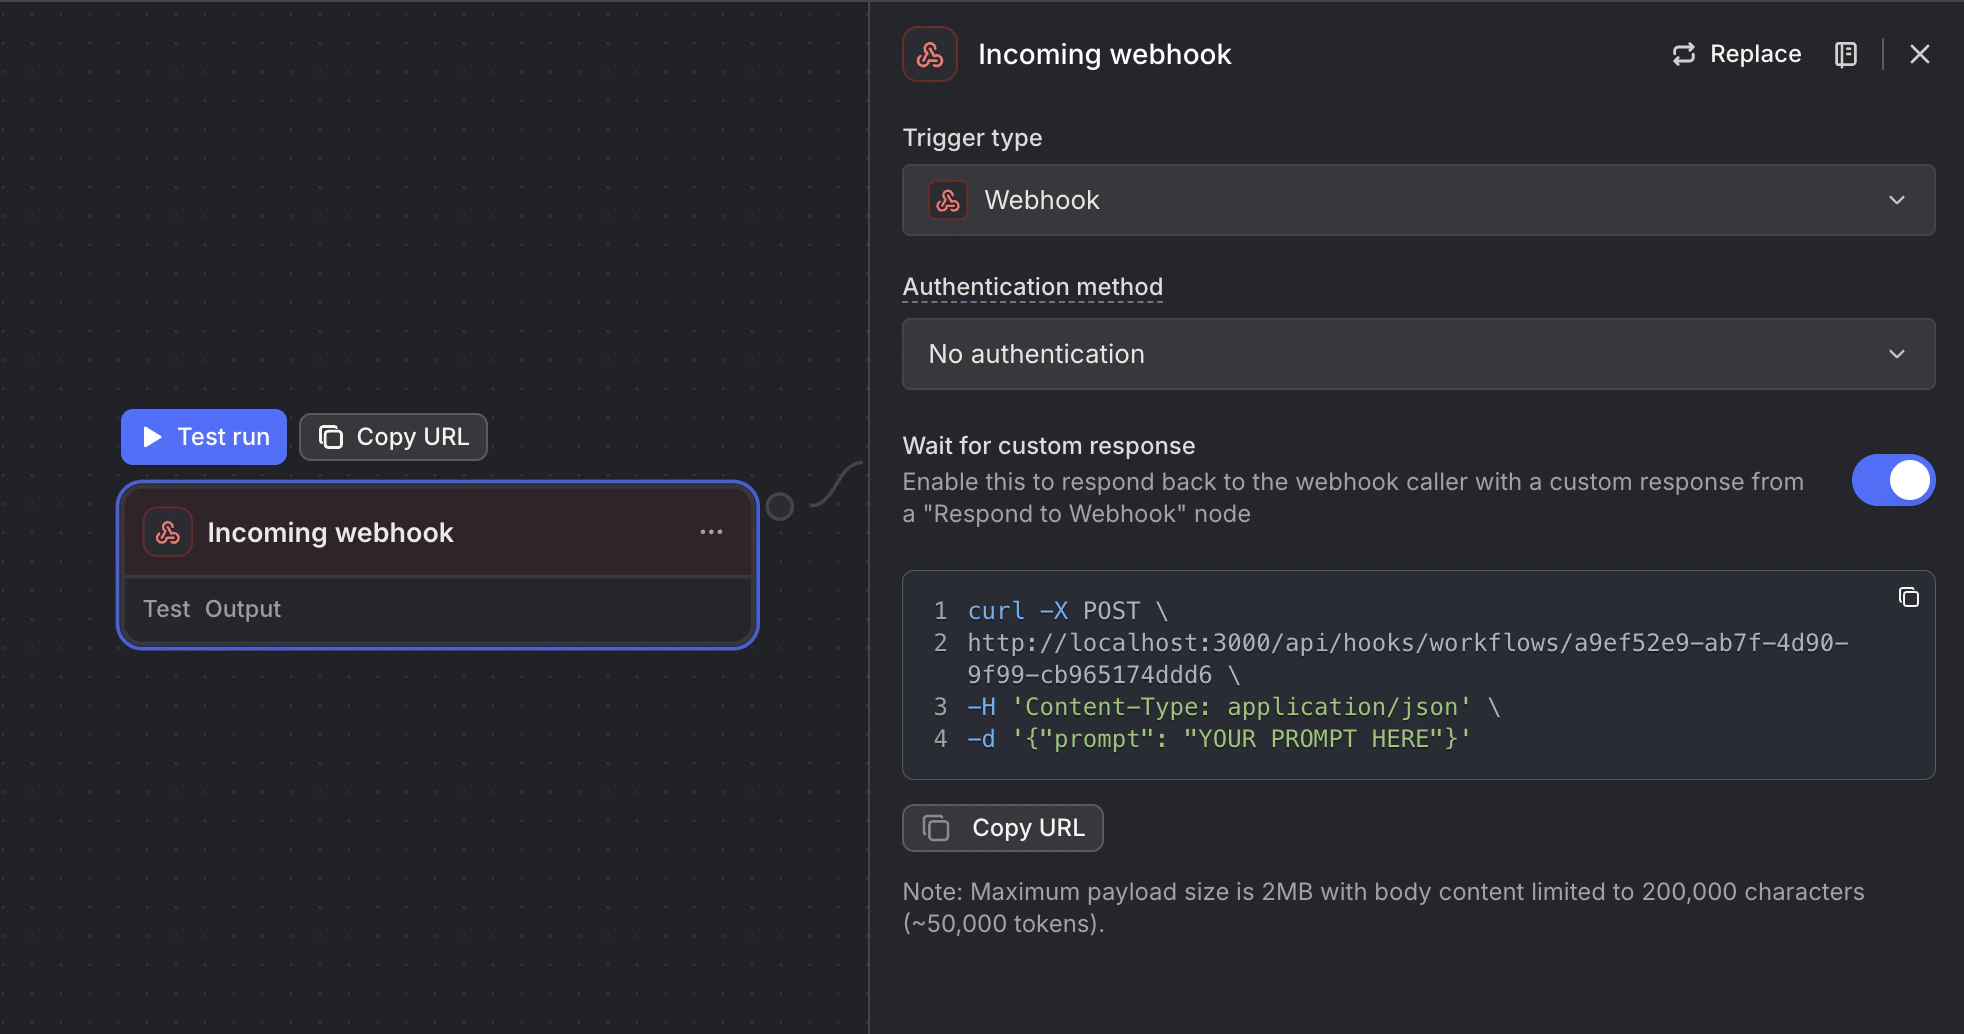
- Unique Webhook URL: A secure endpoint for receiving requests
- Webhook ID: Identifier for your webhook
Security Options
Use the Authentication method setting to control how your webhook is secured. When you select an auth method, a secret is auto-generated for you. The secret is preserved when you switch between methods, so you won’t accidentally lose your configured key.| Method | How it works |
|---|---|
| No authentication | Webhook is publicly accessible — anyone with the URL can trigger it. Good for testing and low-security use cases. |
| Header | Send the secret via the X-Webhook-Secret HTTP header. The webhook URL stays clean; the UI shows a curl snippet with the header included. |
| Query parameter | Send the secret as ?secret=... appended to the URL. This is the legacy behavior and remains fully supported. |
Existing webhooks that use a query parameter secret continue to work without any changes. The authentication method field is optional — if unset, the old behavior is preserved automatically.
How It Works
- External system sends HTTP POST request to webhook URL
- Webhook validates secret (if configured, via
X-Webhook-Secretheader or?secret=query parameter) - Request payload is parsed (JSON body and query parameters)
- Workflow is queued for execution
- Webhook responds immediately with 202 Accepted
- Workflow processes asynchronously in the background
Webhooks always process asynchronously. The webhook responds immediately with 202 Accepted while the workflow runs in the background.
Making Requests to Your Webhook
Basic Request
Example Use Cases
GitHub Webhook Integration
- URL: Your webhook URL
- Events: Push, Pull Request
- Content type: application/json
Stripe Payment Webhook
Custom Application Integration
Slack Command Integration
Accessing Webhook Data
Webhook data is separated intobody (JSON payload) and query (URL parameters):
Request Body
Access JSON payload fields:Query Parameters
Access URL query parameters:Example
For a request like:Response Codes
| Code | Meaning | When It Happens |
|---|---|---|
| 202 | Accepted | Workflow queued successfully |
| 400 | Bad Request | Invalid workflow ID, format, or secret |
| 404 | Not Found | Workflow not found |
| 429 | Too Many Requests | Rate limit or spending cap reached |
| 500 | Server Error | Internal error processing webhook |
Next Steps
Integration Trigger
Use native integration events
HTTP Request Node
Make requests to external APIs
Code Node
Validate and transform webhook data
Getting Started
Build your first workflow