What is MCP?
MCP is an open protocol that standardizes how applications provide context to LLMs. Think of MCP like a USB-C port for AI applications. Just as USB-C provides a standardized way to connect your devices to various peripherals and accessories, MCP provides a standardized way to connect AI models to different data sources and tools.MCP integrations in Langdock reuse the existing integration architecture with MCP-specific extensions, allowing the same action execution system to work for both traditional integrations and MCP servers.
Langdock MCP Key Features
Transport Types
- STREAMABLE_HTTP: HTTP-based transport with optional streaming support
- SSE (Server-Sent Events): Real-time communication transport for streaming data
Authentication Methods
- No Authentication: For public MCP servers that don’t require identification
- API Key Authentication: Simplified key-based authentication with automatic header formatting
- OAuth Authentication: Full OAuth 2.0 with DCR support for secure authorization flows
- Advanced OAuth Authentication: Full OAuth 2.0 without DCR support
Tool Integration
Automatic Discovery: MCP tools are automatically converted to Langdock actions, maintaining the same confirmation mechanisms and previews you’re familiar with.Getting Started
Different authentication methods have slightly different connection flows.- Enter URL Enter the endpoint URL of your MCP server.
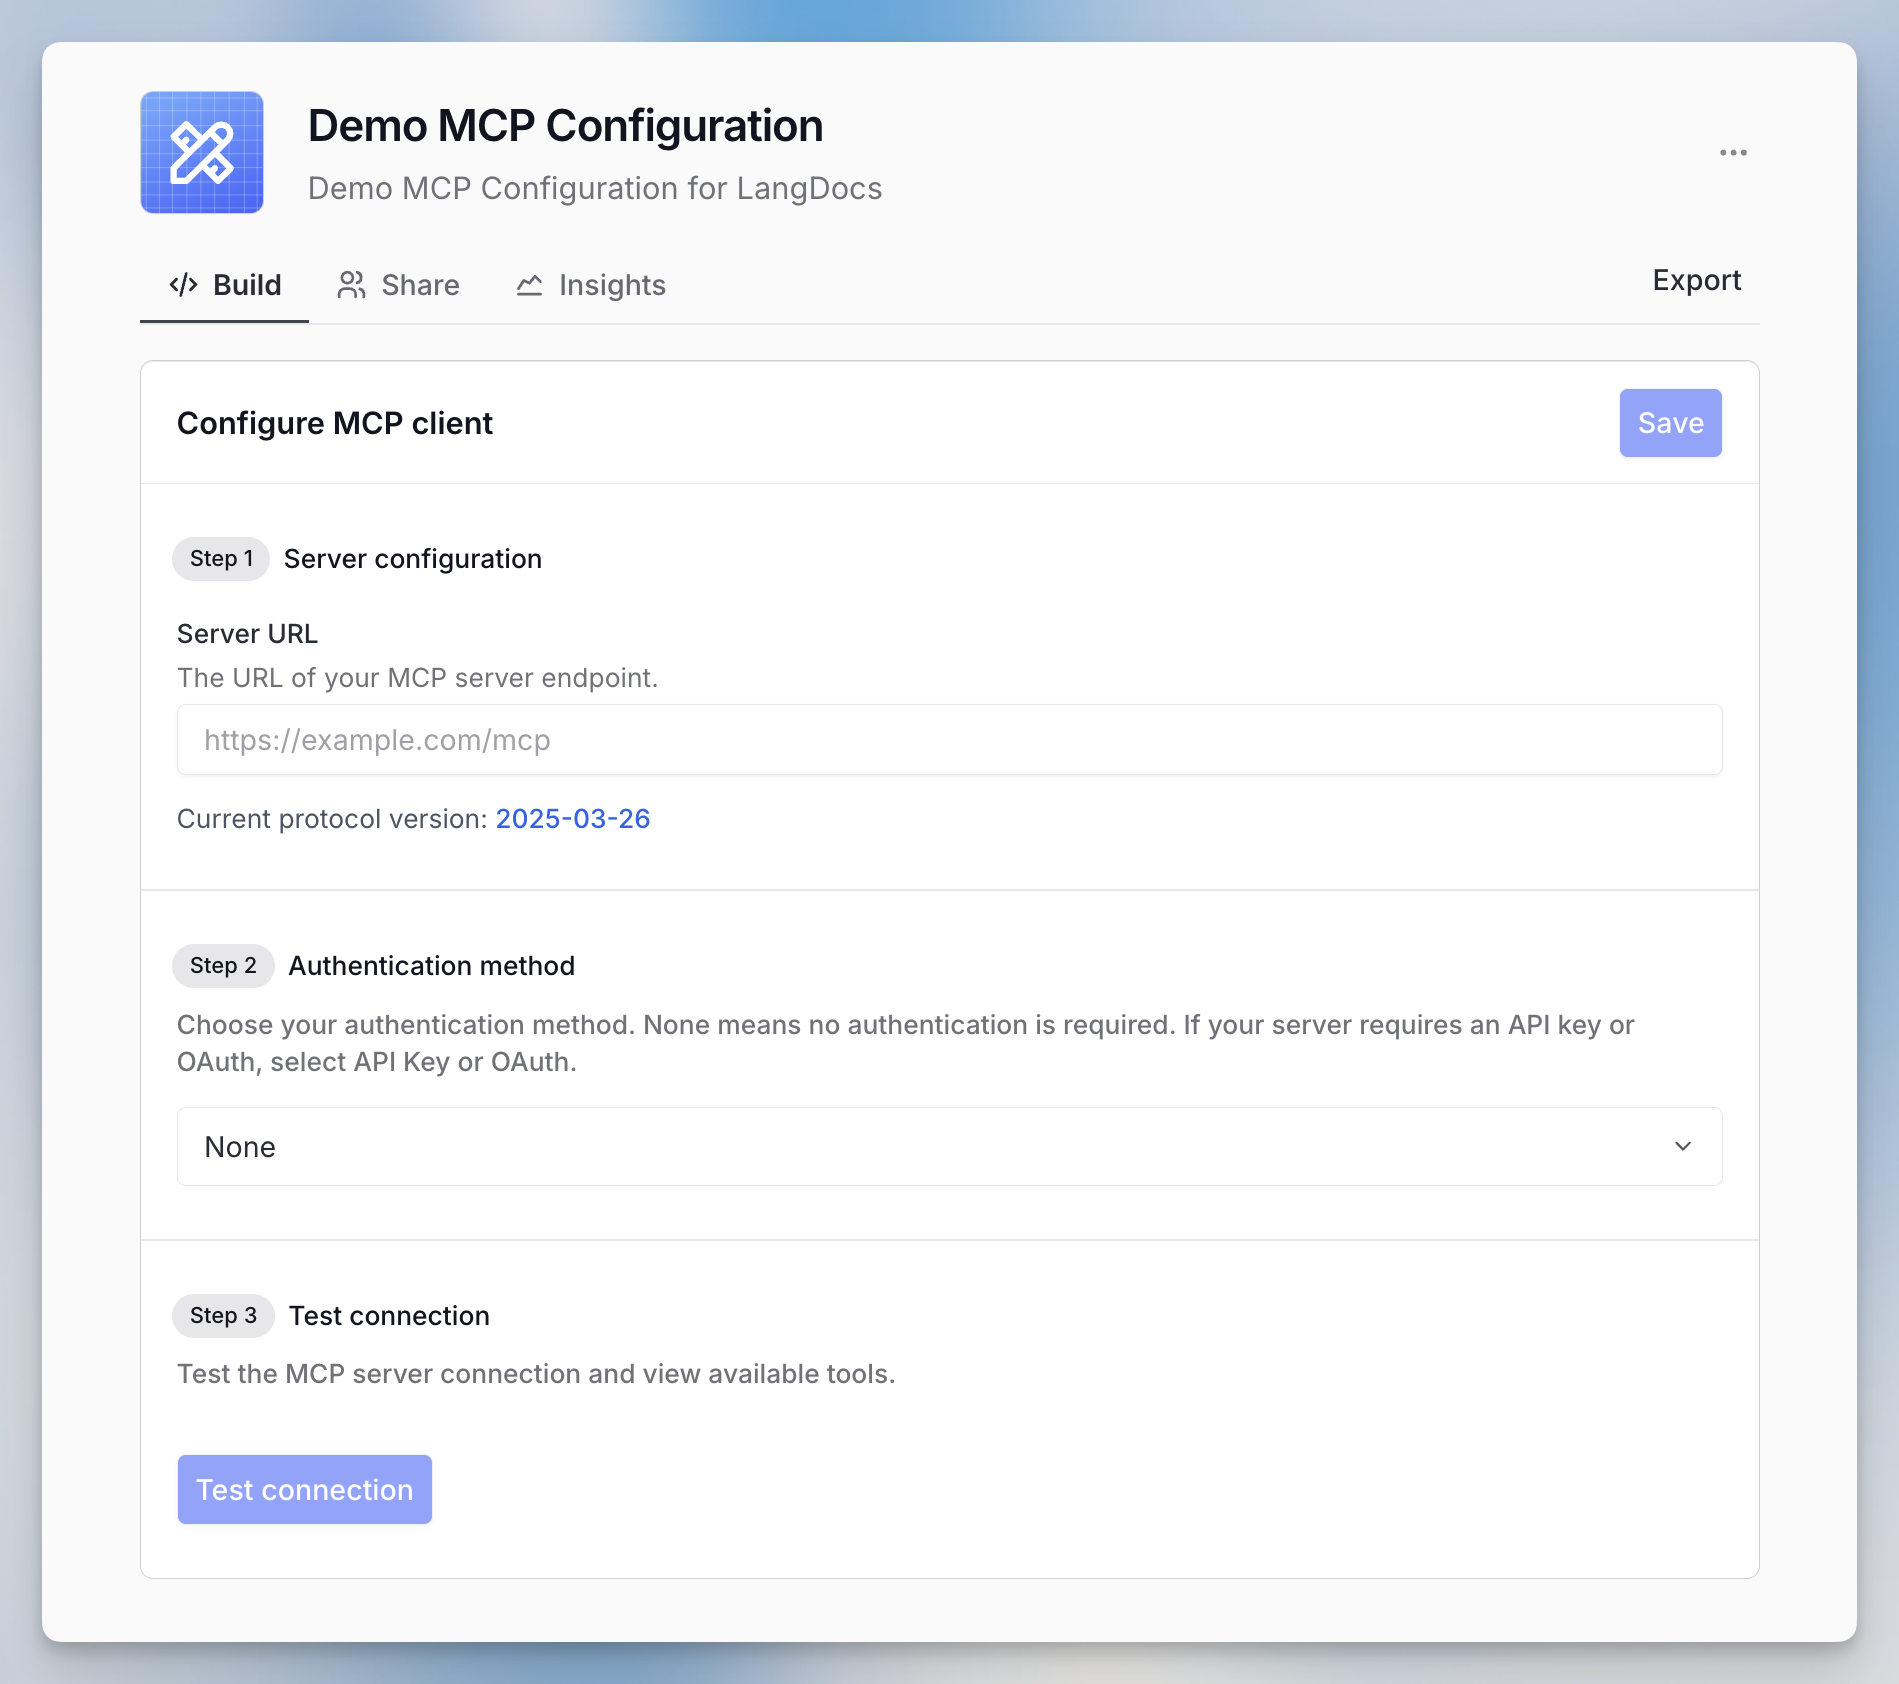
- Select Authentication Method Choose one of the four authentication types. Follow the respective guide below:
No Authentication & API Key Authentication
For public or API key-protected servers, simply enter the server URL (and API key if required).OAuth Authentication
For servers supporting OAuth with PKCE, the connection process is straightforward: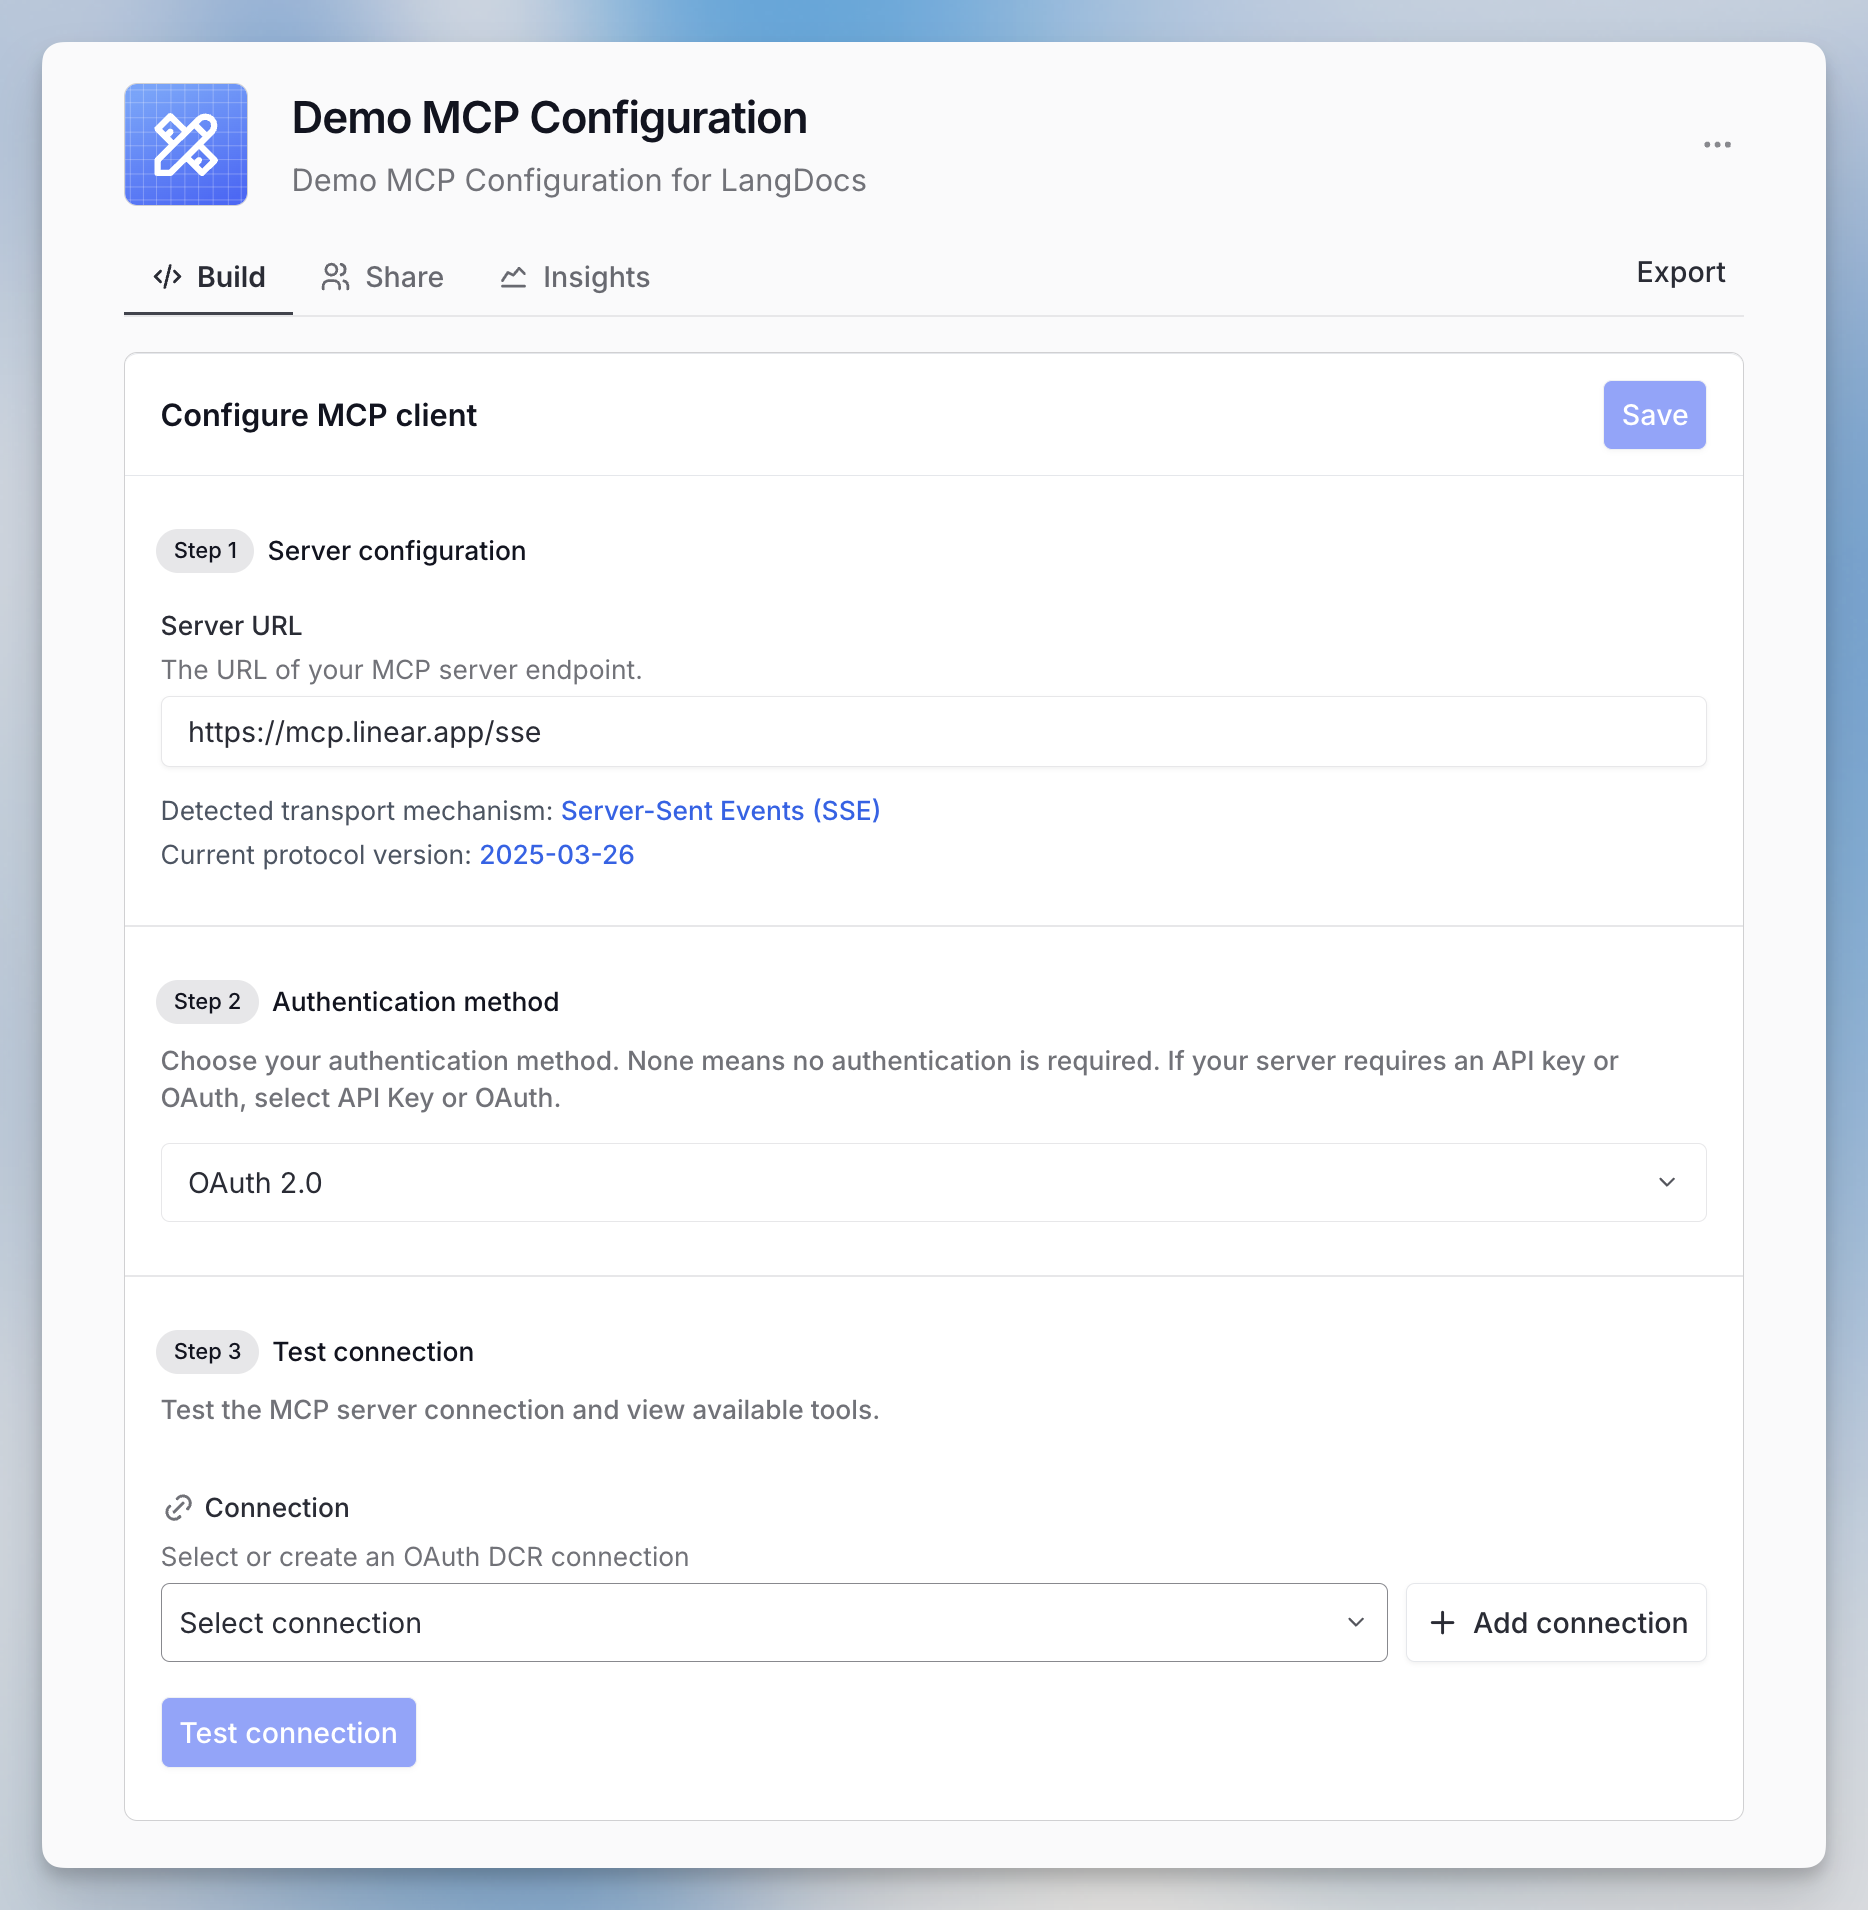
- Enter the server URL and select OAuth.
- Click ”+ Add connection” to initiate the OAuth flow.
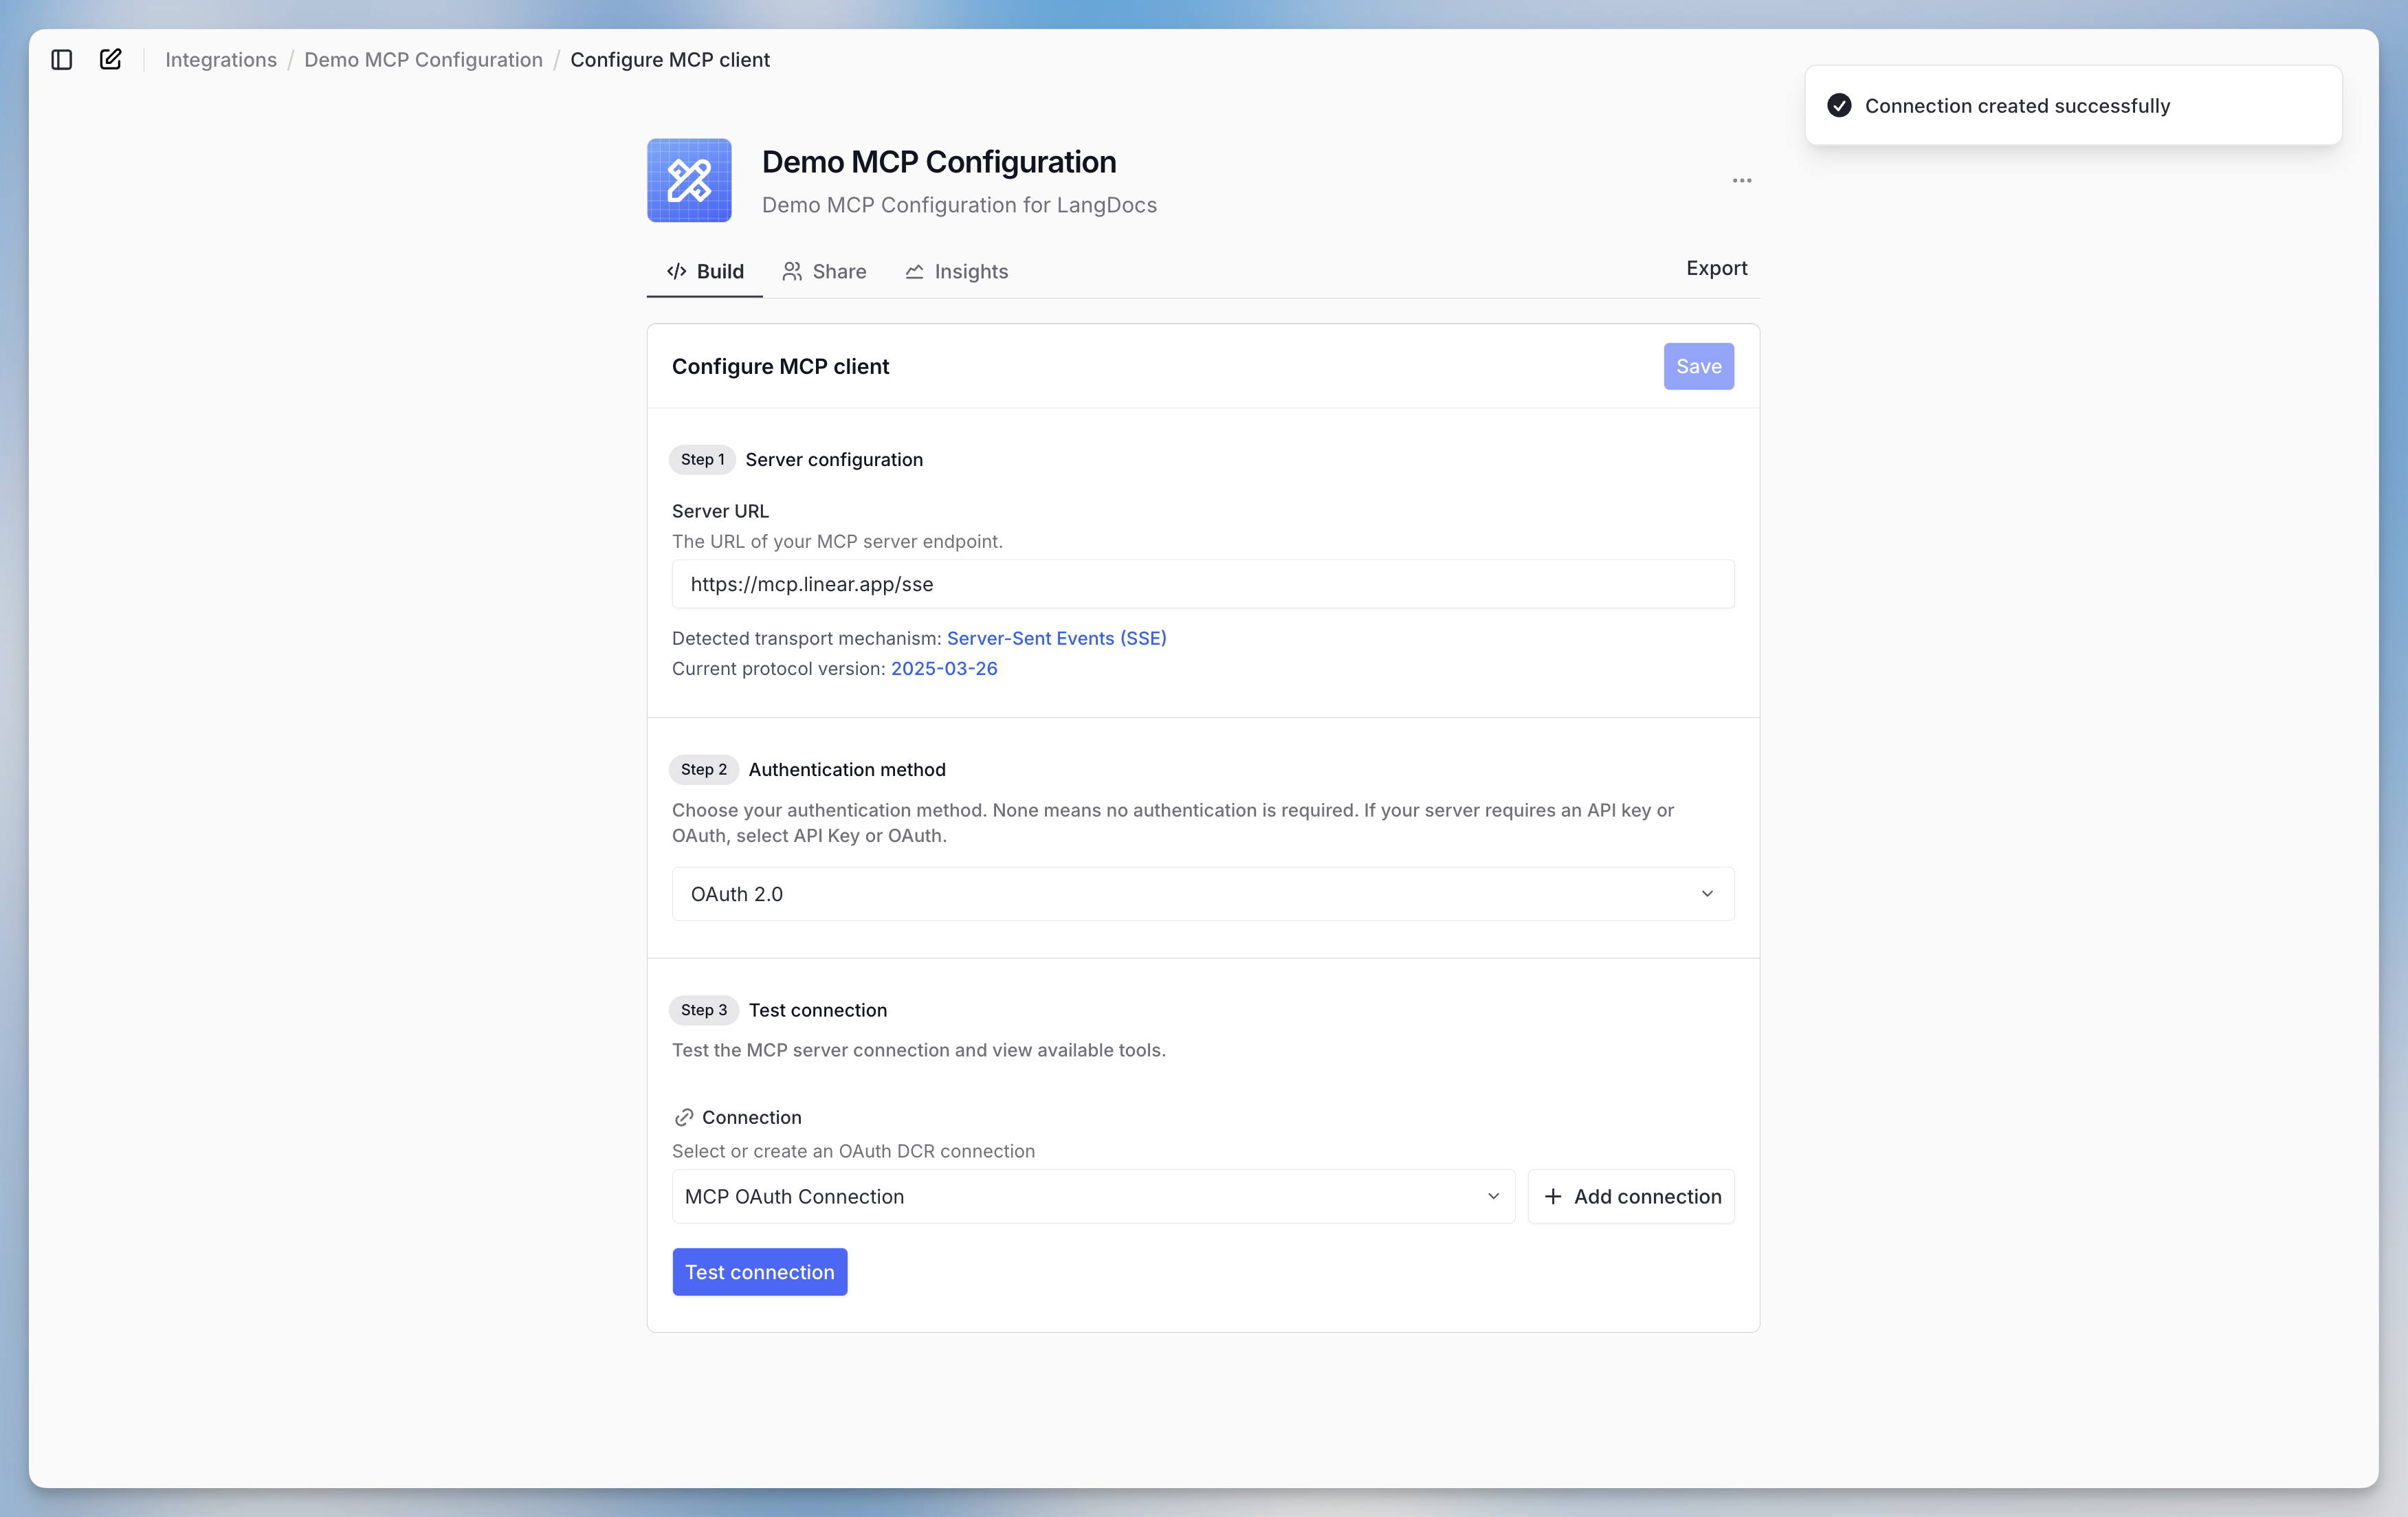
- Once connected, a success popup will confirm the connection.
- Click “Test connection” to verify access and see available tools.
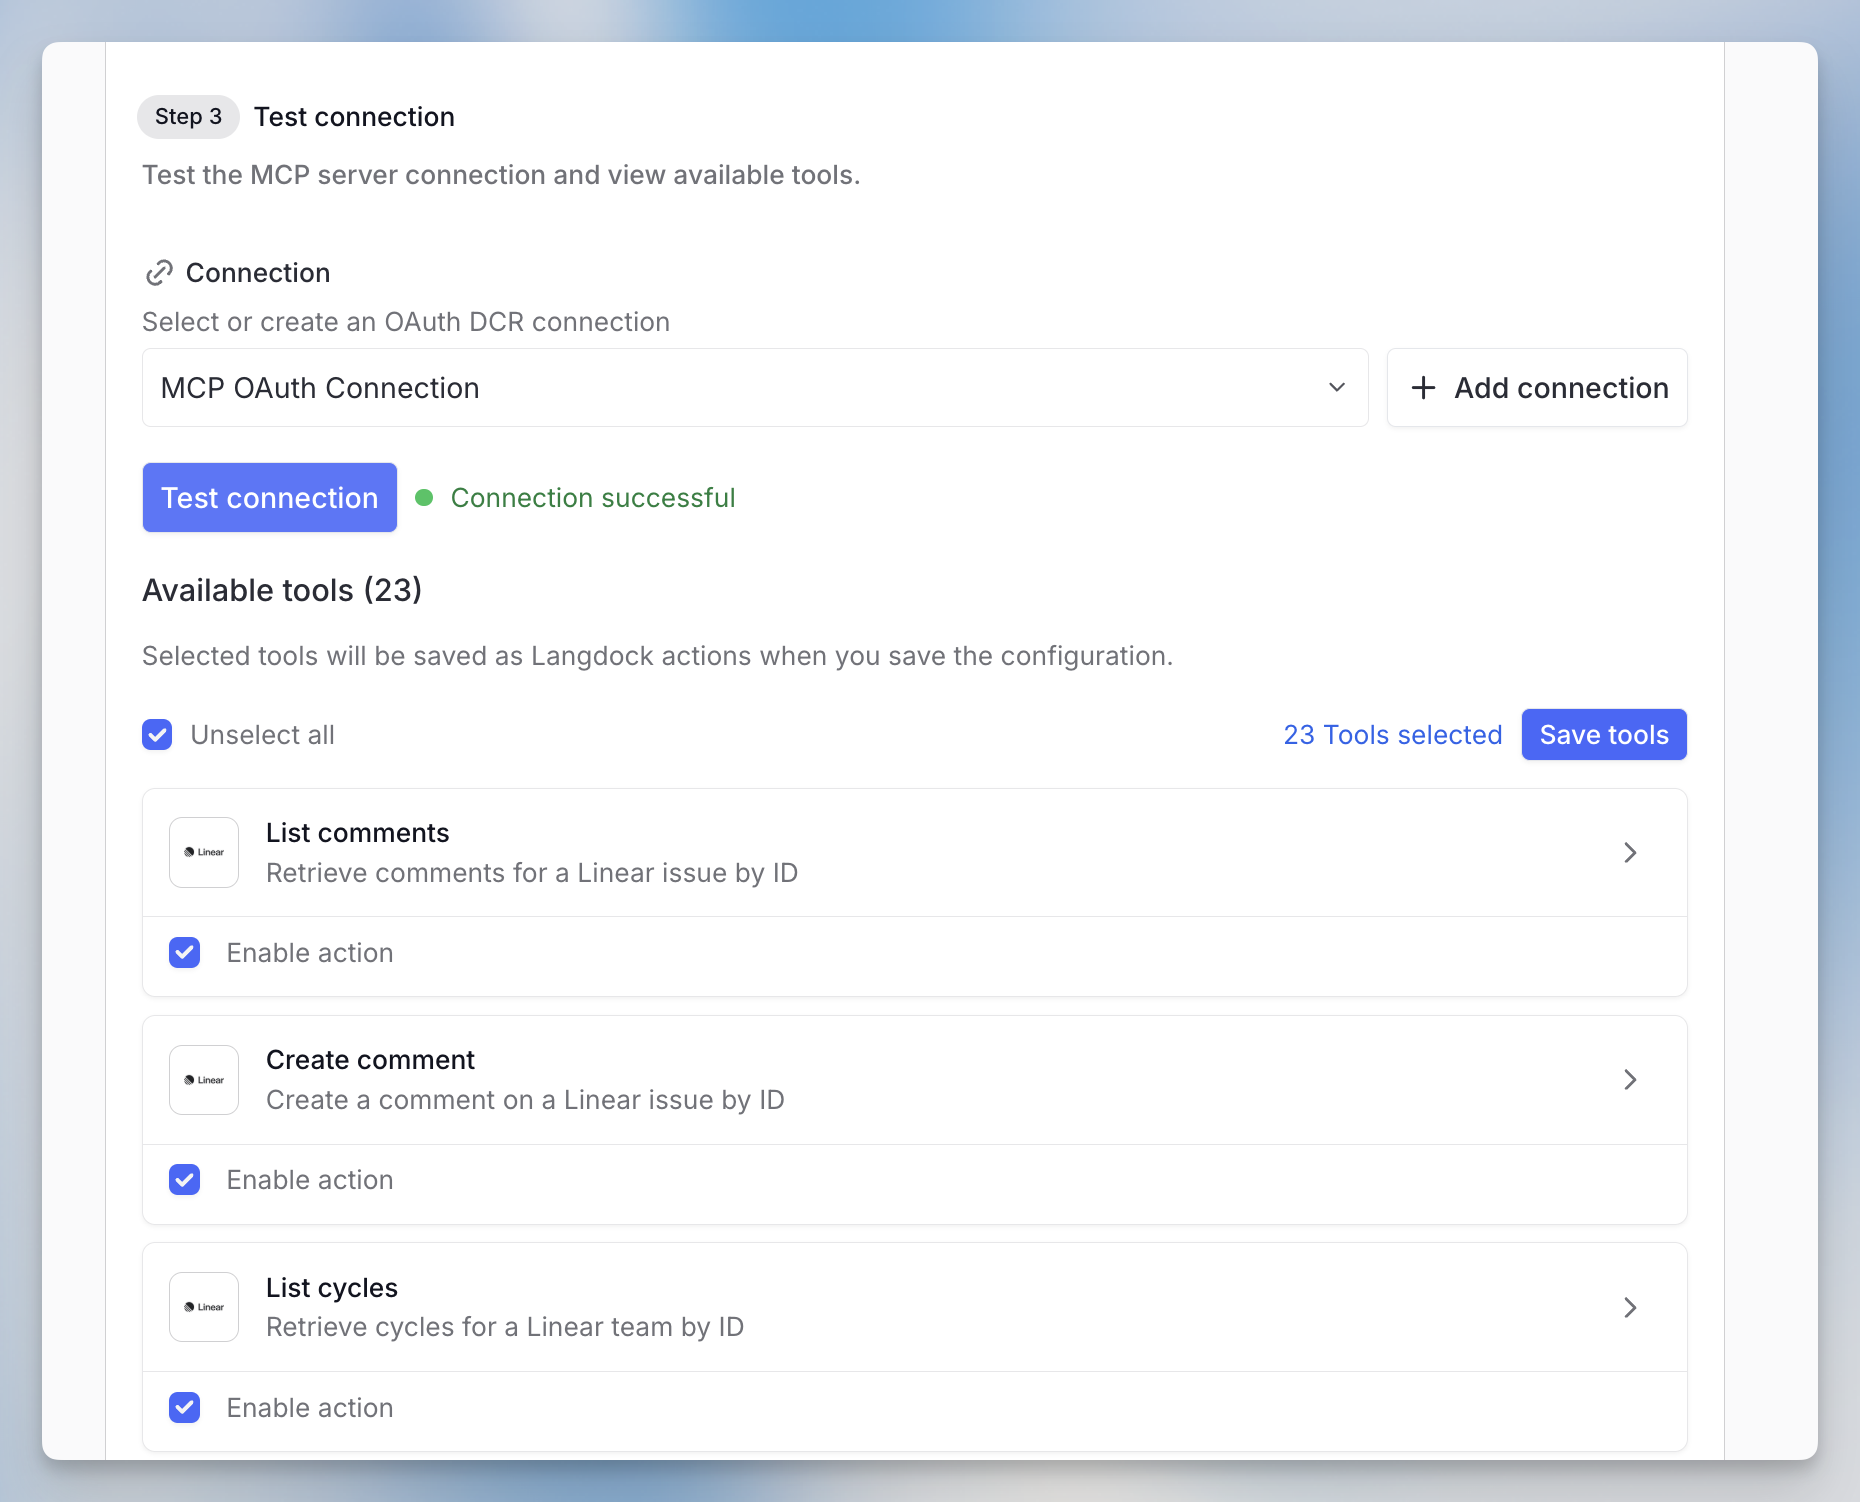
- Select the tools you want to use, then click “Save tools”
Advanced OAuth Authentication
For servers using OAuth without DCR, the process involves a few extra steps: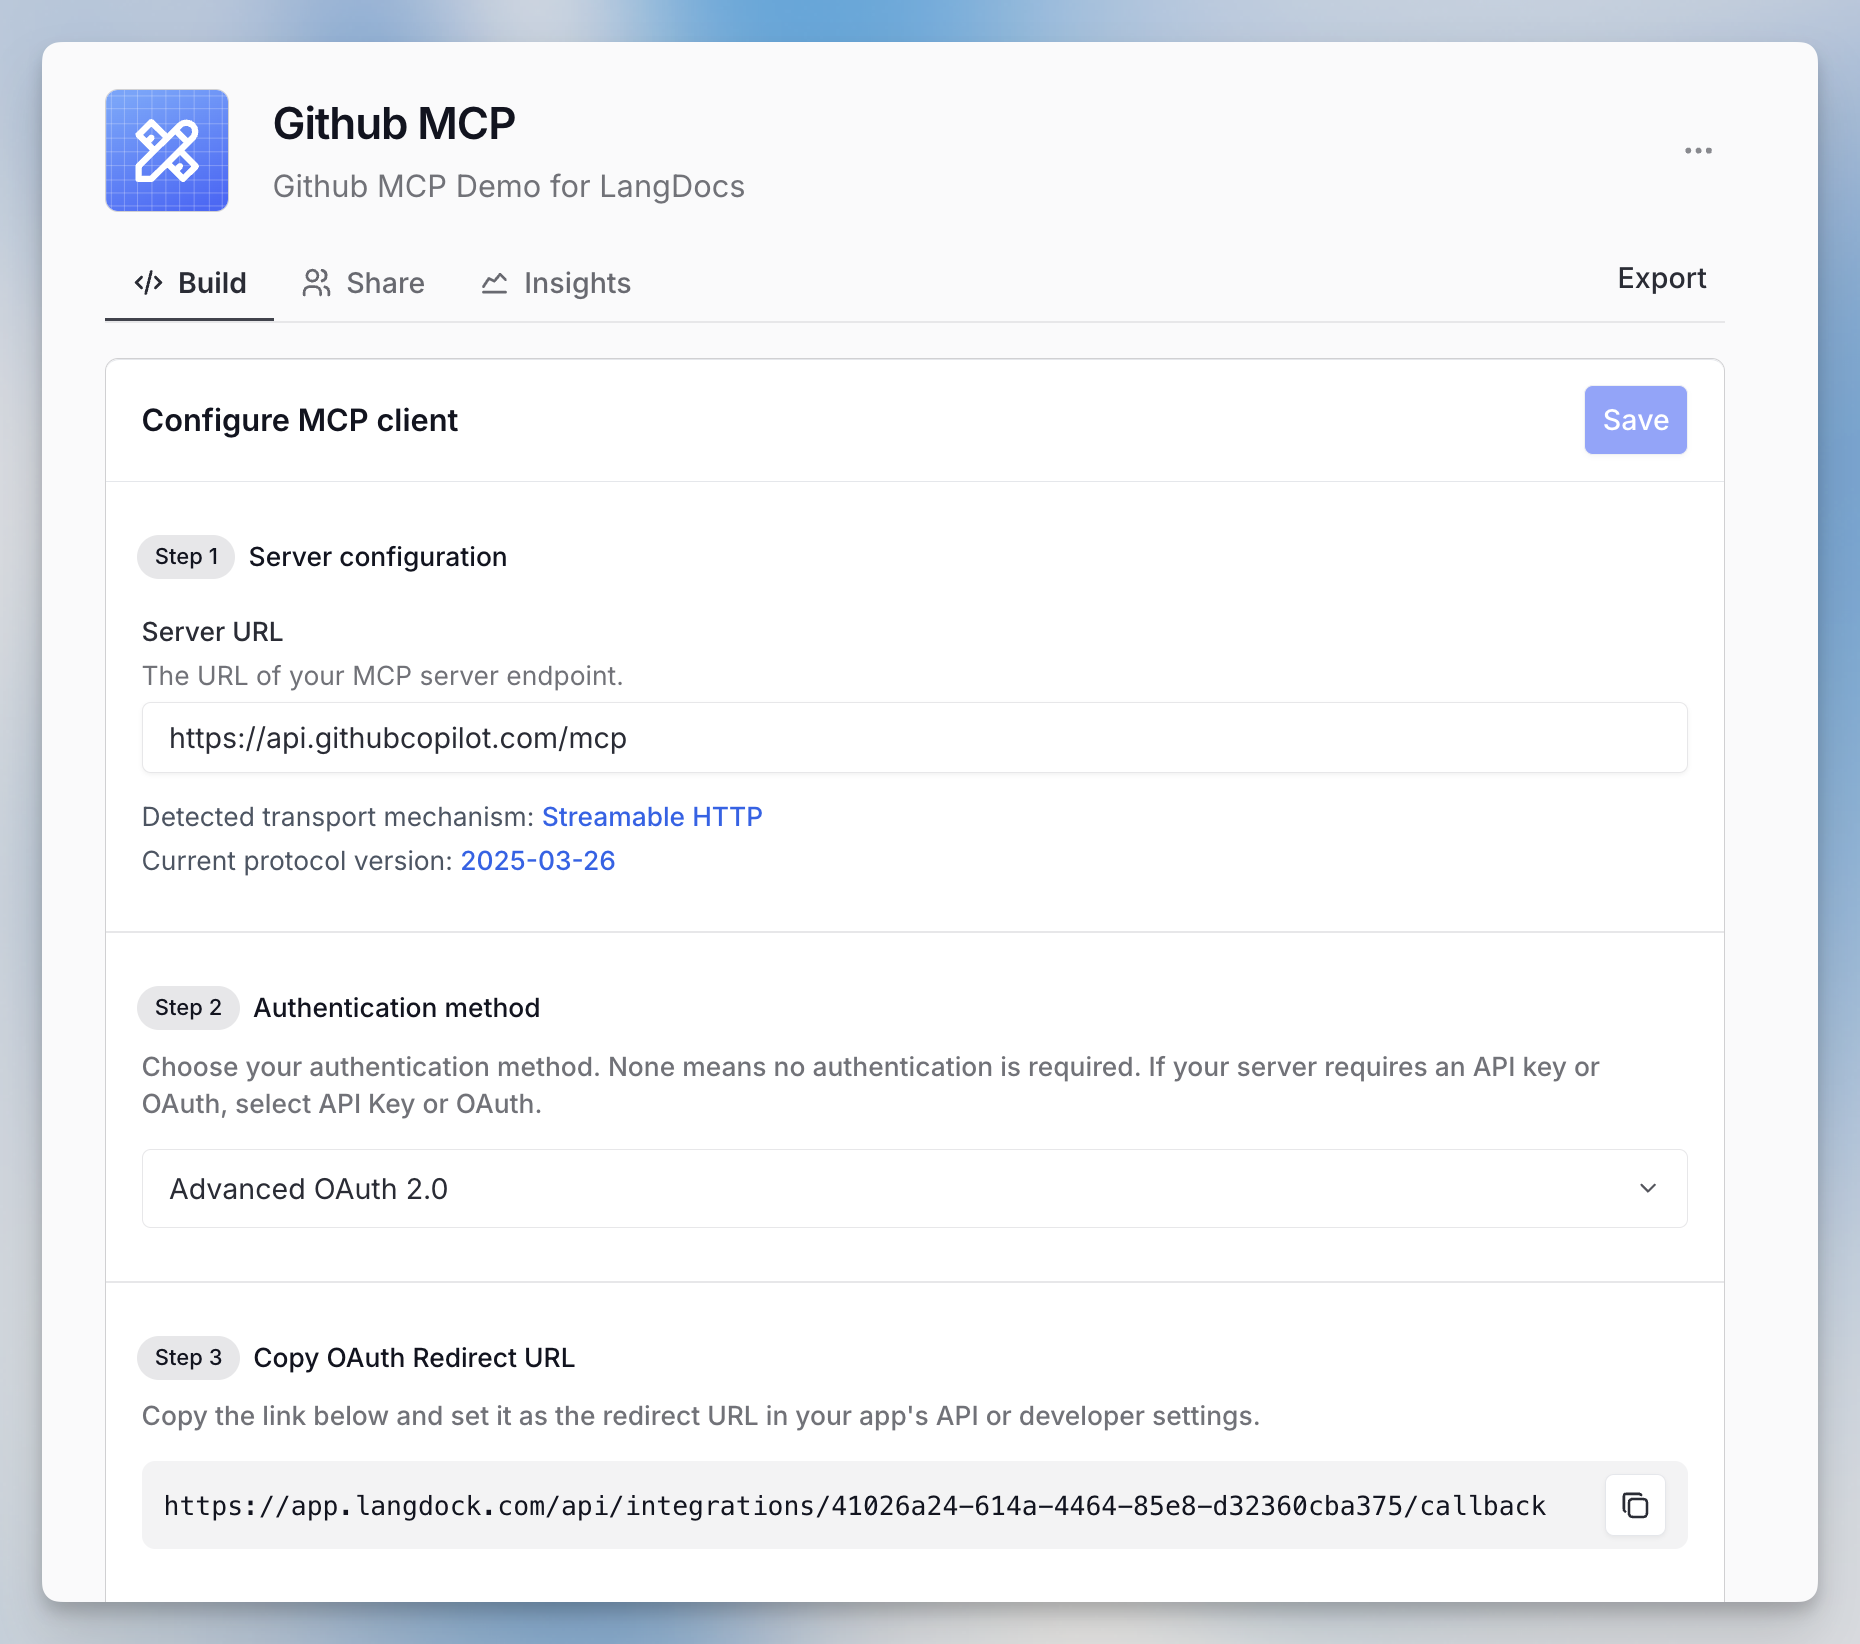
- Enter the server URL and select Advanced OAuth 2.0.
- Copy the OAuth redirect URL into your app’s API or developer settings.
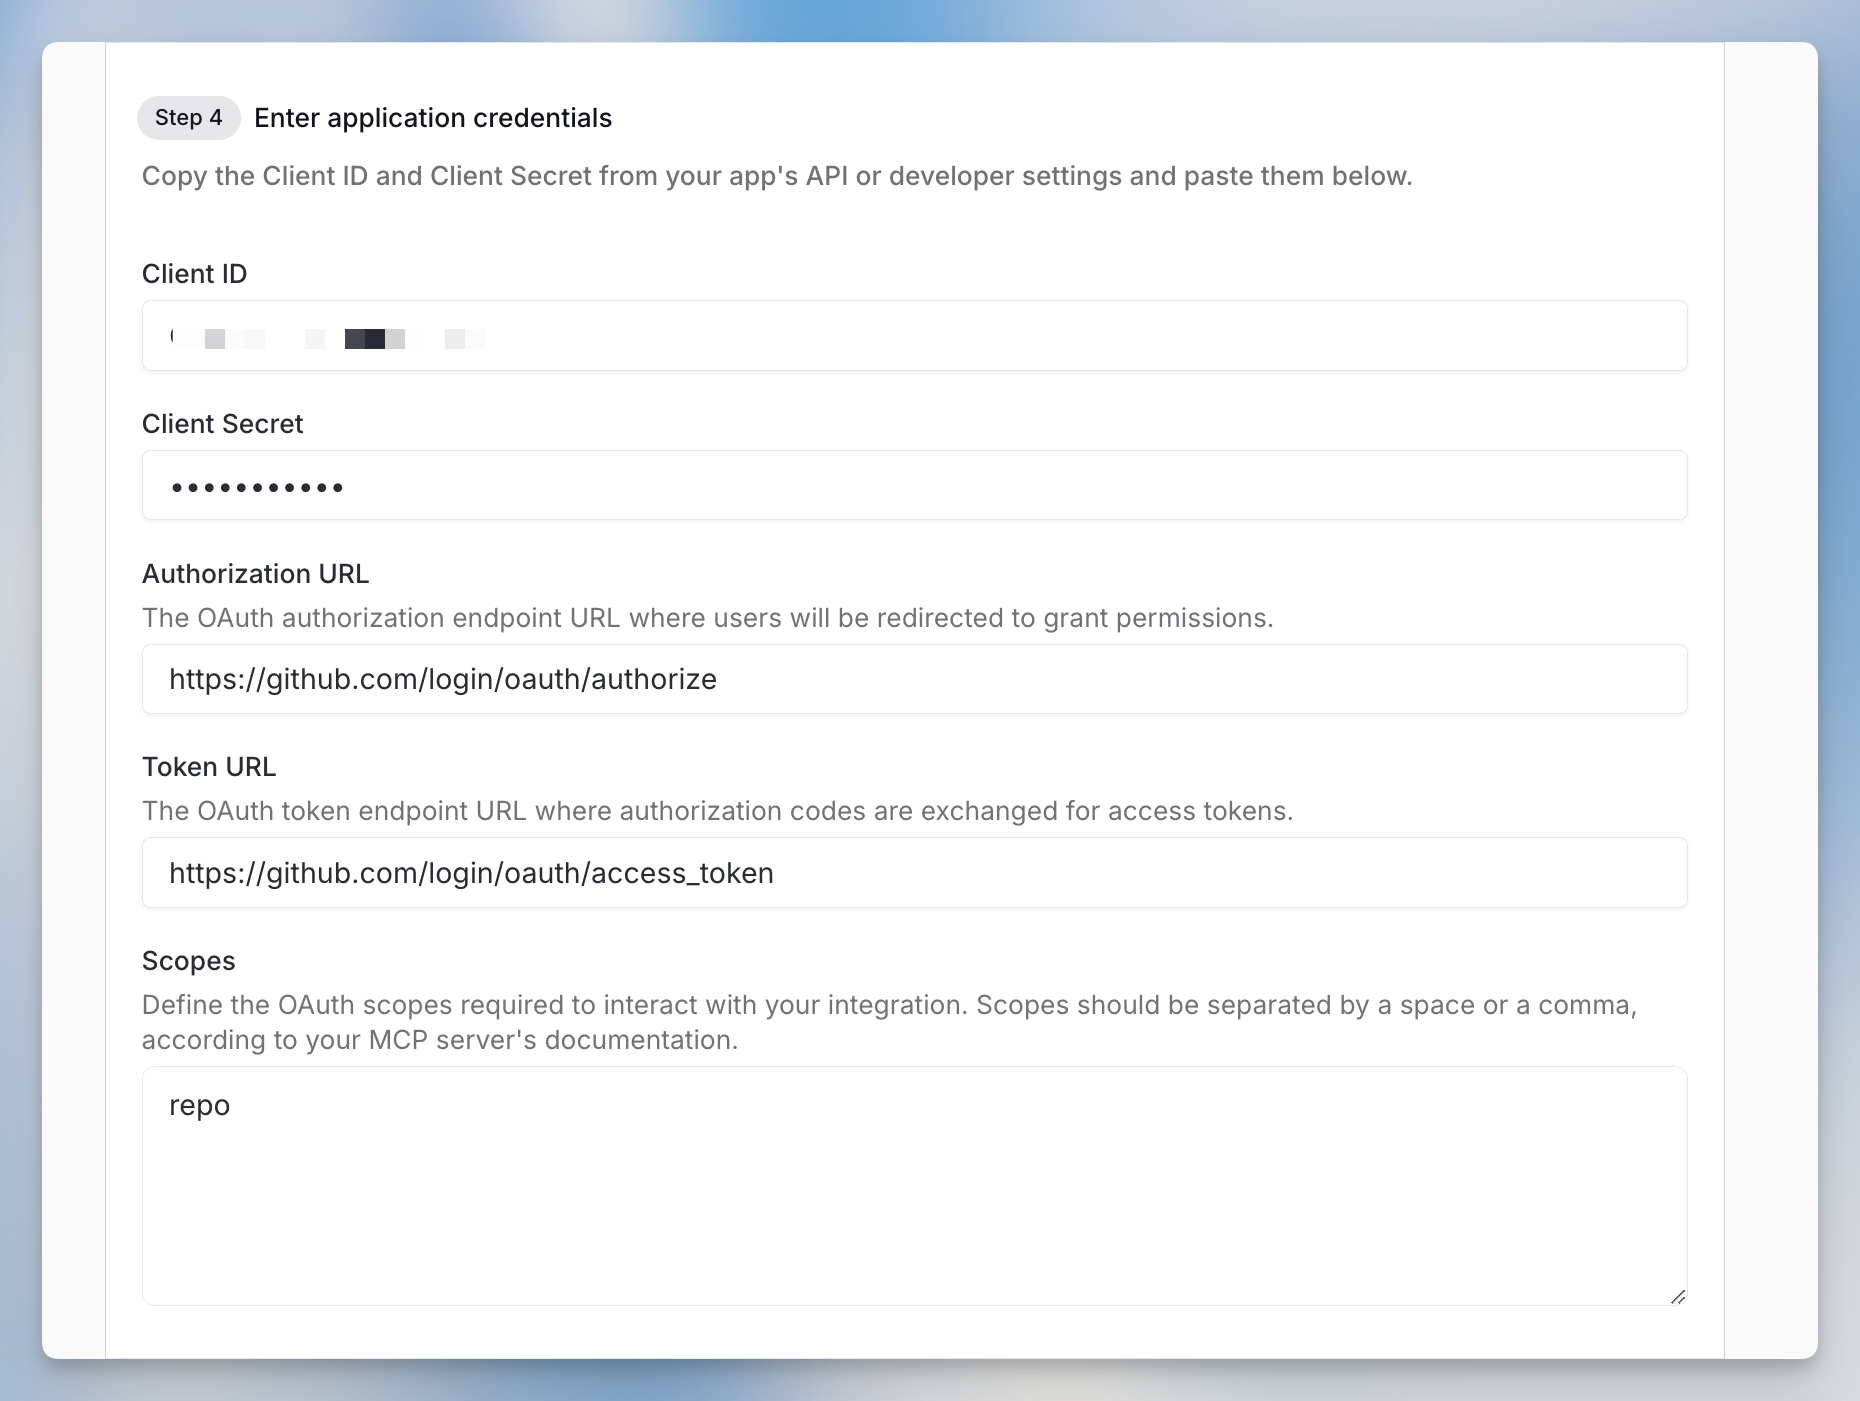
- Copy Client ID and Client Secret from your app into Langdock
- Add Authorization URL (for permissions) and Token URL (for token exchange)
- Define required OAuth scopes (space or comma-separated per your server’s documentation)
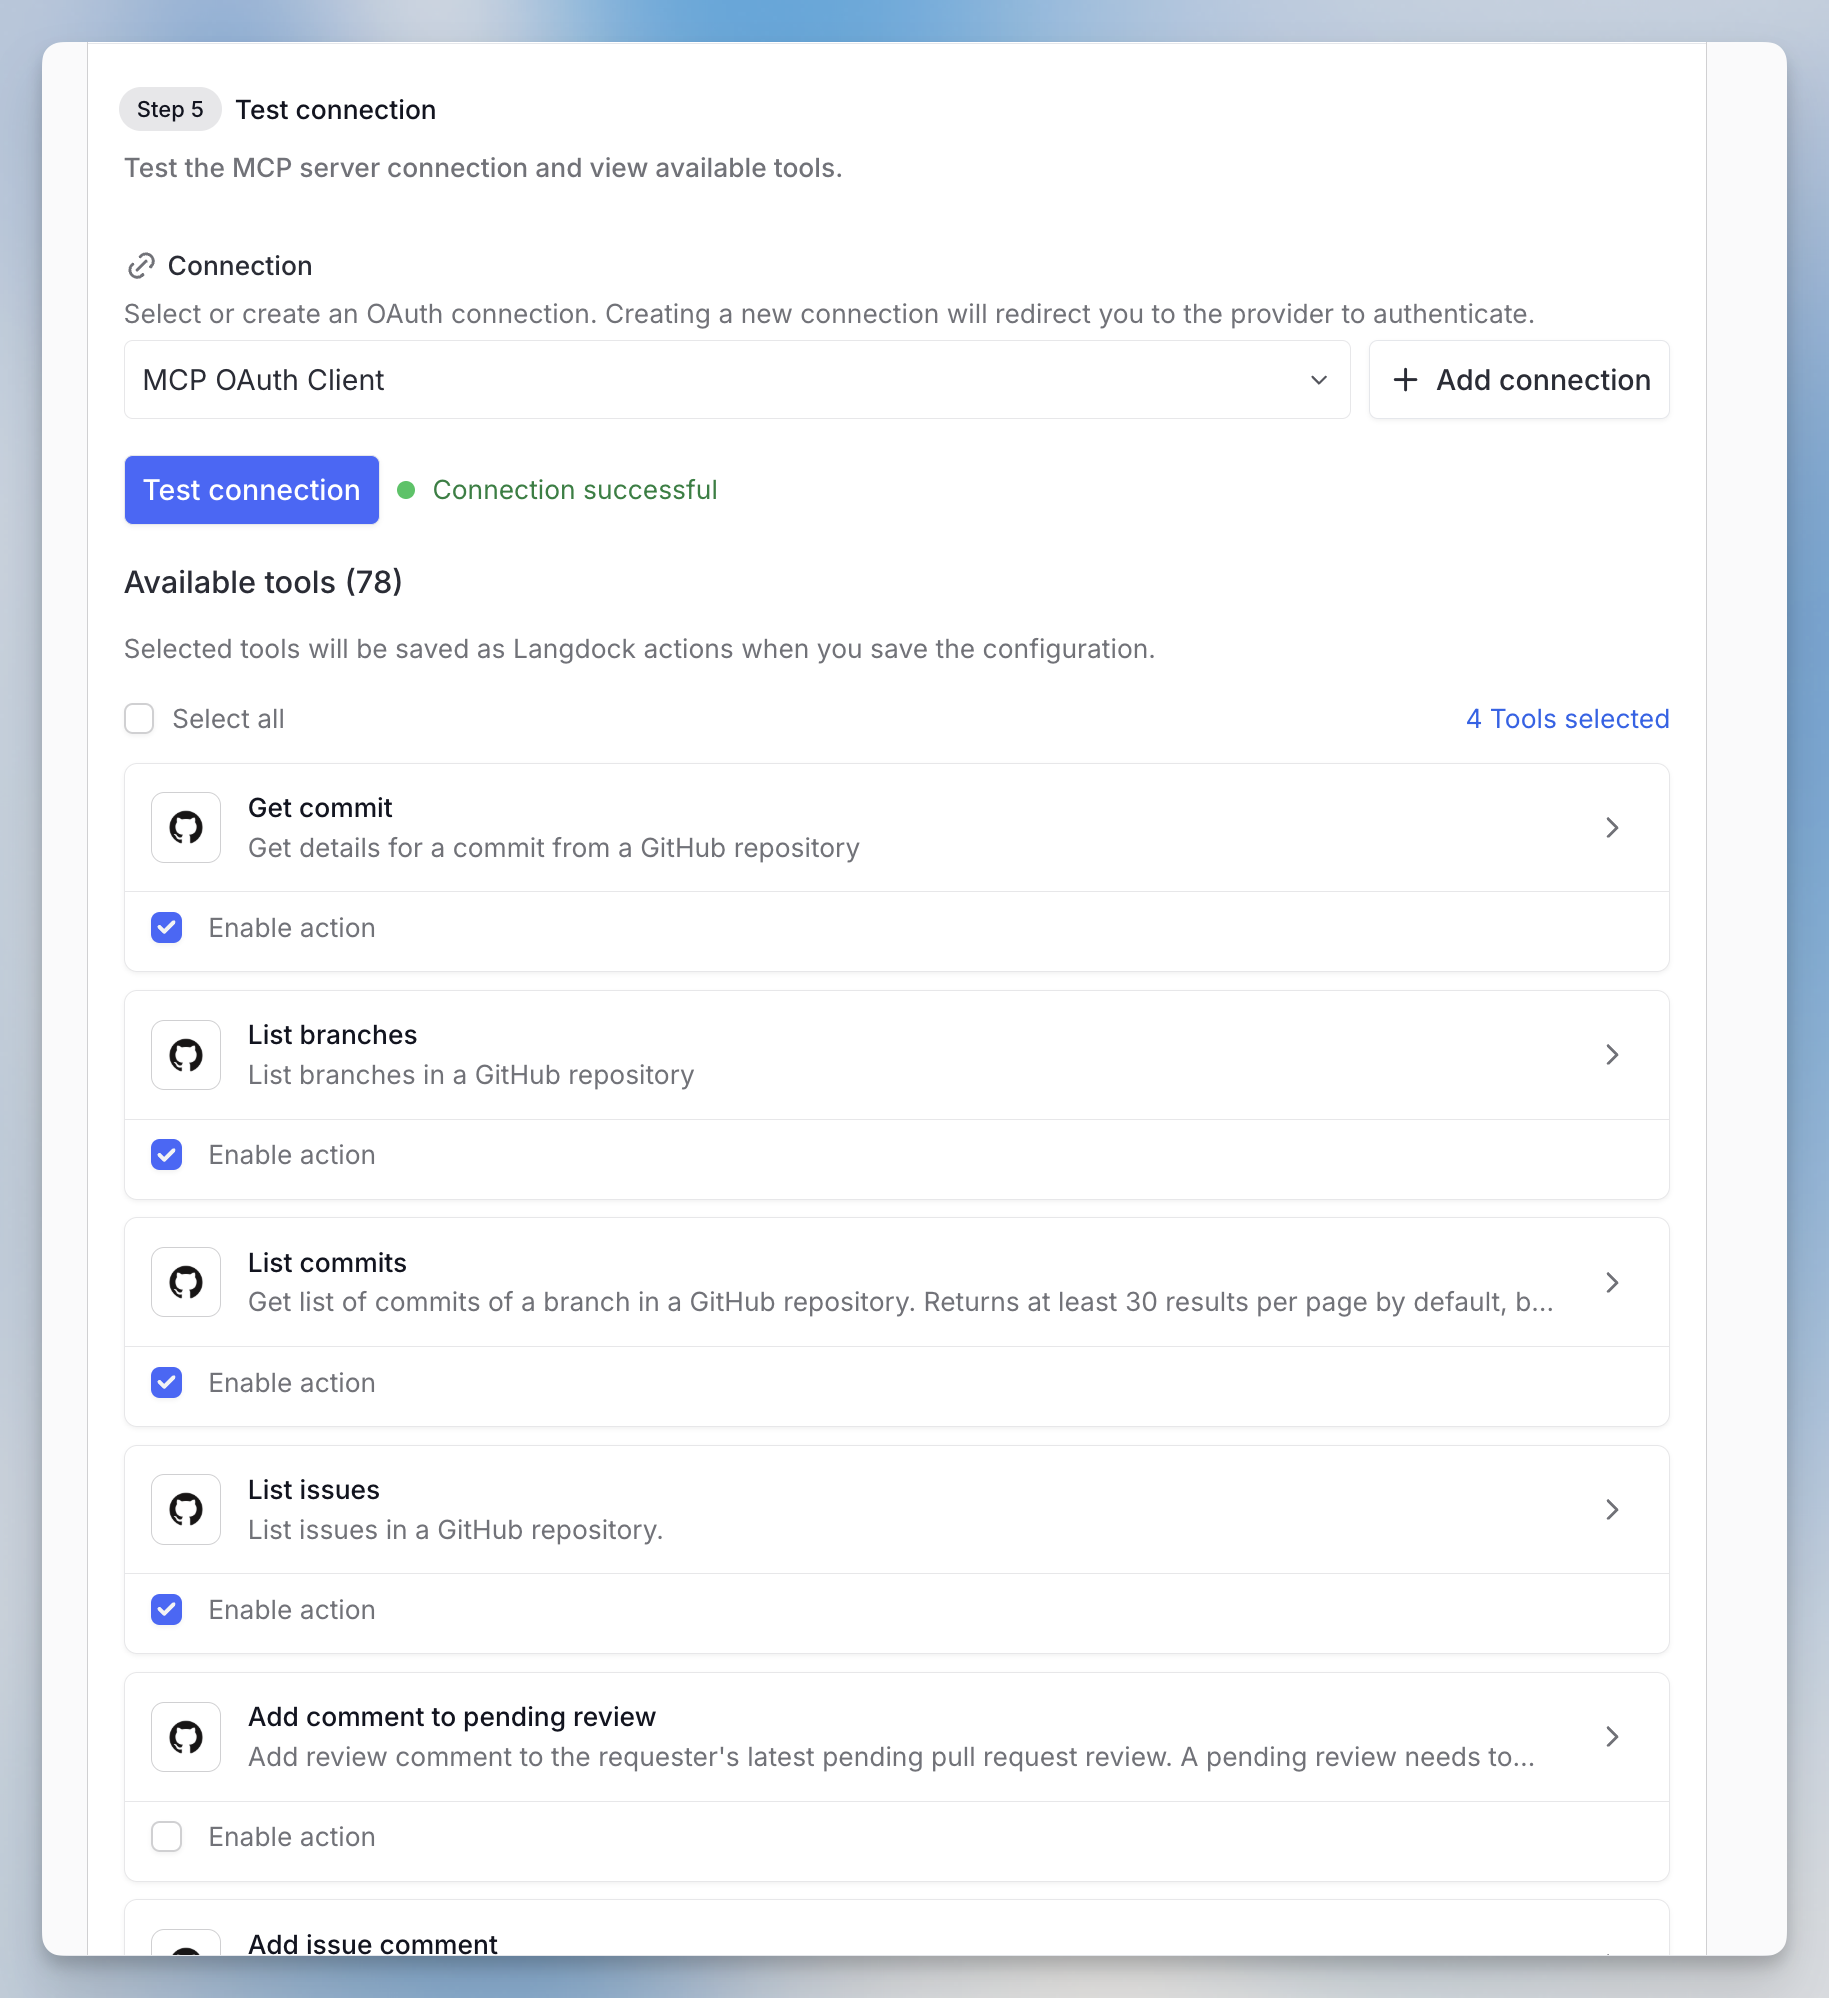
- Test connection and save tools
Zapier MCP Configuration
For Zapier MCP servers, the URL has this format:https://mcp.zapier.com/api/mcp/s/[your-api-key]/mcp
split your URL as follows:
- Server URL: https://mcp.zapier.com/api/mcp/mcp
- API Key: The encoded string after /s/ in your original URL
Related Documentation
- Integrations Overview - Learn about Langdock’s integration system
- Agent Actions - Understanding how actions work with agents