Overview
This guide walks you through configuring SAML single sign-on with Microsoft Entra ID. You’ll create an Enterprise application in Entra ID, configure SAML settings, and establish a secure connection between your identity provider and Langdock. Once complete, your users will be able to sign in to Langdock using their Entra ID credentials.Setup Checklist
Verify that you have completed these steps from the setup checklist:Create a new Enterprise application in Entra ID
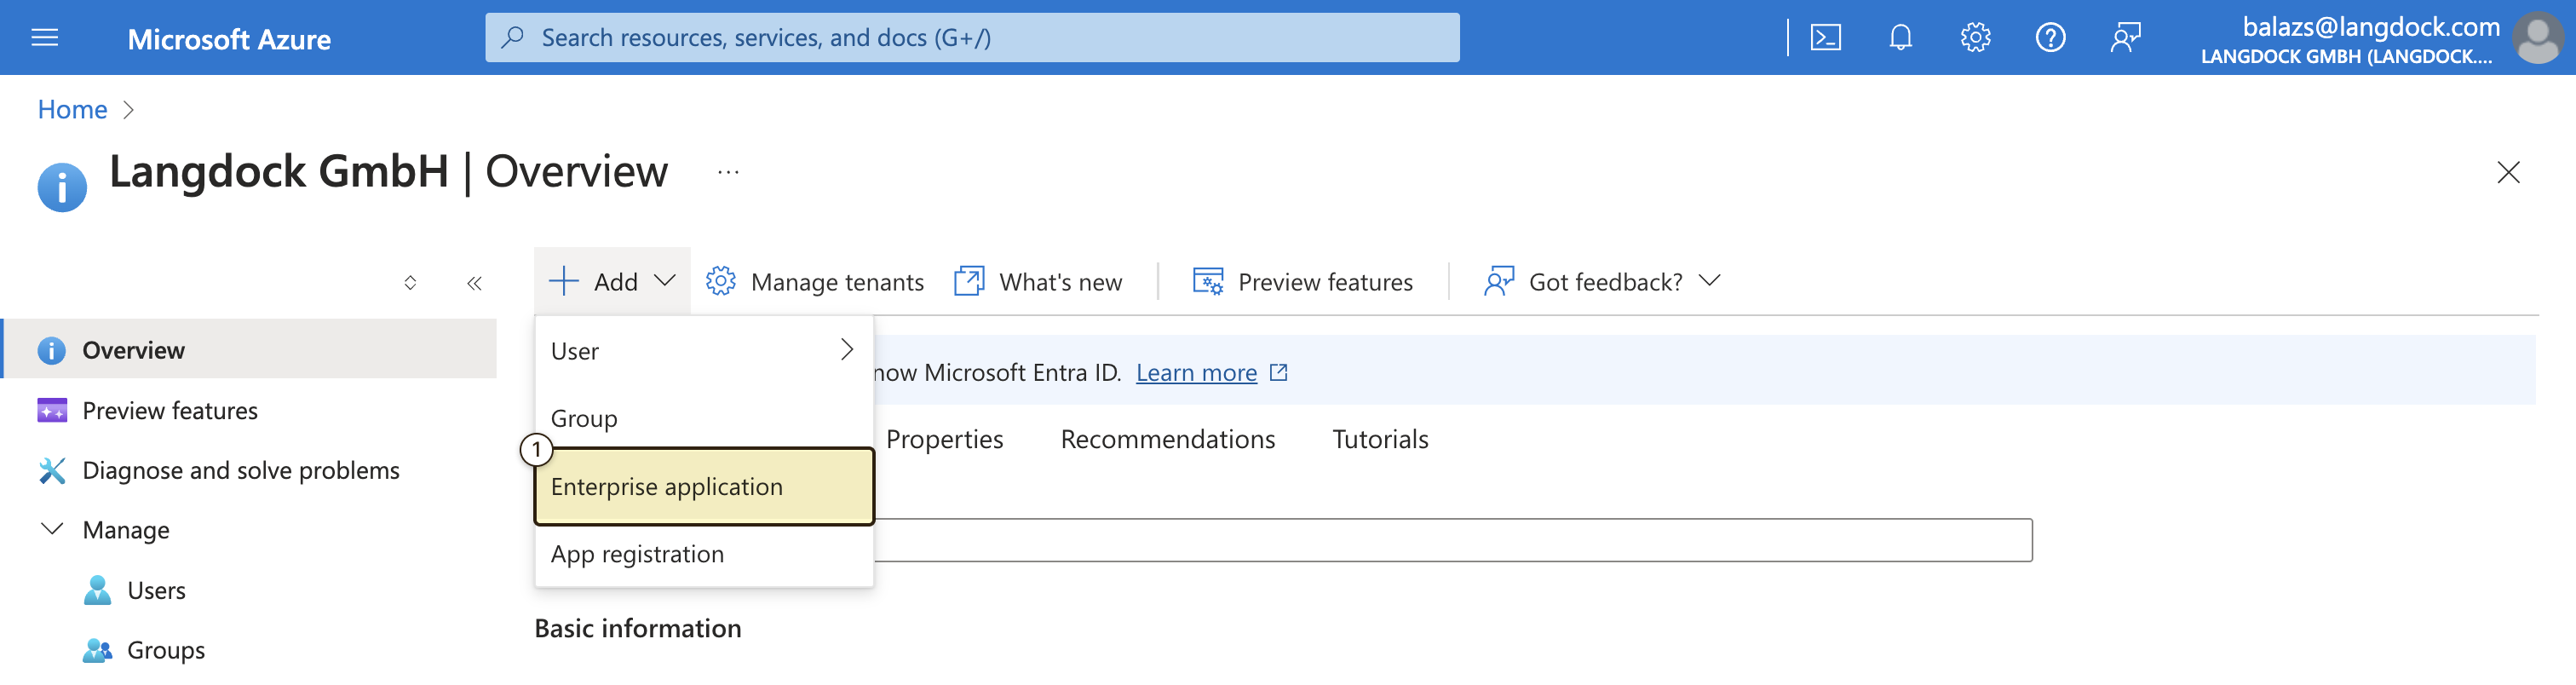
Next, you need to create a new Enterprise application in your Entra ID portal. To do this, follow these steps:- In your Entra ID portal navigate to the Overview page and add a new Enterprise application under ”+ Add” → “Enterprise application”
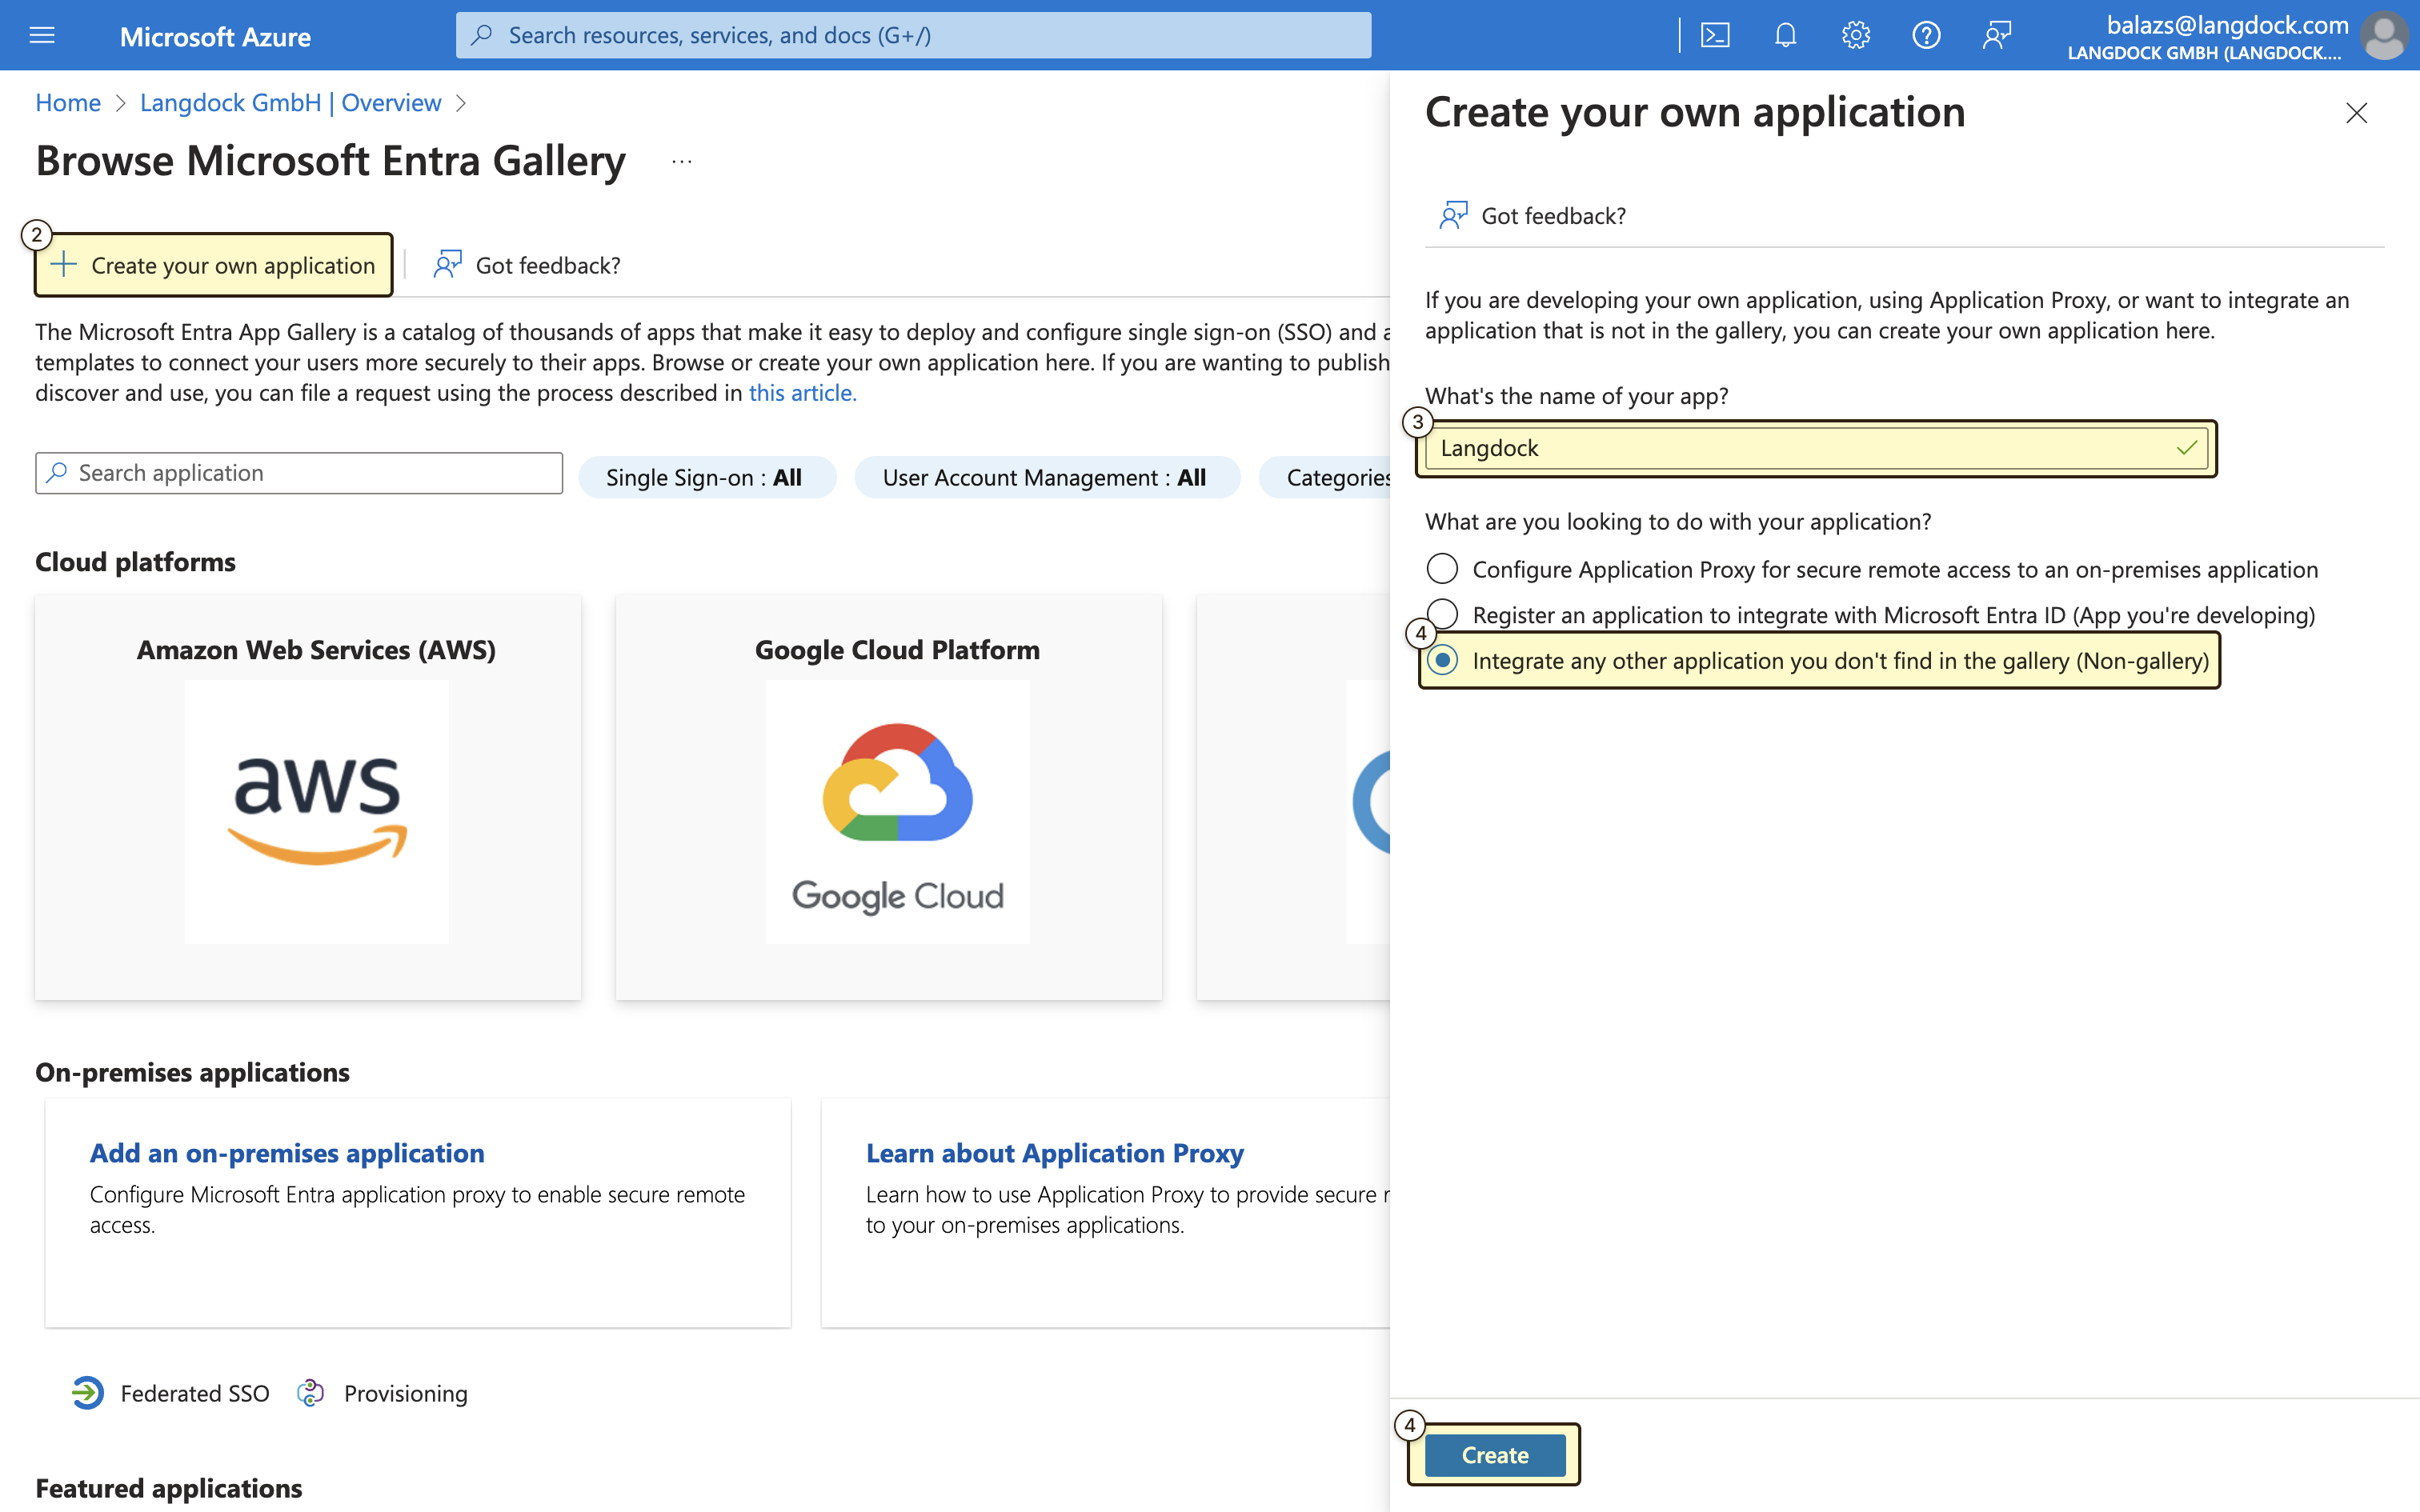
- Create a new custom application by clicking on ”+ Create your own application”
- Name your application (e.g., “Langdock”)
- Select the option “Integrate any other application you don’t find in the gallery (Non-gallery)“
SAML Configuration
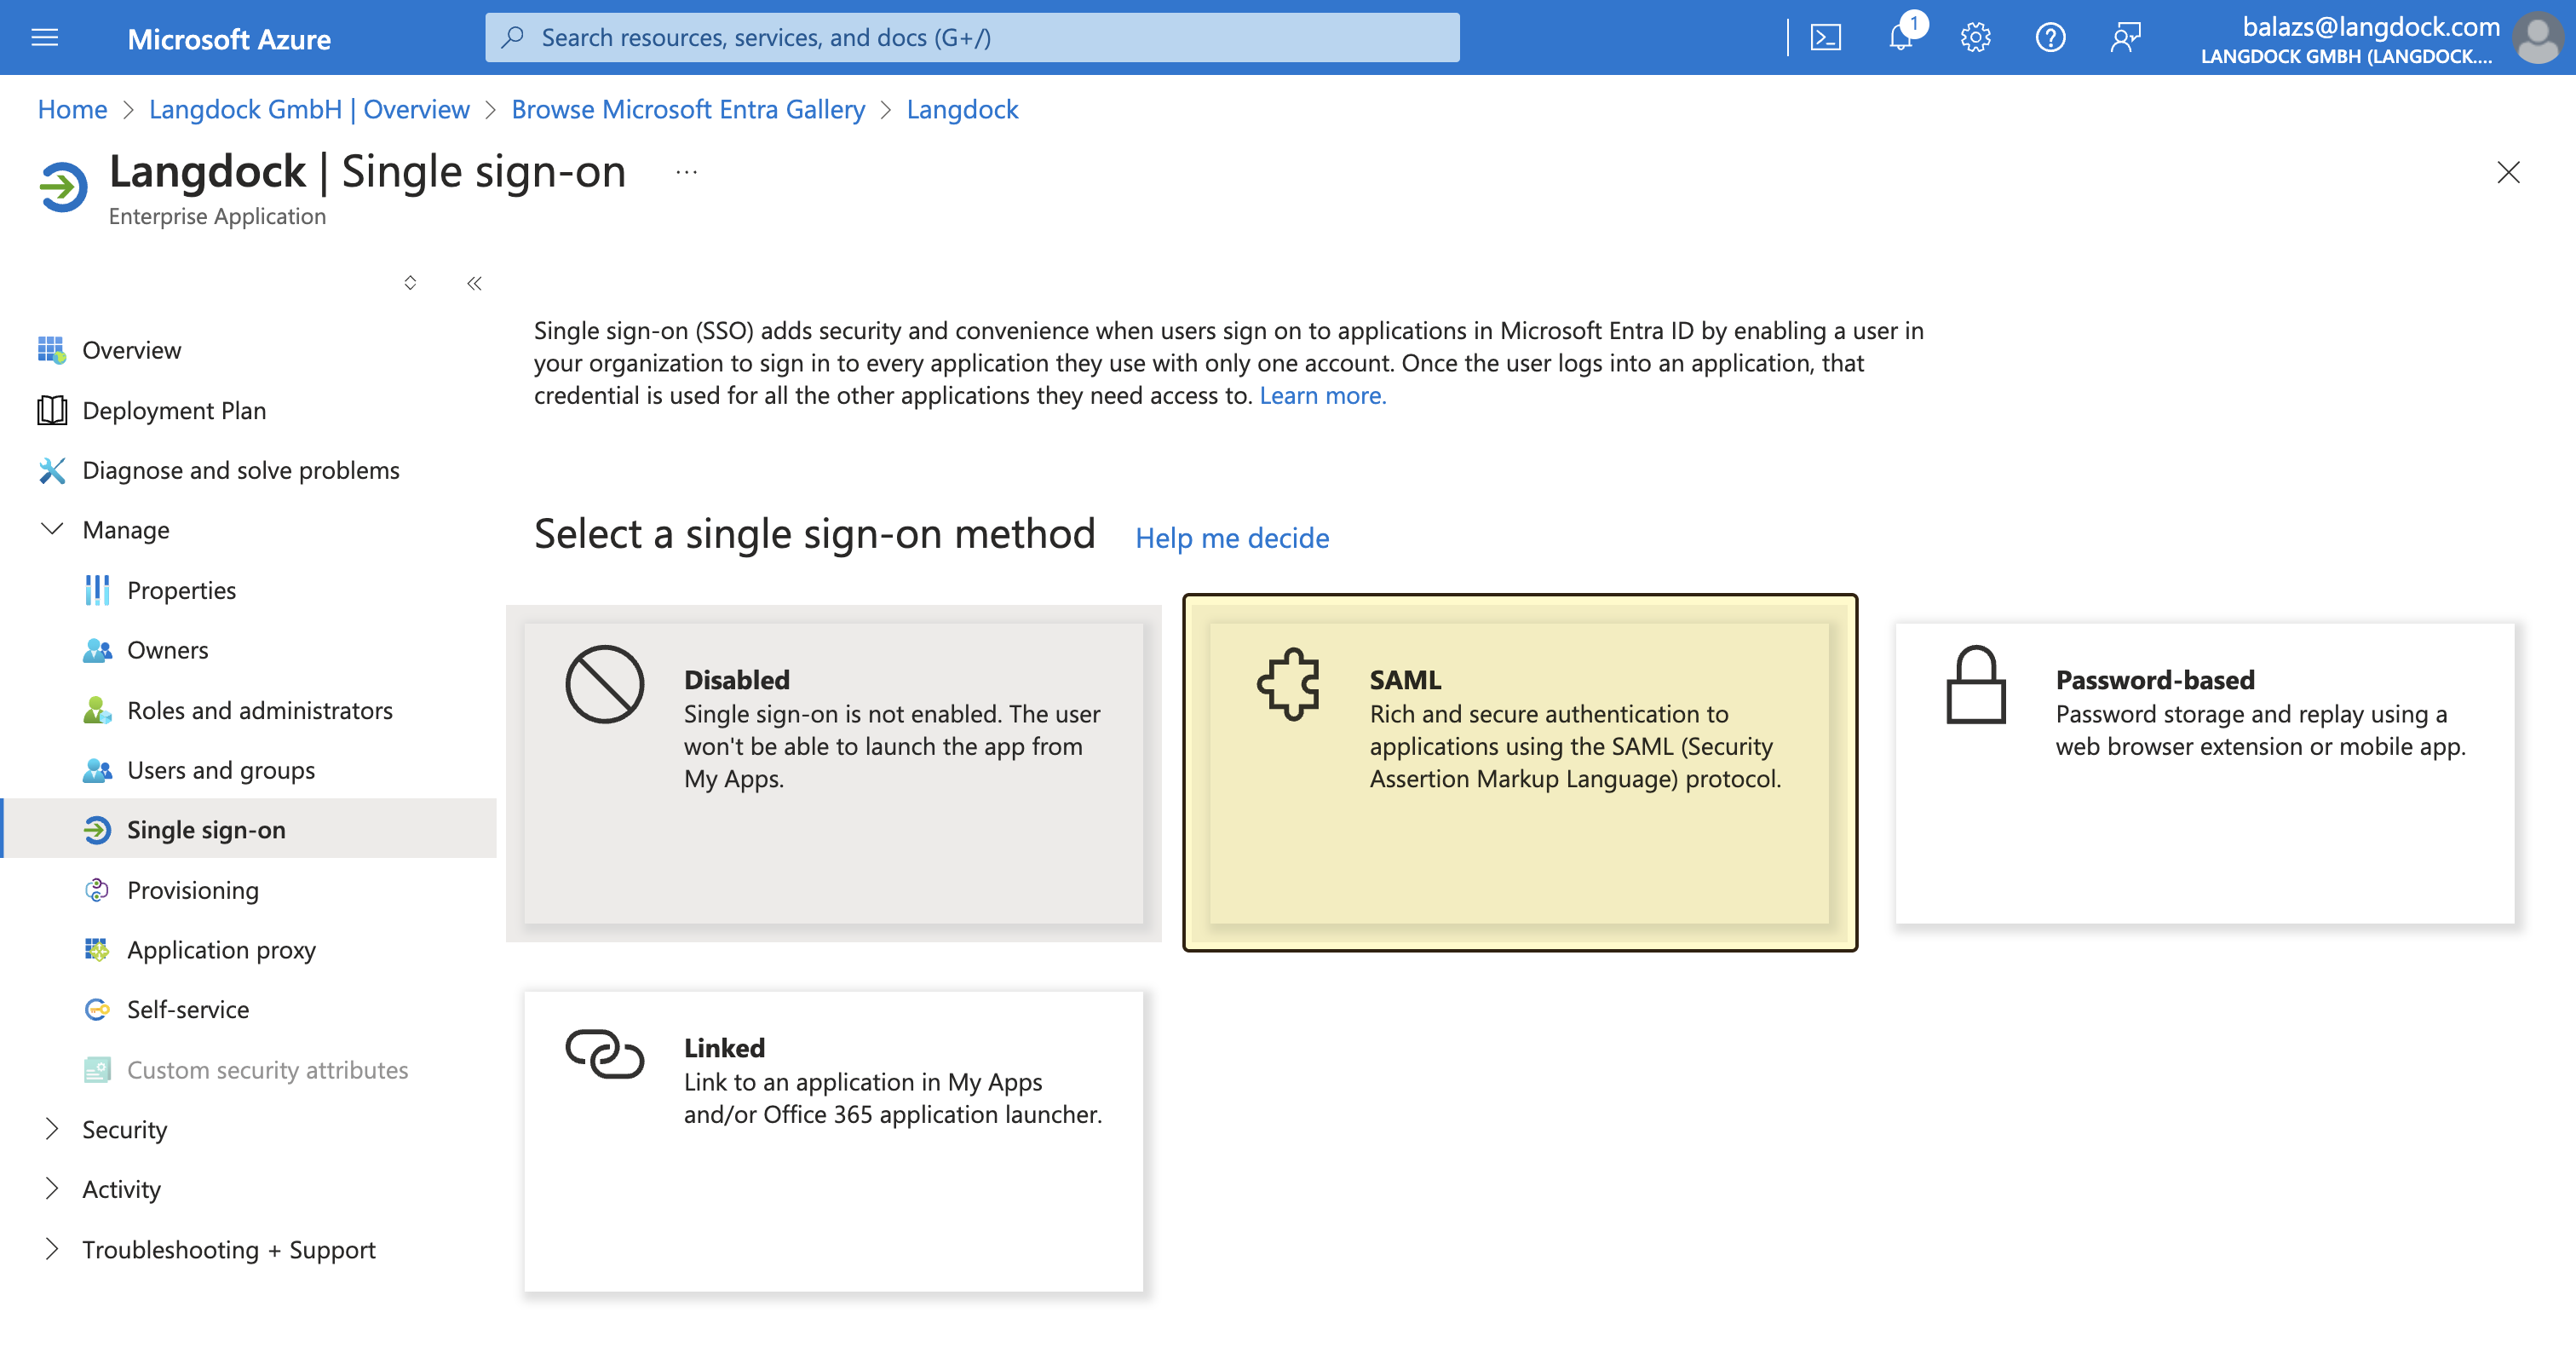
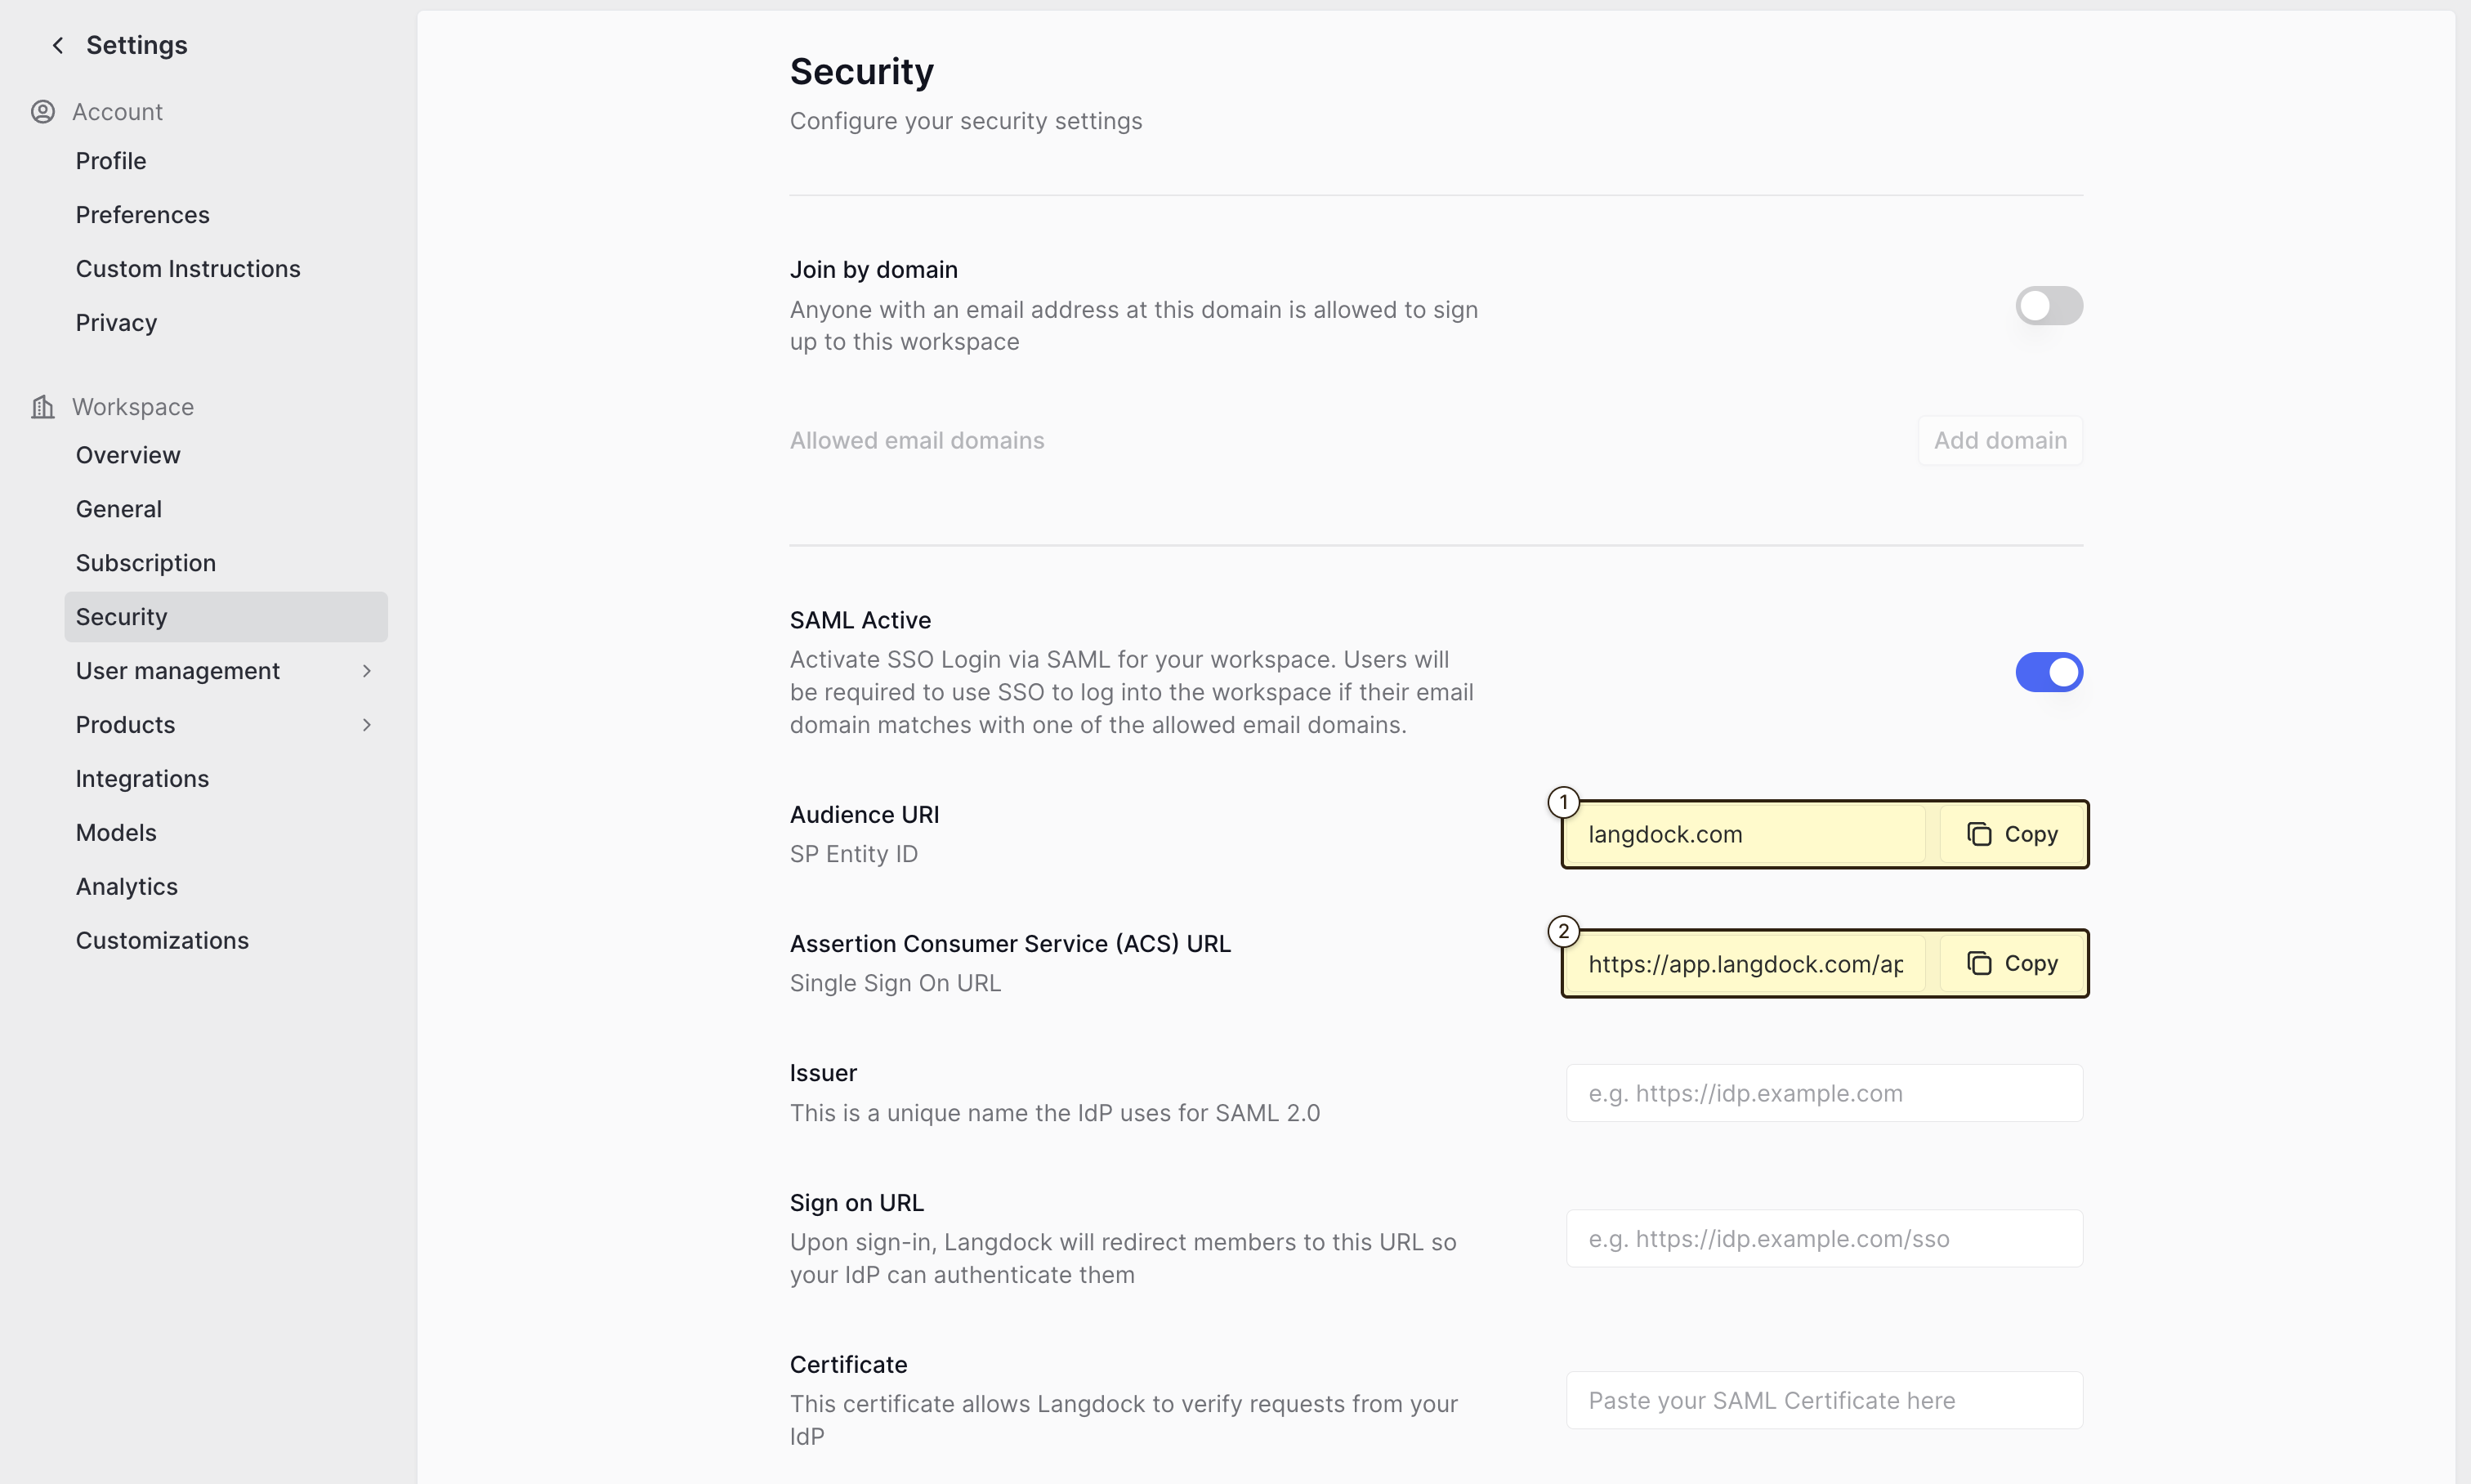
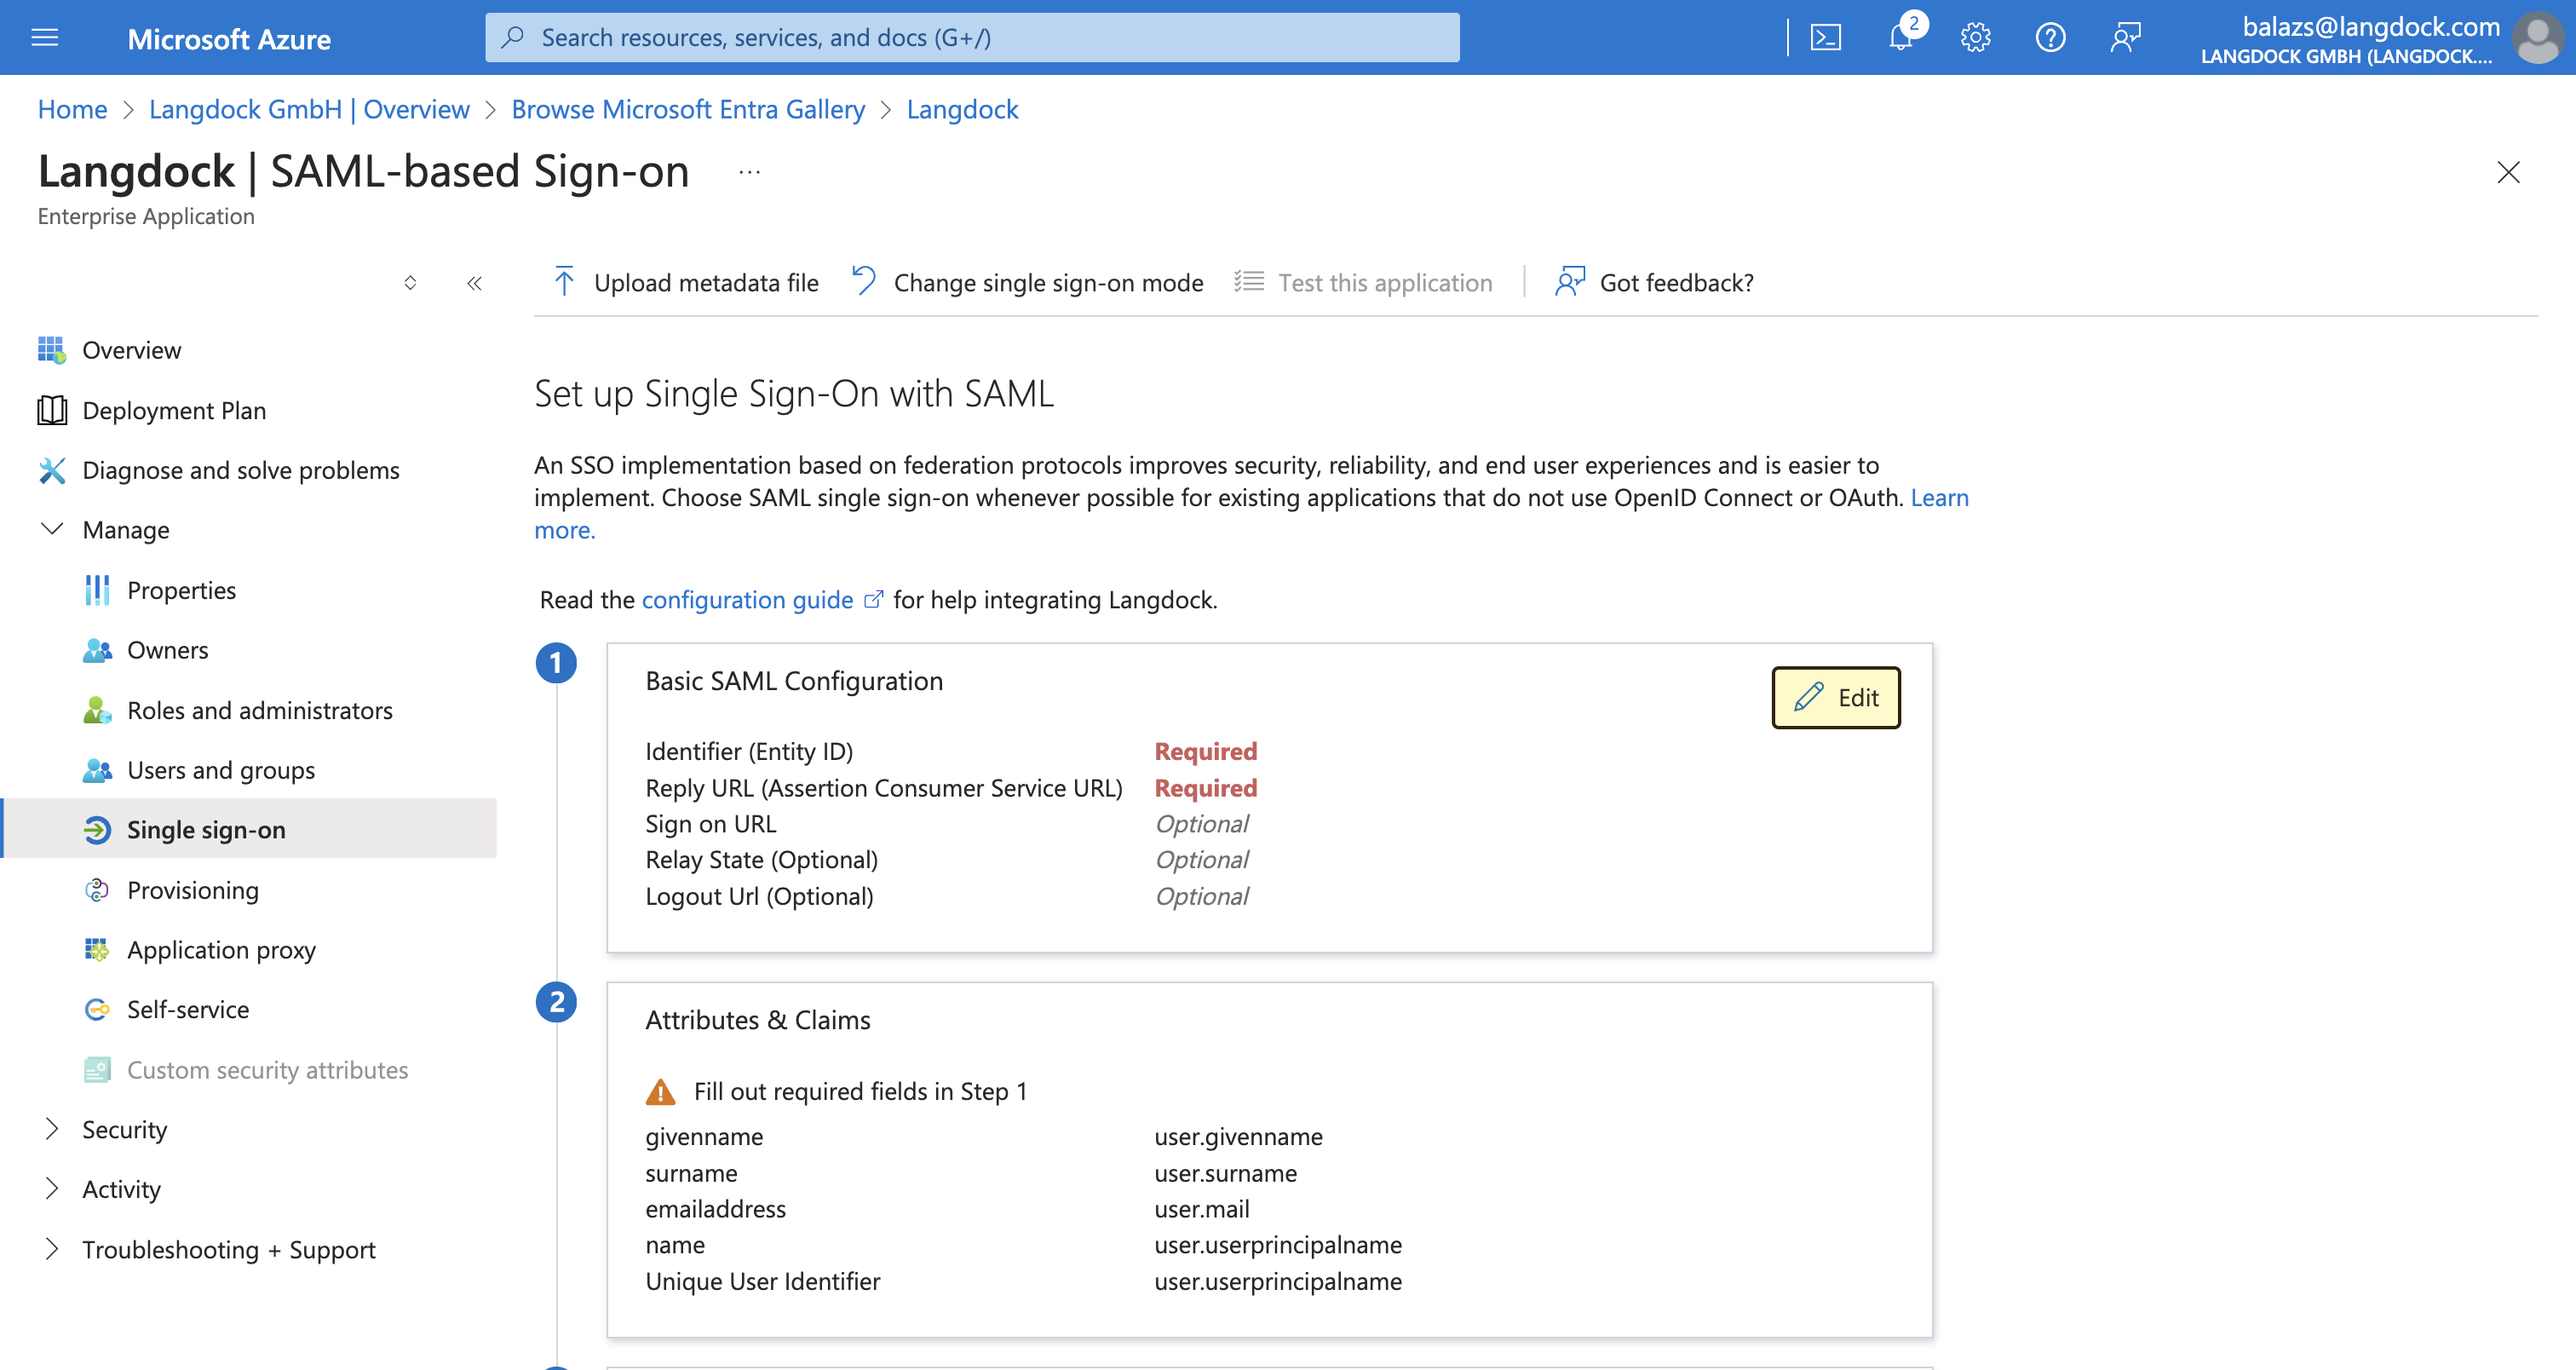
Langdock uses SAML 2.0 as the standard for SSO authentication. After creating the application, you need to configure the SAML settings, which will allow Langdock to authenticate users via SAML. First, navigate to the “Single sign-on” settings of your newly created application, by selecting “Set up single sign on” and choosing “SAML” as the single sign-on method.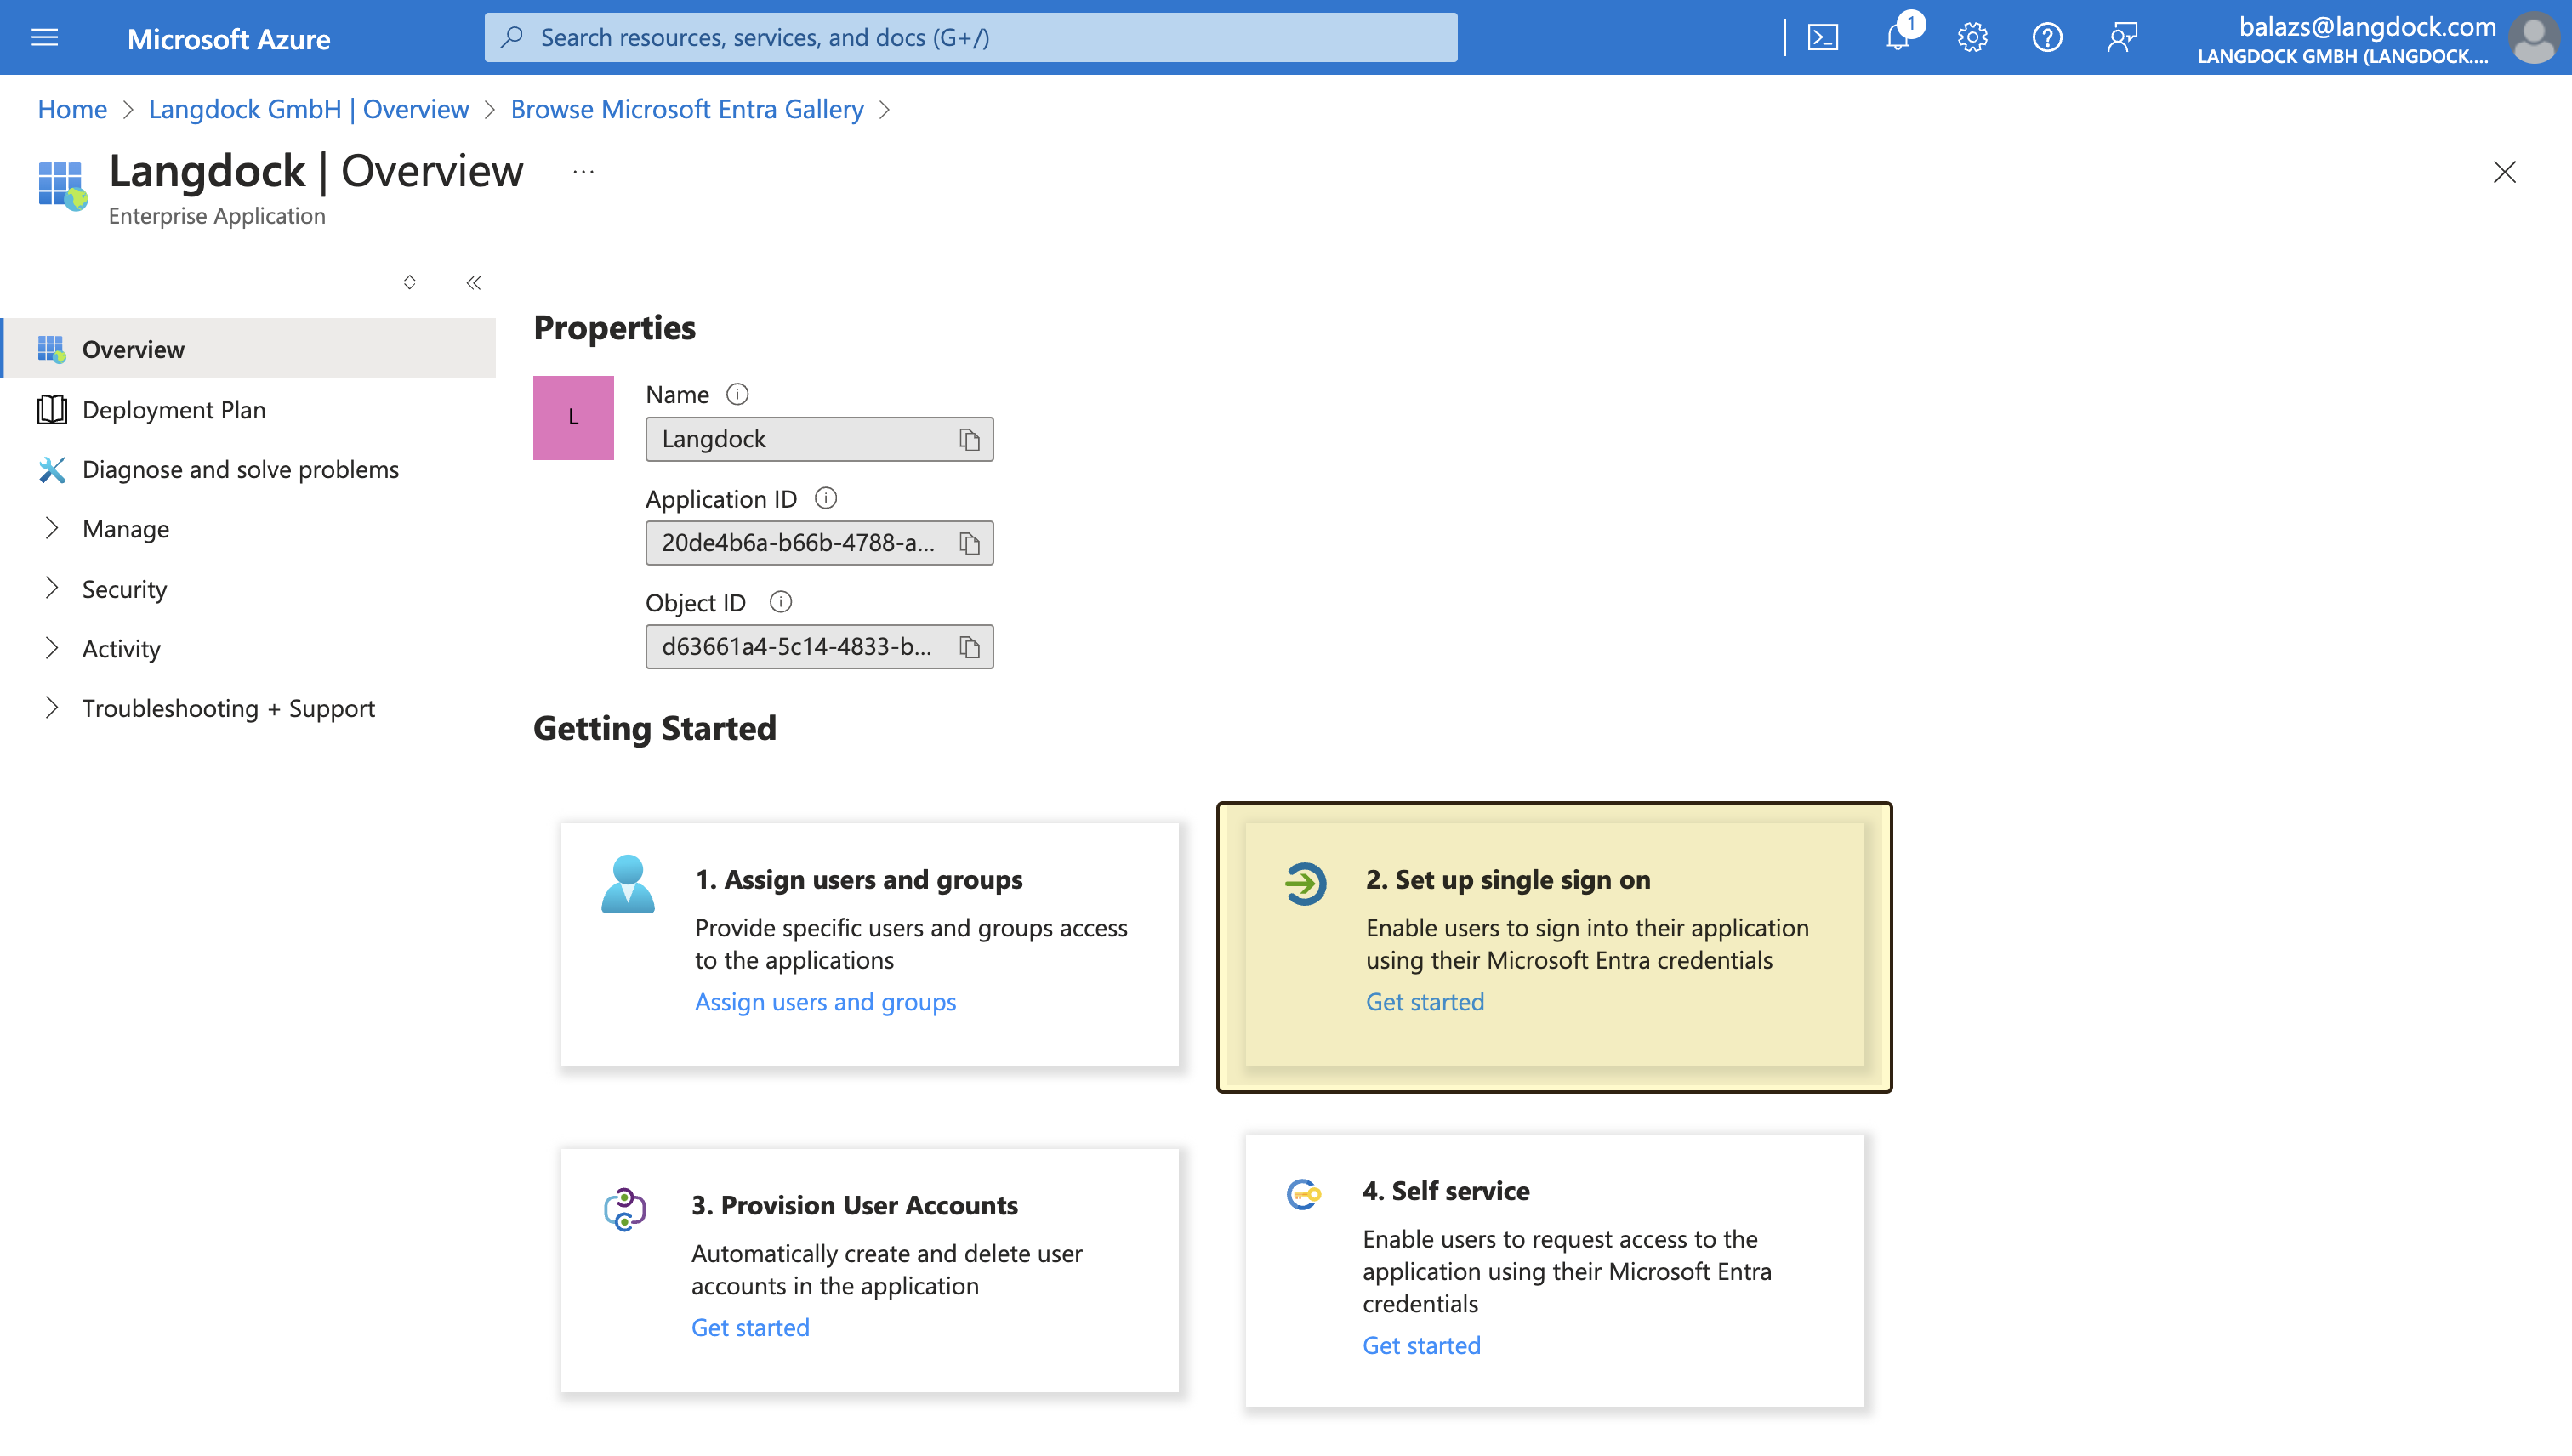
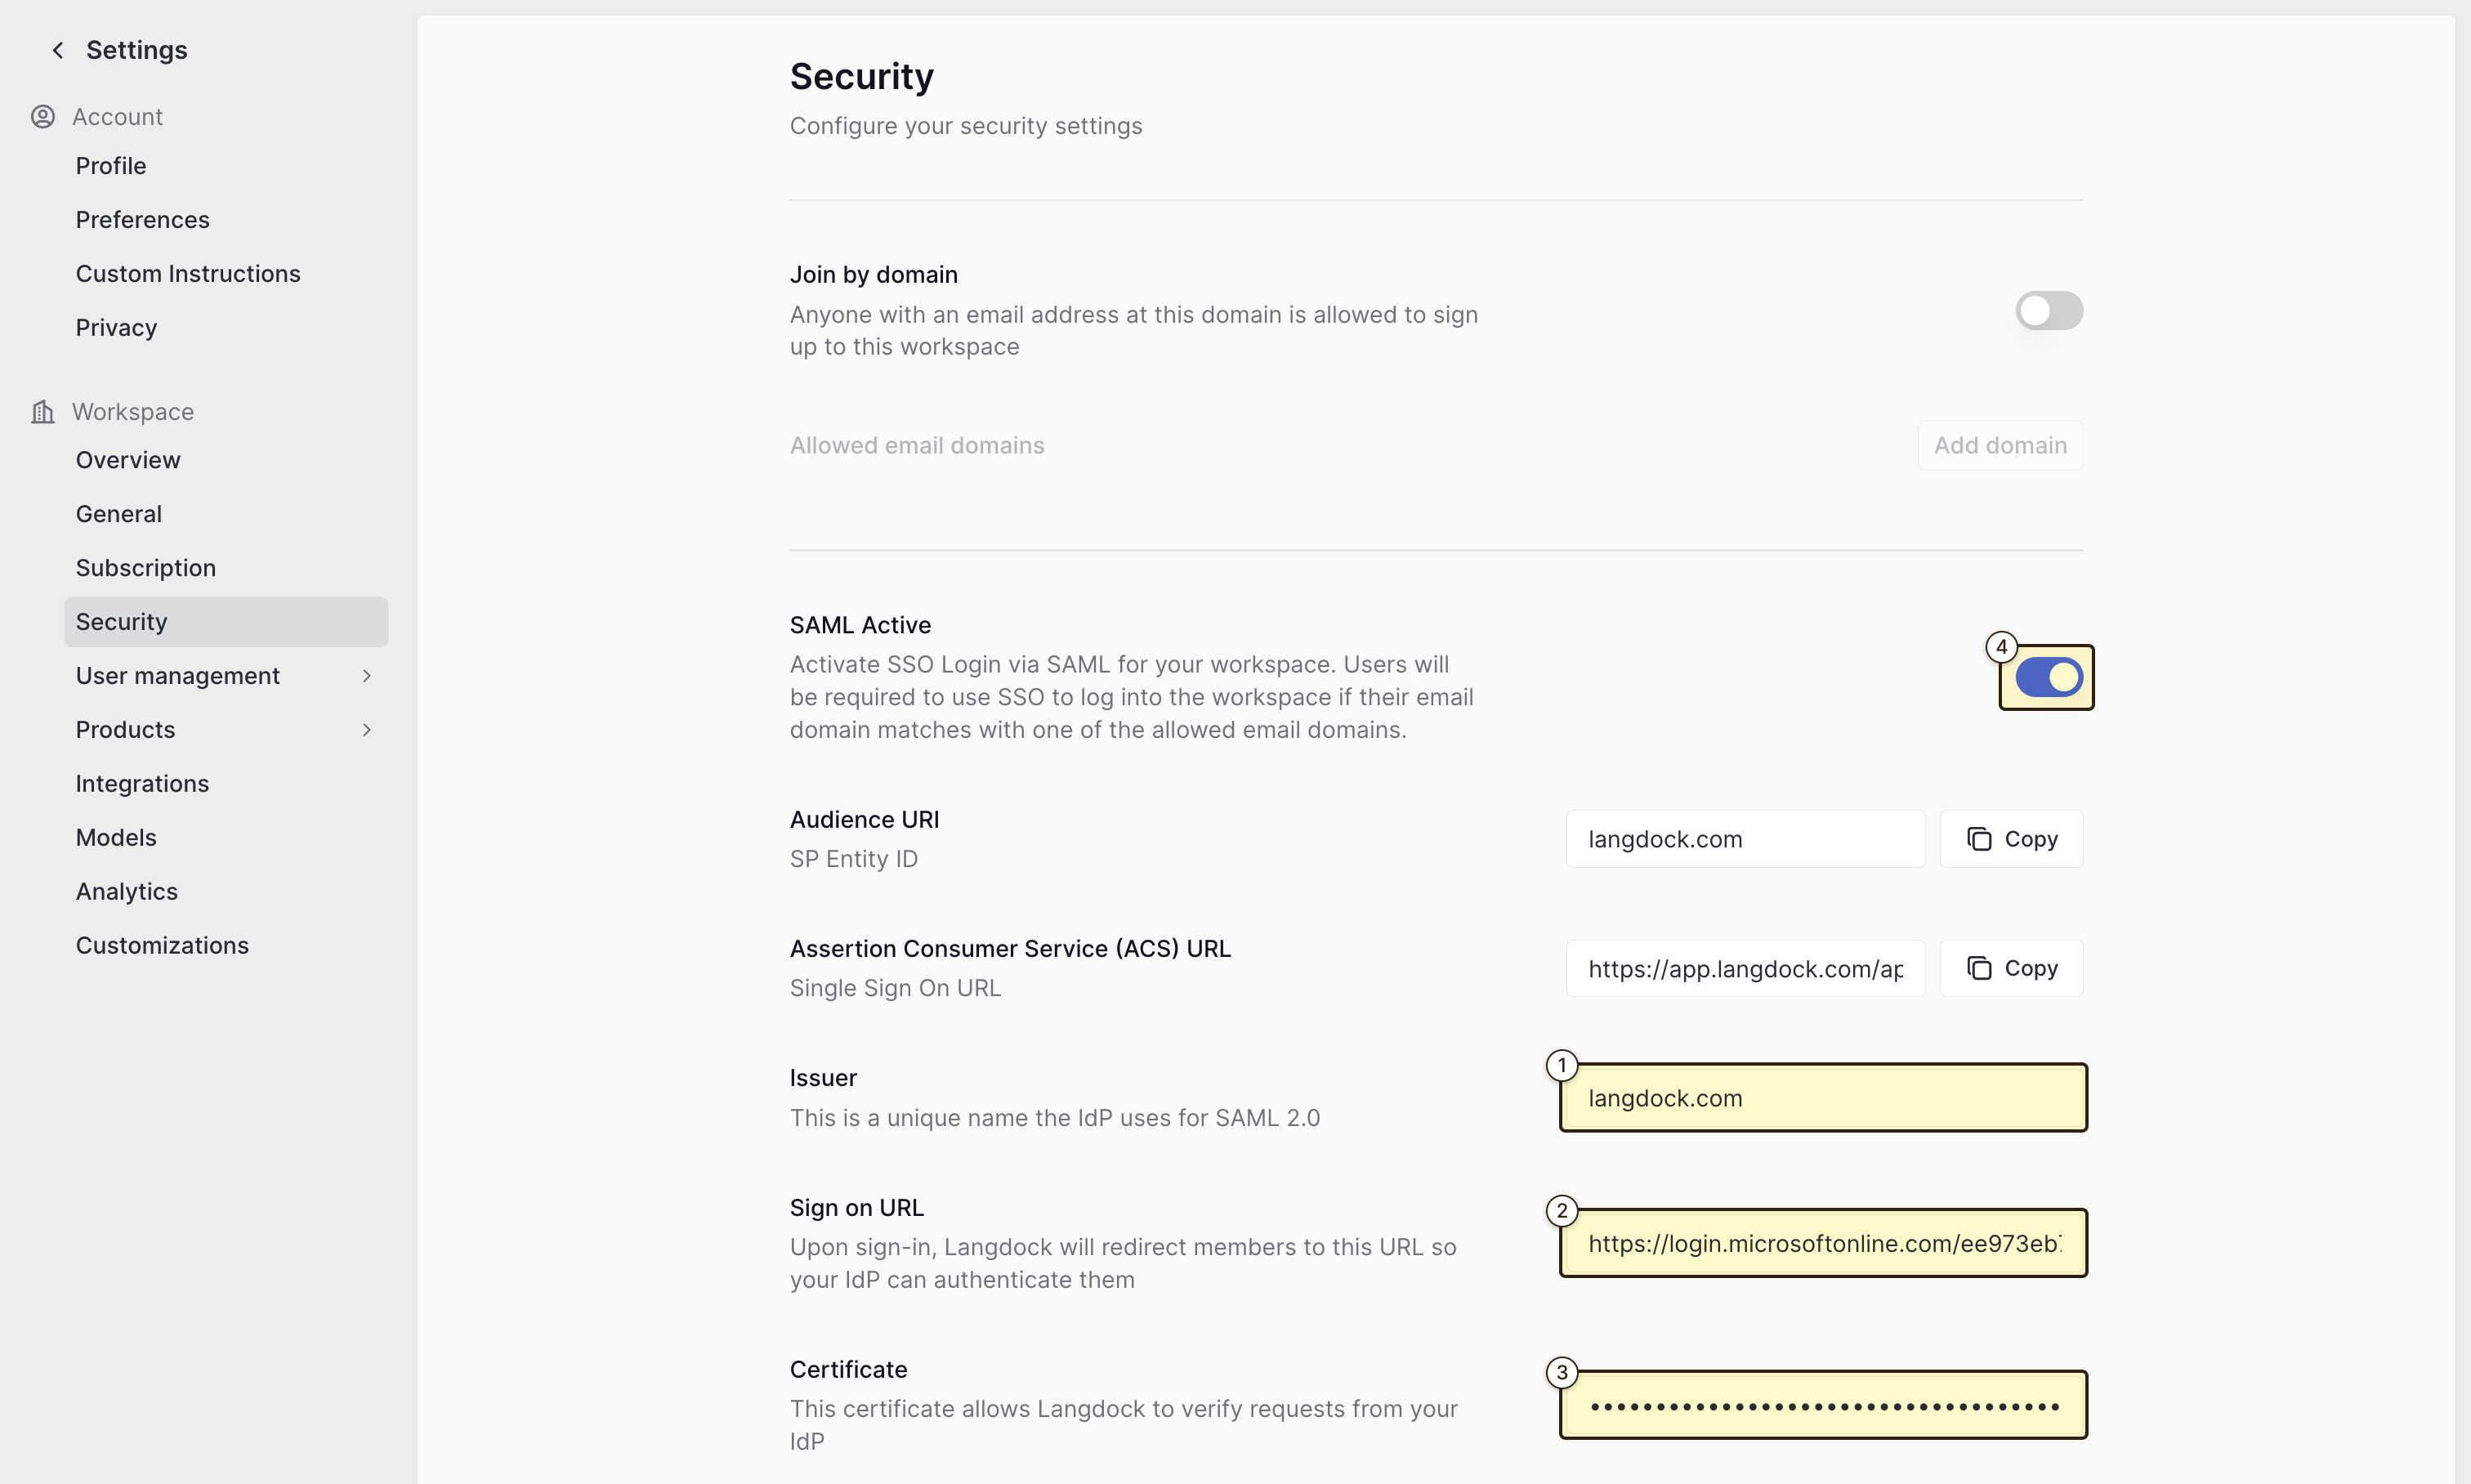
- The “Audience URI (SP Entity ID)” value(
langdock.com) - The “Assertion Consumer Service (ACS) URL” value
- “Identifier (Entity ID)”: The “Audience URI (SP Entity ID)” value from Langdock
- “Reply URL (Assertion Consumer Service URL)”: The “Assertion Consumer Service (ACS) URL” value from Langdock
- Setting the “Signing Option” to “Sign SAML response and assertion”
- Setting the “Signing Algorithm” to “SHA-256”
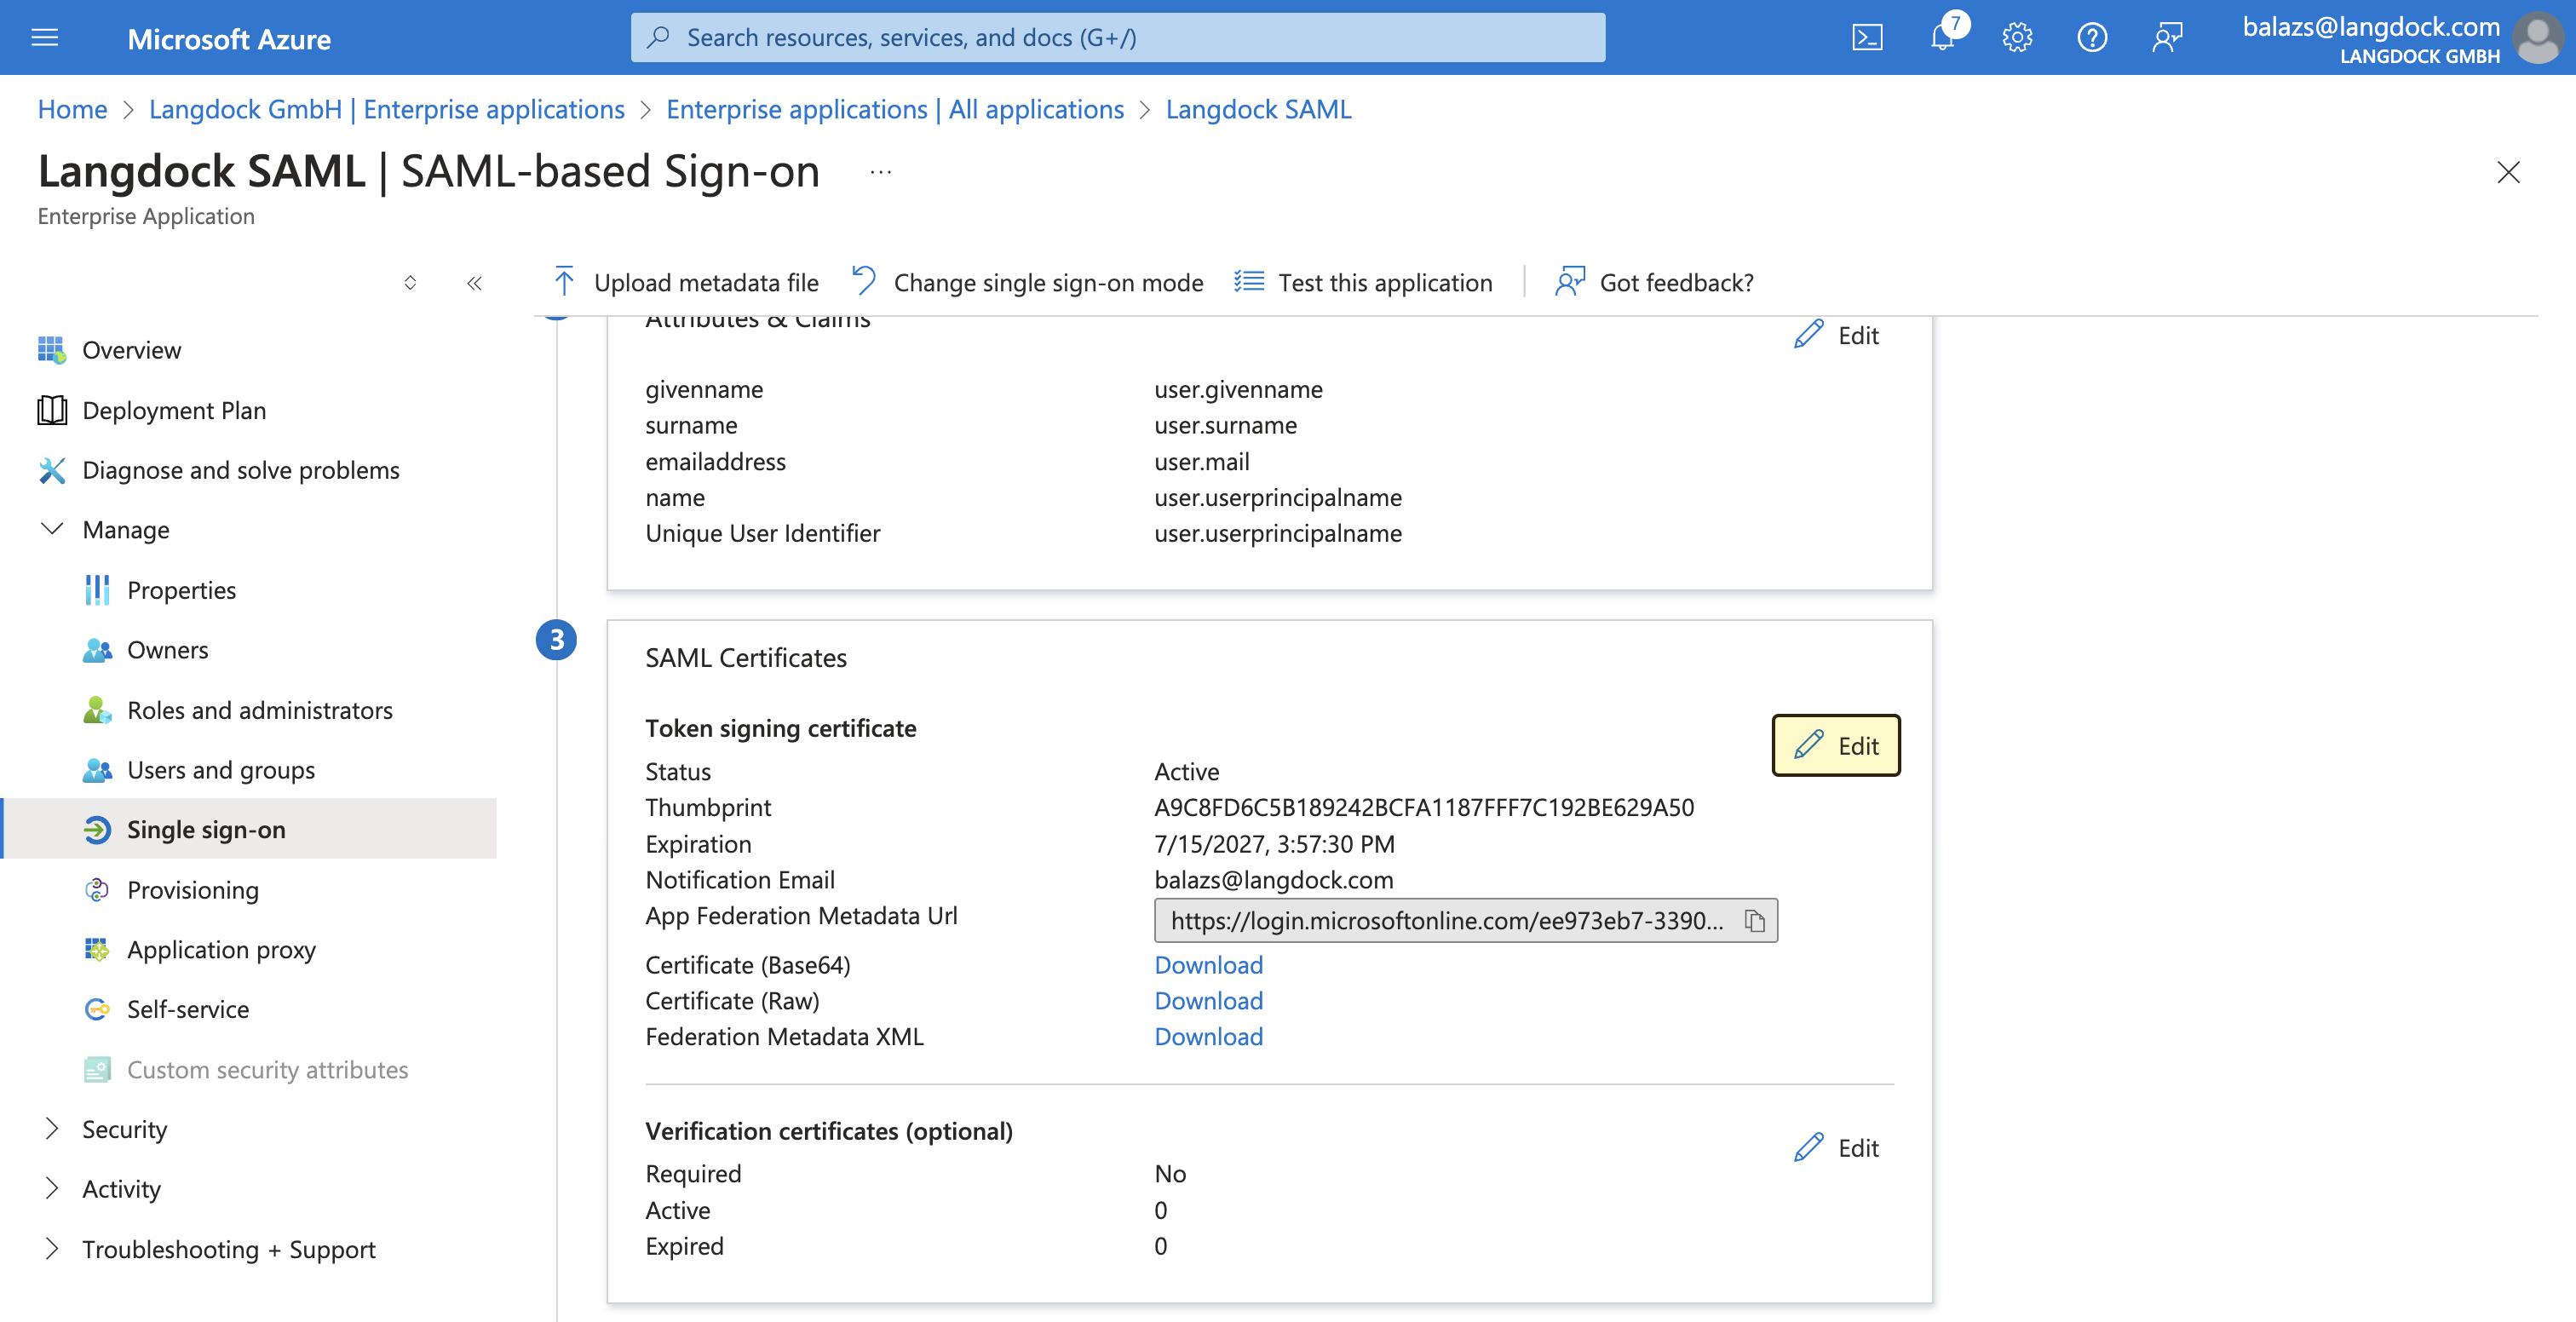

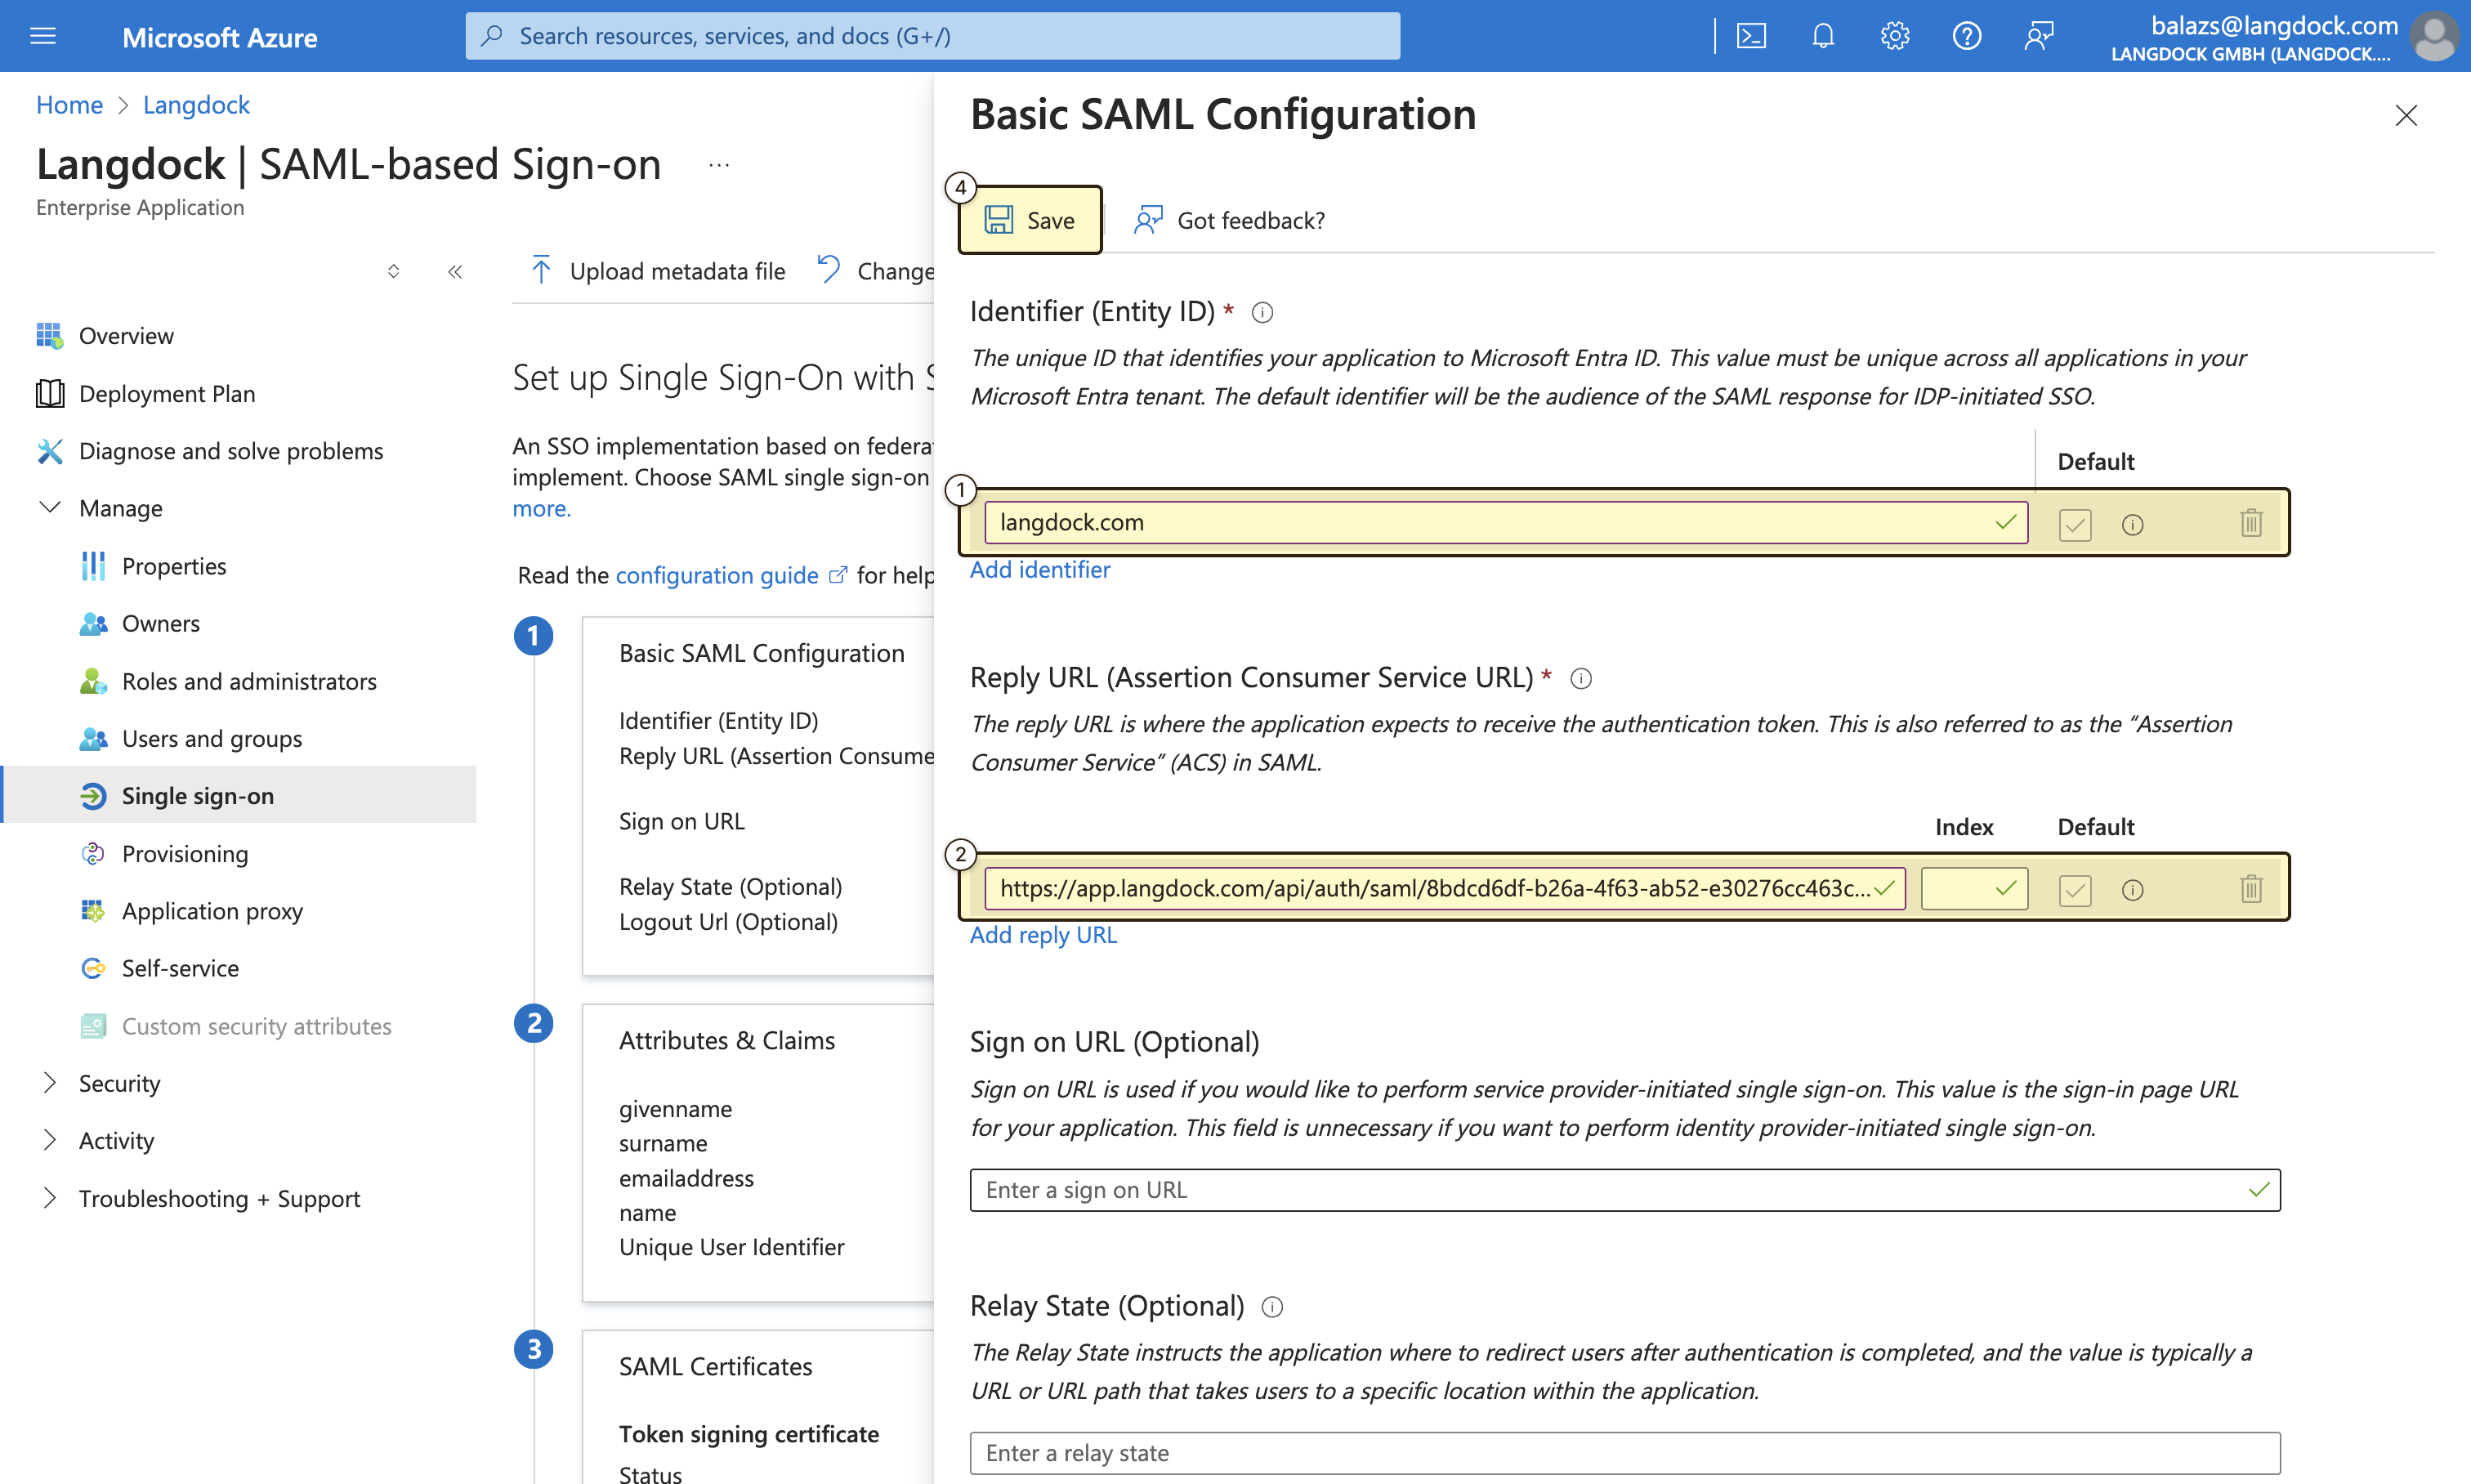
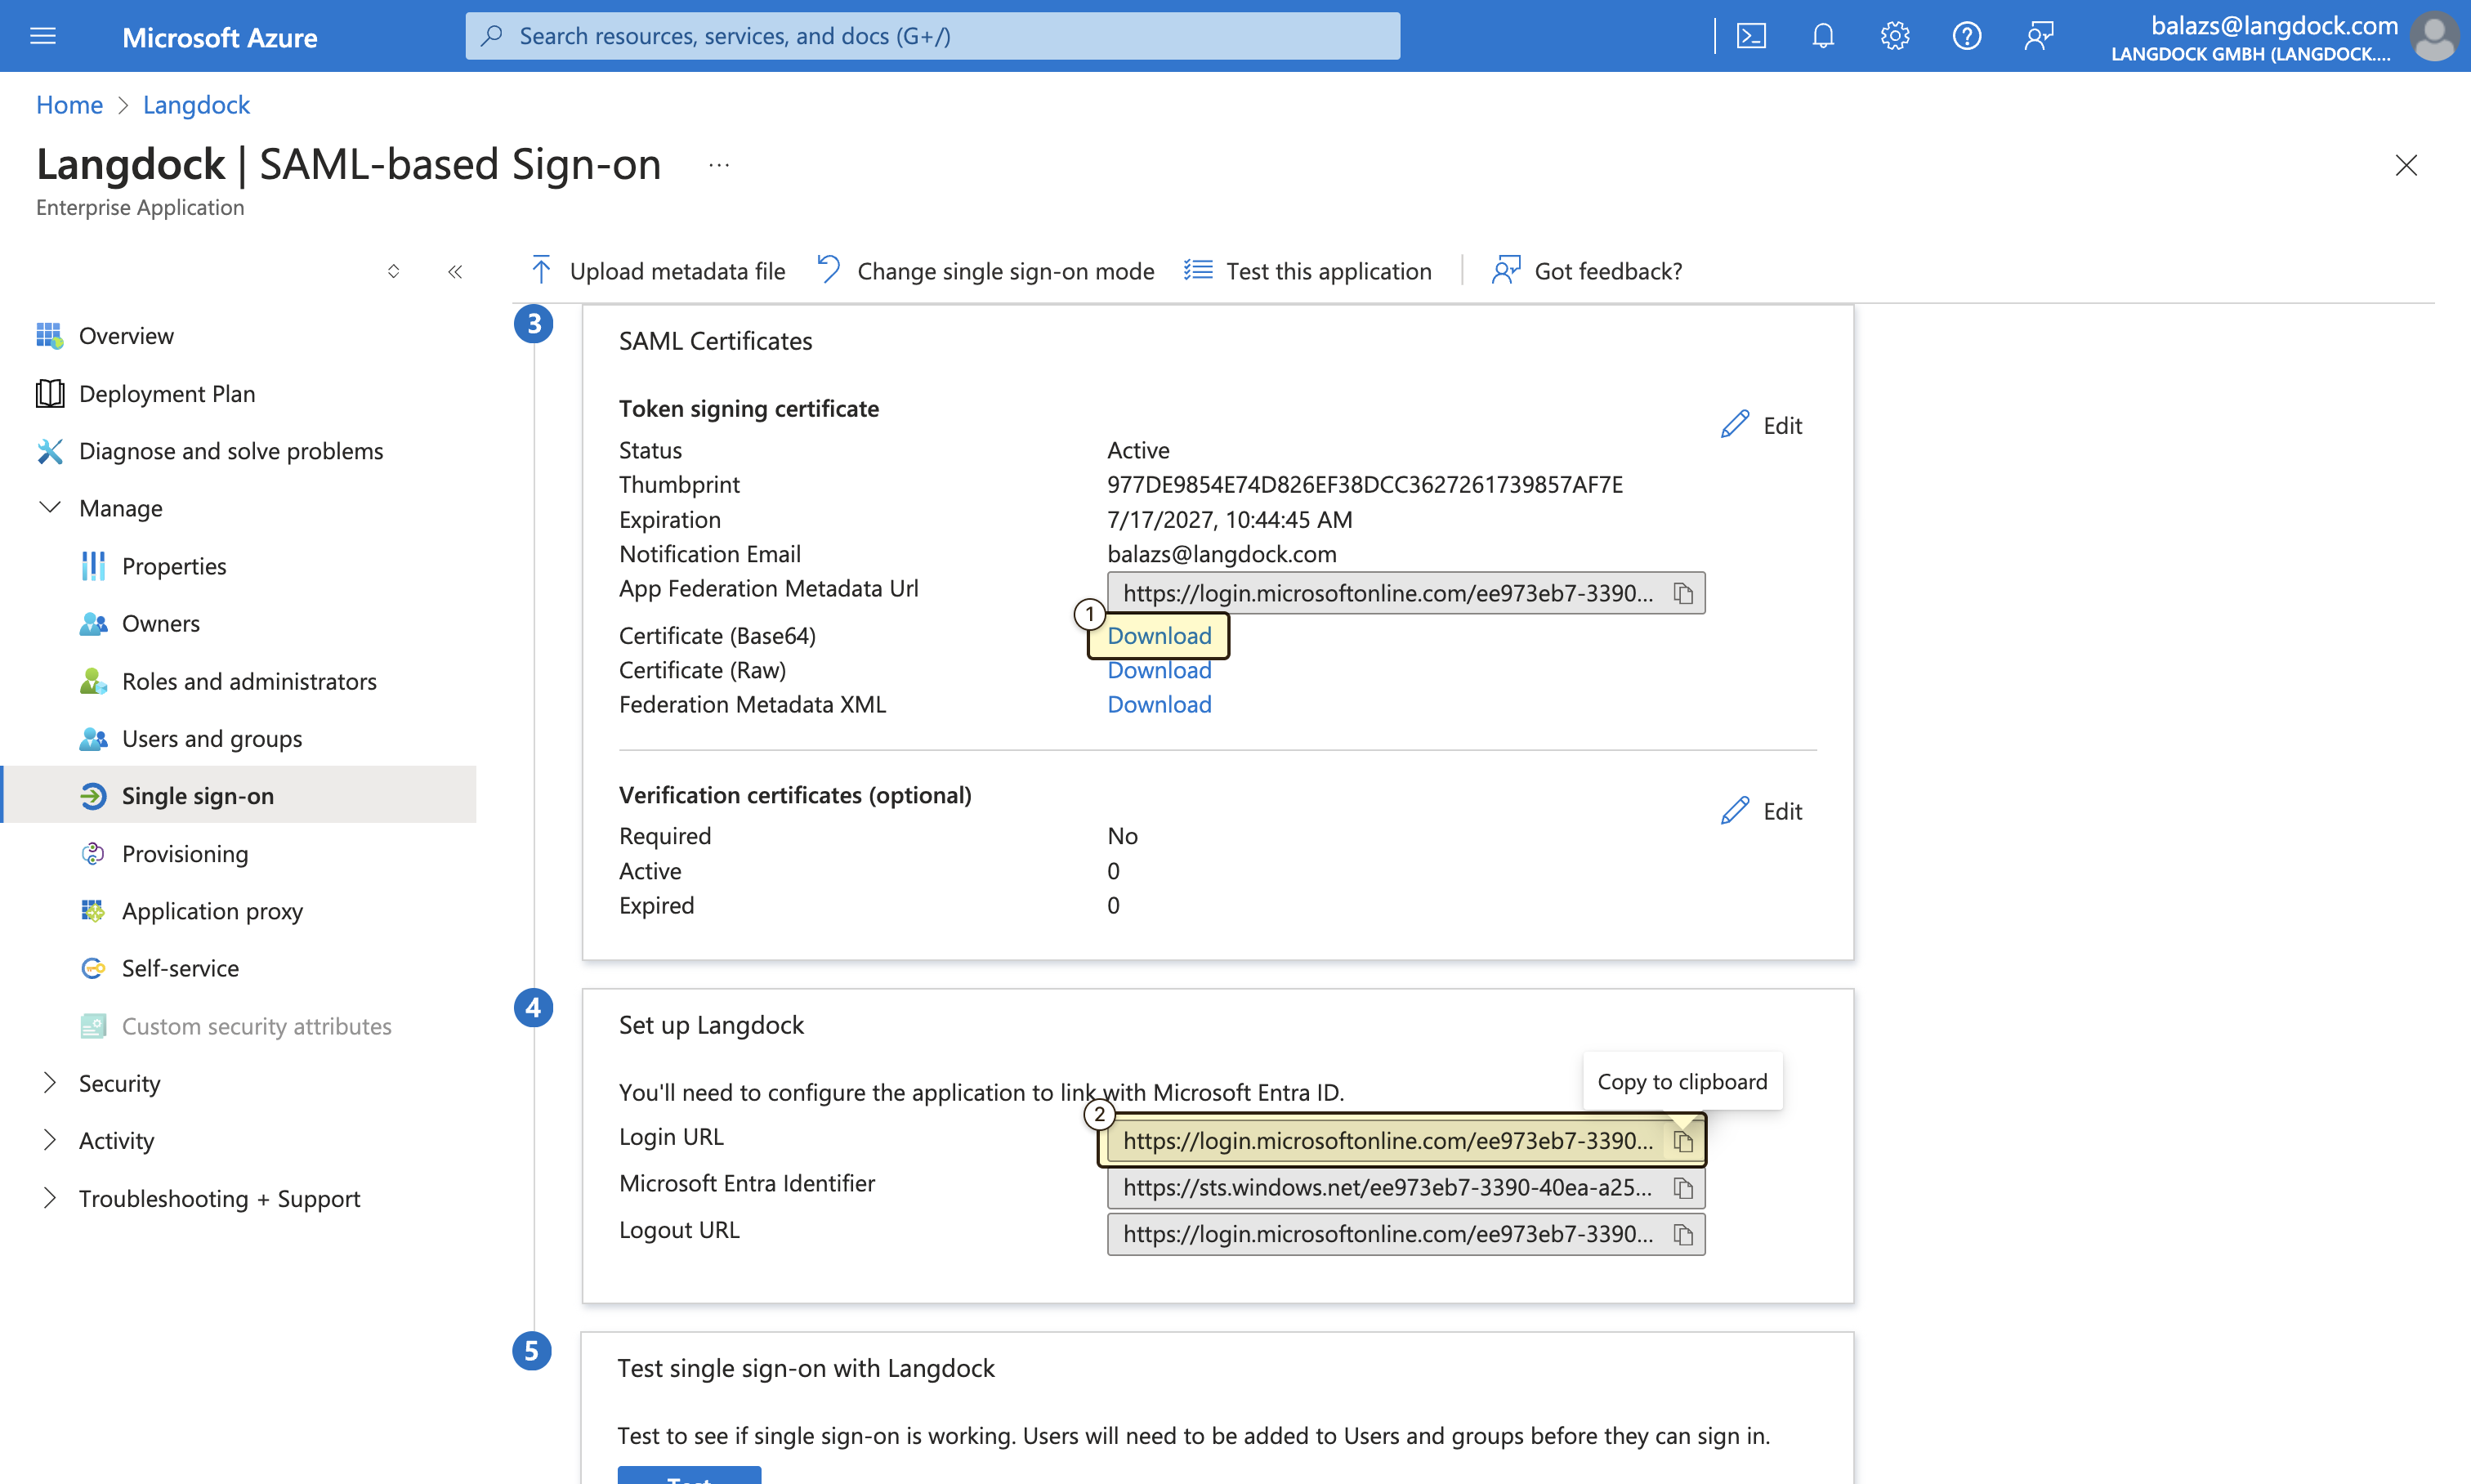
- In the “SAML Signing Certificate” section of your Entra ID portal, click on “Download” next to “Certificate (Base64)” link to download the certificate. Copy the entire certificate so that the beginning and end match the example below:
- Copy the “Login URL” value from the “Set up Langdock” section in your Entra ID portal.
- Fill in the “Issuer” field with the Audience URI specified earlier (
langdock.com). - Paste the “Login URL” value from Entra ID into the “Sign on URL” field
- Paste the SAML Signing certificate content into the “Certificate” field
Assign Users to the Application
Before users can sign in to Langdock via SAML, they must be assigned access to the Enterprise application in Entra ID. By default, Entra ID requires explicit user assignment to prevent unauthorized access. Follow these steps to grant users access:- In your Entra ID portal, navigate to the Langdock Enterprise application you created
- In the left menu, select “Users and groups”
- Click on ”+ Add user/group”
- Under “Users”, click on “None Selected” and search for the users you want to grant access to
- Select the users or groups that should have access to Langdock
- Click “Select” and then “Assign”
Best Practice: For organizations with multiple users, we recommend creating a dedicated Entra ID security group (e.g., “Langdock Users”) and assigning this group to the application. This makes it easier to manage access as your team grows.
Alternative: Allow All Users
If you want to allow all users in your organization to access Langdock automatically without explicit assignment:- In your Entra ID portal, navigate to the Langdock Enterprise application
- In the left menu, select “Properties”
- Set “Assignment required?” to “No”
- Click “Save”
Test the SAML setup
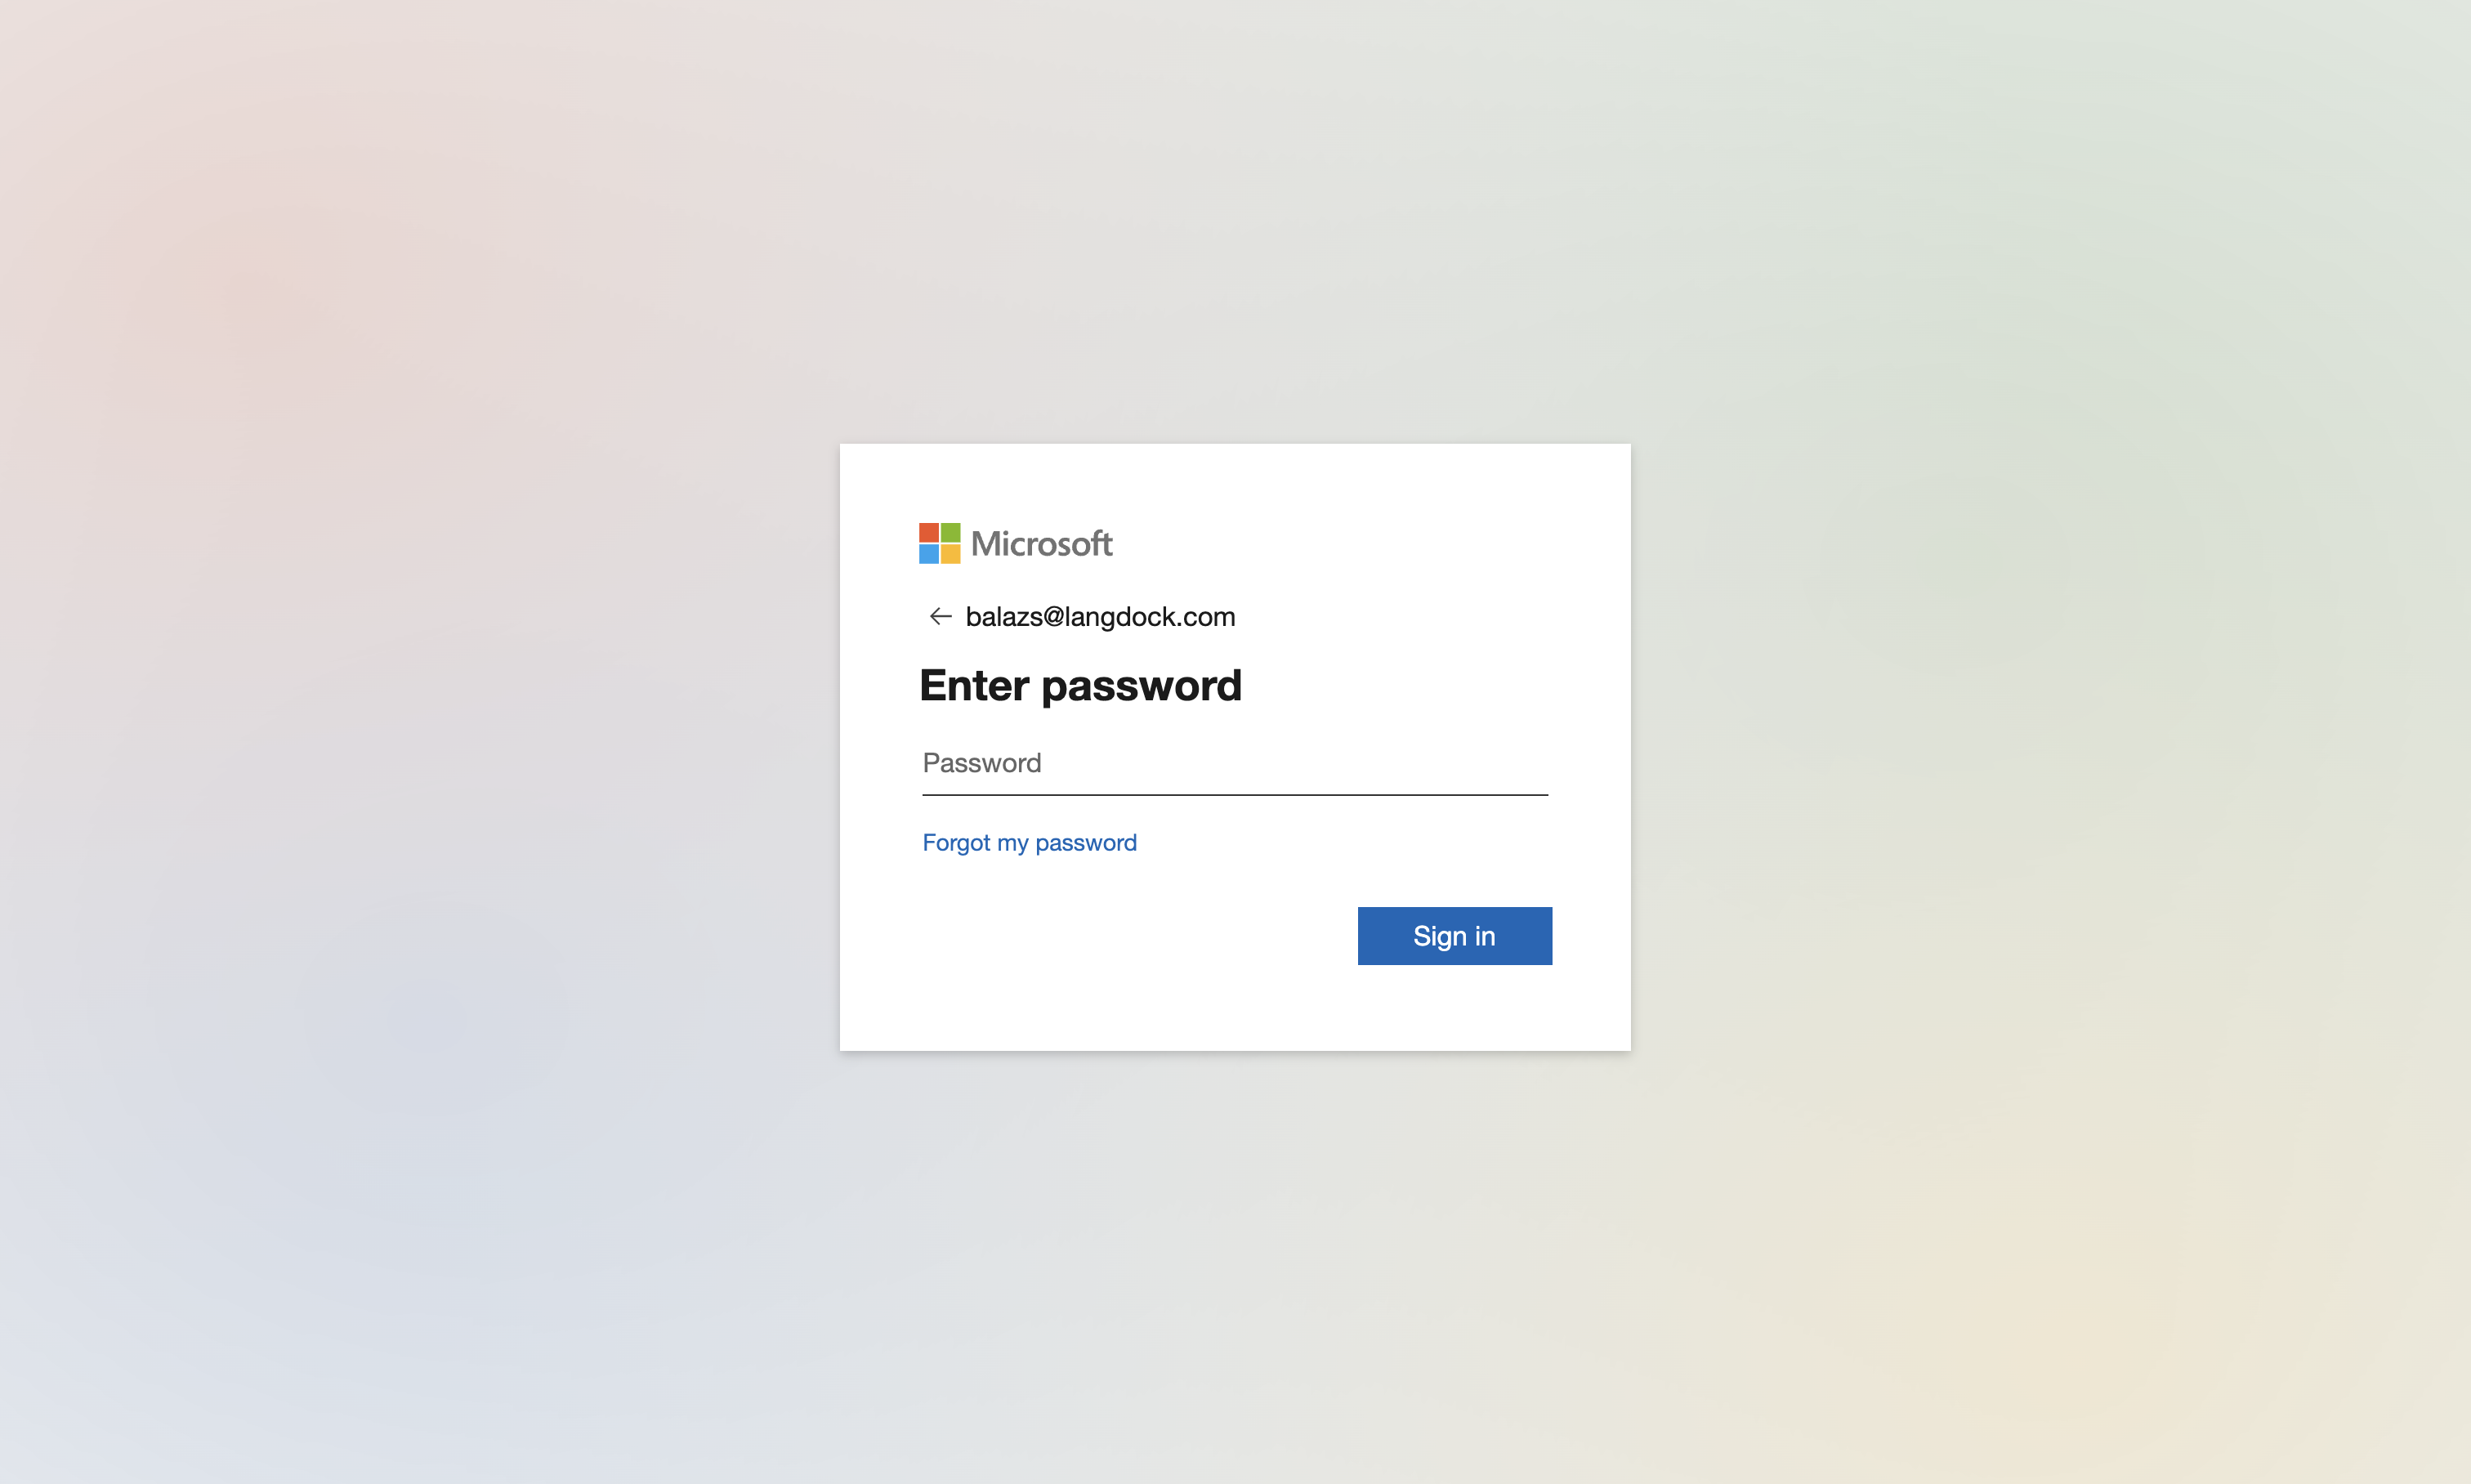
To test the setup, please stay logged in to the current browser session and open a separate browser or an incognito window and navigate to https://app.langdock.com.

Multiple Entra ID Tenants with One Workspace
Langdock integrates with a single identity provider per workspace, so connecting multiple Entra tenants directly isn’t supported. The recommended approach is to route all authentication through one hub tenant and use Microsoft’s B2B, cross-tenant synchronization, and cross-tenant access policies to bring users from other tenants in automatically.Multiple Workspaces with the Same Entra ID Tenant
If you want to connect multiple Langdock workspaces to the same Entra ID tenant, this is possible but requires manual configuration by the Langdock team.
- Ask the Langdock Team at support@langdock.com to create a new Workspace and provide you with the Assertion Consumer Service (ACS) URL.
- Create a separate Enterprise application in Entra ID for each workspace you want to connect (following the same steps as above)
- Use a unique Identifier (Entity ID) for each app registration. Instead of using
langdock.com, use a unique identifier likeyourcompany.langdock.comorworkspace-name.langdock.com - Enter the Assertion Consumer Service (ACS) URL provided by the Langdock Team.
- Contact Langdock support at support@langdock.com and provide the following information for each additional workspace:
- The Issuer (your unique Entity ID)
- The Login URL (Sign-on URL)
- The Certificate (Base64)
- All E-Mail domains of users that should be able to join the workspace. More details on that here.
Workspace Switching Behavior
When users have access to multiple SAML-enabled workspaces with the same domain:- After entering their email address during login, users will see a workspace picker to choose which workspace to access
- The regular “switch workspace” button is not available for SAML users
- To switch between workspaces, users need to log out and log in again, then select the desired workspace from the picker