Overview
This guide walks you through configuring SAML single sign-on with Google Workspace. You’ll create a custom SAML app in your Google Admin console, configure the authentication settings, and establish a secure connection between your identity provider and Langdock. Once complete, your users will be able to sign in to Langdock using their Google Workspace credentials.Setup Checklist
Verify that you have completed these steps from the setup checklist:Create a new custom SAML app
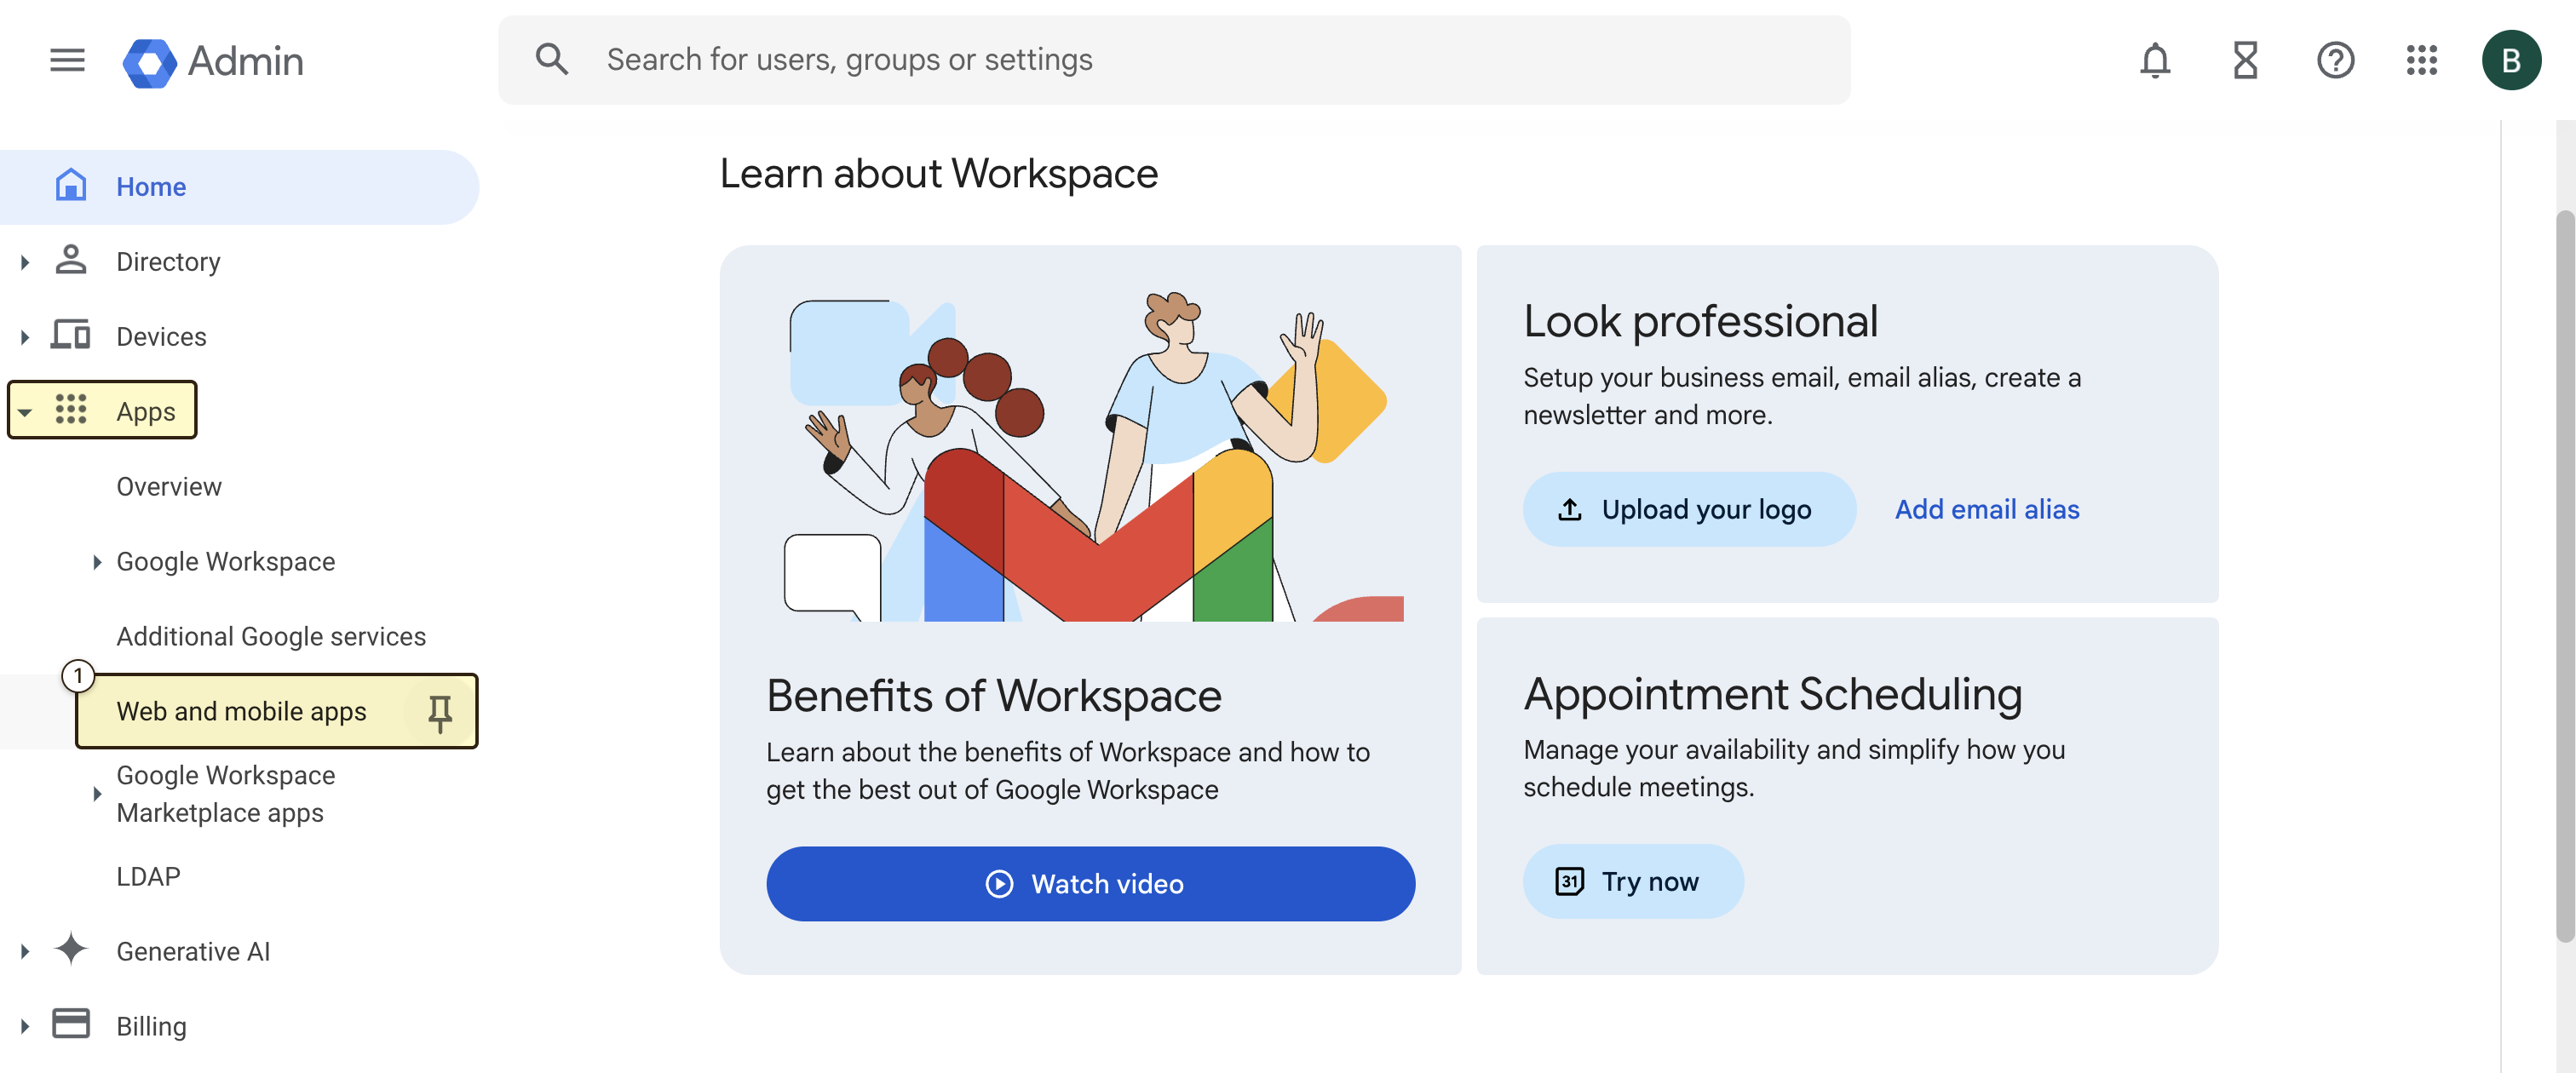
First, you need to create a new custom SAML app in your Google Workspace Admin console. To do this, follow these steps:- In your Admin console, navigate to the Menu and then “Apps” and then “Web and mobile apps”
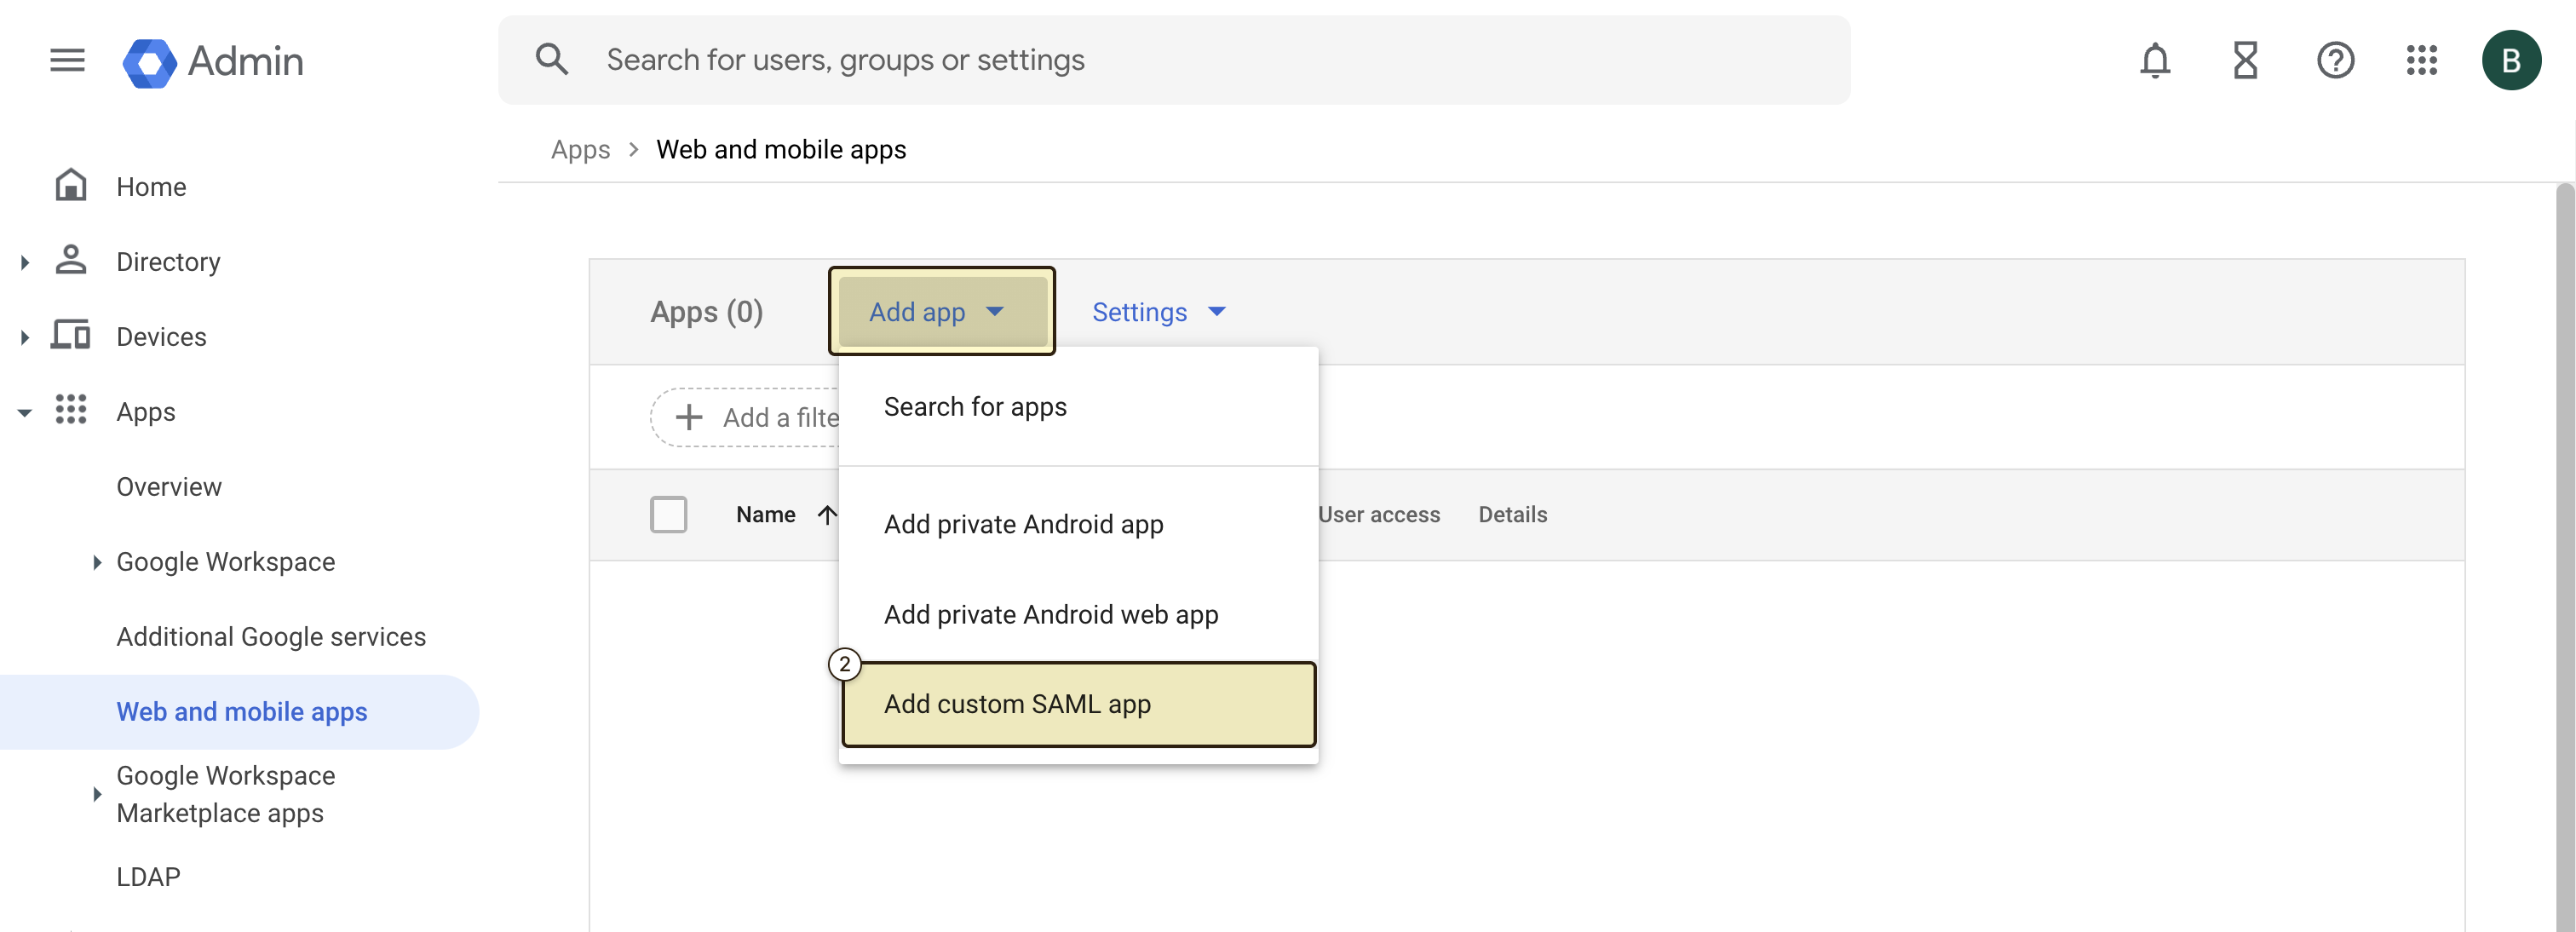
- Create a new custom SAML application by clicking on “Add app” and “Add custom SAML app”
- Name your application (e.g., “Langdock”) and, optionally, upload an icon
- Click Continue

SAML Configuration
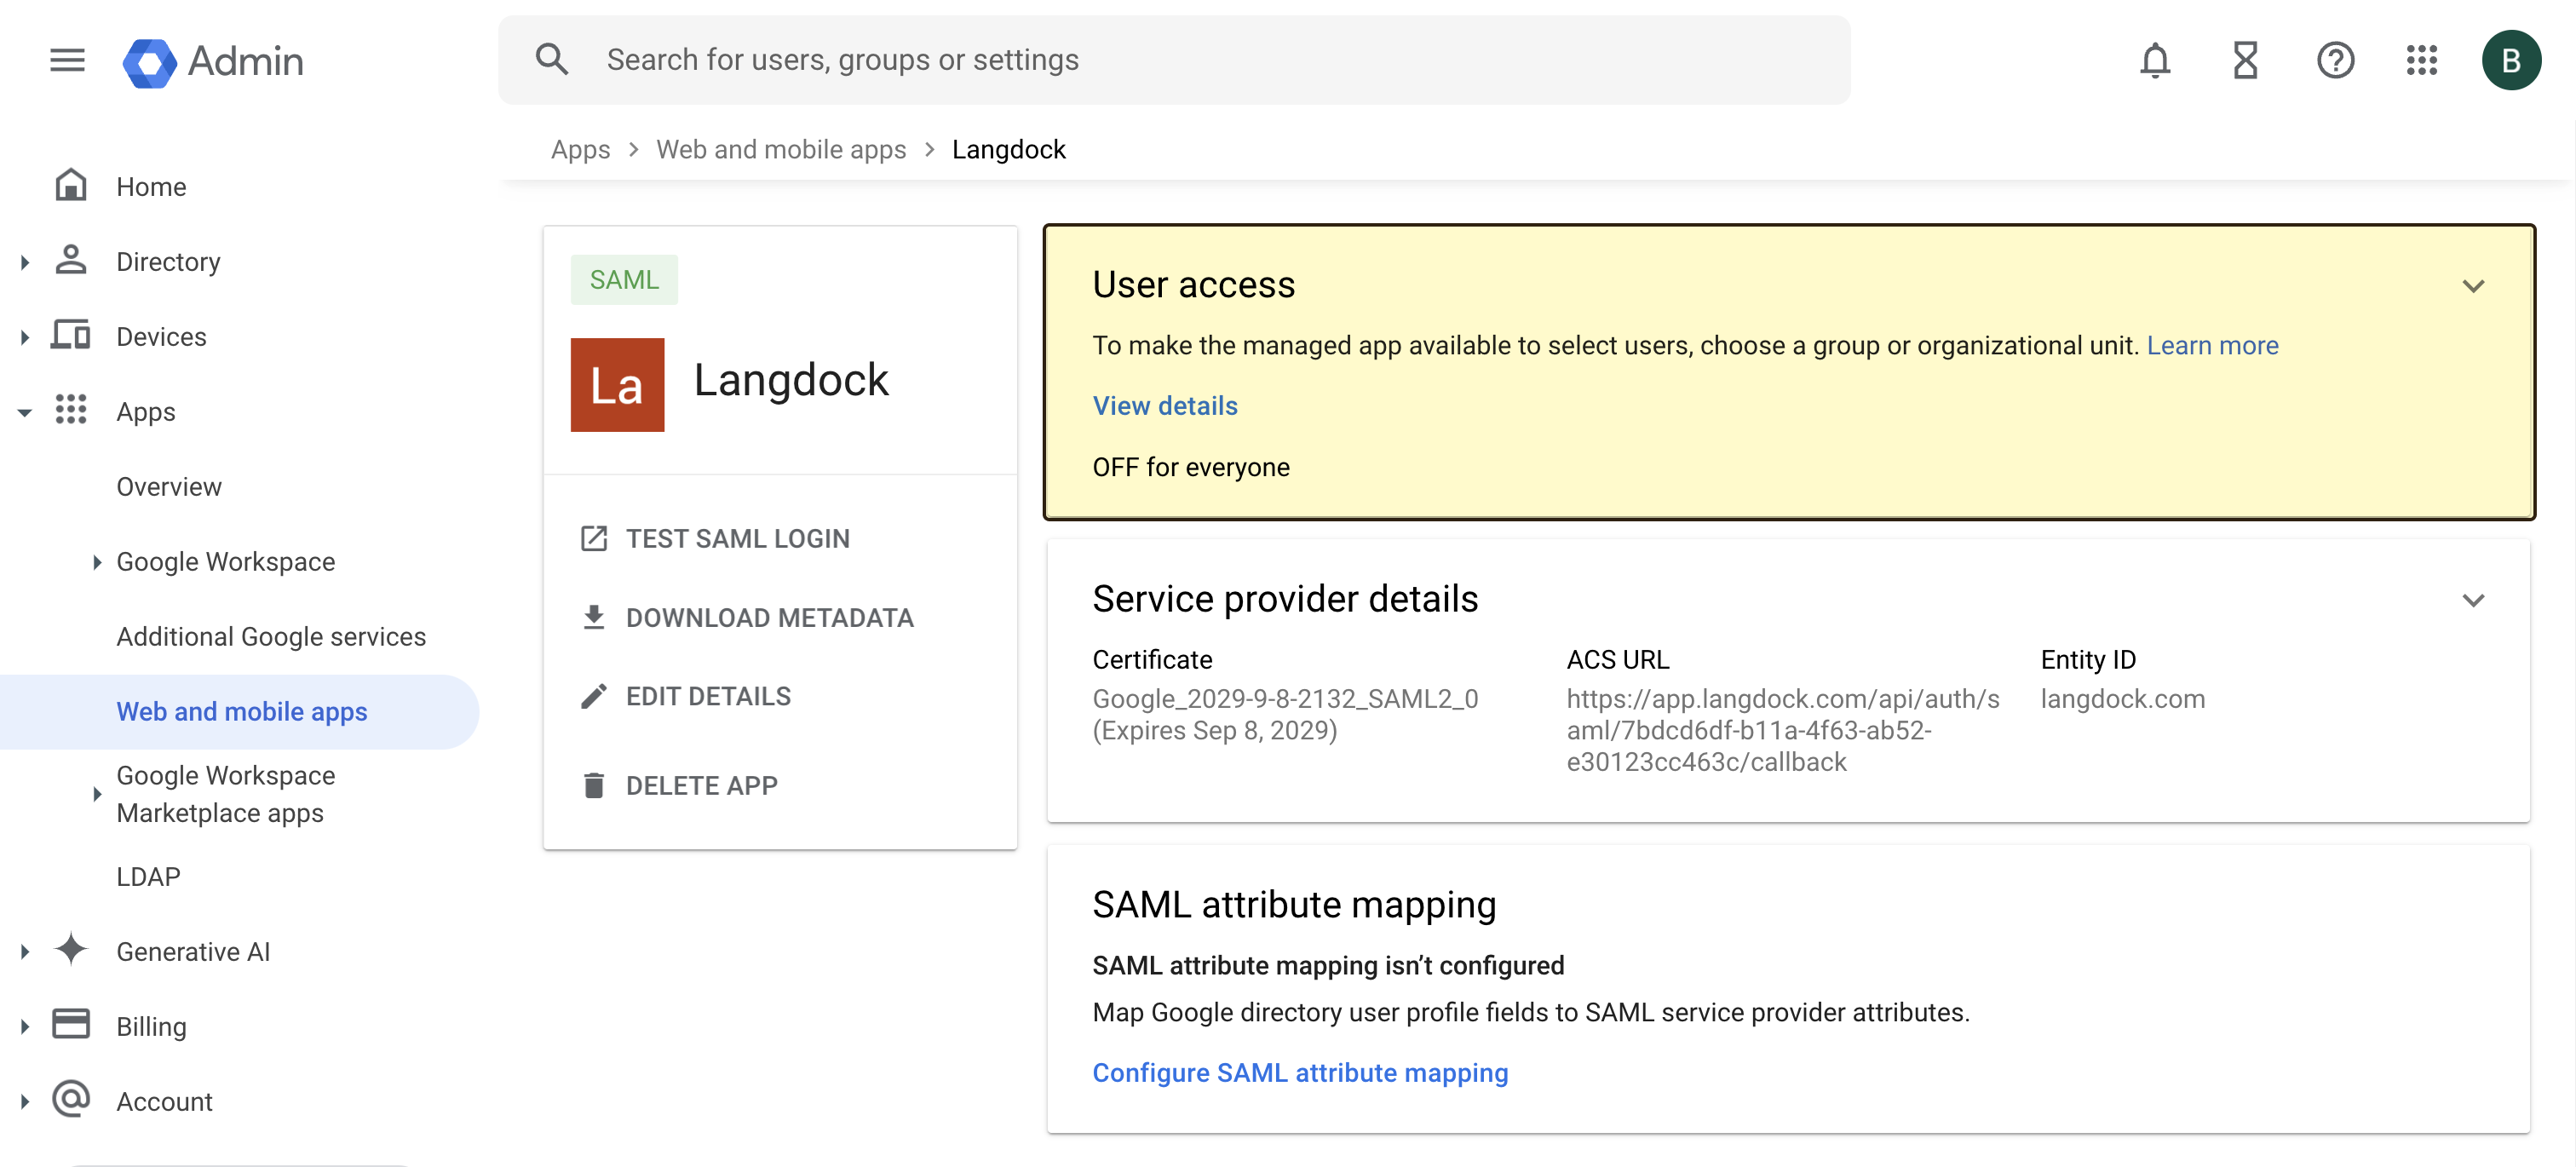
Langdock uses SAML 2.0 as the standard for SSO authentication. After creating the application, you need to configure the SAML settings, which will allow Langdock to authenticate users via SAML. First, you need to copy configuration values from the Google Workspace Admin console to Langdock. In Langdock, navigate to the Security settings and fill out the following fields:- “Audience URI”: Set this to a unique identifier for your SAML app (e.g.,
langdock.com) - “Issuer”: Use the same value as the Audience URI (e.g.,
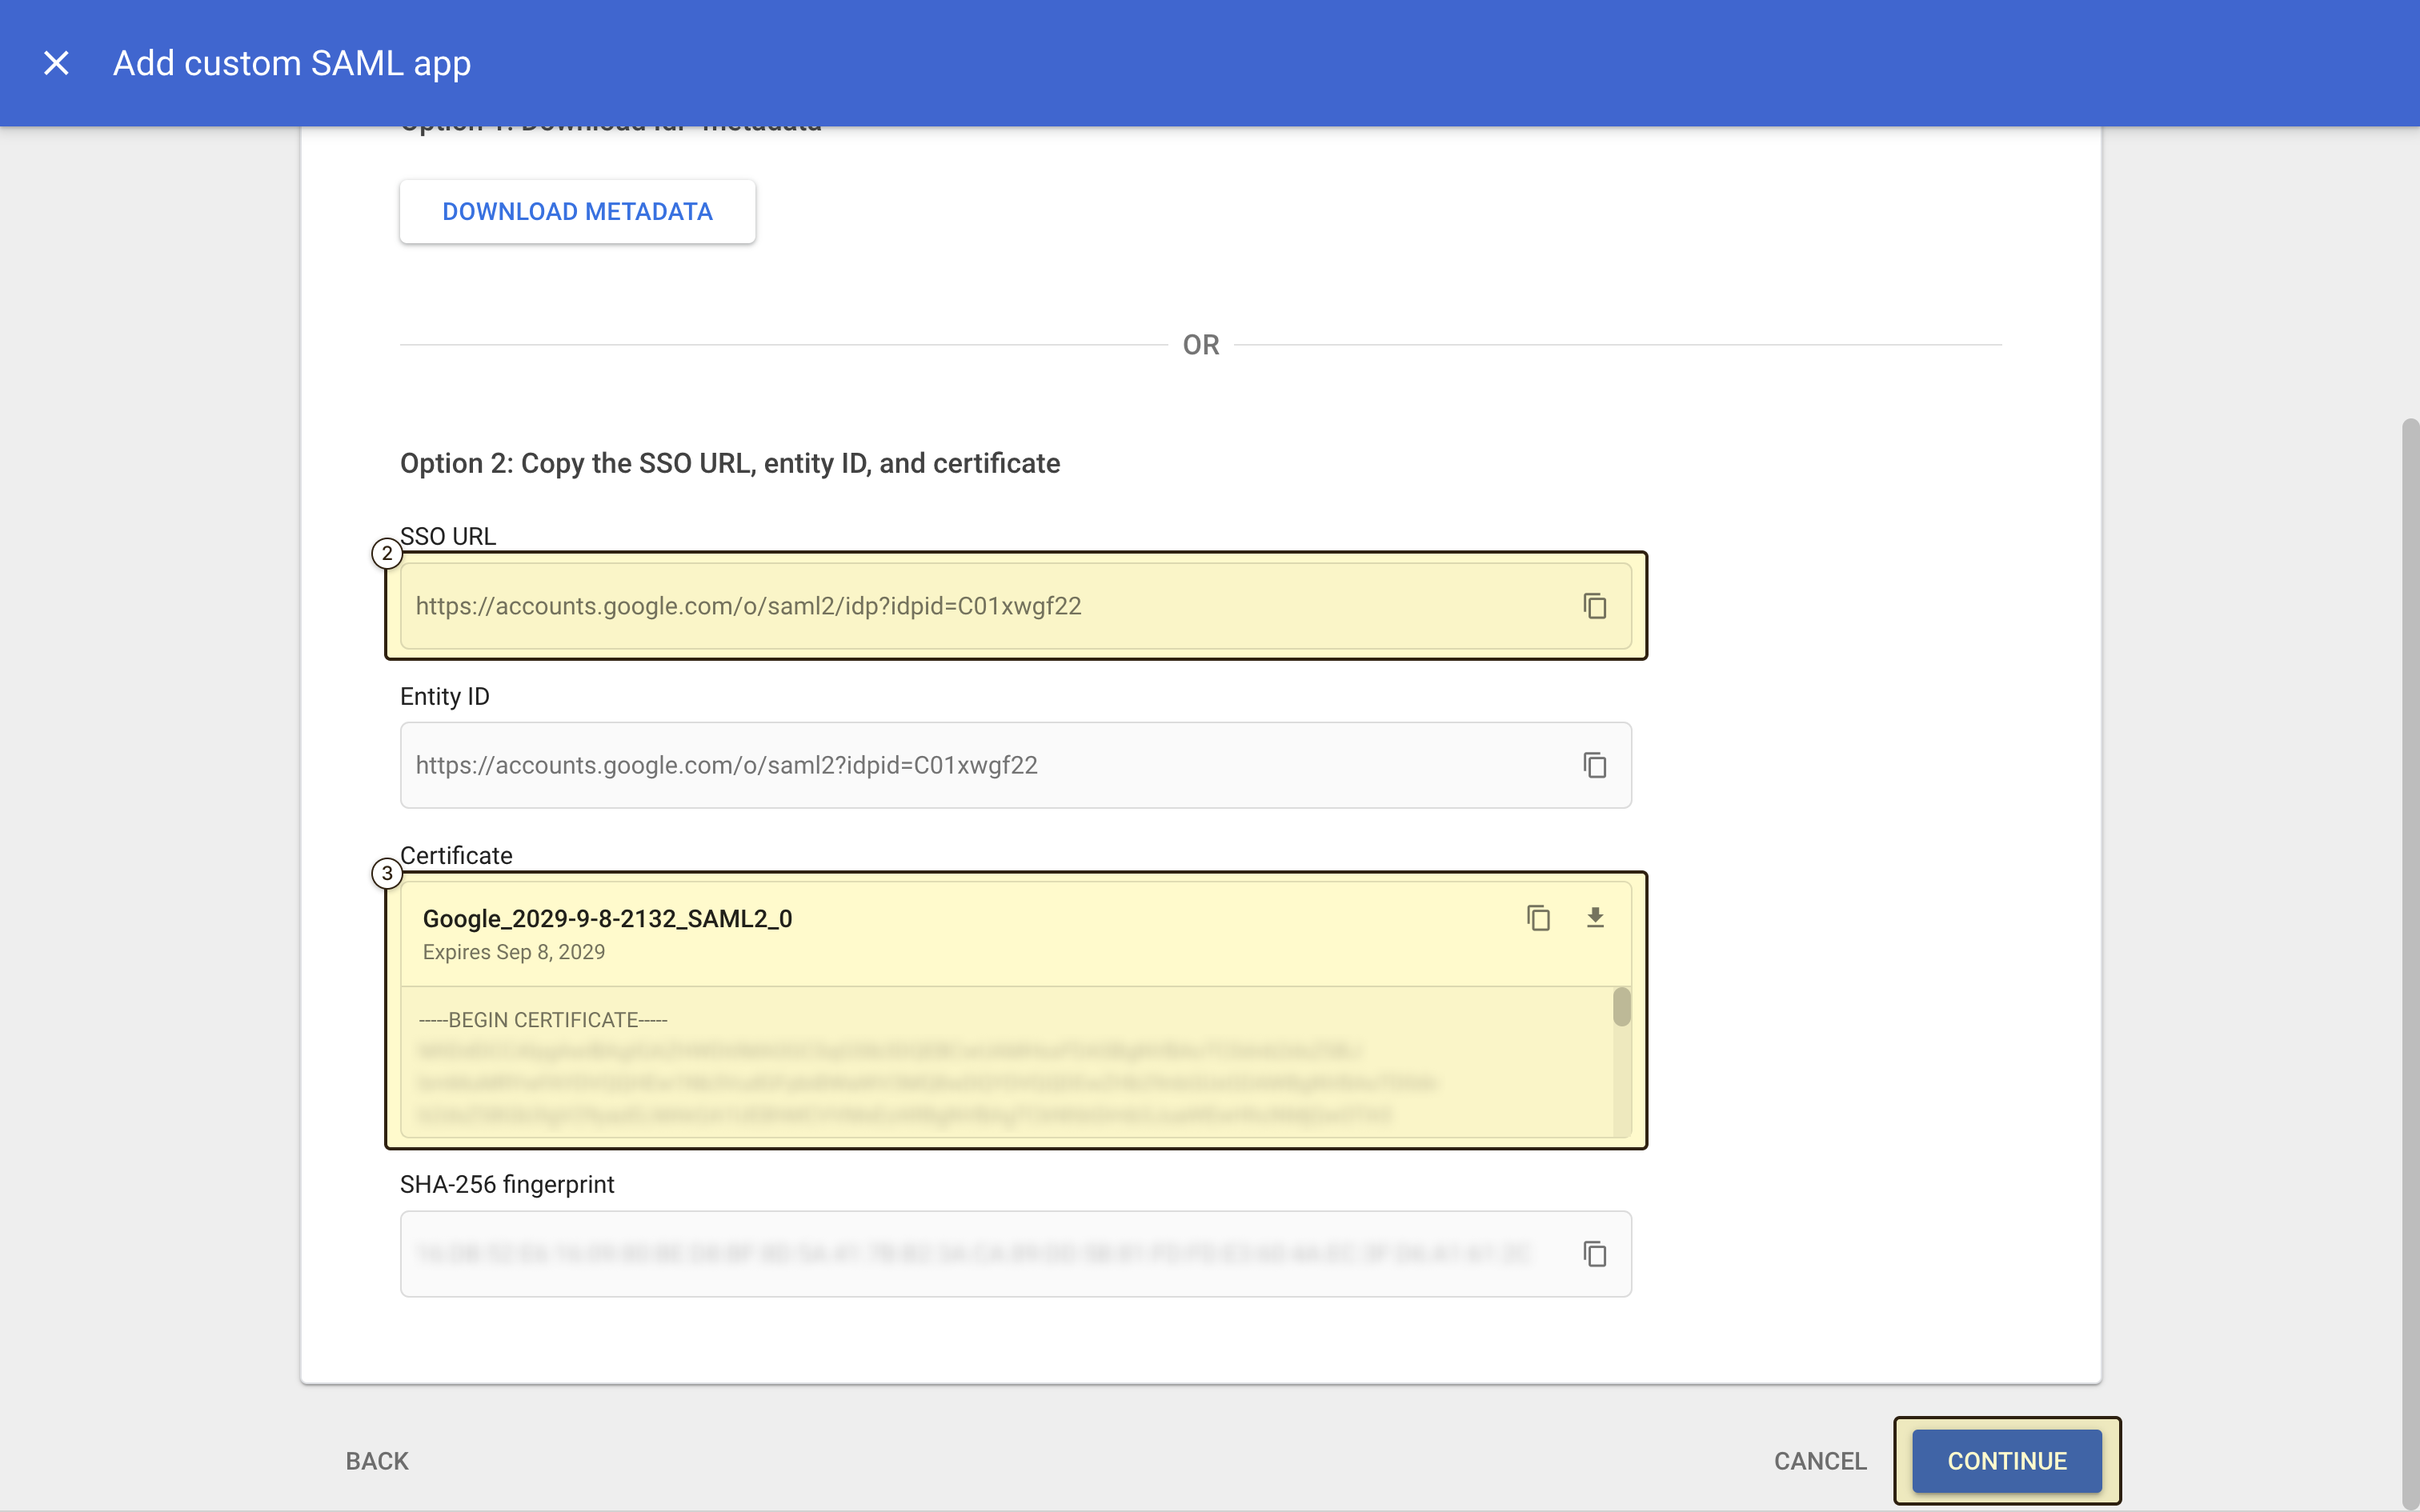
langdock.com) - “Sign on URL”: The “SSO URL” value from Google Workspace Admin console (e.g.,
https://accounts.google.com/o/saml2/idp?idpid=XXXXXXXXX) - “Certificate”: The “Certificate” value from Google Workspace Admin console. Copy the entire certificate so that the beginning and end match the example below:
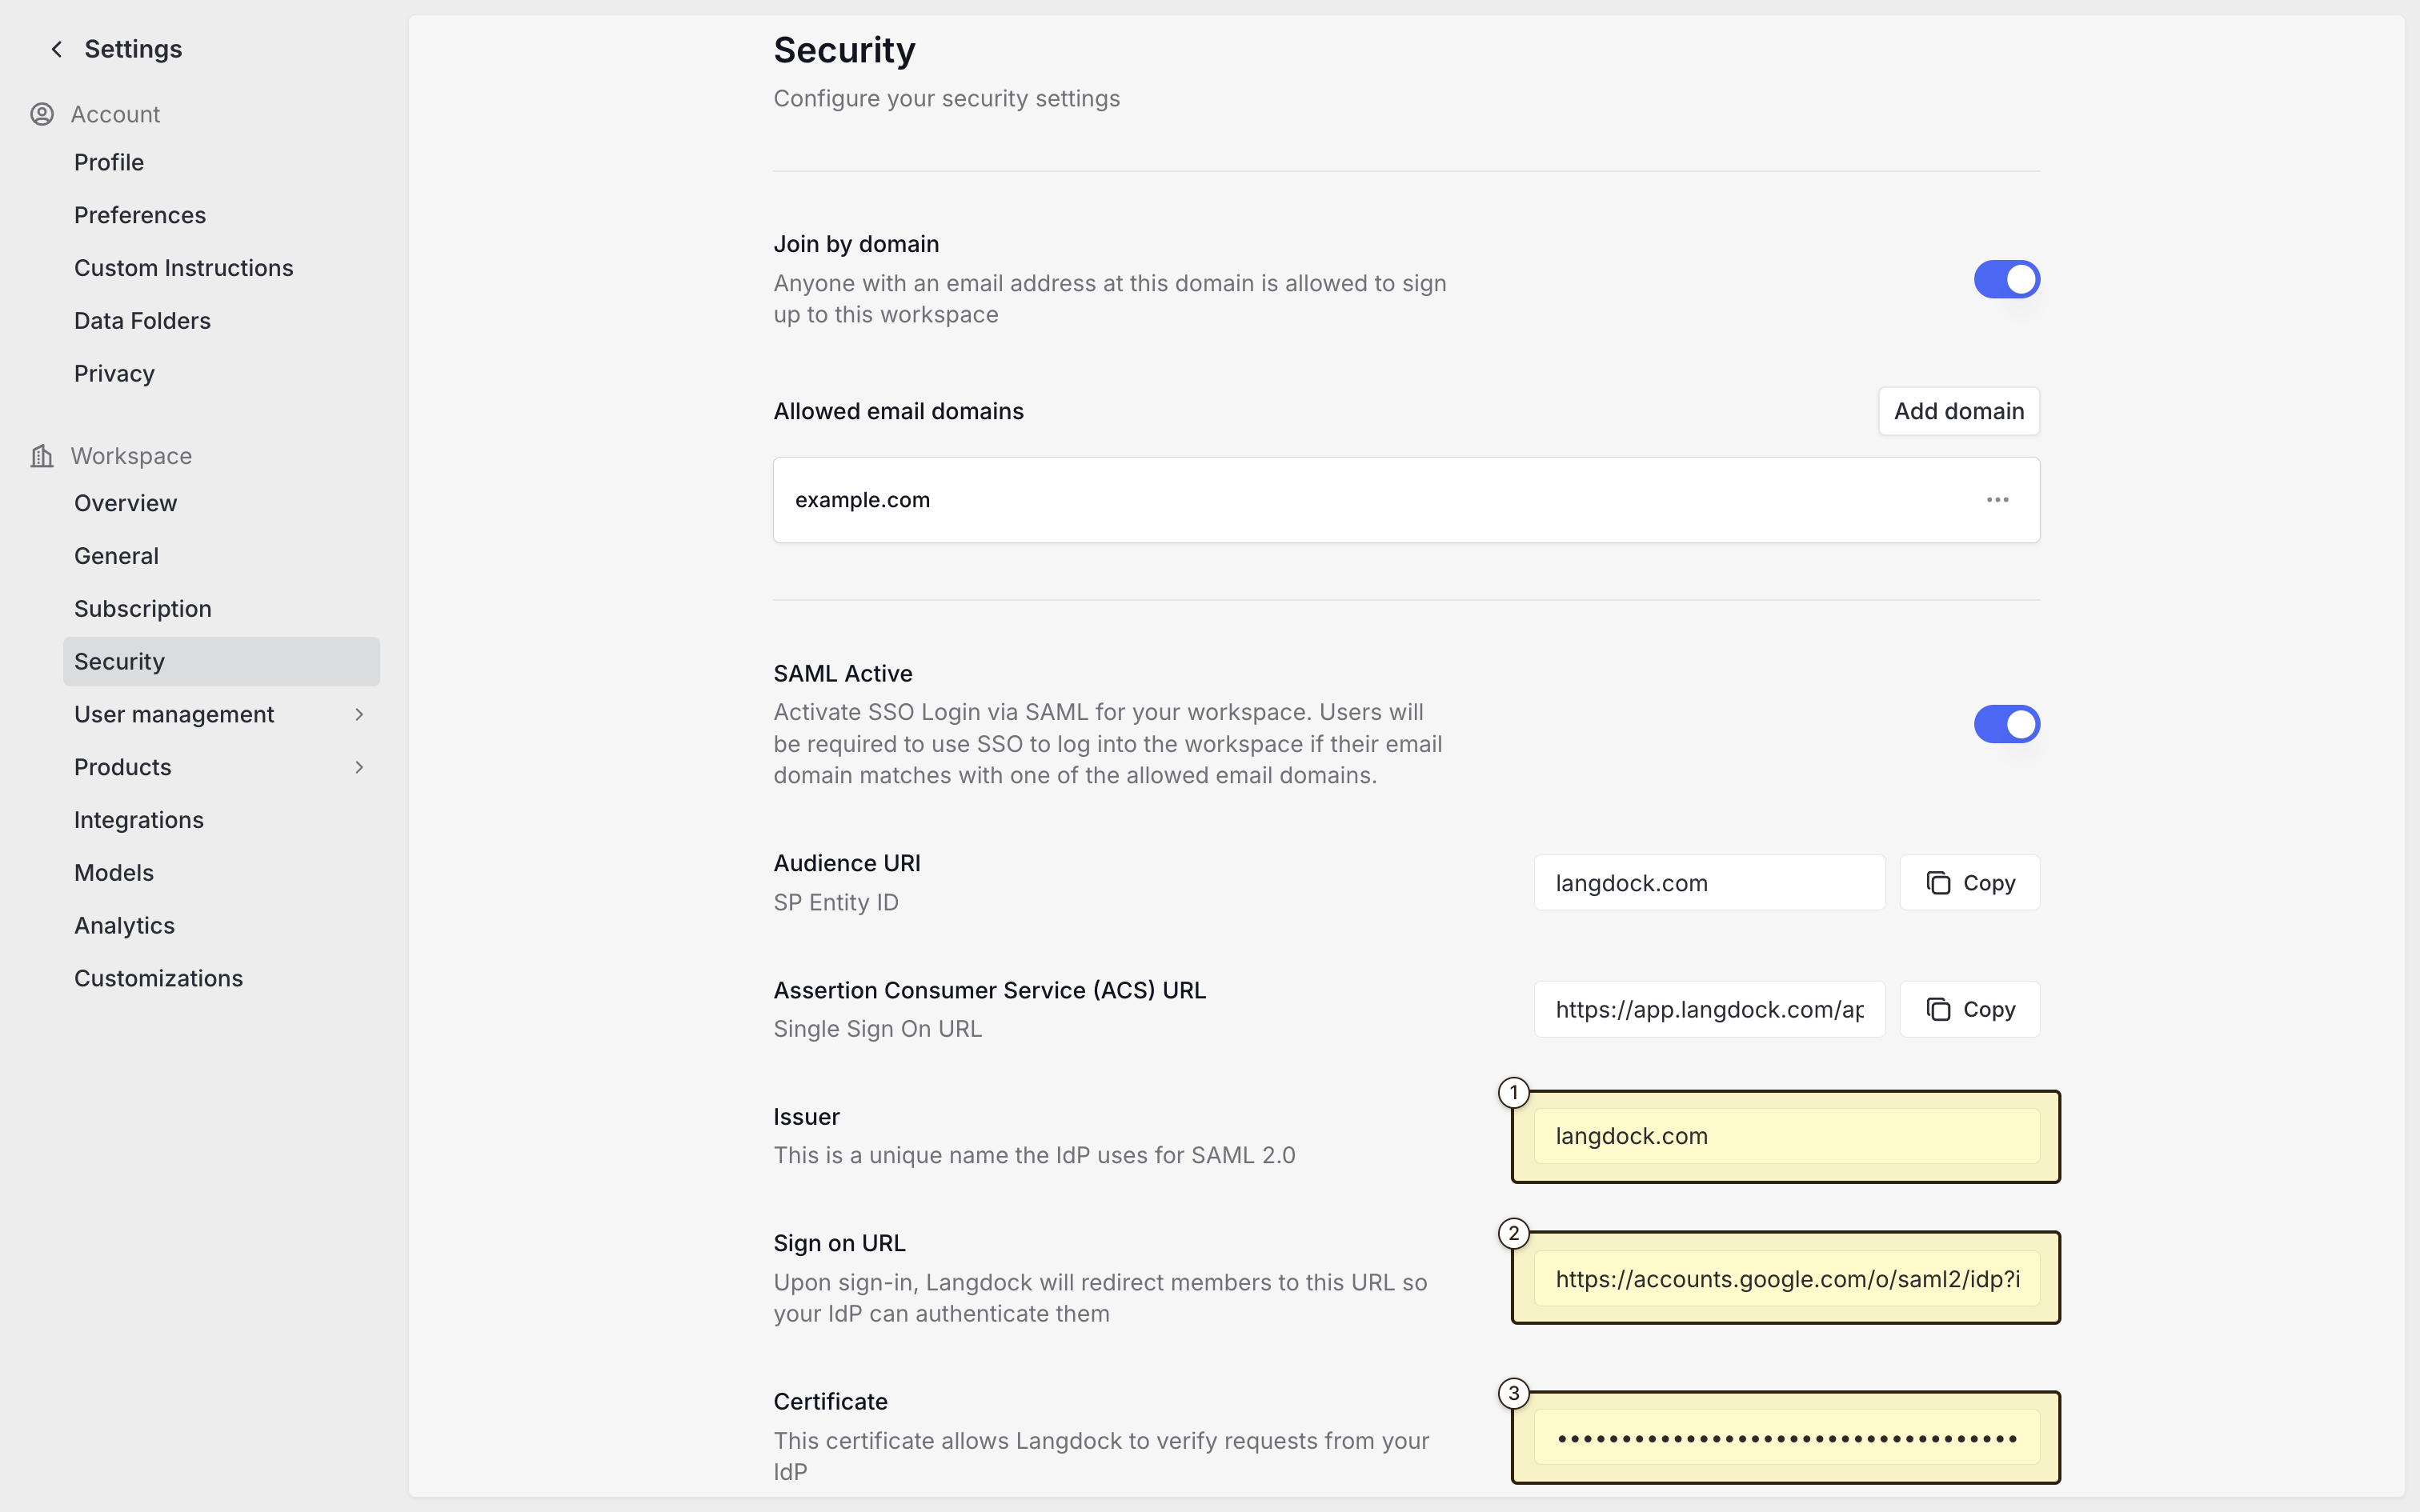
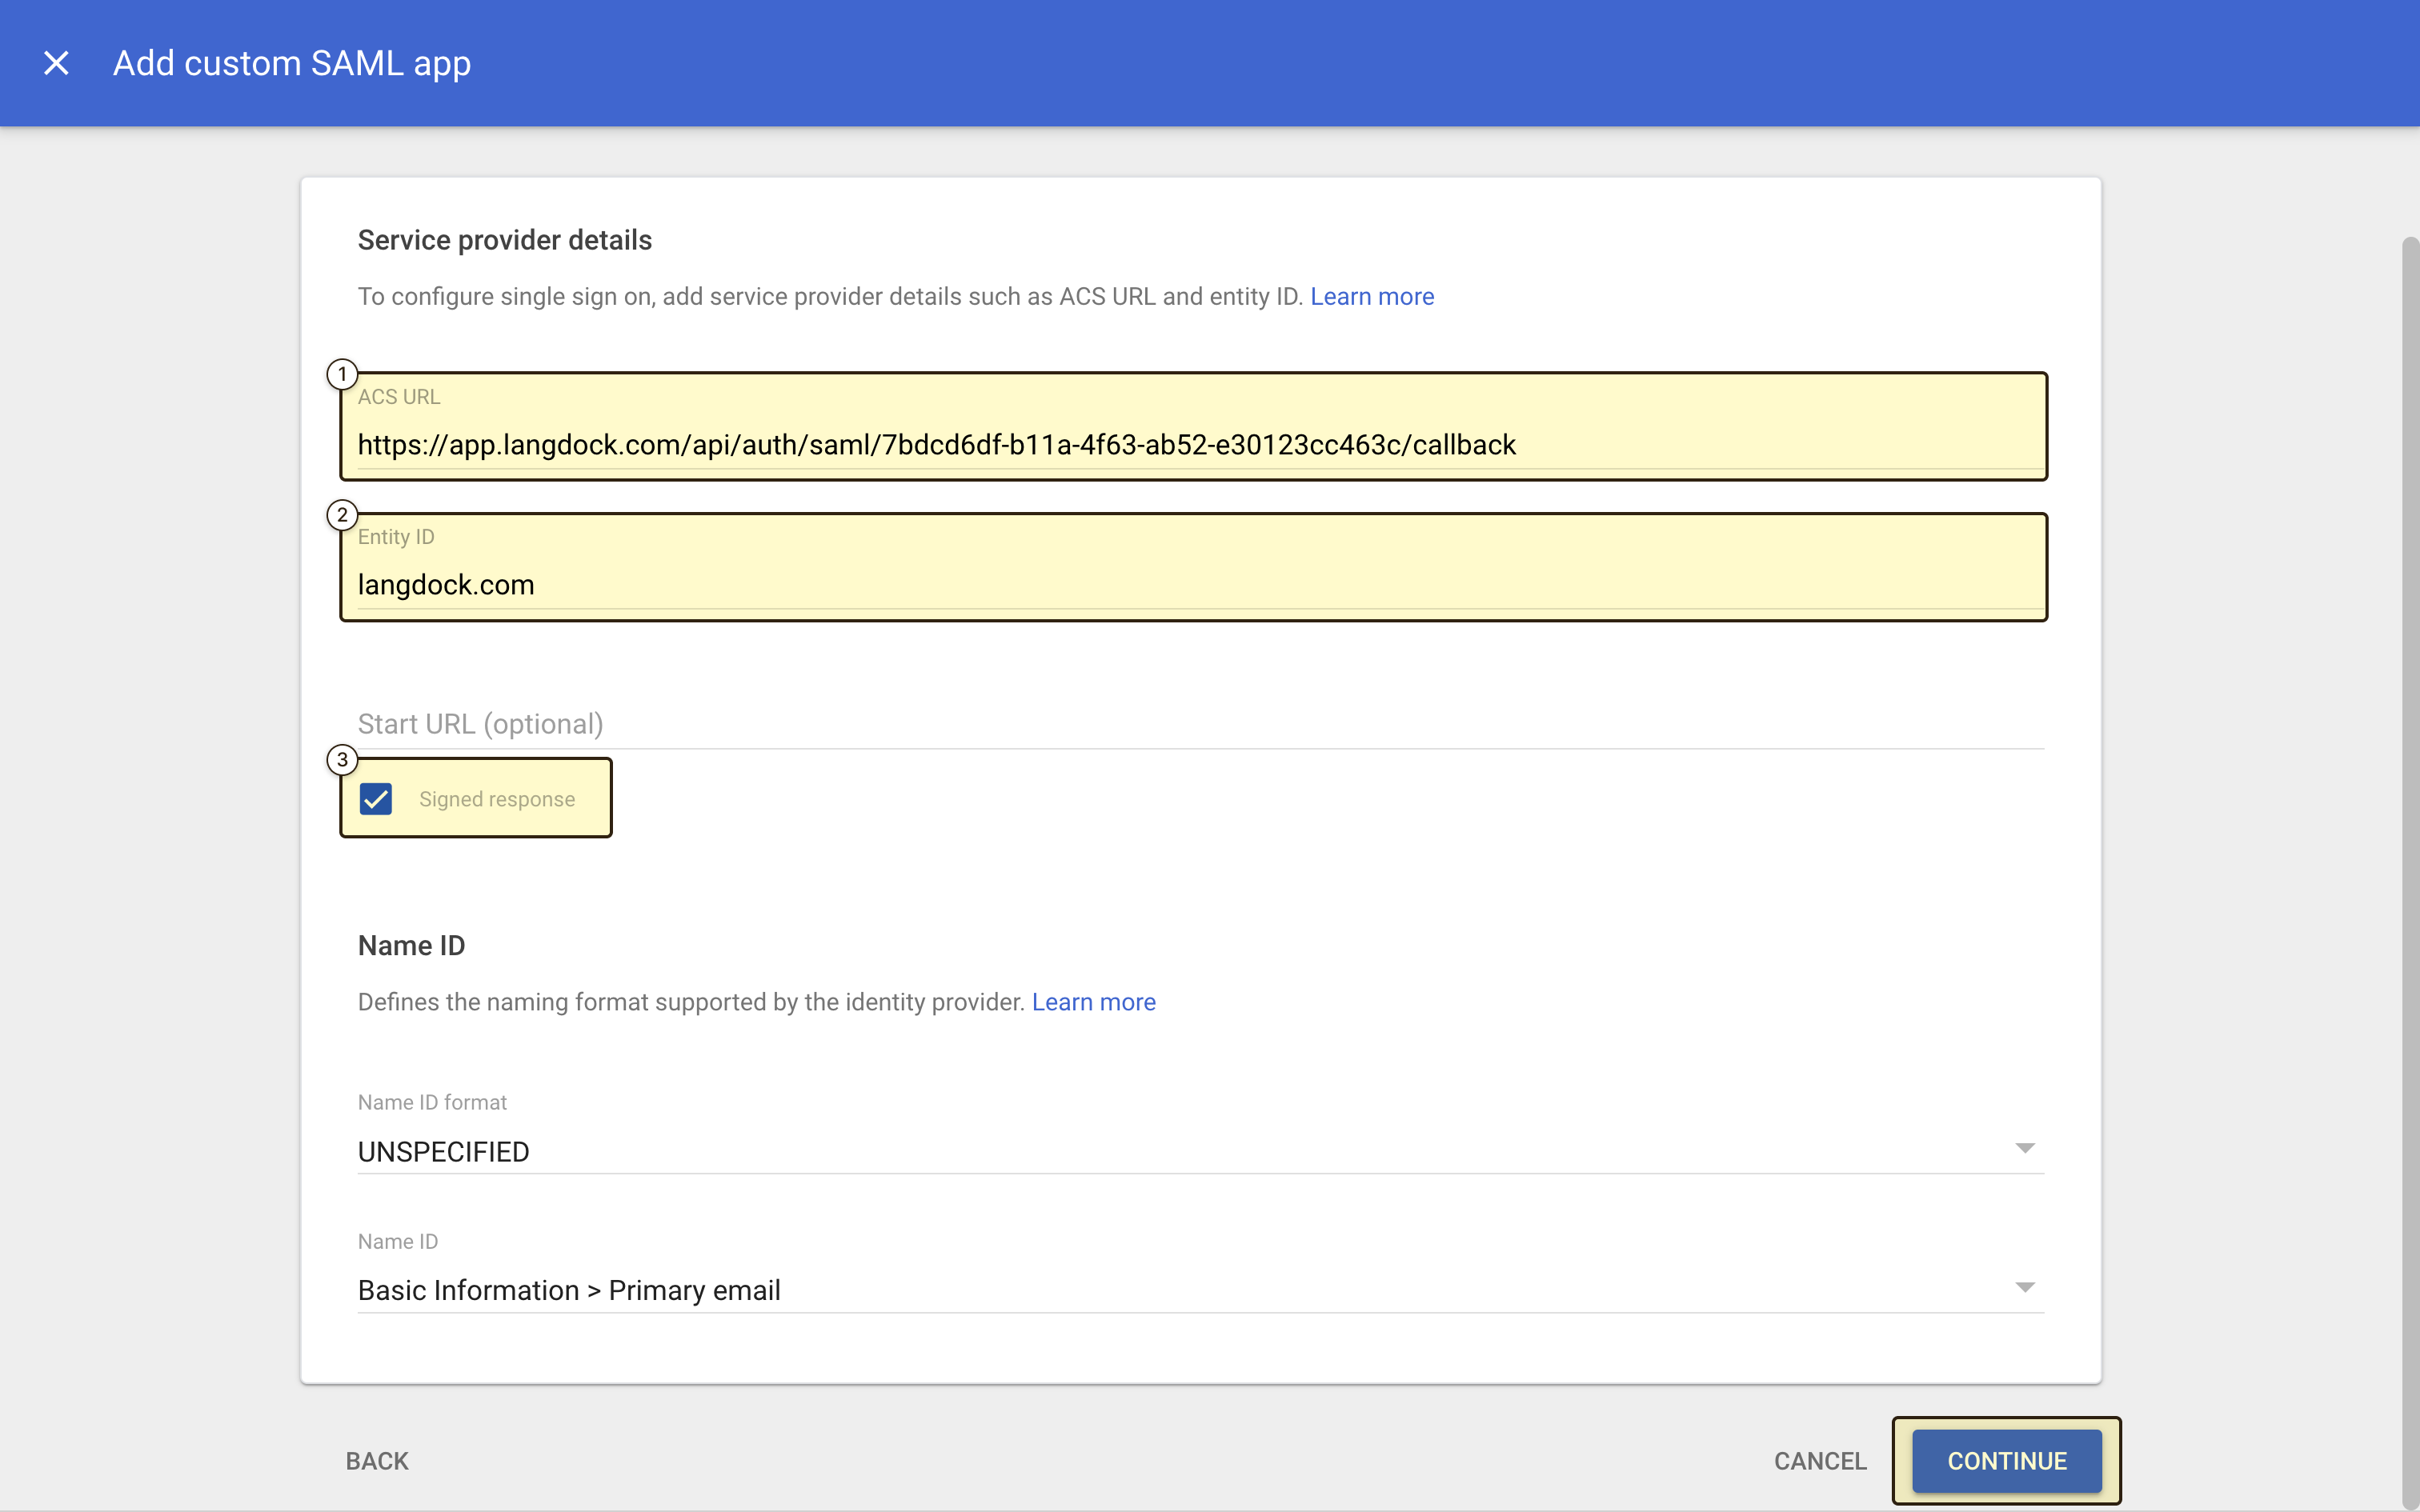
- “ACS URL”: The “Assertion Consumer Service (ACS) URL” value from Langdock
- “Entity ID”: The same value as the “Audience URI” / “Issuer” field (e.g.,
langdock.com) - “Signed response”: Make sure this is checked
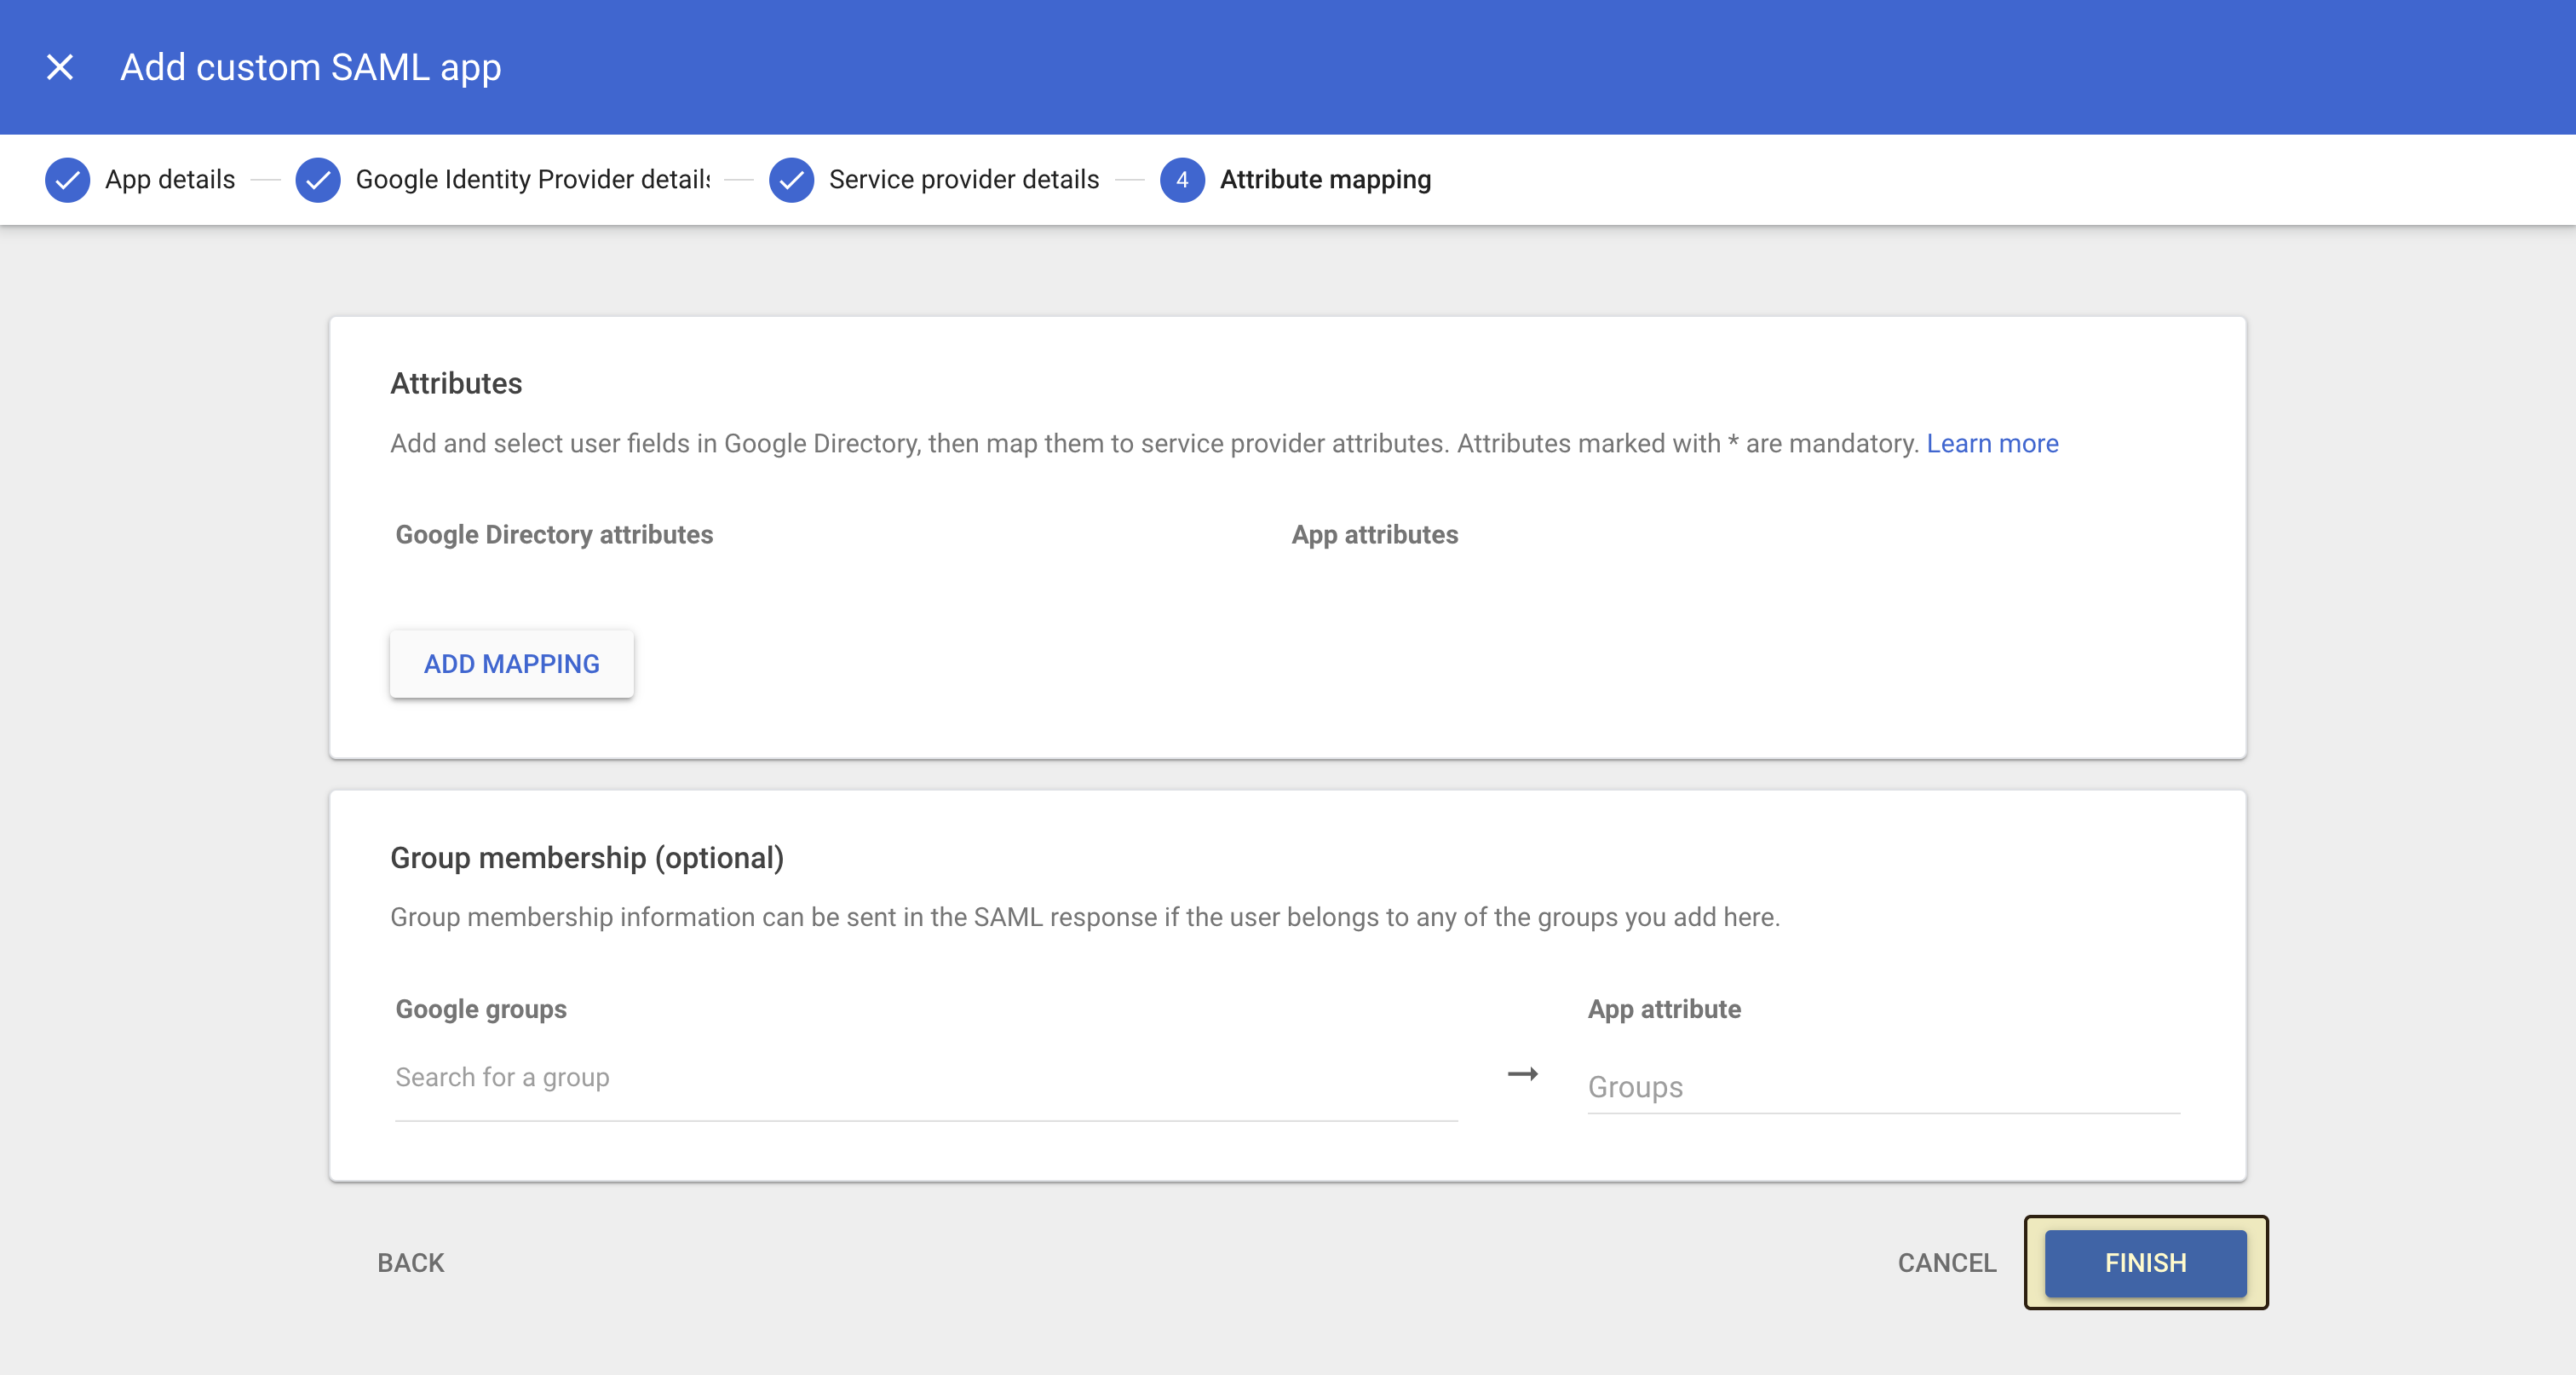
givenname and Last name to surname so users don’t have to enter their name on first login. Click “Finish” to complete the SAML configuration.
Test the SAML setup
To test the SAML setup, open a separate browser or an incognito window and navigate to https://app.langdock.com. Enter an email address of a user in your Google Workspace account and click “Continue”. You will be redirected to the Google login page, where you can enter your credentials. After successful authentication, you will be redirected back to Langdock and logged in.