Overview
This guide walks you through configuring SCIM user provisioning with Microsoft Entra ID. You’ll connect your existing Enterprise application to Langdock’s SCIM endpoint and configure automatic user synchronization. Once complete, user changes in Entra ID will automatically sync to Langdock.Setup Checklist
Verify that you have completed these steps from the setup checklist:Configure Connection
1. Navigate to the Enterprise application that you set up for the SAML connection in your Azure Portal (as described in https://docs.langdock.com/settings/security/entra). Click on “Get started” under “Provision User Accounts”.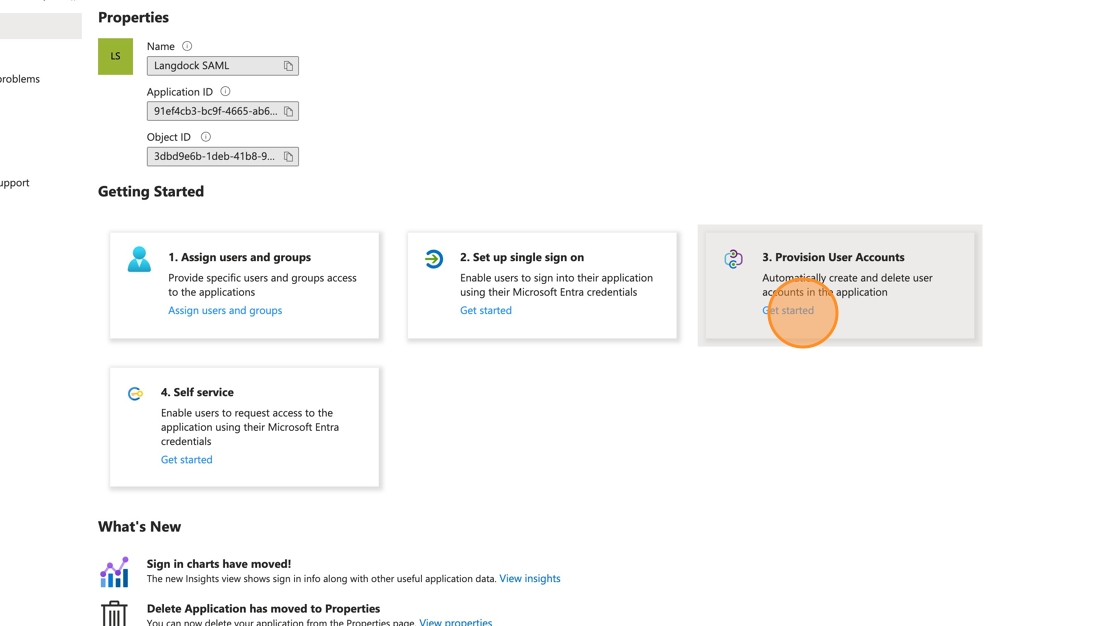 2. Click “Connect your application”
 3. Go over to your Langdock security settings and copy the “SCIM Base URL” value.
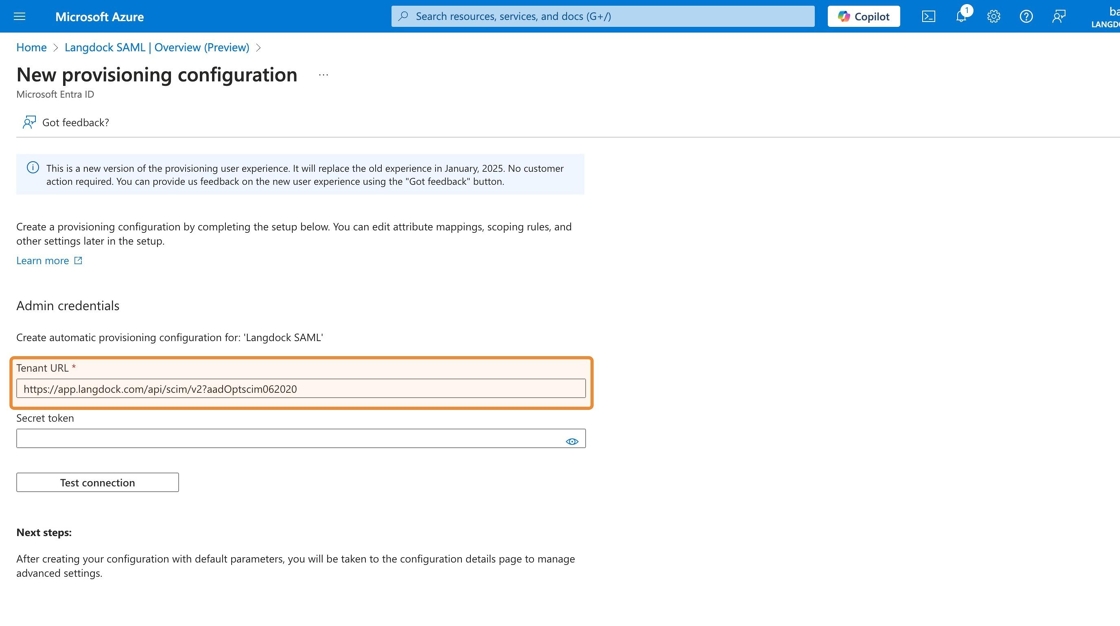
 4. Back in your Azure Portal, enter the SCIM Base URL into the “Tenant URL” field and (!) append
 ?aadOptscim062020 to the end of the URL to fix known issues in Microsoft’s implementation of the SCIM protocol.
Your final “Tenant URL” will look like this: https://app.langdock.com/api/scim/v2?aadOptscim062020
 5. Copy the “SCIM Bearer Token (API Key)” value from your Langdock security settings…
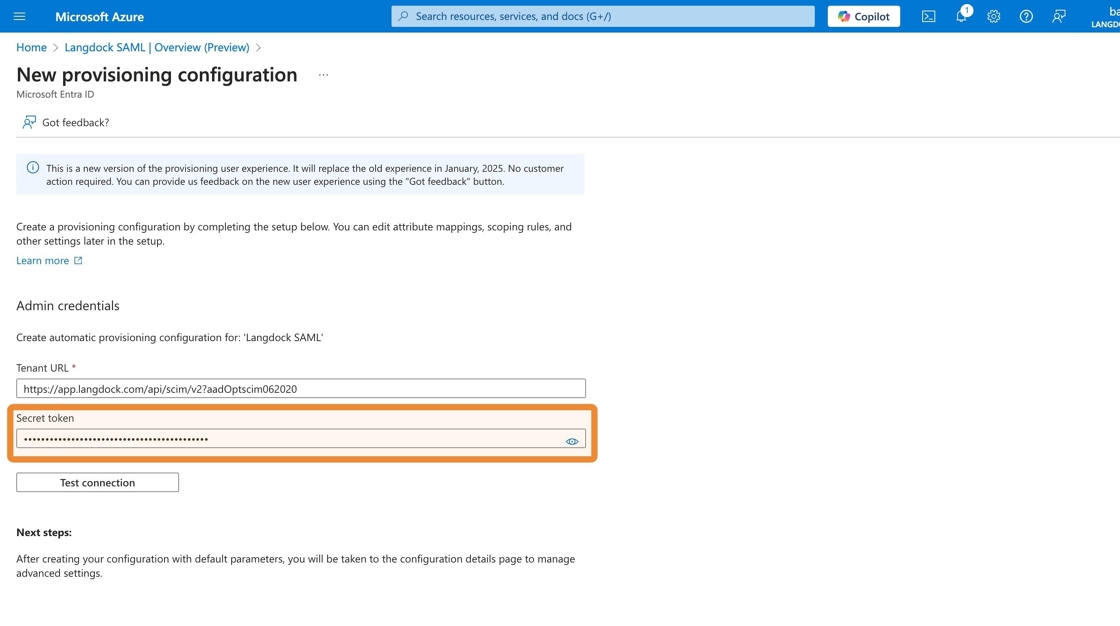
 6. …and paste it into the “Secret token” field in your Azure Portal.
 7. Toggle “SCIM User Sync Active” to enable SCIM for your workspace in your Langdock security settings. This is required to test the connection.
 8. Back in your Azure Portal click on “Test connection” and you should see a message confirming that the connection between Entra ID and Langdock is working.
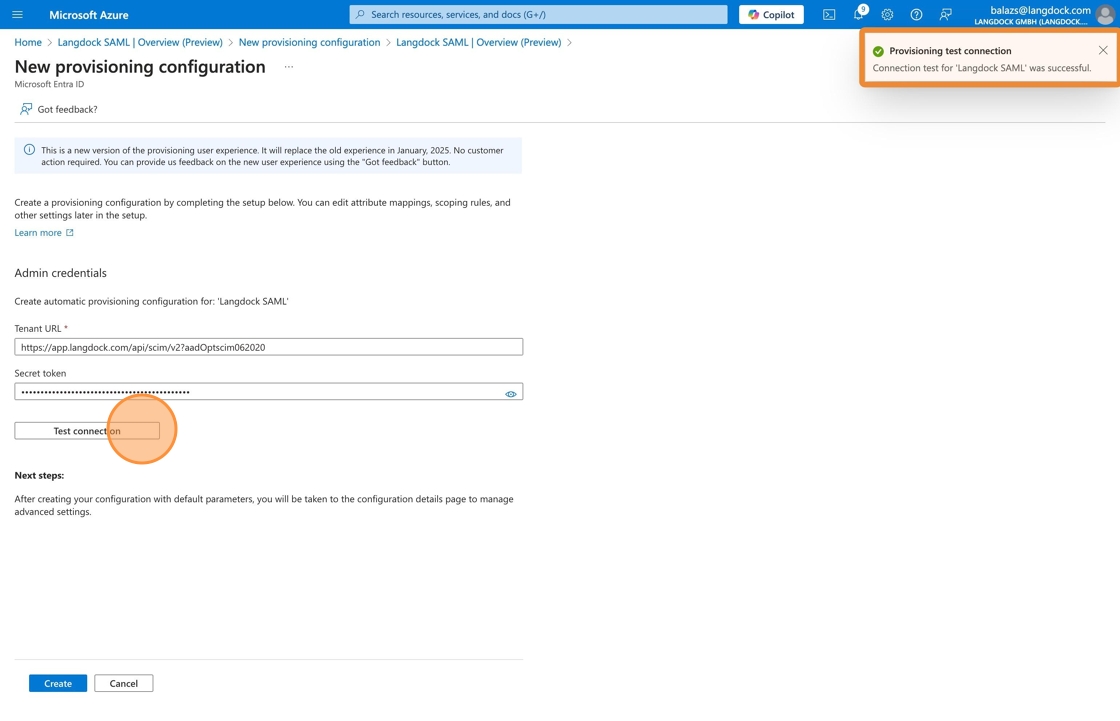 9. Click “Create” to finish the configuration

Optional: Disable group synchronization
10. (Optional) To customize your provisioning settings, go to “Manage” > “Provisioning”. You might need this if you want to only synchronize users (but not groups) or if you want to disable one or more types of object actions (create, update or delete). E.g. to disable synchronizing groups, click on “Mappings” and follow the optional steps below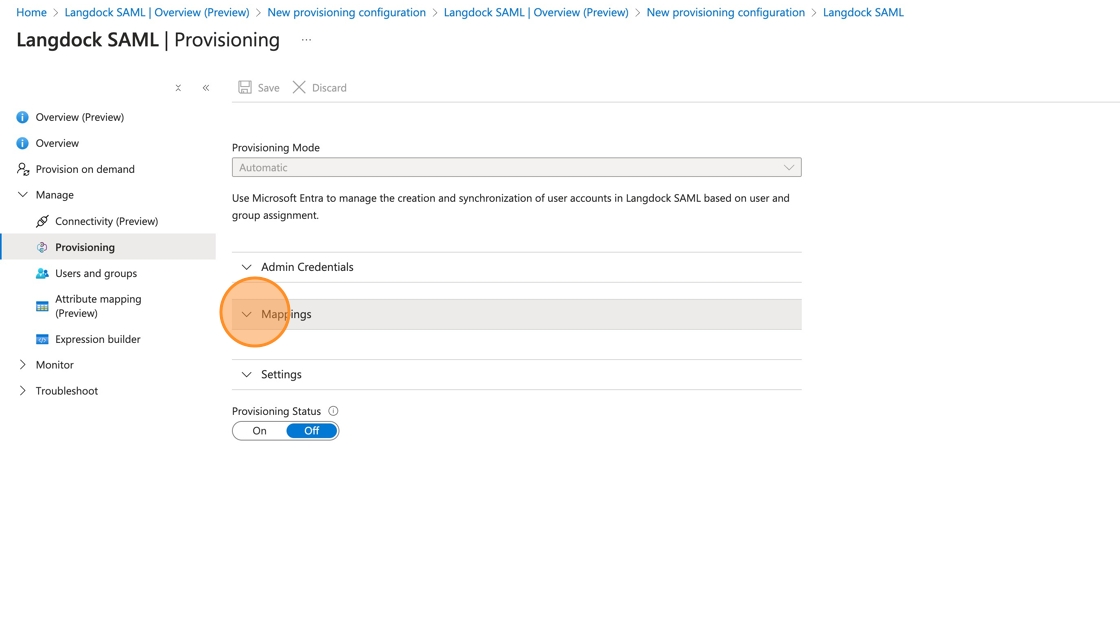 11. (Optional: Disabling group synchronization) Click “Provision Microsoft Entra ID Groups”
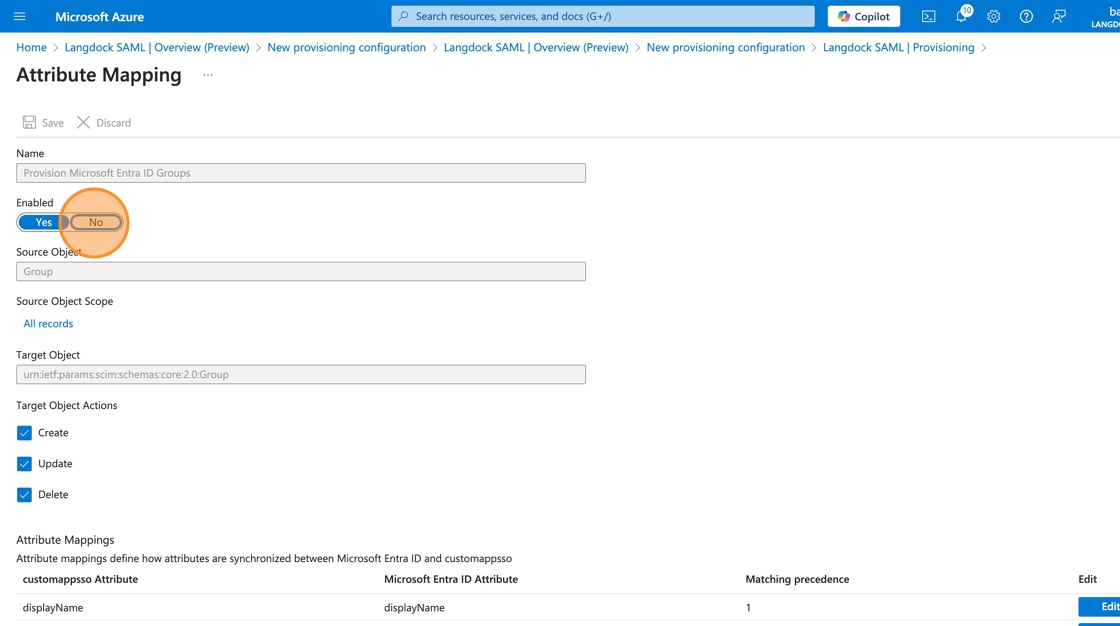
 12. (Optional: Disabling group synchronization) Click “No”
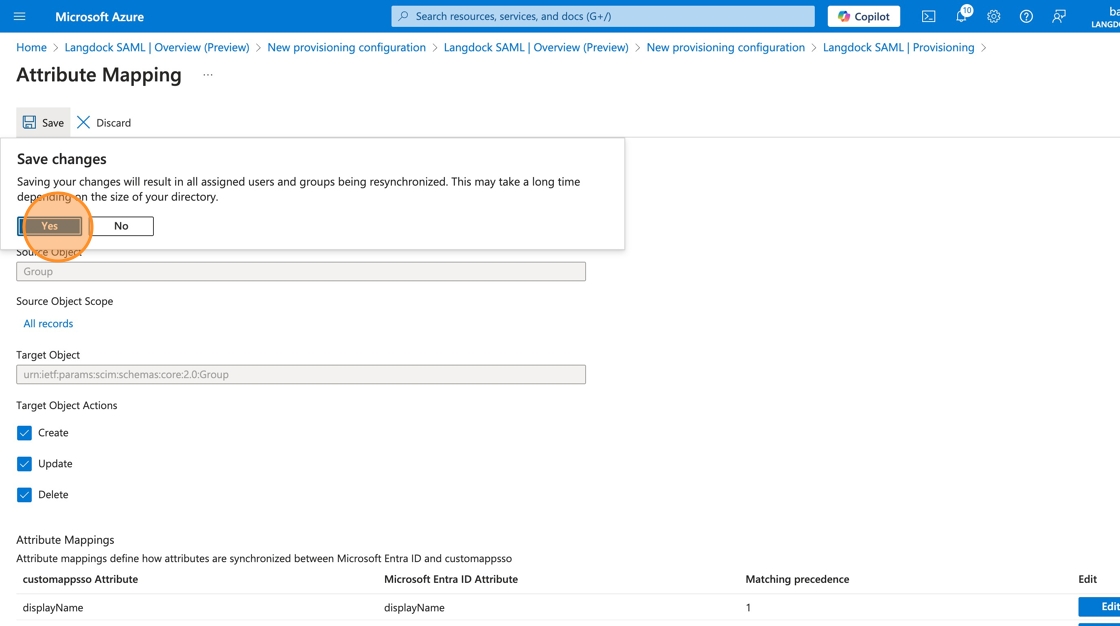
 13. (Optional: Disabling group synchronization) Click “Save” then “Yes” to confirm changes
Enable provisioning
14. Recommended: Open down “Settings”, click “Send an email notification when a failure occurs” and enter your email address 15. Click “On” to set provisioning status to enabled
 16. Click on “Save” to finalize your changes

Verify your setup
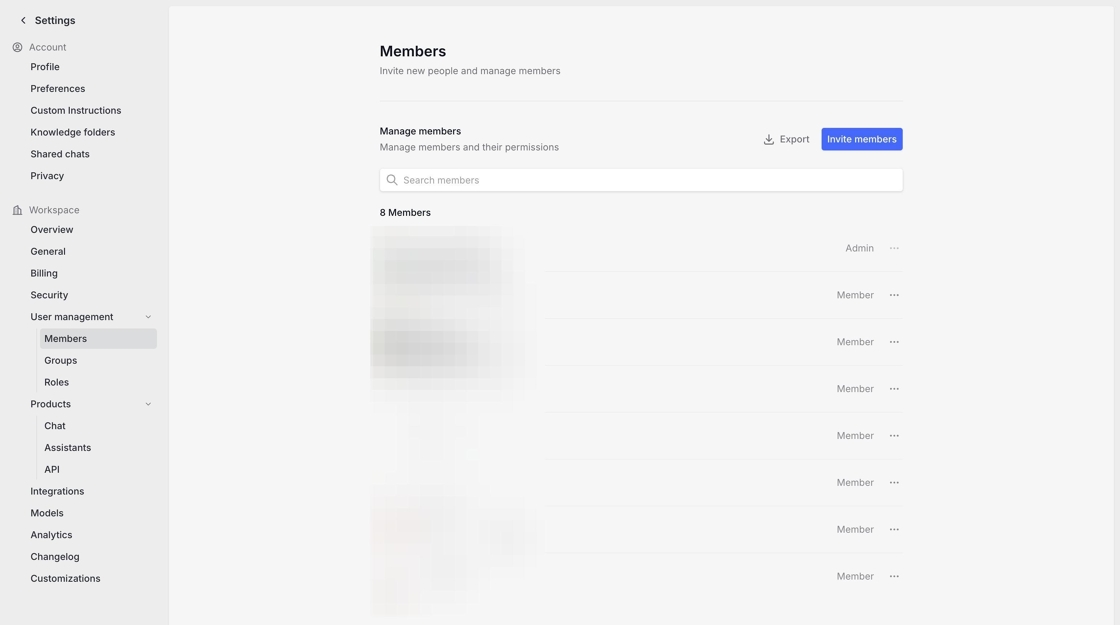
17. To verify that the provisioning is working as expected, go to “Monitor” > “Provisioning logs” and check if your users have been successfully mapped to Langdock. In case you don’t see any logs, make sure to wait and check back in a couple of minutes. It can take a bit until the first synchronization is triggered. If your setup was successful, you will see “Success” values in the status column. 18. You should also see the newly synchronized users in your Langdock member settings.
Updating User Email Addresses (Domain Changes)
If your organization changes email domains (e.g., from@old-company.de to @new-company.de), SCIM can automatically update user email addresses in Langdock when you update them in Entra ID. However, the new domain must be configured in Langdock before the email change.
Requirements
Before updating user email addresses in Entra ID:- The new email domain must be added to the allowed domains in your Langdock security settings
- The new domain must be verified (domain verification ensures you own the domain)
Process
Add the new domain to your Langdock workspace
Go to your Langdock security settings and add the new domain (e.g.,
new-company.de) to the list of allowed domains.Verify the new domain
Add the new domain to the allowed domains in your workspace and then verify it by contacting the Langdock Support.
Update user emails in Entra ID
Once the domain is added and verified in Langdock, you can update the user email addresses in Microsoft Entra ID. The SCIM provisioning will automatically sync these changes to Langdock.
Verify the sync
Check the provisioning logs in Entra ID (Monitor > Provisioning logs) to confirm the email updates were successful. You can also verify in your Langdock member settings that the user emails have been updated.
Existing user data (chat history, agents, etc.) will be preserved when updating email addresses via SCIM. The users are identified by their SCIM ID, not their email address.