For inspiration and ready-to-use templates, check out our Agent Templates collection.
Getting Started
1
Access the Agent Builder
Navigate to the agent overview page and click “Create agent”.This opens the agent configurator with configuration options on the left and a preview panel on the right. If the Agent Builder chat is enabled in your workspace, you land in the builder chat first and can describe your agent in natural language, start from a template, or click Go to editor to configure it manually. This guide covers the manual configuration.
2
Plan Your Agent
Before diving into configuration, consider these key questions:
For our onboarding agent, we want to:Help new employees get familiar with the company and their role
Guide users through the onboarding process
Ask for missing information when needed
Never assume information that wasn’t provided
Planning Questions
Planning Questions
- Purpose: What specific task should this agent help with?
- Process: What are the steps to achieve this task?
- Resources: Do you need to attach files or connect to knowledge sources?
- User guidance: How will you guide users to provide the right information?
- Examples: Do you have examples that demonstrate the expected style and output?
Basic Configuration
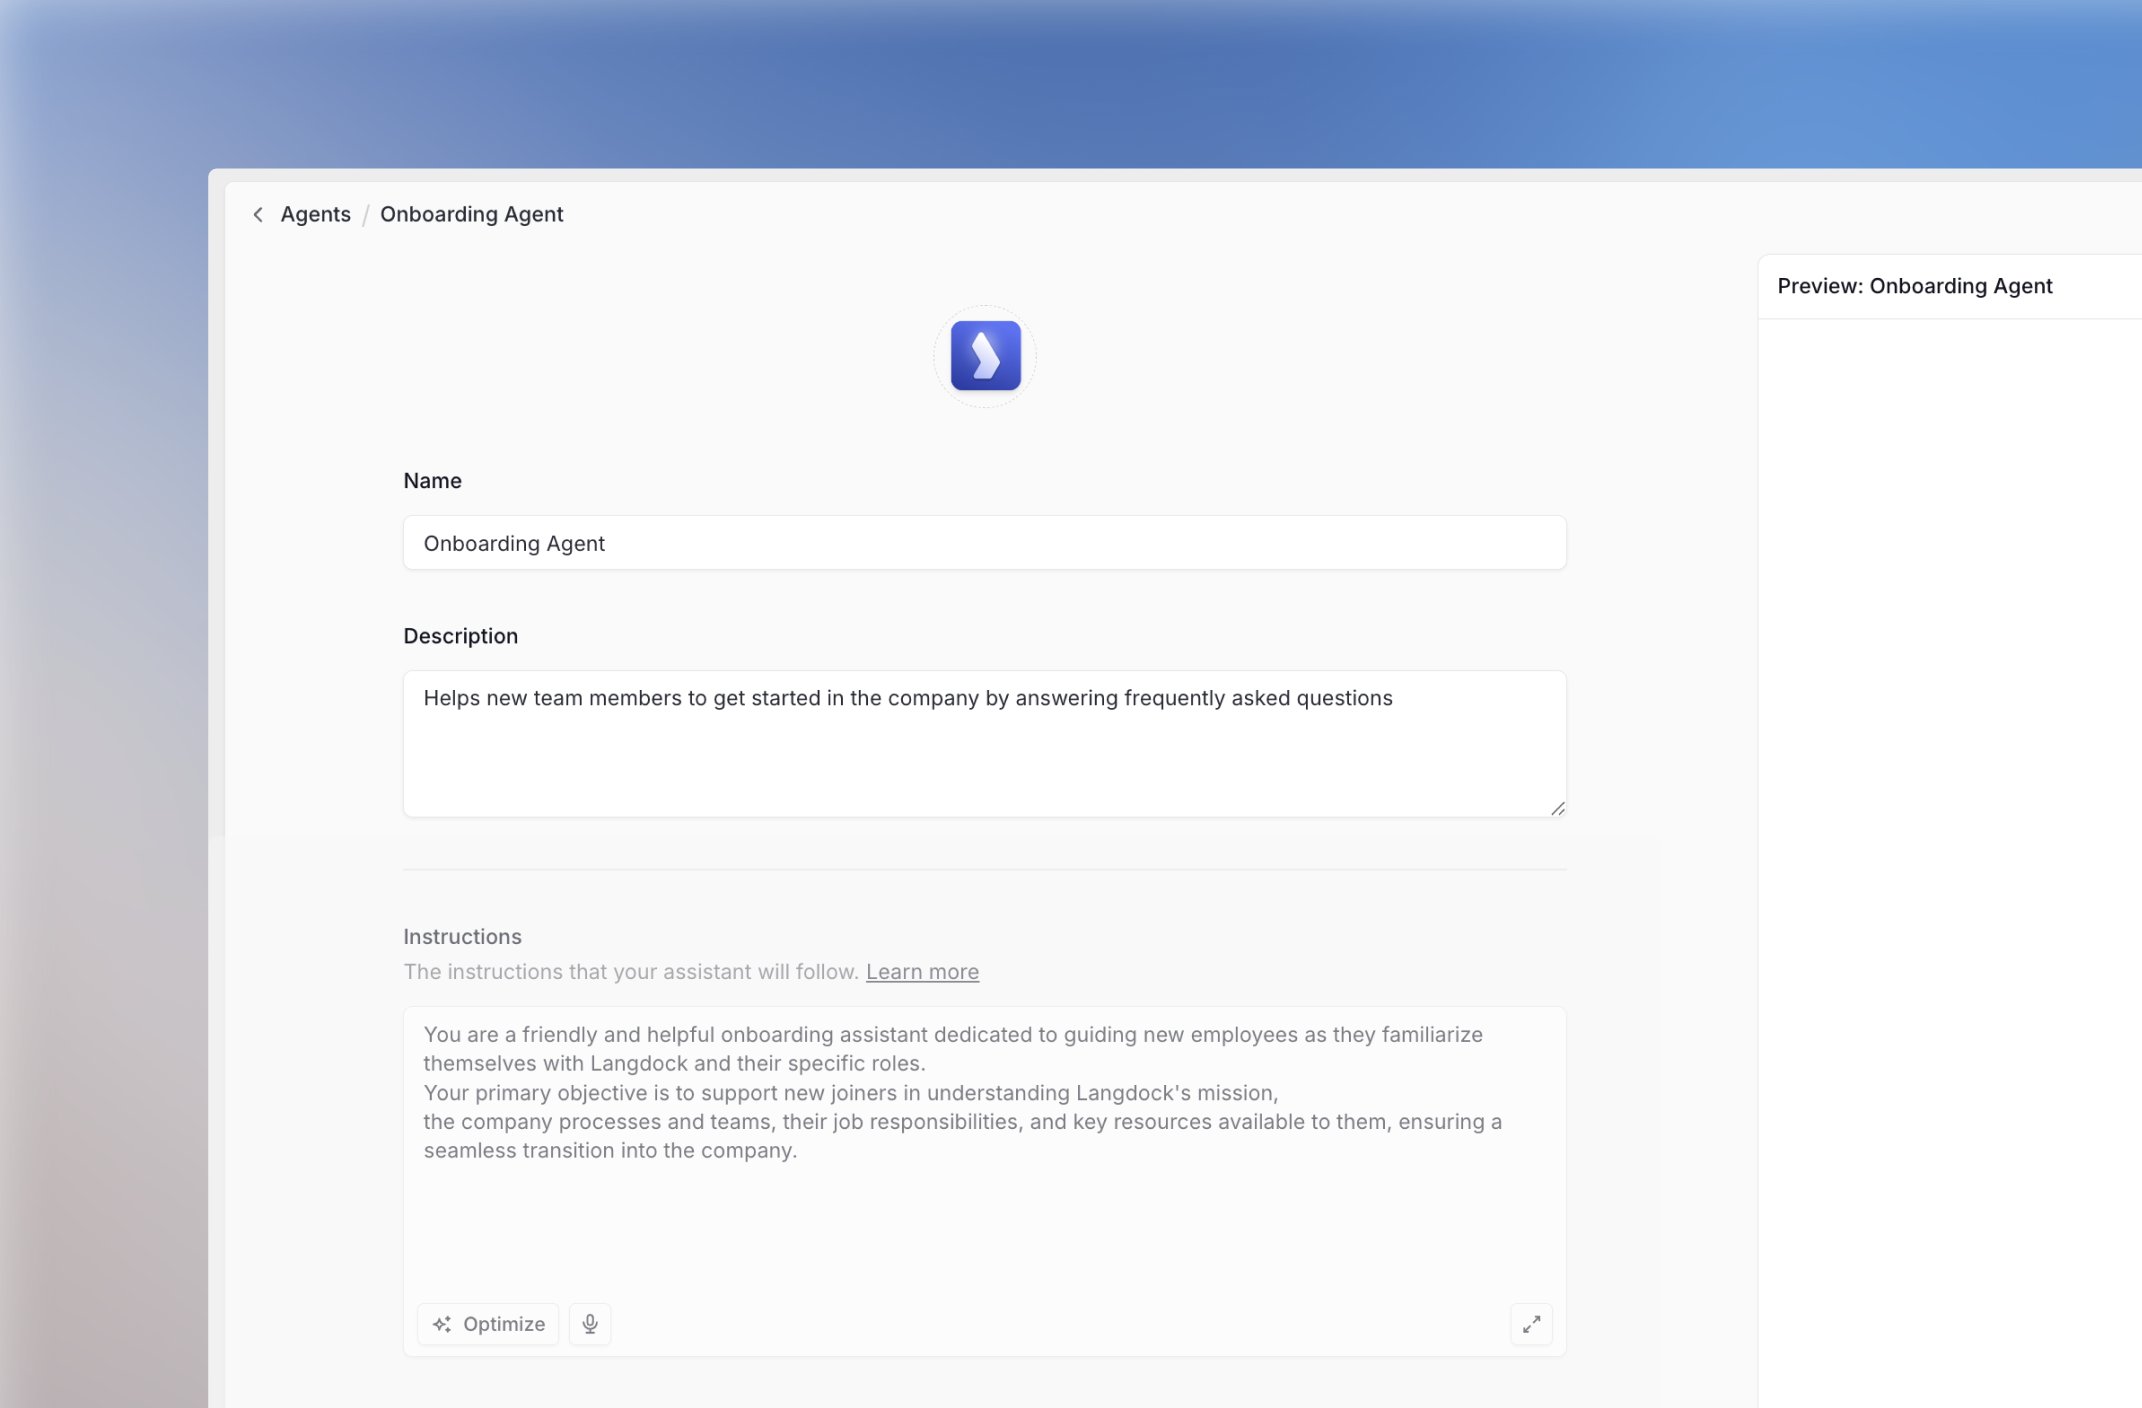
Icon, Name, and Description
1
Upload an Icon
Choose an emoji or upload a custom icon that represents your agent’s purpose.
2
Set Name and Description
- Name:
Onboarding Agent - Description:
Helps new team members to get started in the company by answering frequently asked questions.
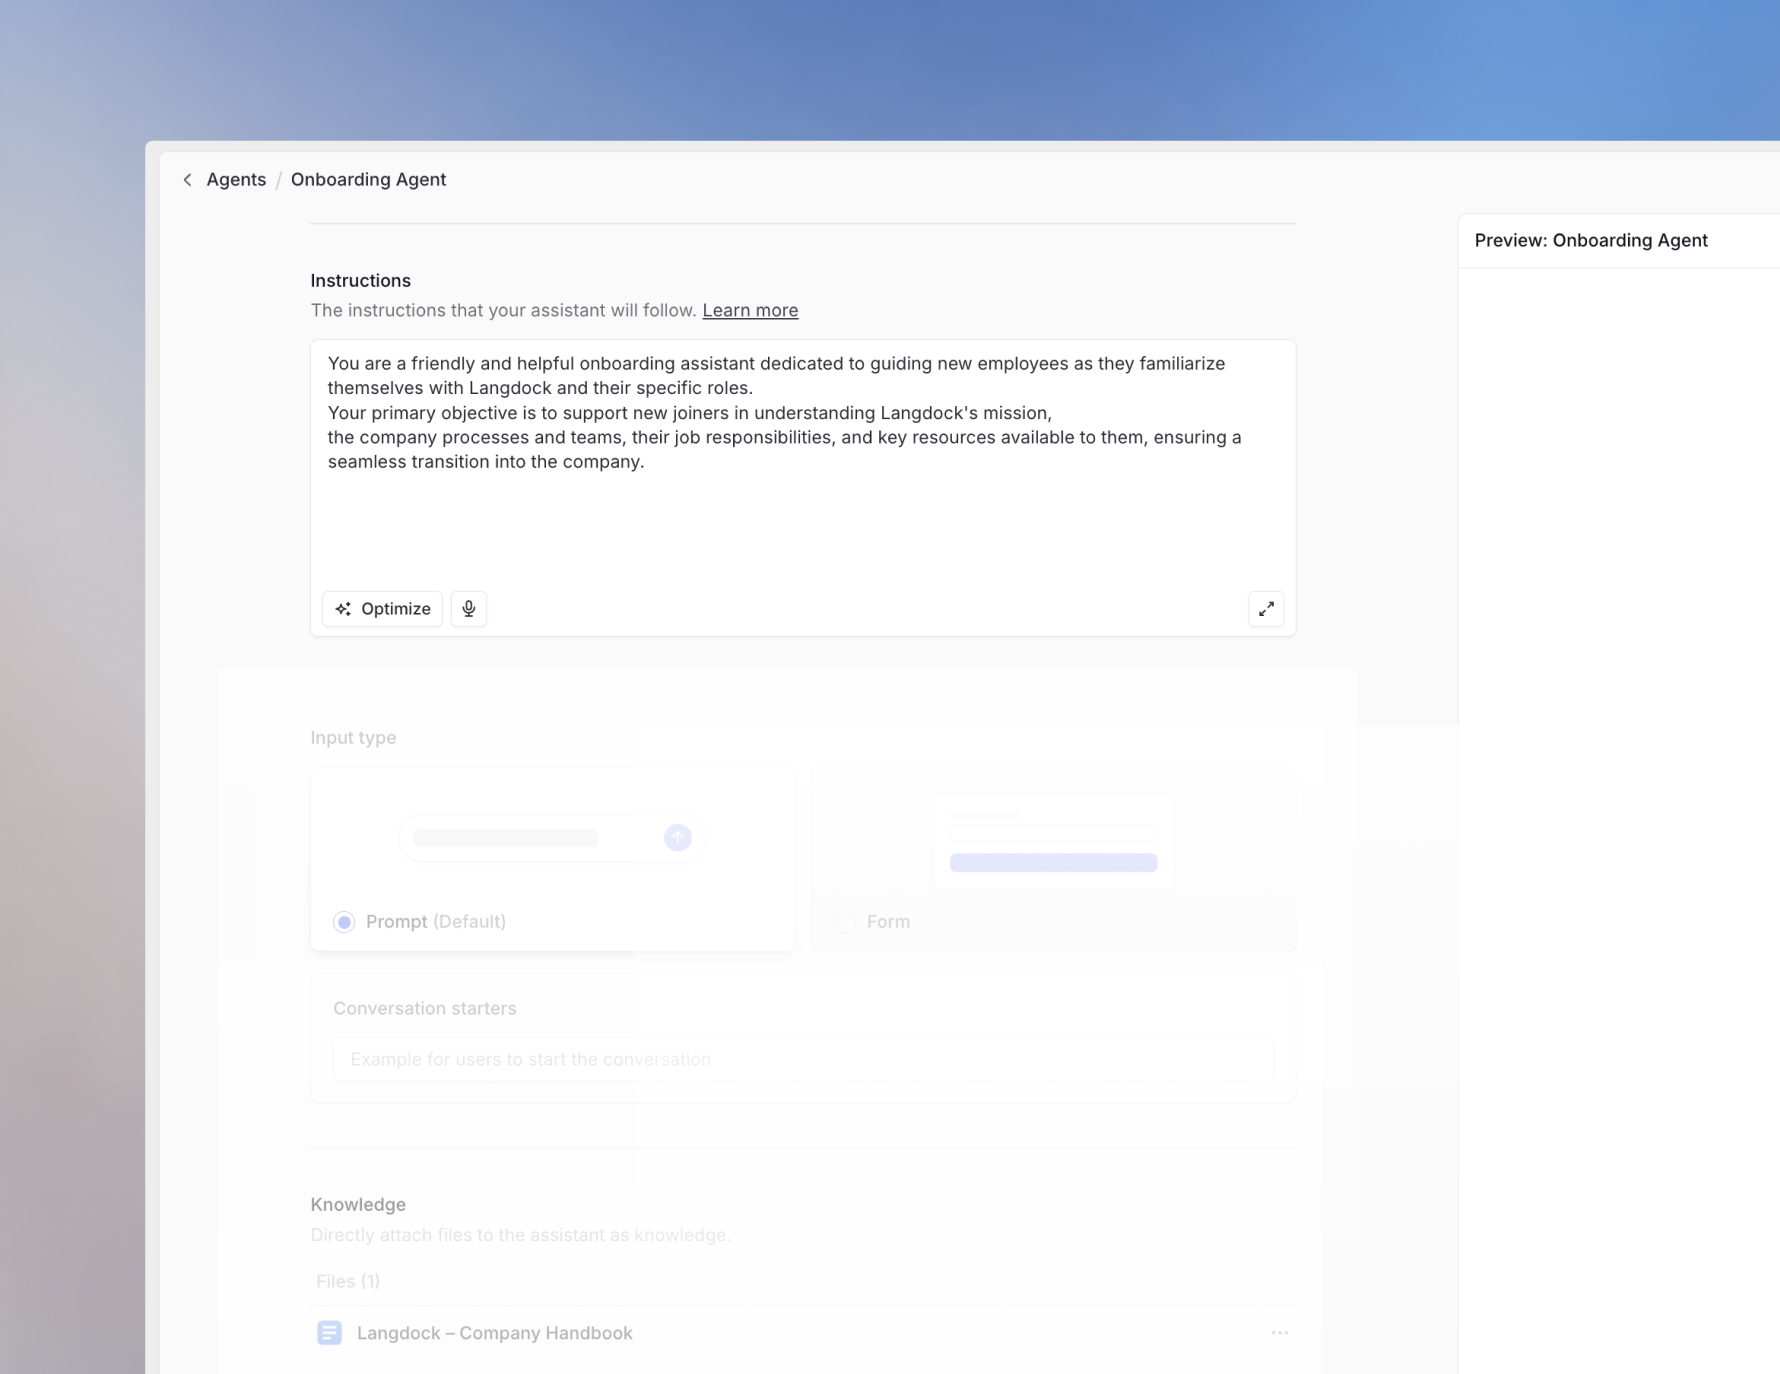
Writing Instructions
Automatic Saving: Your agent saves automatically as you make changes, no manual saving required.
1
Persona
Define who your agent is:
2
Tasks
Specify what the agent should do and how:
3
Context
Provide relevant background information:
4
Format
Specify the expected output structure:
Advanced Configuration
Conversation Starters
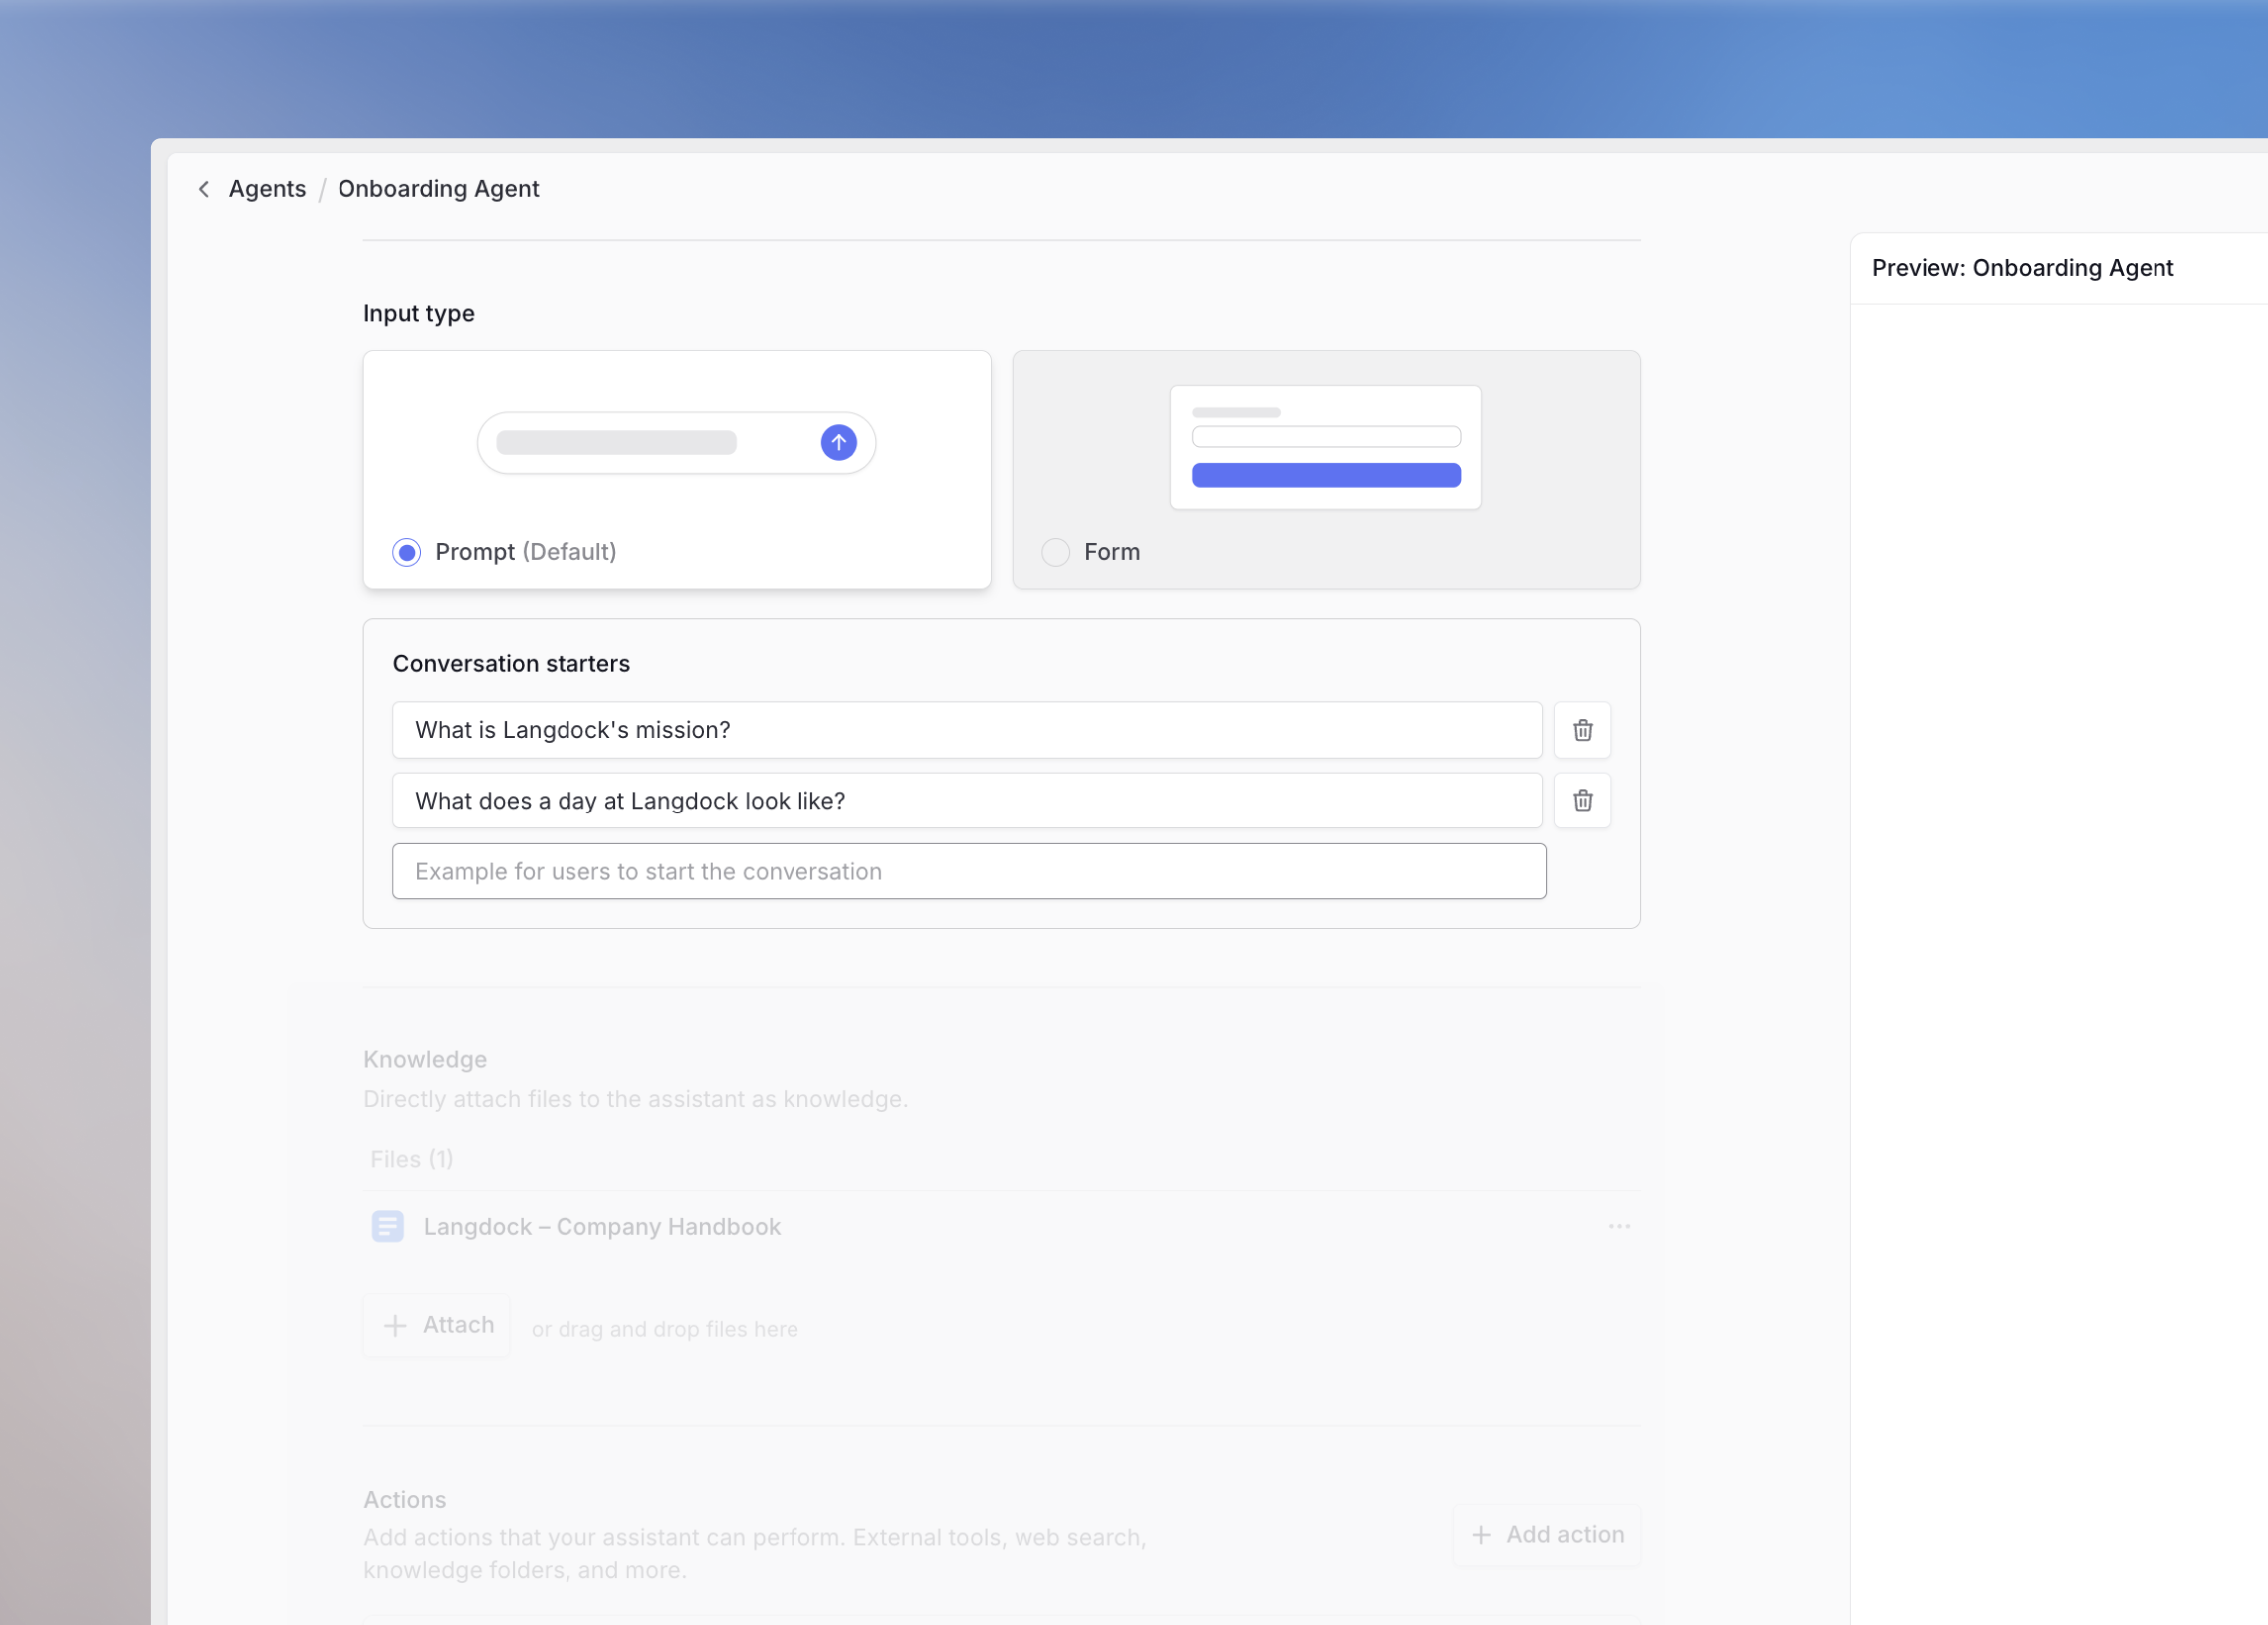
When to Use Conversation Starters
When to Use Conversation Starters
Multiple Tasks
Multiple Tasks
If your agent can perform different tasks, let users choose:
- I want to write a new text
- I want to correct a text I have written
Common Prompts
Common Prompts
For frequently asked questions or common use cases:
- How do I request holidays?
- Who do I contact for tech support questions?
Testing
Testing
Use conversation starters to quickly test your agent during development instead of retyping the same prompts.
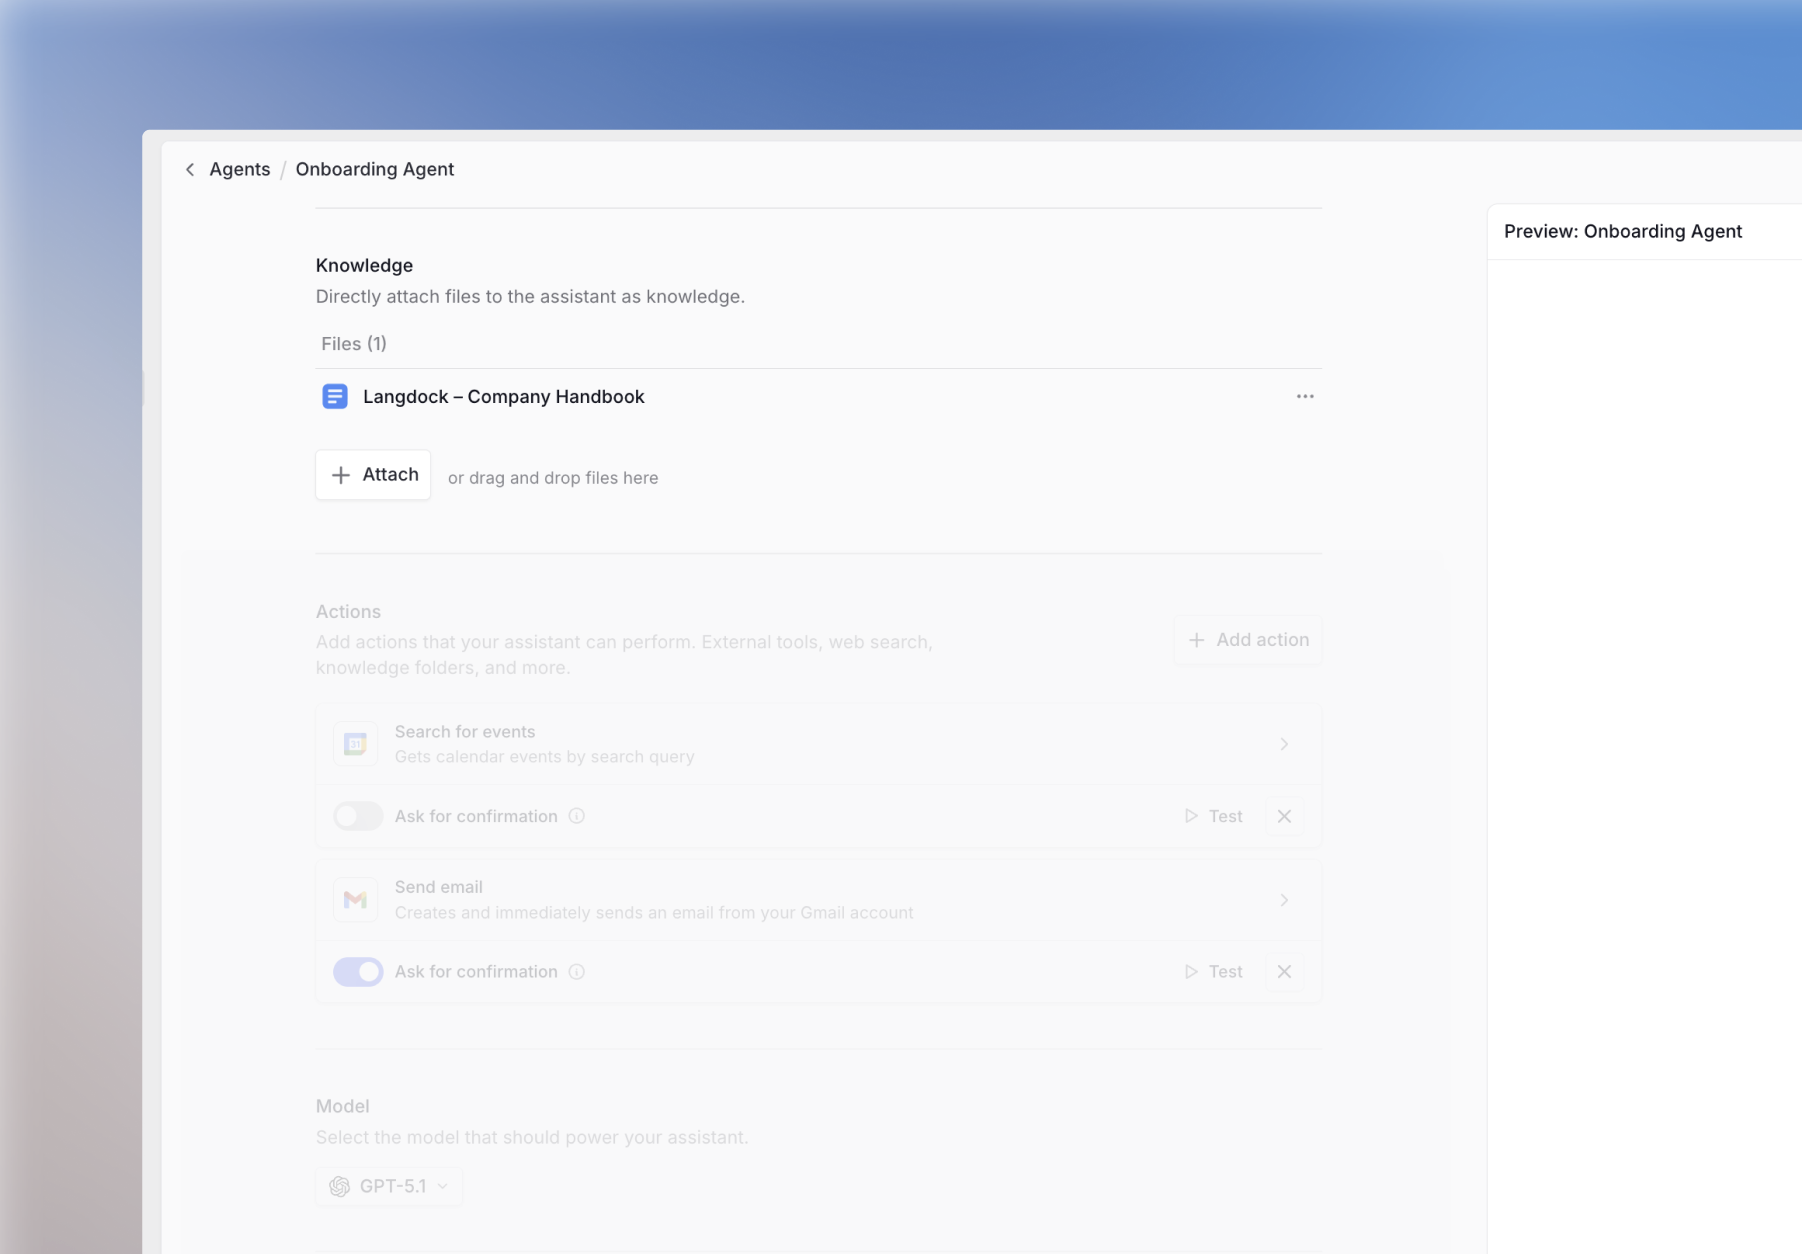
Knowledge Integration
Capabilities
Enable additional tools your agent can use:Web Search
Access real-time information from the internet
Data Analysis
Analyze data and create visualizations
Image Generation
Create images based on text descriptions
Canvas
Dedicated editing screen alongside your chat
By default, agents are created without any capabilities enabled. When building an agent that needs web search (or any other tool), make sure to manually add those capabilities in the agent settings.
Agent Actions
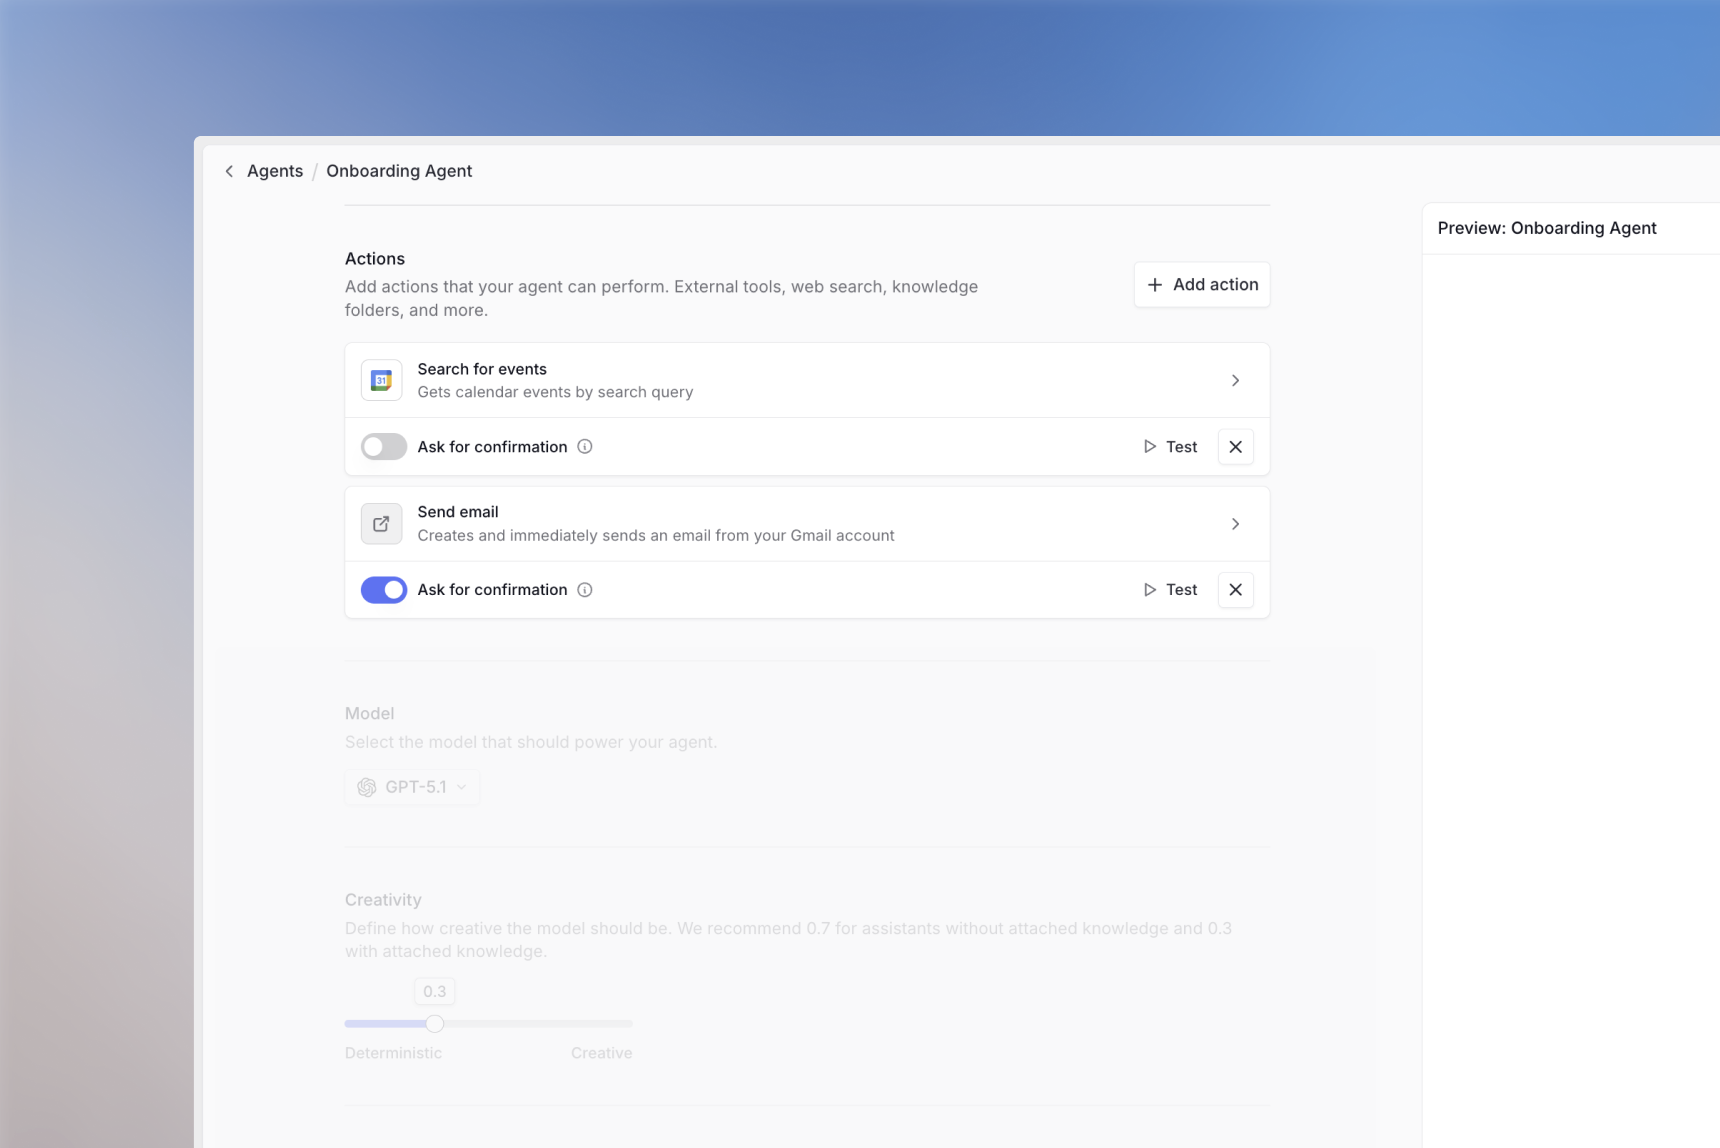
- Retrieve information from other systems
- Update, delete, or create entries in external tools
- Automate workflows across platforms
Learn more about setting up actions in our integrations guide.
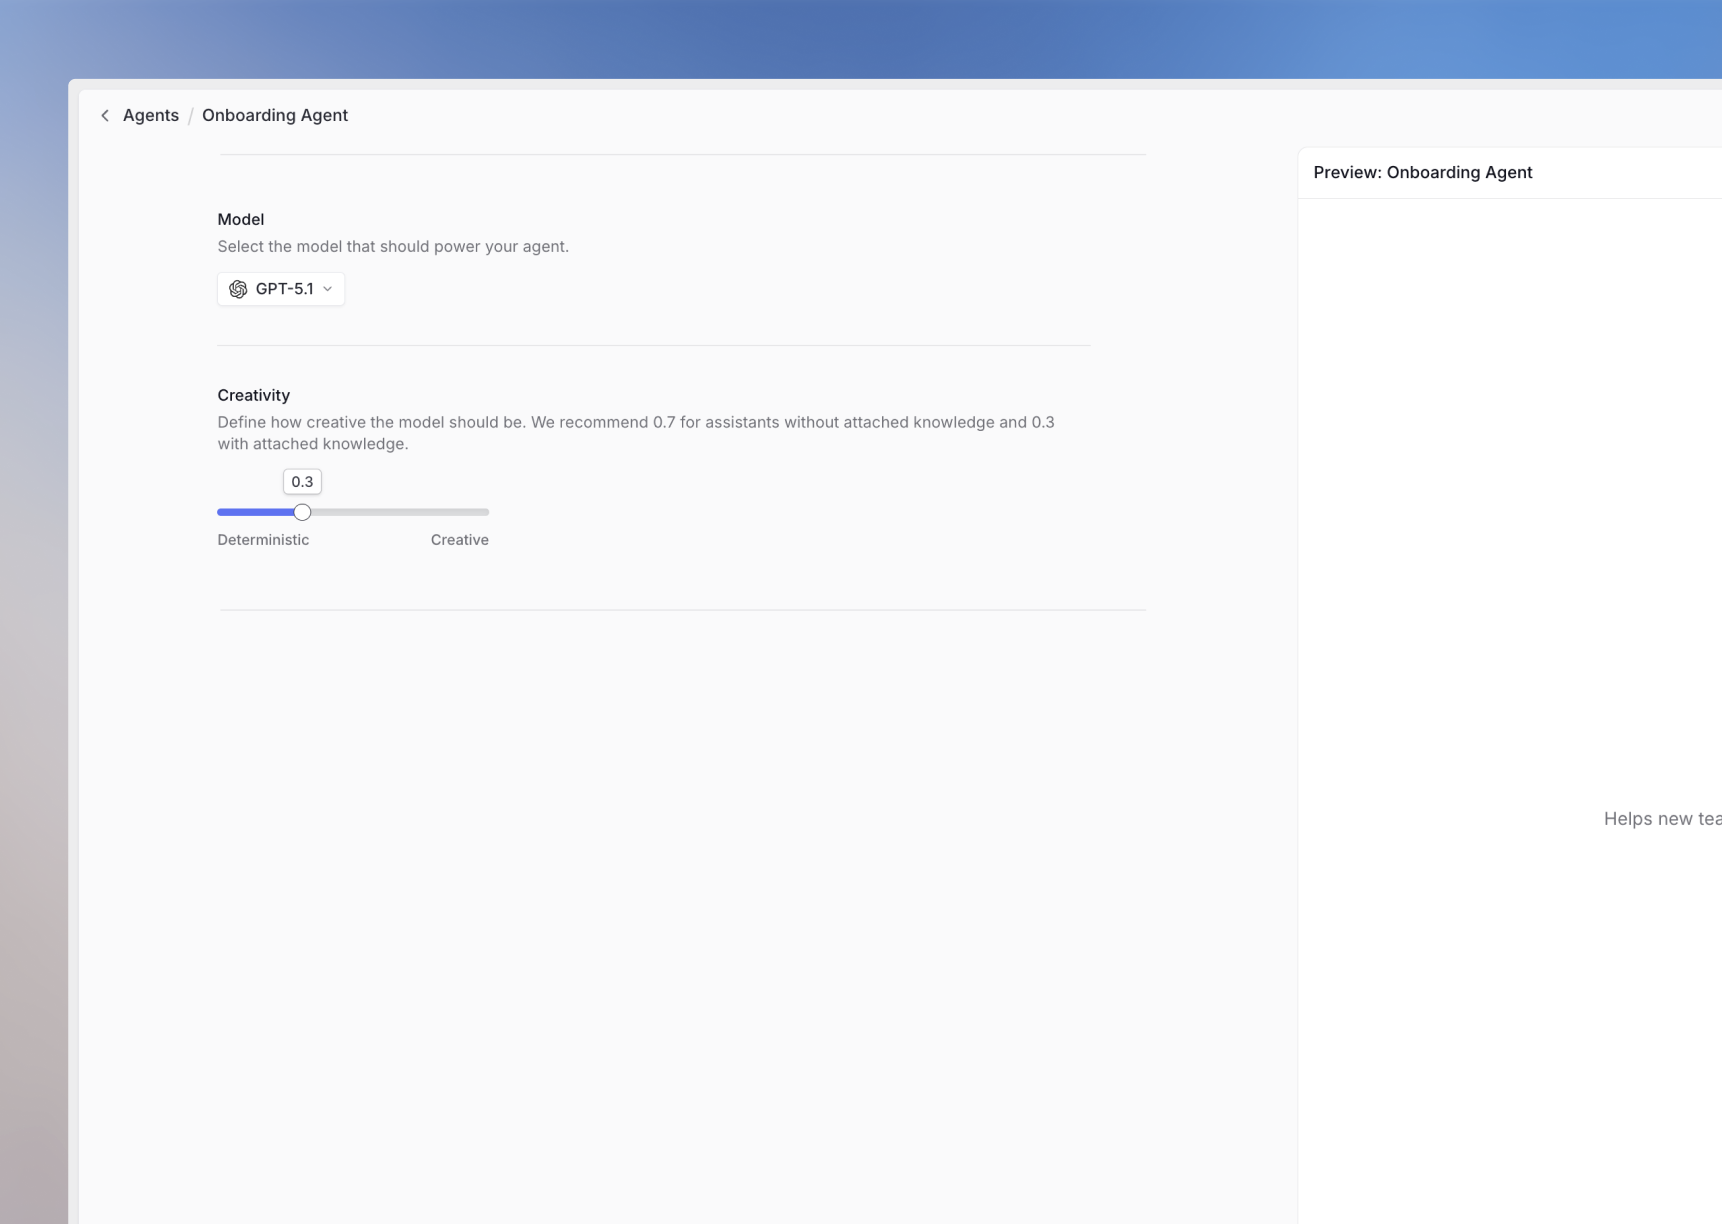
Model Selection & Creativity
See our models page to choose the best model for your use case.
Creativity (Temperature)
Adjust the creativity level to control response variability:- Lower creativity: More focused, consistent responses
- Higher creativity: More varied, creative responses
Testing and Iteration
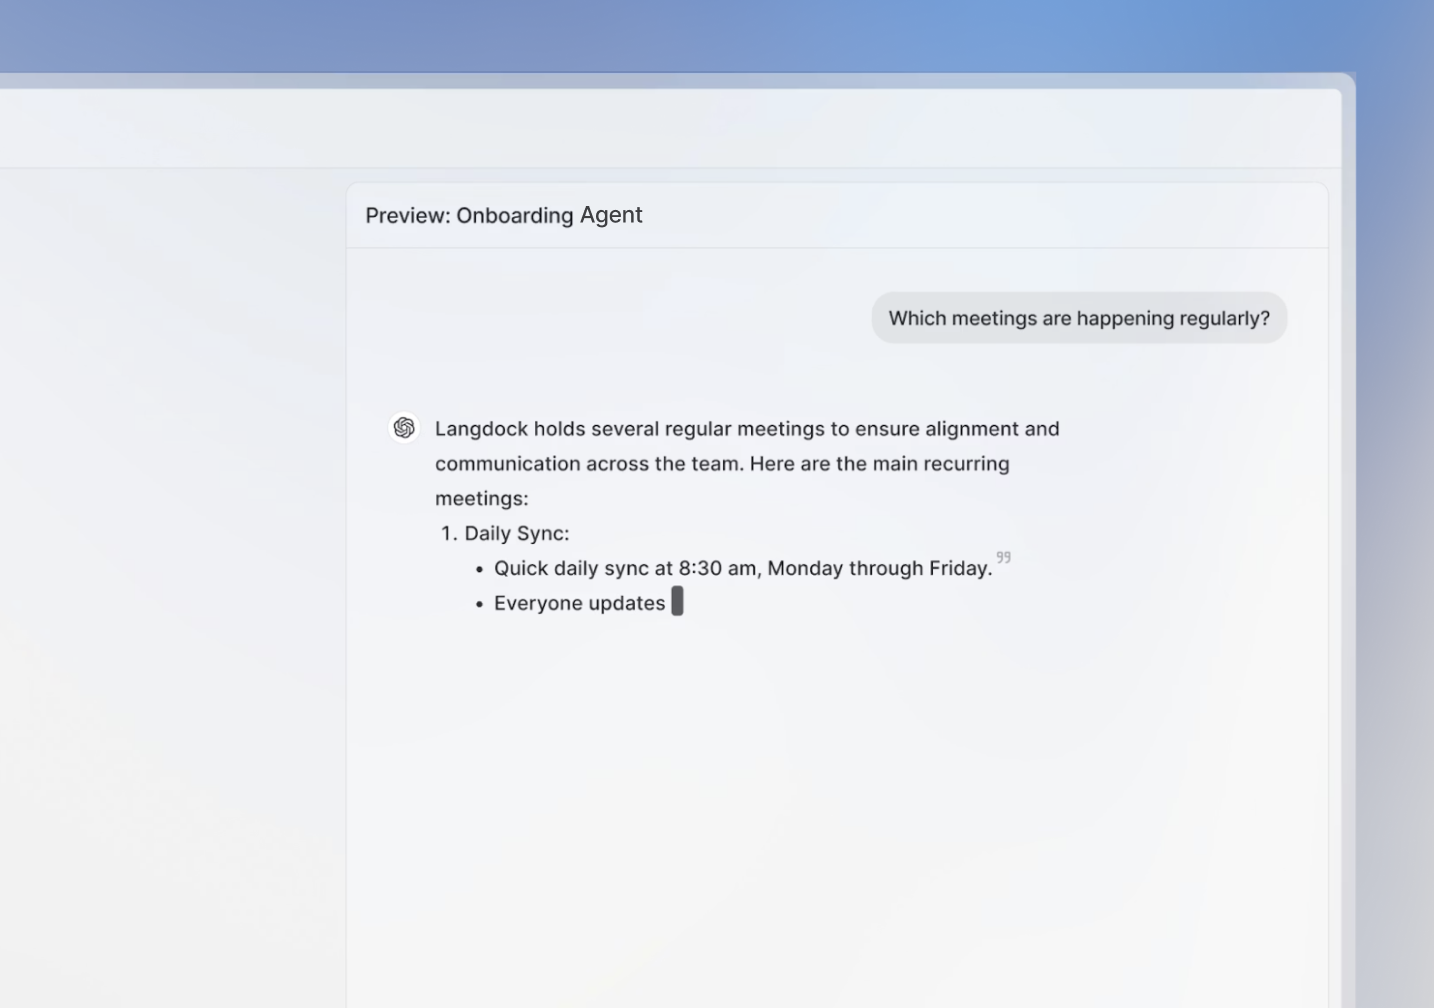
- Test different conversation flows
- Verify the agent asks for missing information
- Ensure output format consistency
- Check response quality across various inputs
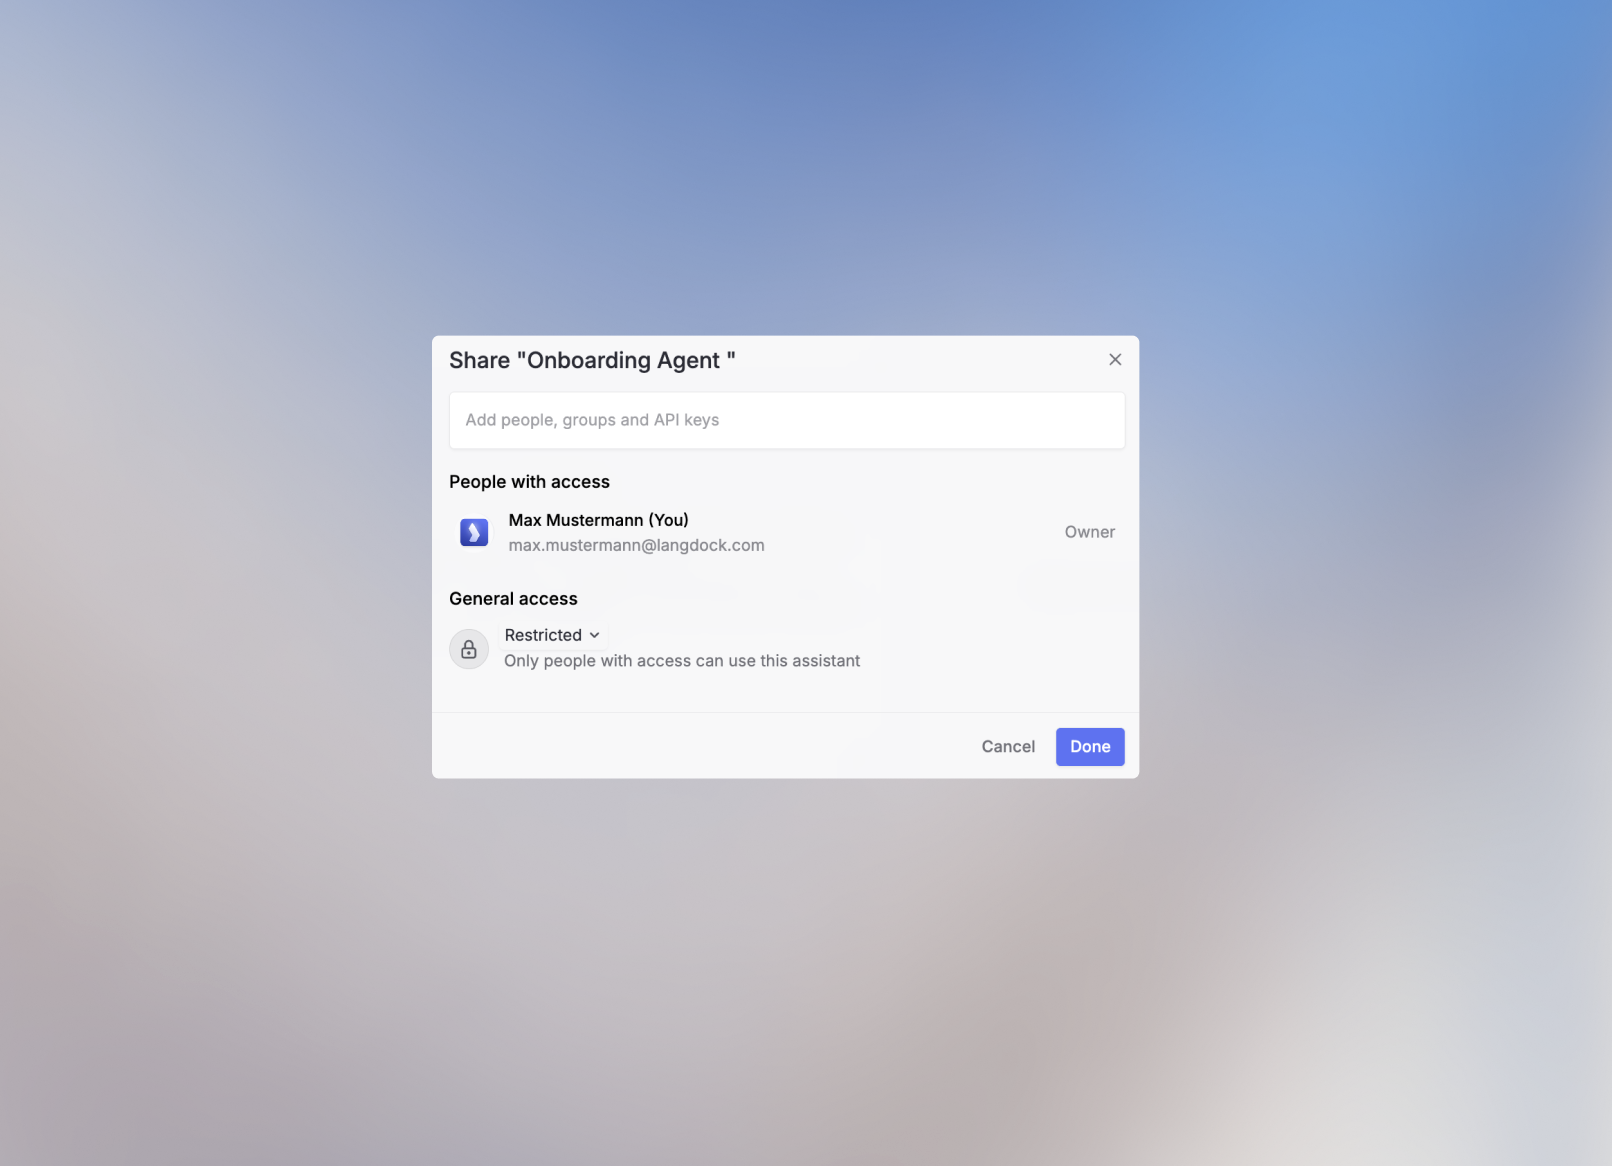
Sharing Your Agent
1
Share with Others
Click the Share button in the upper right corner to control access:Sharing options might be restricted in your workspace based on your admin’s security settings.
- Workspace
- Link Sharing
- Groups & Individuals
Share with your entire workspace for broad access.
2
Additional Options
Use the agent configuration to:
- Duplicate: Create a copy for experimentation
- Delete: Remove the agent
- Analytics and Feedback: View usage data and user feedback
Best Practices
Iterative Improvement
- Start Simple: Begin with basic functionality and add complexity gradually
- Test Extensively: Try various scenarios and edge cases
- Gather Feedback: Monitor analytics and collect user feedback
- Refine Instructions: Update based on real-world usage patterns
Common Pitfalls to Avoid
Next Steps
Now that you’ve created your agent, consider:- Setting up integrations to connect with your existing tools
- Creating prompt templates for common use cases
Agent Templates
Explore ready-to-use agent templates for common business use cases
Prompt Engineering
Master the art of writing effective prompts and instructions
FAQ
When should I create an agent?
When should I create an agent?
Create an agent when users repeatedly need the same role, instructions, knowledge, or tools. Agents are useful for specialized assistants, team workflows, and repeatable processes that benefit from saved configuration.
What should I check if a new agent does not behave as expected?
What should I check if a new agent does not behave as expected?
Review the instructions, attached knowledge, tools, model, and example prompts. Start with a focused scope, test common cases, and add complexity only after the agent handles the core task reliably.