> ## Documentation Index
> Fetch the complete documentation index at: https://docs.langdock.com/llms.txt
> Use this file to discover all available pages before exploring further.
# Model Context Protocol (MCP)
> Langdock’s implementation of the Model Context Protocol (MCP) enables seamless integration with external tools and services, providing powerful extensibility for AI agents and chat interactions.
## What is MCP?
MCP is an open protocol that standardizes how applications provide context to LLMs.
Think of MCP like a USB-C port for AI applications. Just as USB-C provides a standardized way to connect your devices to various peripherals and accessories, MCP provides a standardized way to connect AI models to different data sources and tools.
MCP integrations in Langdock reuse the existing integration architecture with MCP-specific extensions, allowing the same action execution system to work for both traditional integrations and MCP servers.
## Langdock MCP Key Features
### Transport Types
* **STREAMABLE\_HTTP**: HTTP-based transport with optional streaming support
* **SSE (Server-Sent Events)**: Real-time communication transport for streaming data
### Authentication Methods
* **No Authentication:** For public MCP servers that don't require identification
* **API Key Authentication:** Simplified key-based authentication with automatic header formatting
* **OAuth Authentication:** Full OAuth 2.0 with DCR support for secure authorization flows
* **Advanced OAuth Authentication:** Full OAuth 2.0 without DCR support
### Authentication Details
* **Custom headers:** Add static values or the placeholders `{{ access_token }}`, `{{ refresh_token }}`, and `{{ api_key }}`. On dedicated deployments with user OAuth login enabled, you can also use `{{ user_oauth_access_token }}` to forward the user's Langdock login token to the MCP server.
* **OAuth discovery:** Langdock discovers supported OAuth metadata and scopes automatically when available.
* **MCP Apps:** Some MCP Apps expose connection metadata for faster setup.
* **Advanced OAuth:** Use Advanced OAuth when your server does not support Dynamic Client Registration.
### Tool Integration
**Automatic Discovery:** Langdock discovers tools and resources from the MCP server during setup and shows up to 50 items. Tools are converted to Langdock actions with the same previews you're familiar with.
* **Tools:** Select the tools you want Agents to call.
* **Confirmation:** Newly saved tools and resources do **not** require confirmation before execution by default. You can enable confirmation per tool after saving if you need a confirmation step.
### MCP Resources
MCP resources expose contextual data from the server. Langdock discovers resources during setup and lets you save the ones you want to make available. For file resources, see [MCP File Outputs](/en/using-langdock/guides/integrations/mcp/mcp-file-outputs).
### Langdock as an MCP Server
Langdock also provides its own MCP server endpoint, allowing external AI clients to call your Langdock agents.
Connect external AI clients to your Langdock agents via MCP
## Getting Started
Different authentication methods have slightly different connection flows.
1. **Enter URL**
Enter the endpoint URL of your MCP server.
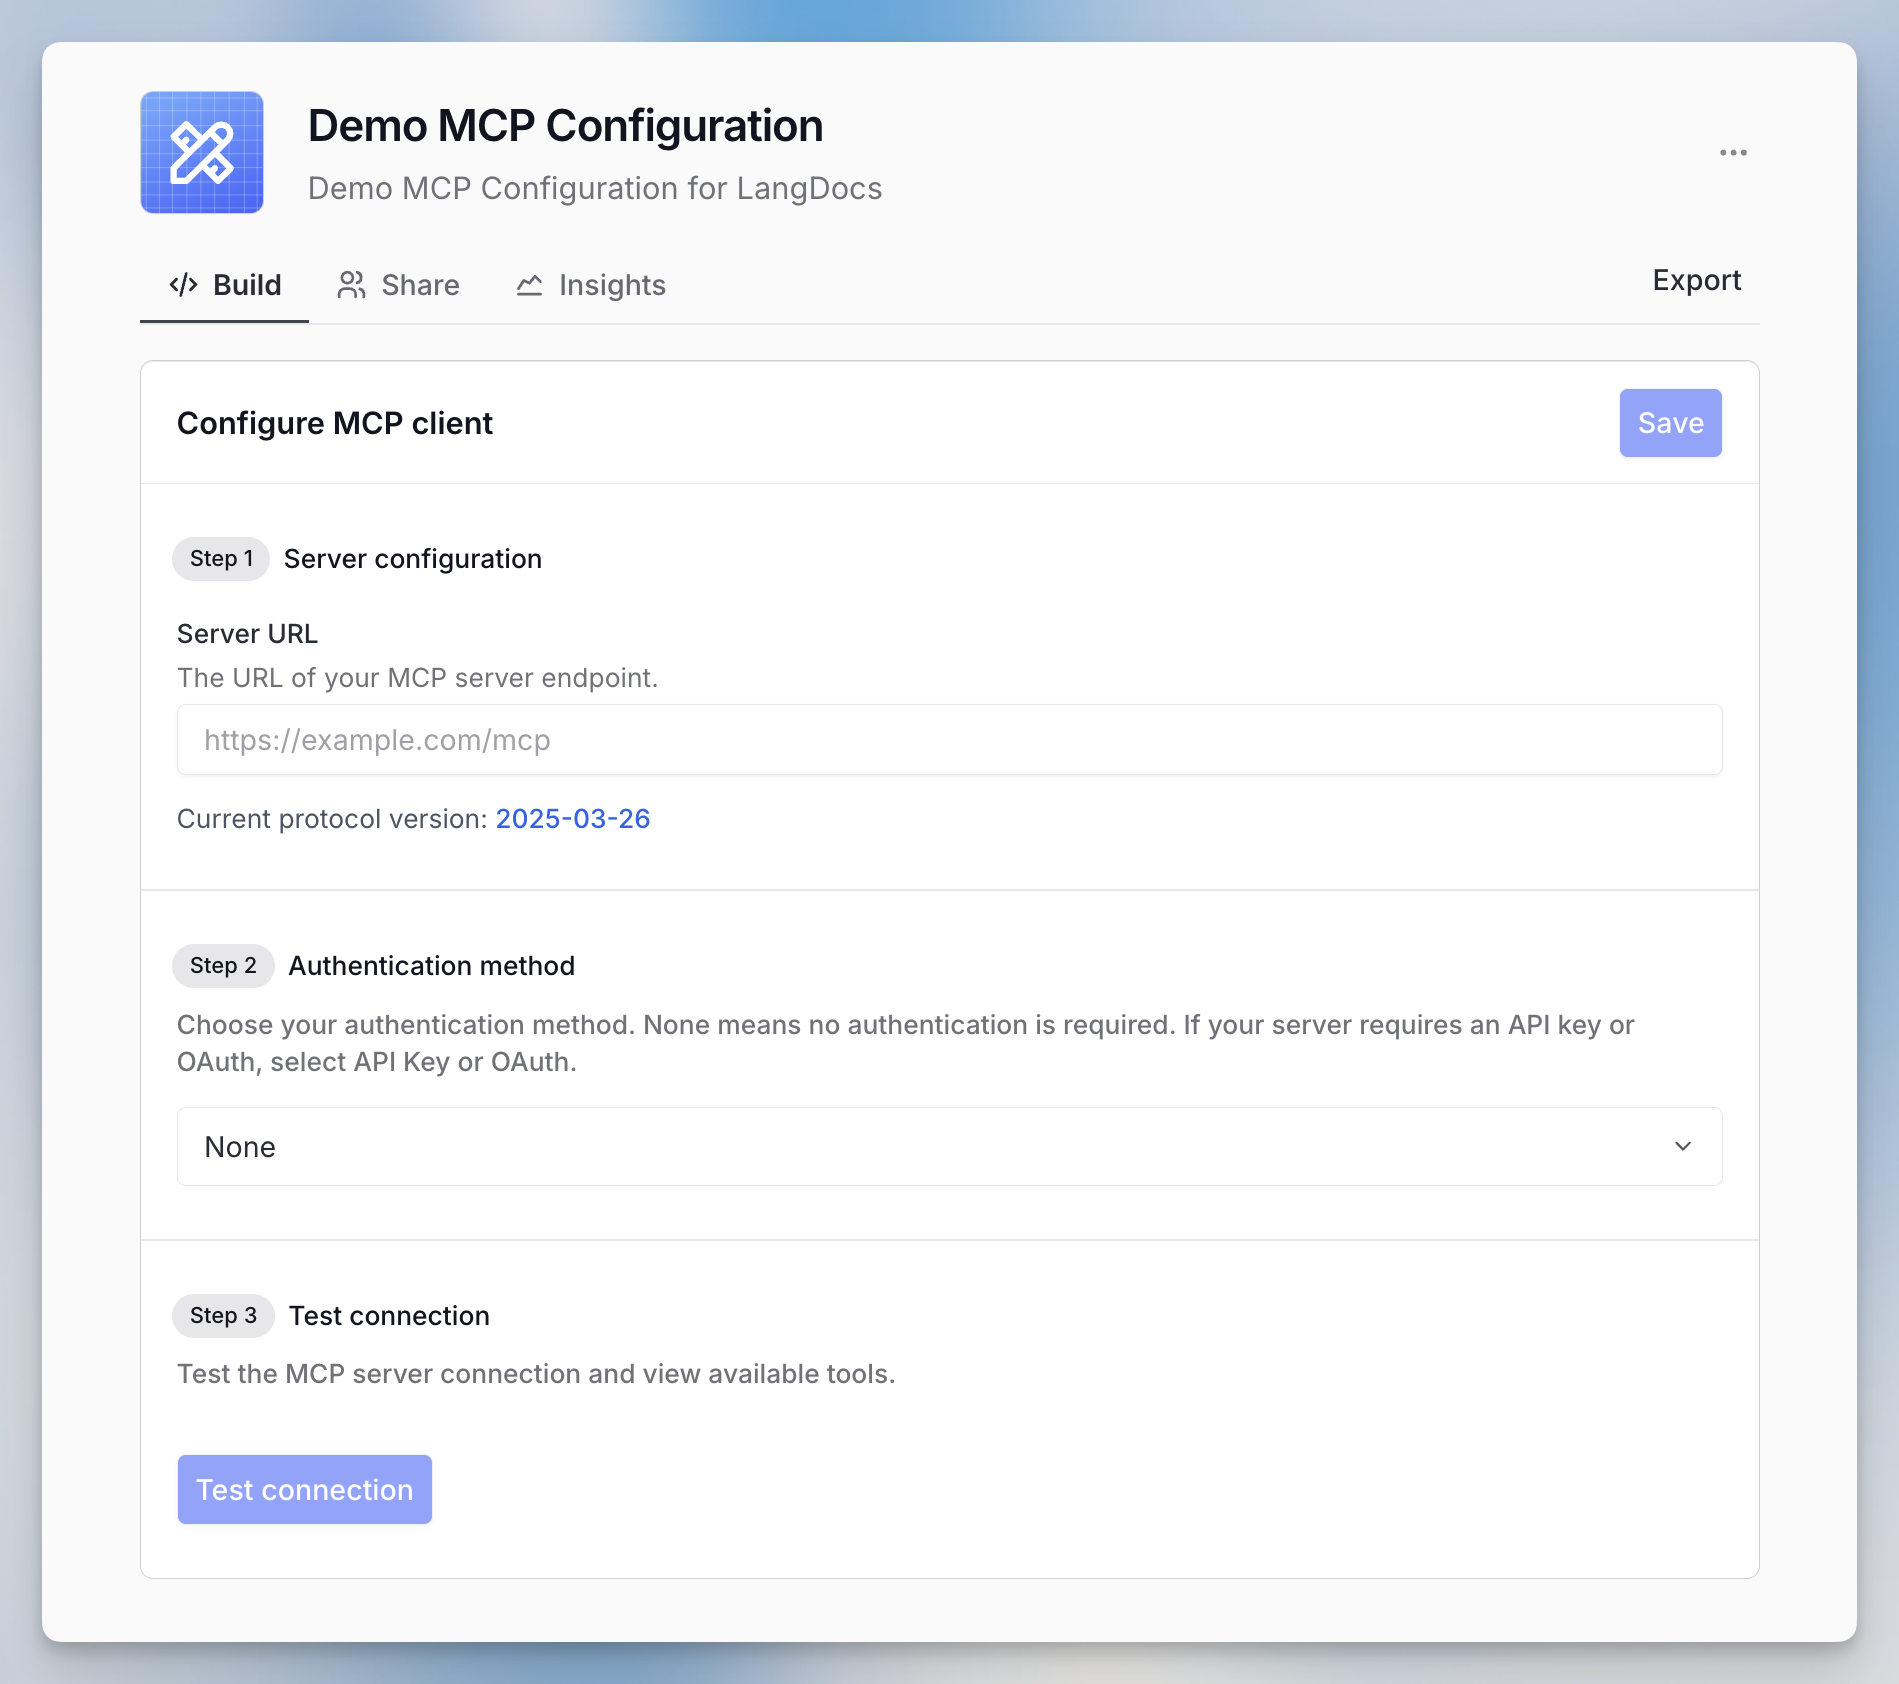 2. **Select Authentication Method**
Choose one of the four authentication types. Follow the respective guide below:
### **No Authentication & API Key Authentication**
For public or API key-protected servers, simply enter the server URL (and API key if required).
### OAuth Authentication
For servers supporting OAuth with PKCE, the connection process is straightforward:
2. **Select Authentication Method**
Choose one of the four authentication types. Follow the respective guide below:
### **No Authentication & API Key Authentication**
For public or API key-protected servers, simply enter the server URL (and API key if required).
### OAuth Authentication
For servers supporting OAuth with PKCE, the connection process is straightforward:
 1. Enter the server URL and select OAuth.
2. Click **"+ Add connection"** to initiate the OAuth flow.
1. Enter the server URL and select OAuth.
2. Click **"+ Add connection"** to initiate the OAuth flow.
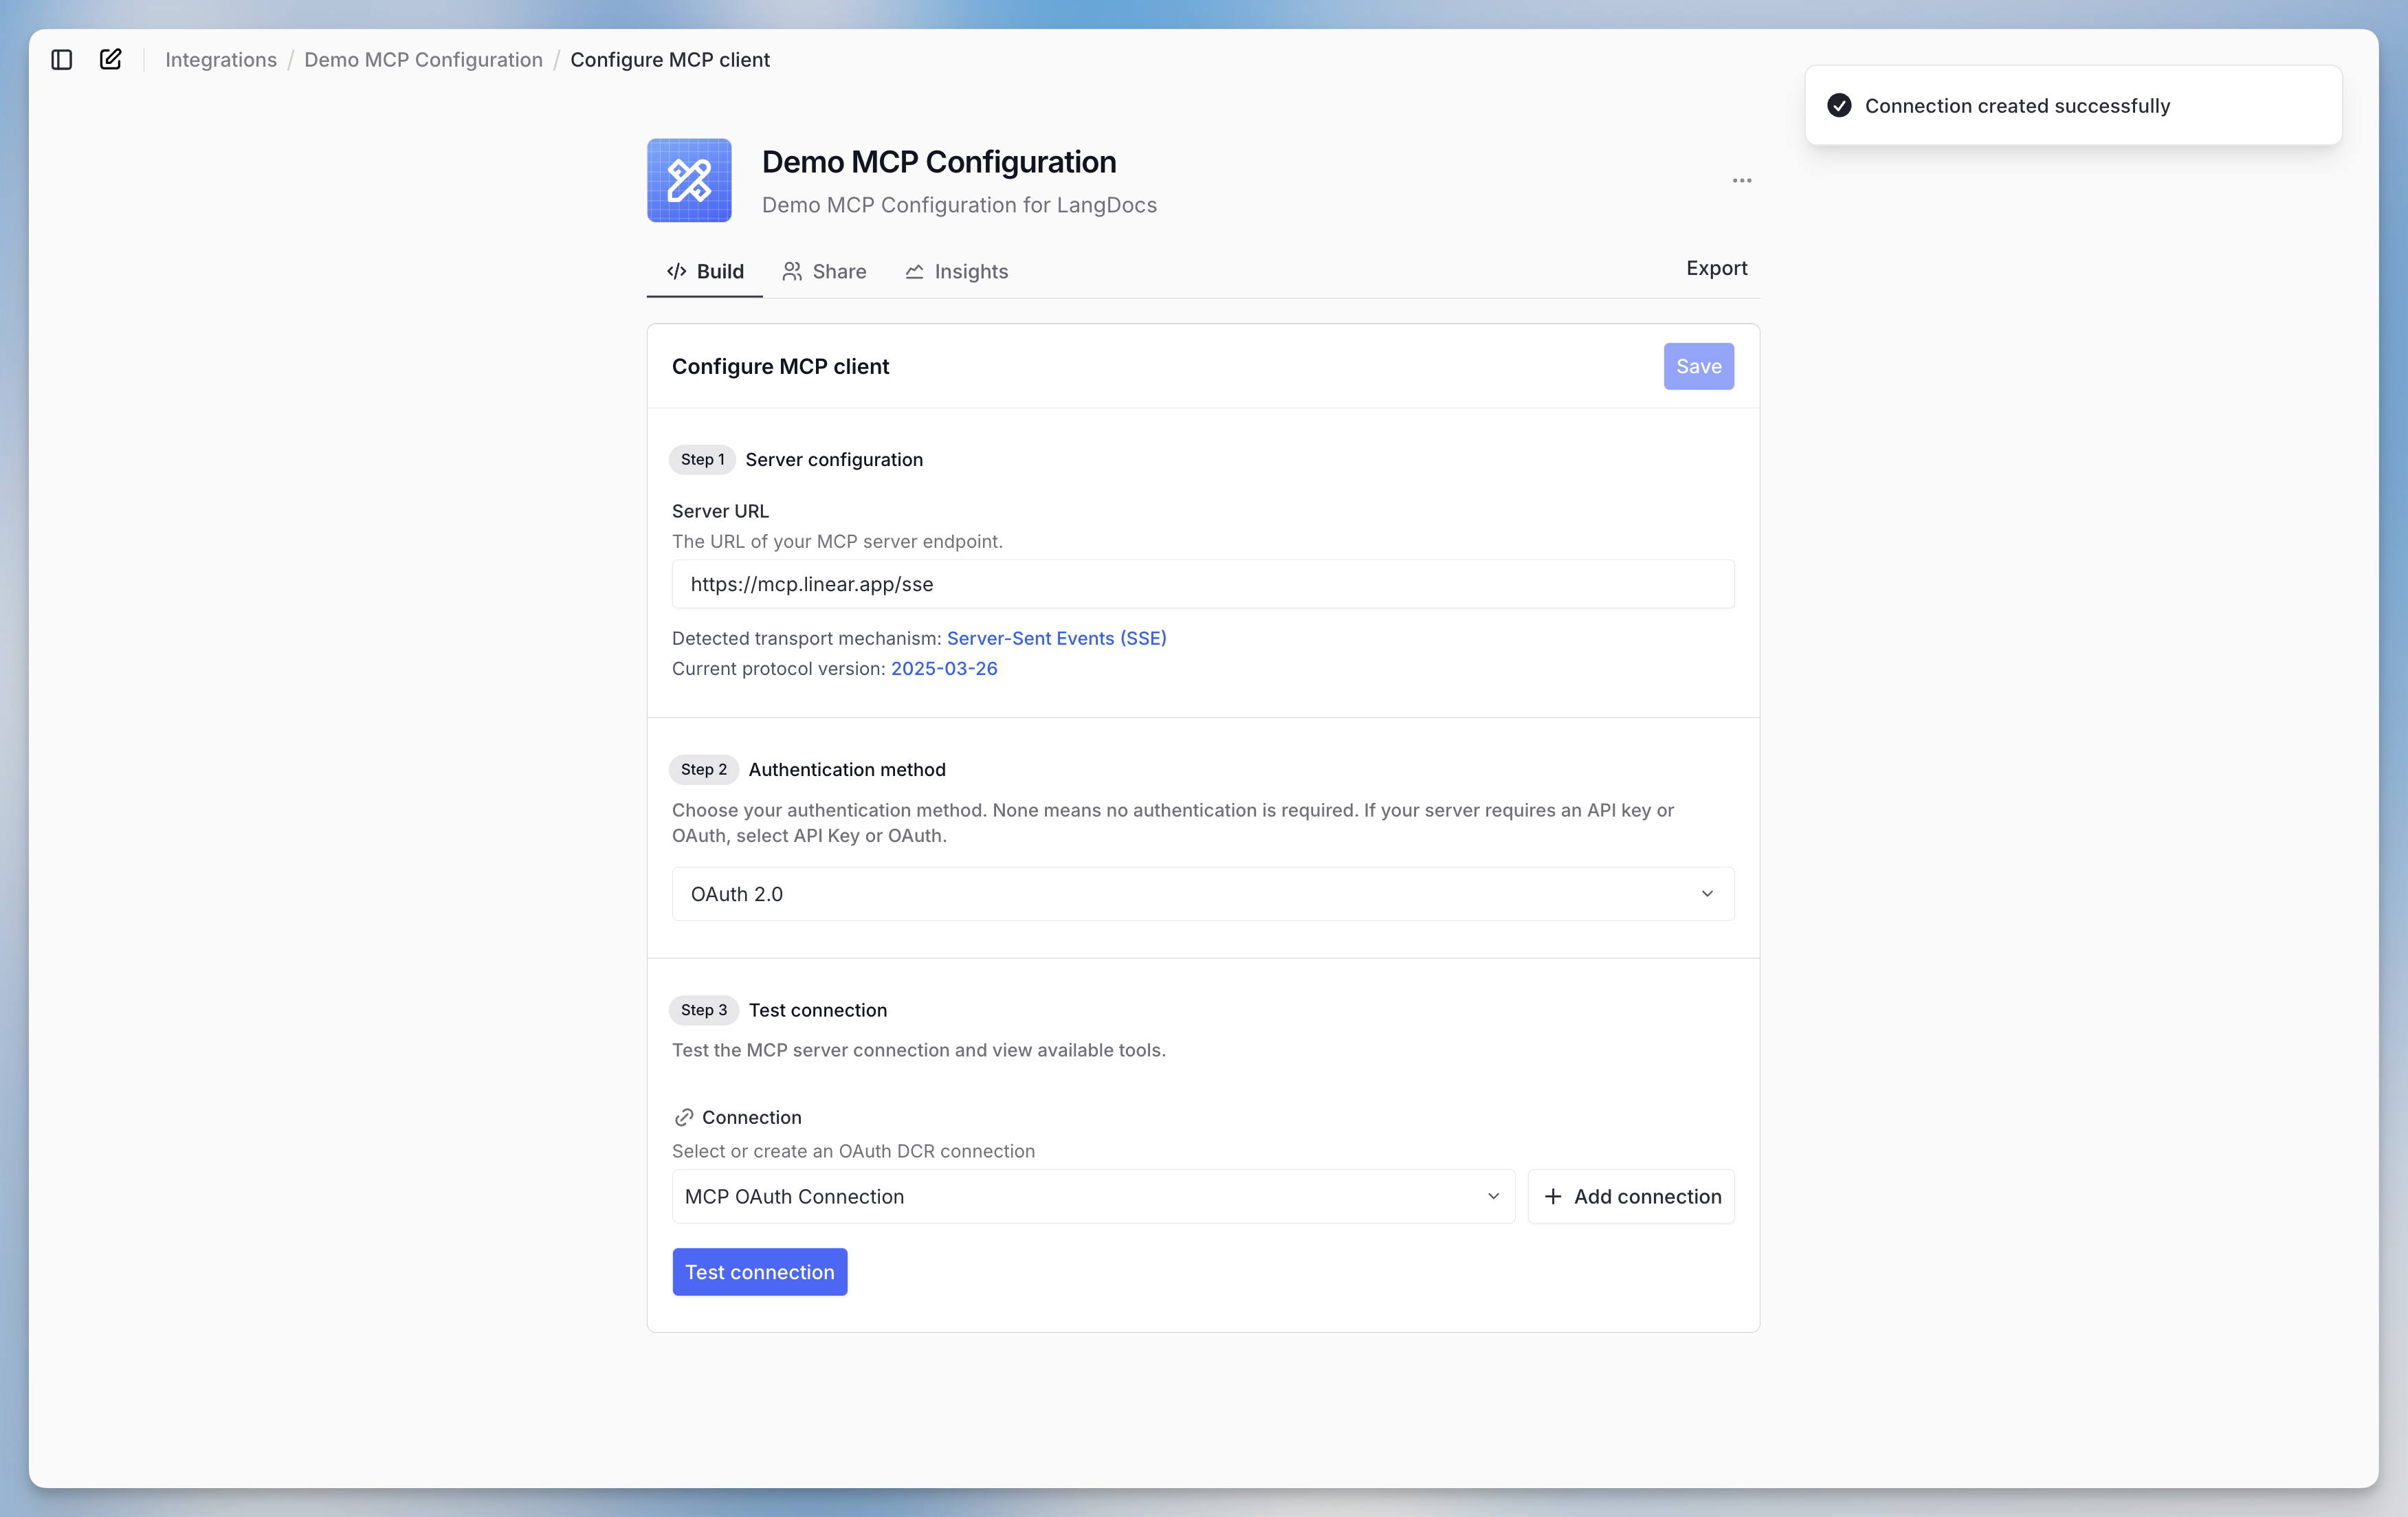 3. Once connected, a success popup will confirm the connection.
4. Click **"Test connection"** to verify access and see available tools. If the test fails, Langdock shows the error returned by the server.
3. Once connected, a success popup will confirm the connection.
4. Click **"Test connection"** to verify access and see available tools. If the test fails, Langdock shows the error returned by the server.
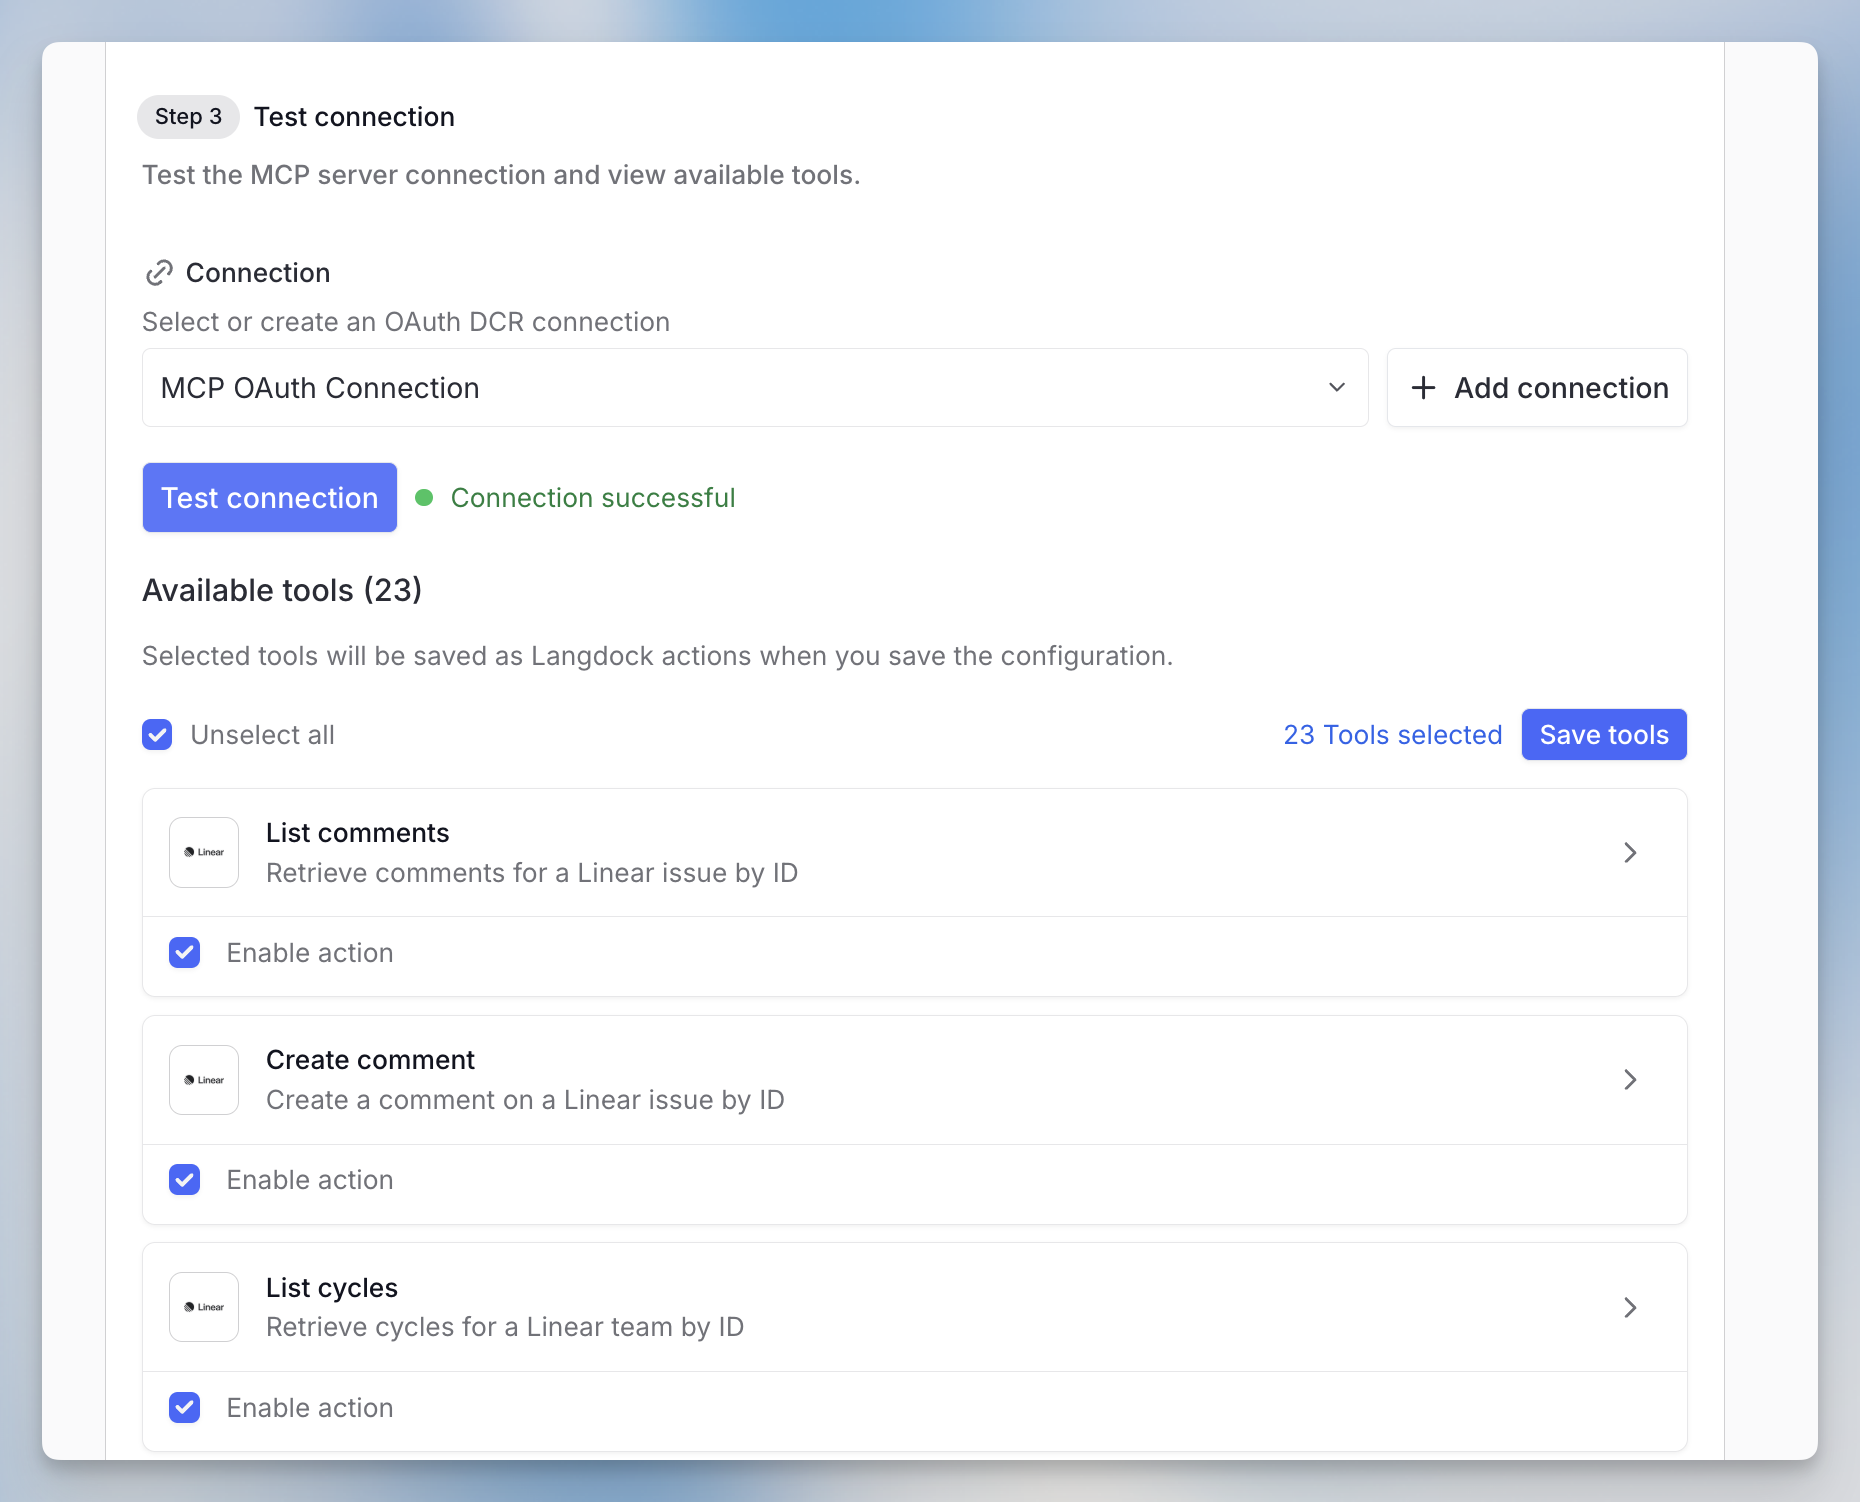 5. Select the tools you want to use, then click **"Save tools"**. Use `CMD` + `S` on Mac or `Ctrl` + `S` on Windows to save. Use `CMD` + `Enter` on Mac or `Ctrl` + `Enter` on Windows to test.
### Advanced OAuth Authentication
For servers using OAuth without DCR, the process involves a few extra steps:
5. Select the tools you want to use, then click **"Save tools"**. Use `CMD` + `S` on Mac or `Ctrl` + `S` on Windows to save. Use `CMD` + `Enter` on Mac or `Ctrl` + `Enter` on Windows to test.
### Advanced OAuth Authentication
For servers using OAuth without DCR, the process involves a few extra steps:
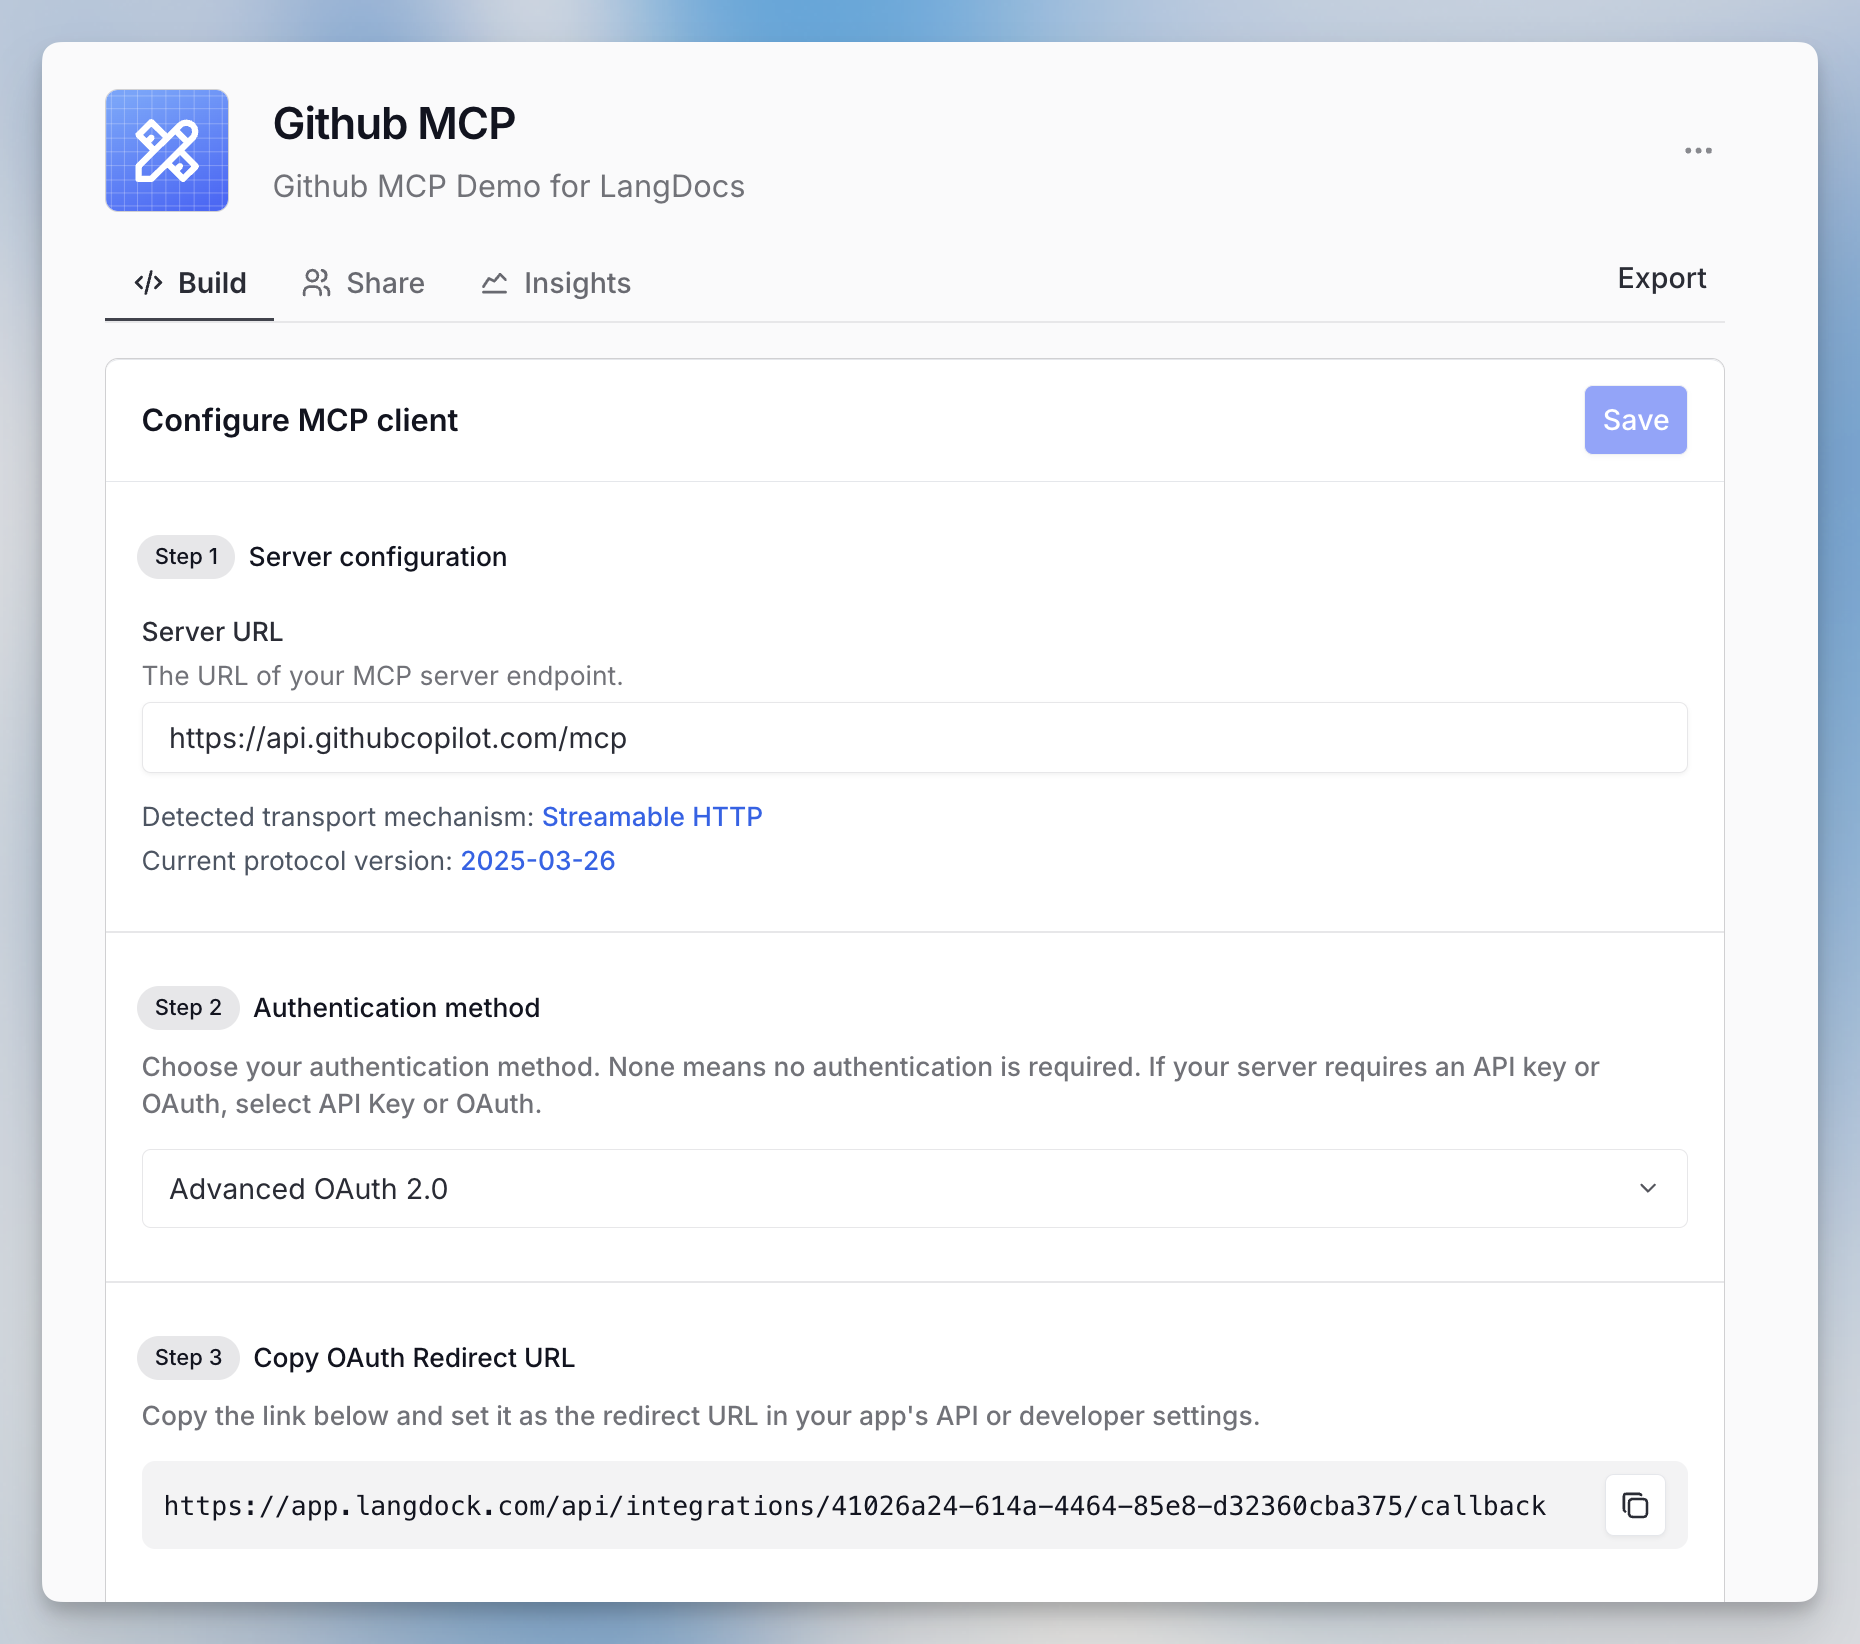 1. Enter the server URL and select Advanced OAuth 2.0.
2. Copy the OAuth redirect URL into your app’s API or developer settings.
1. Enter the server URL and select Advanced OAuth 2.0.
2. Copy the OAuth redirect URL into your app’s API or developer settings.
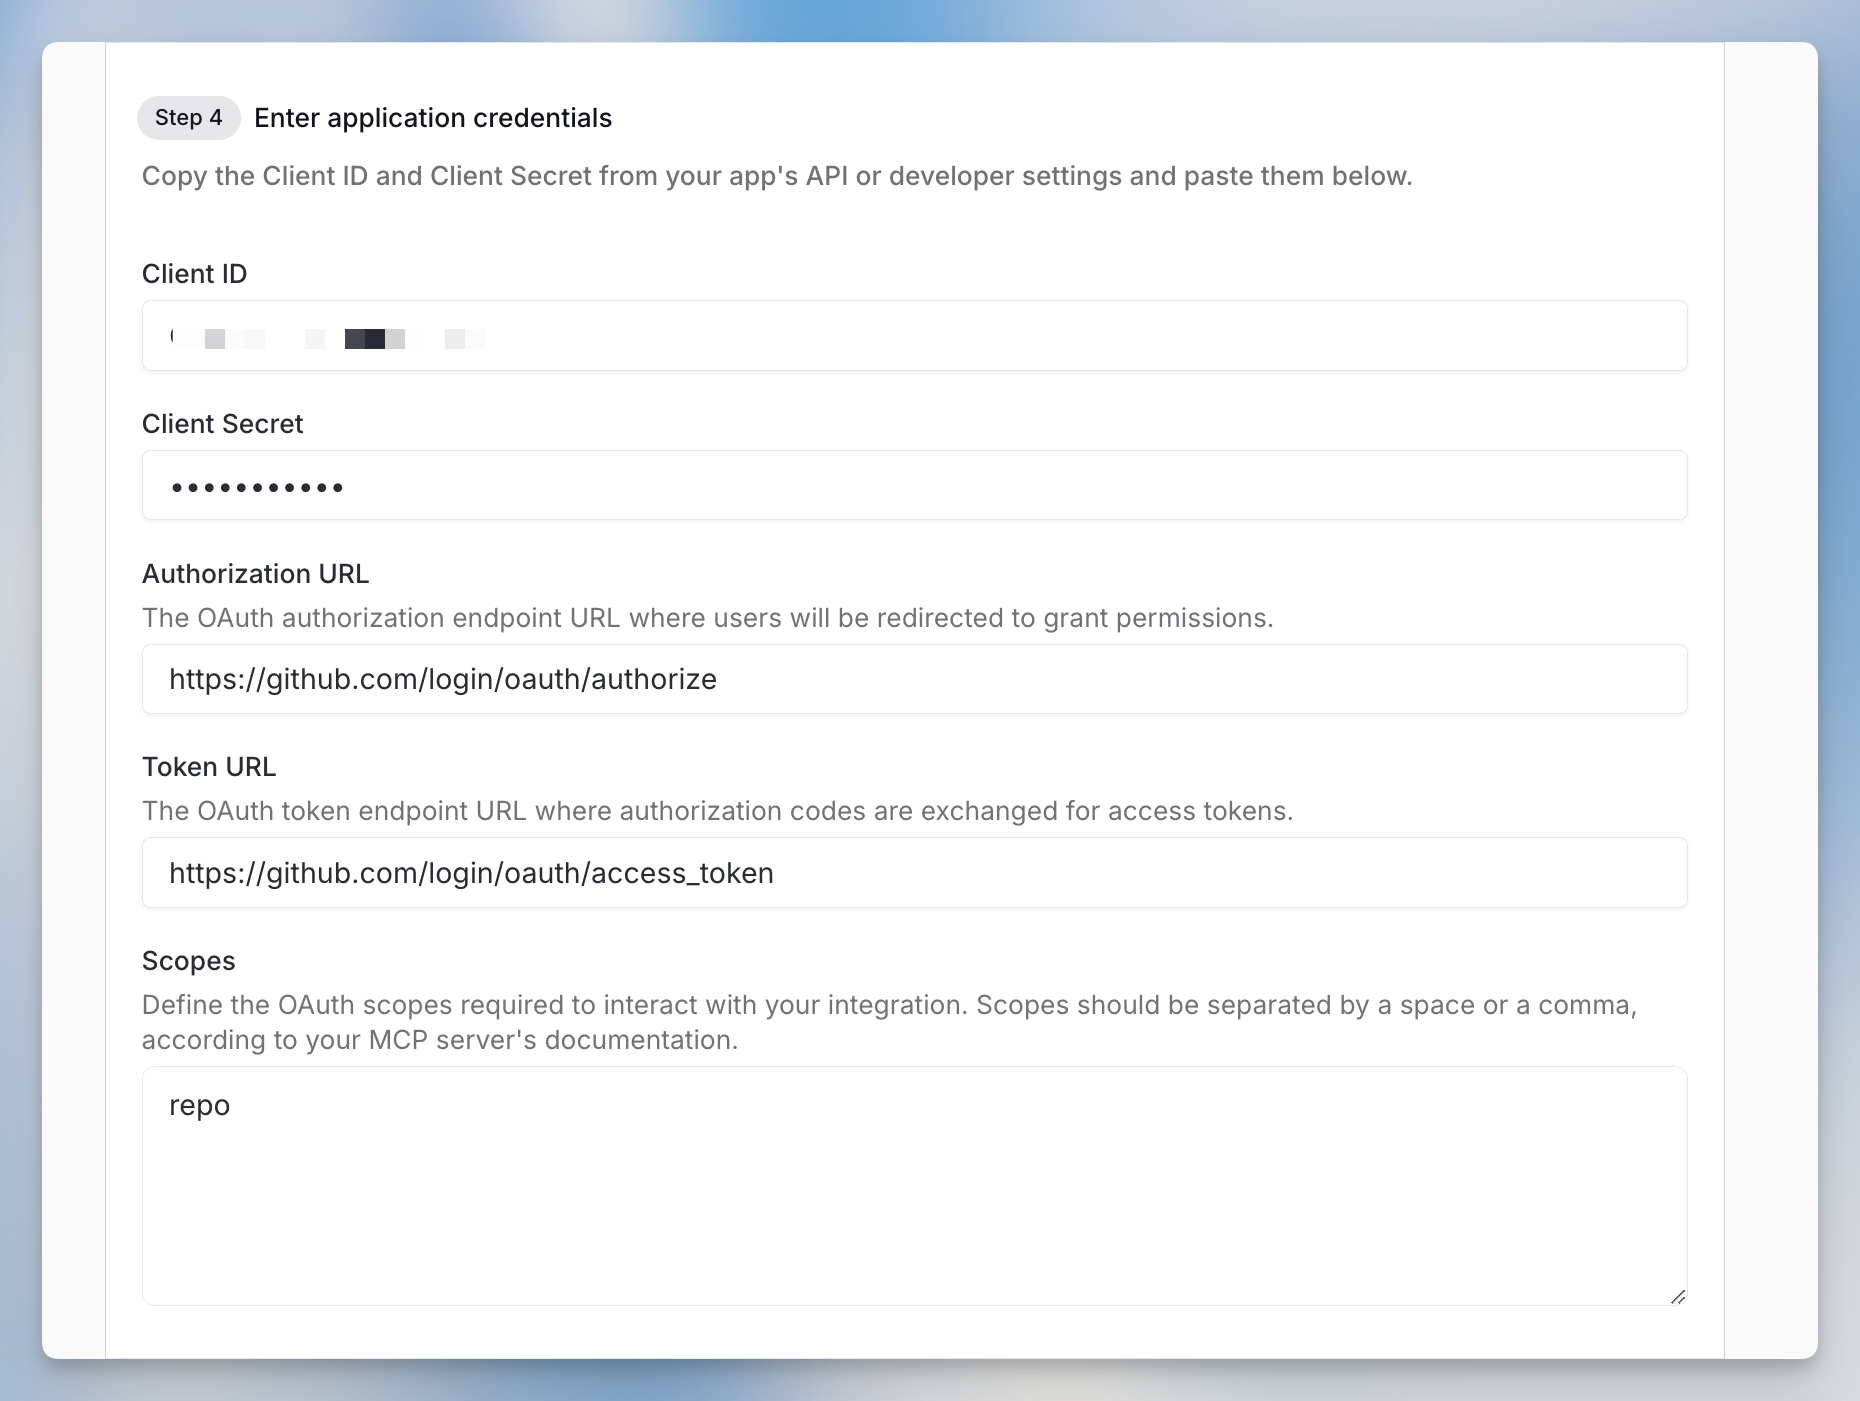 3. Copy Client ID and Client Secret from your app into Langdock
4. Add Authorization URL (for permissions) and Token URL (for token exchange)
5. Define required OAuth scopes (space or comma-separated per your server's documentation)
6. Leave **Send resource parameter** enabled to send the MCP server URL as the OAuth resource parameter. Disable it for servers that include the resource in the scope, such as Entra ID.
3. Copy Client ID and Client Secret from your app into Langdock
4. Add Authorization URL (for permissions) and Token URL (for token exchange)
5. Define required OAuth scopes (space or comma-separated per your server's documentation)
6. Leave **Send resource parameter** enabled to send the MCP server URL as the OAuth resource parameter. Disable it for servers that include the resource in the scope, such as Entra ID.
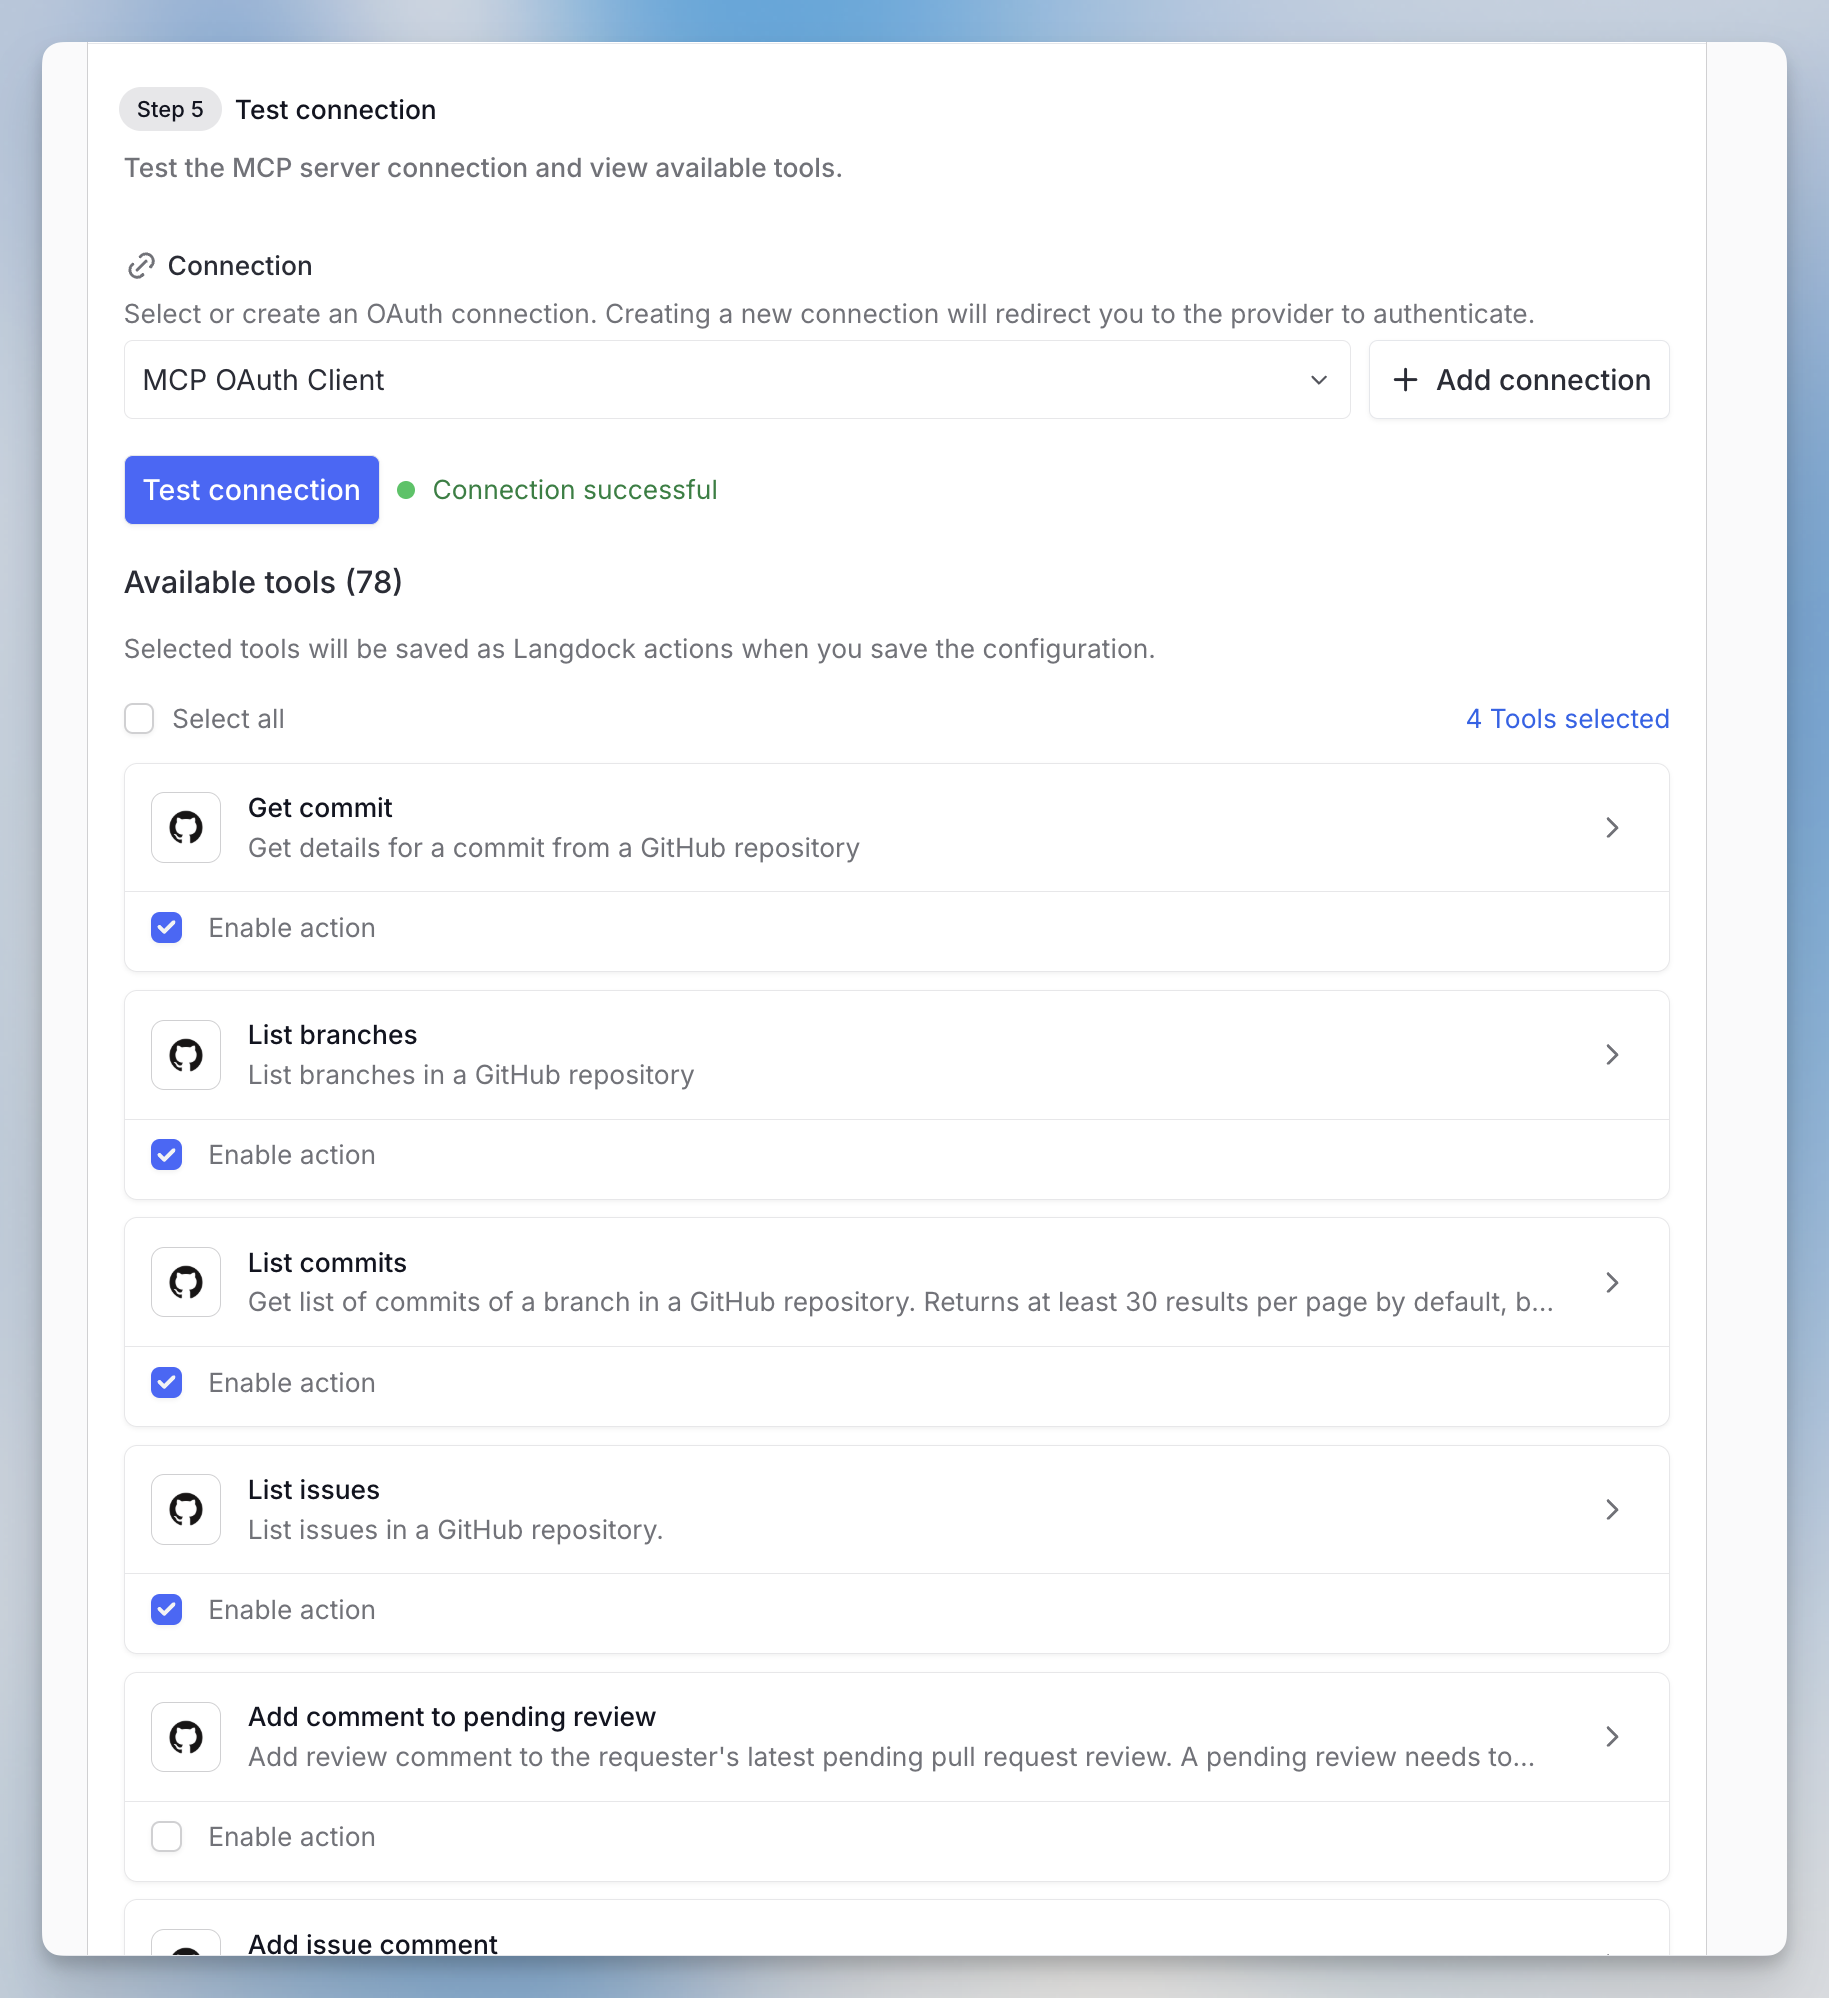 7. Test connection and save tools
***
### Zapier MCP Configuration
For Zapier MCP servers, the URL has this format:
`https://mcp.zapier.com/api/mcp/s/[your-api-key]/mcp`
split your URL as follows:
* **Server URL:** [https://mcp.zapier.com/api/mcp/mcp](https://mcp.zapier.com/api/mcp/mcp)
* **API Key:** The encoded string after /s/ in your original URL
***
## Related Documentation
* [Integrations Overview](/en/using-langdock/integrations/introduction) - Learn about Langdock's integration system
* [File Input in MCP Tools](/en/using-langdock/guides/integrations/mcp/mcp-file-input) - Learn how to pass files to MCP tools
* [Agent Actions](/en/using-langdock/guides/integrations/using-integrations) - Understanding how actions work with agents
## Additional Resources
* [Langdock Cookbook](/en/developer/overview/cookbook) - Runnable MCP recipes, including OAuth and DCR authentication and file handling
* [General introduction to MCP](https://modelcontextprotocol.io/docs/getting-started/intro)
* [Deep Dive into Protocol Specification ](https://modelcontextprotocol.io/specification/2025-06-18)
## FAQ
Use MCP when you want Langdock to connect to external tools or services through the Model Context Protocol. MCP is most useful for extending agents and chats with standardized tool access.
Check server configuration, authentication, tool definitions, permissions, and whether the MCP server is reachable. If a tool appears but fails at runtime, inspect the tool input schema and the error returned by the server.
7. Test connection and save tools
***
### Zapier MCP Configuration
For Zapier MCP servers, the URL has this format:
`https://mcp.zapier.com/api/mcp/s/[your-api-key]/mcp`
split your URL as follows:
* **Server URL:** [https://mcp.zapier.com/api/mcp/mcp](https://mcp.zapier.com/api/mcp/mcp)
* **API Key:** The encoded string after /s/ in your original URL
***
## Related Documentation
* [Integrations Overview](/en/using-langdock/integrations/introduction) - Learn about Langdock's integration system
* [File Input in MCP Tools](/en/using-langdock/guides/integrations/mcp/mcp-file-input) - Learn how to pass files to MCP tools
* [Agent Actions](/en/using-langdock/guides/integrations/using-integrations) - Understanding how actions work with agents
## Additional Resources
* [Langdock Cookbook](/en/developer/overview/cookbook) - Runnable MCP recipes, including OAuth and DCR authentication and file handling
* [General introduction to MCP](https://modelcontextprotocol.io/docs/getting-started/intro)
* [Deep Dive into Protocol Specification ](https://modelcontextprotocol.io/specification/2025-06-18)
## FAQ
Use MCP when you want Langdock to connect to external tools or services through the Model Context Protocol. MCP is most useful for extending agents and chats with standardized tool access.
Check server configuration, authentication, tool definitions, permissions, and whether the MCP server is reachable. If a tool appears but fails at runtime, inspect the tool input schema and the error returned by the server.