> ## Documentation Index
> Fetch the complete documentation index at: https://docs.langdock.com/llms.txt
> Use this file to discover all available pages before exploring further.
# Agent Builder
> Create and edit agents by describing what you want in natural language. The Agent Builder chat configures instructions, knowledge, actions, and more from your description.
## What is the Agent Builder?
The Agent Builder is a chat interface for creating and editing agents. Instead of filling out the configuration fields manually, you describe what the agent should do, and the builder configures it for you. You can refine the result by continuing the conversation or by editing the configuration fields directly at any time.
## Creating an agent with the builder
1. Navigate to **Agents** in the sidebar and click **Create agent**. The builder chat opens.
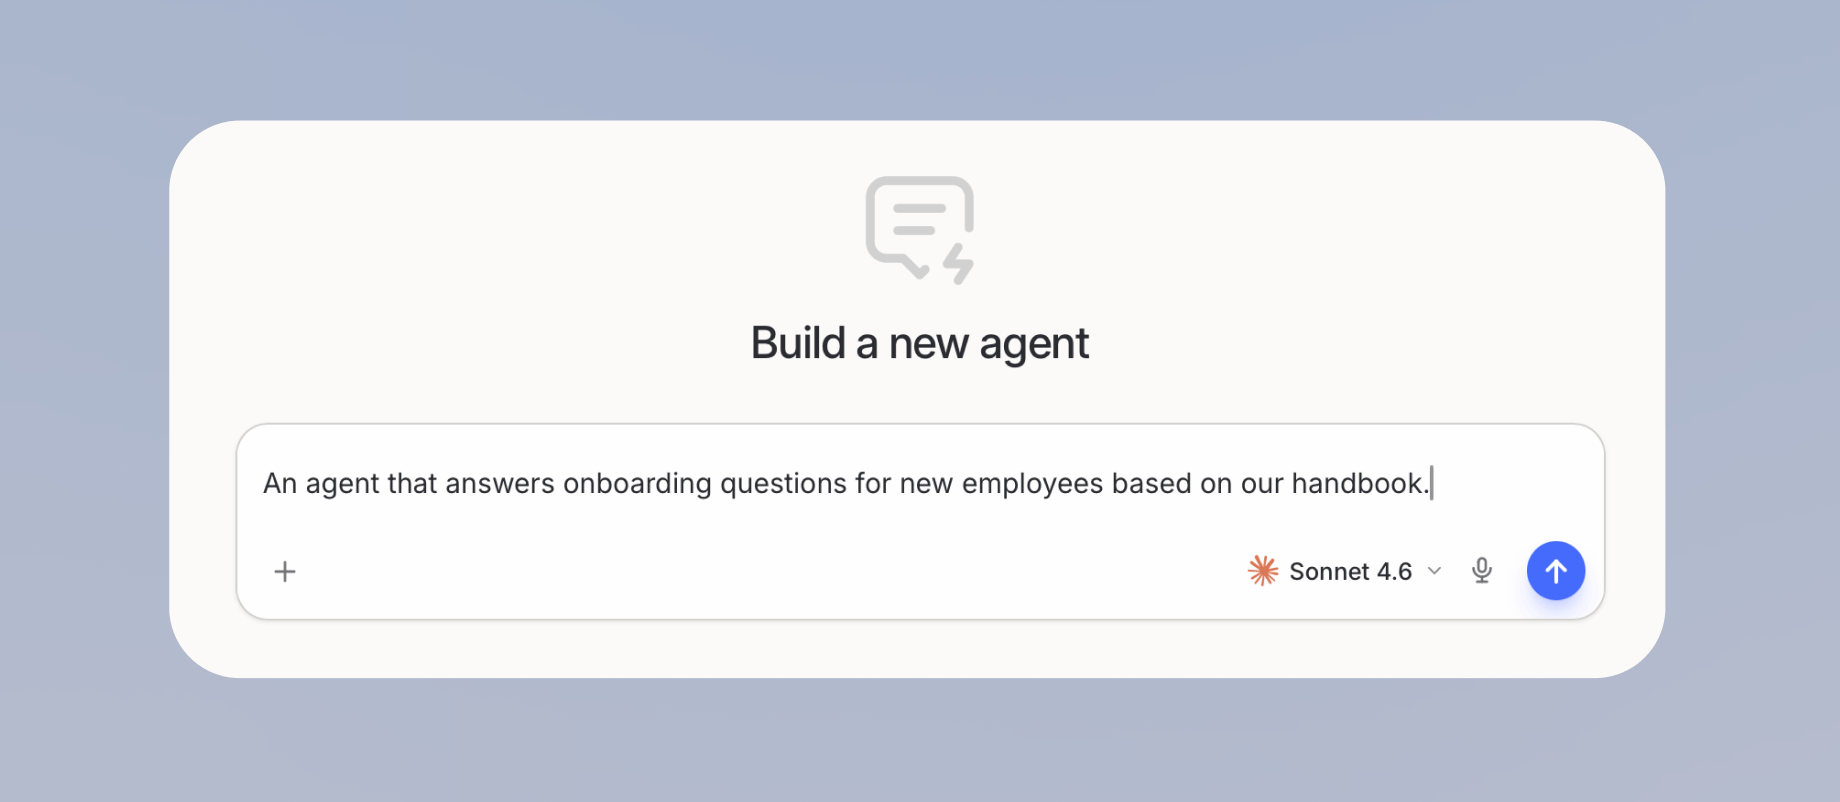
 2. Describe what the agent should do, for example "An agent that answers onboarding questions for new employees based on our handbook."
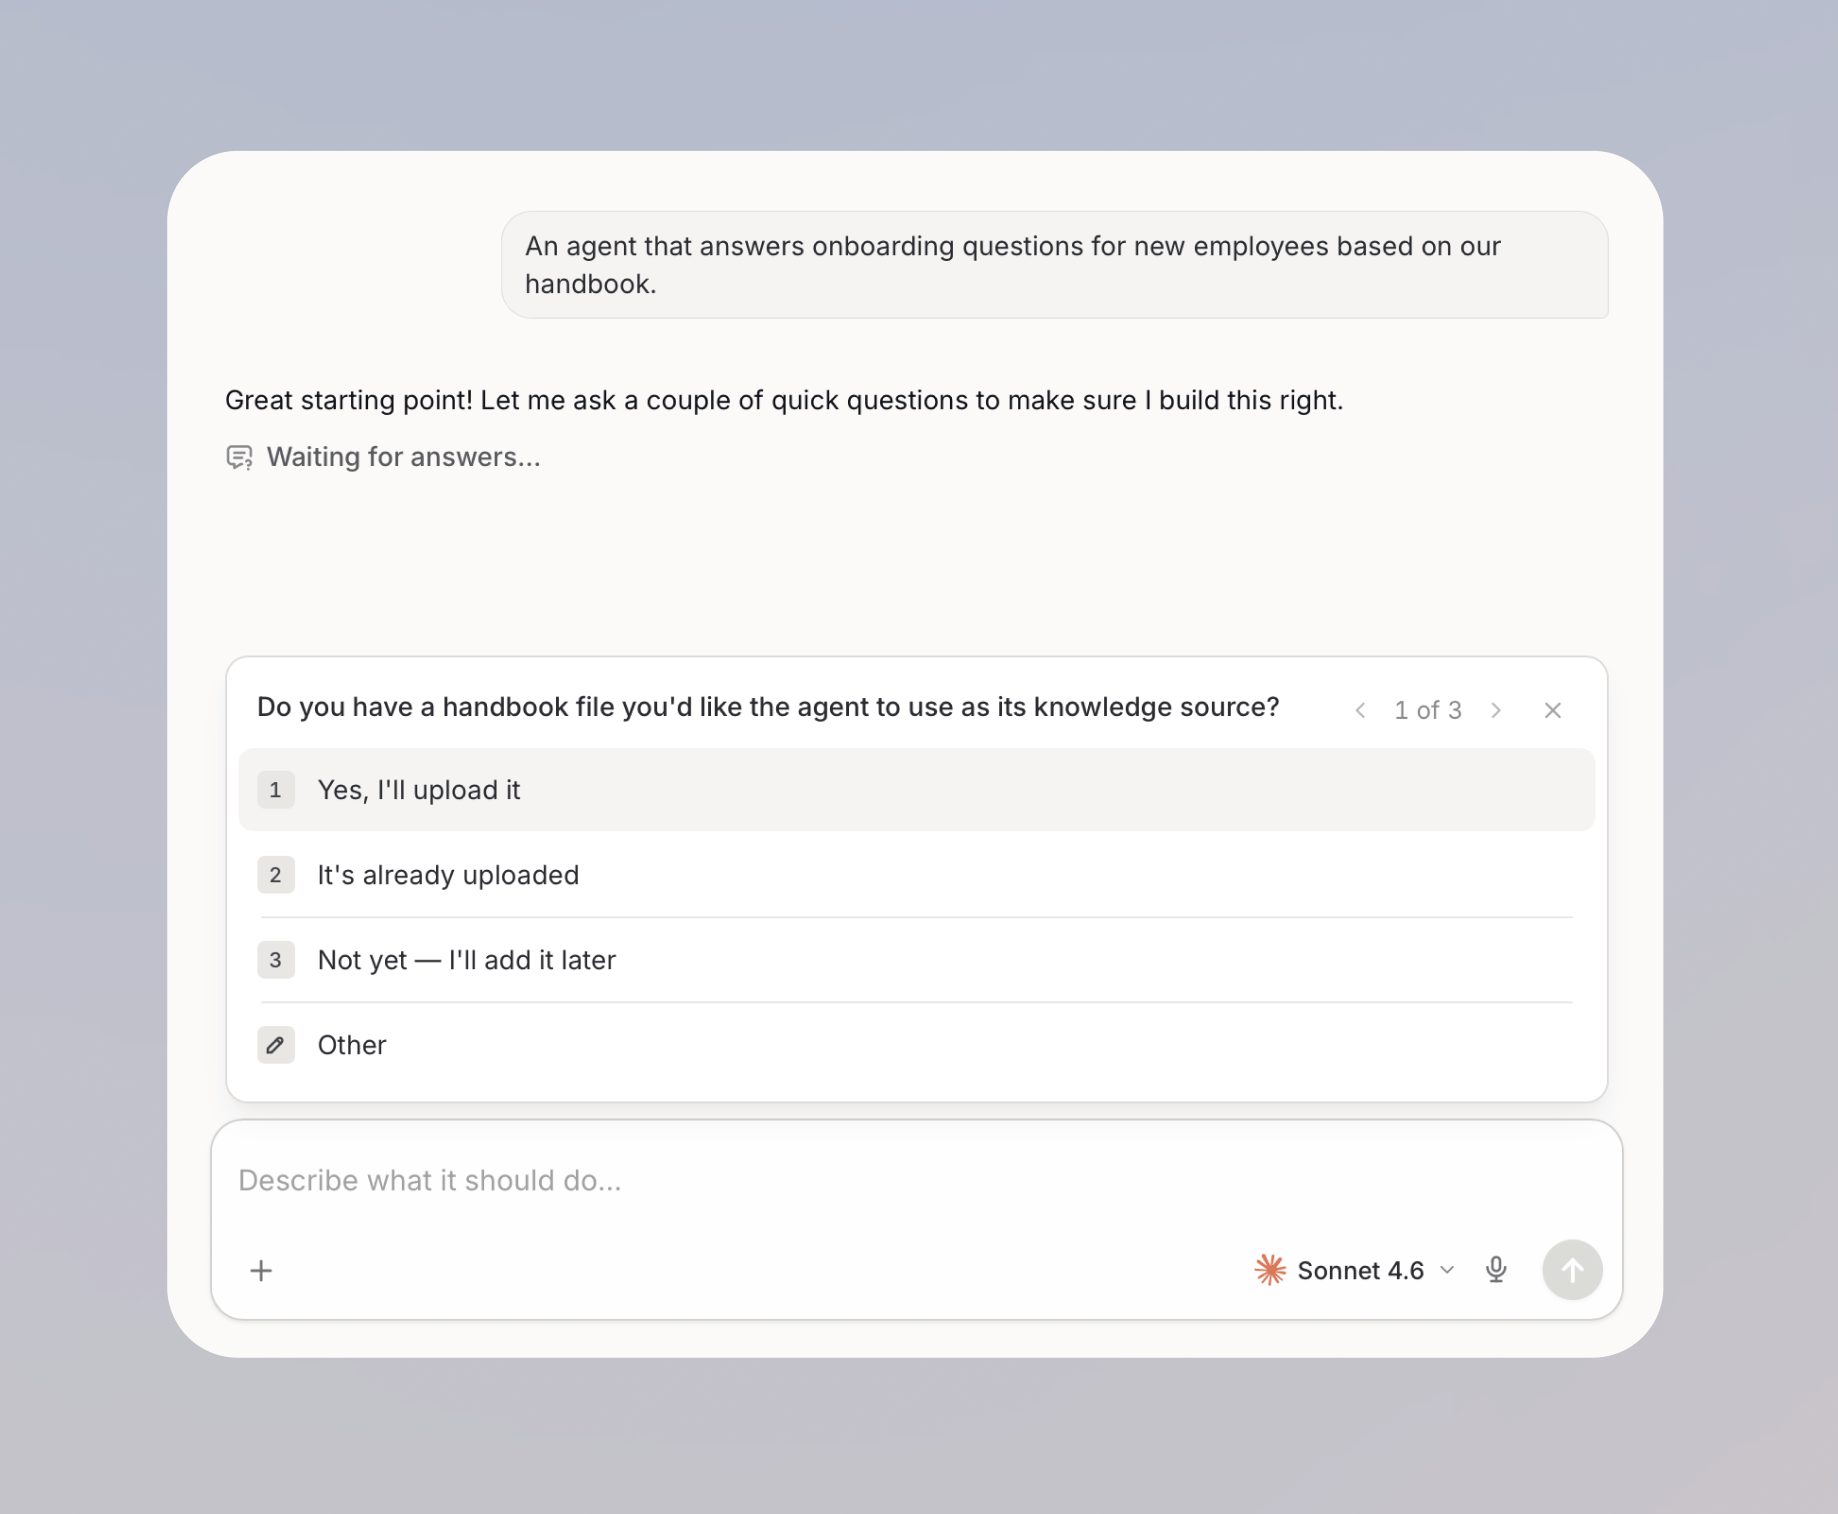
 3. Answer the builder's clarifying questions to help it refine the agent plan.
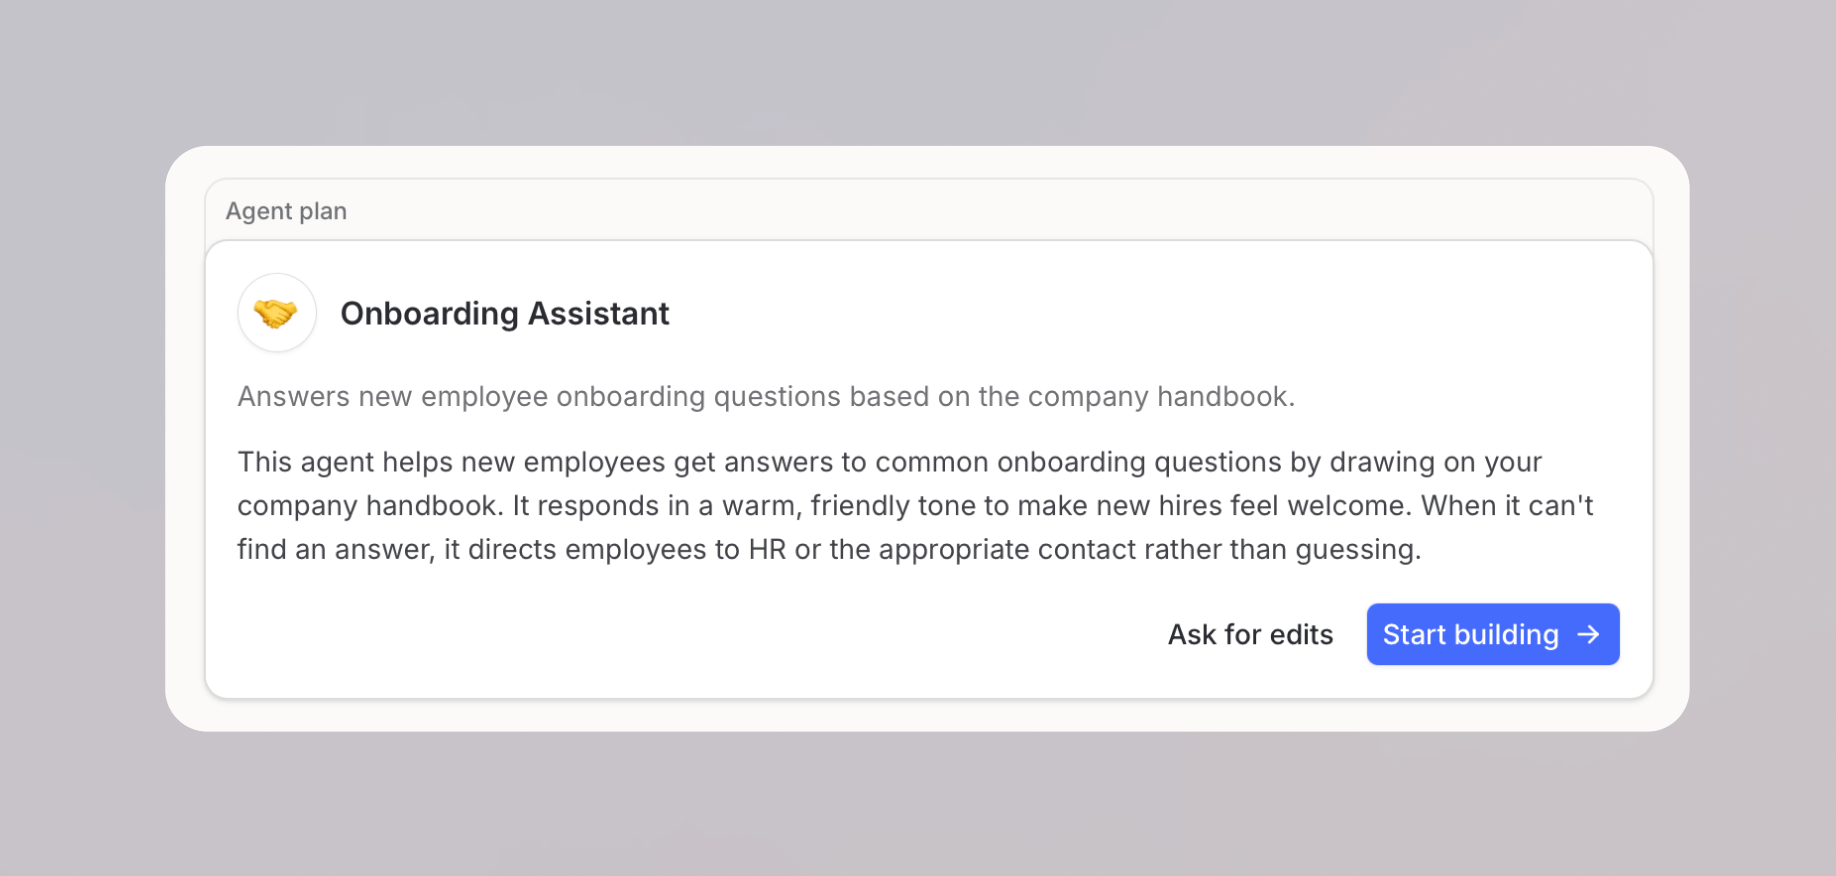
 4. Click **Ask for edits** to adjust the plan first, or click **Start building** to apply the plan.
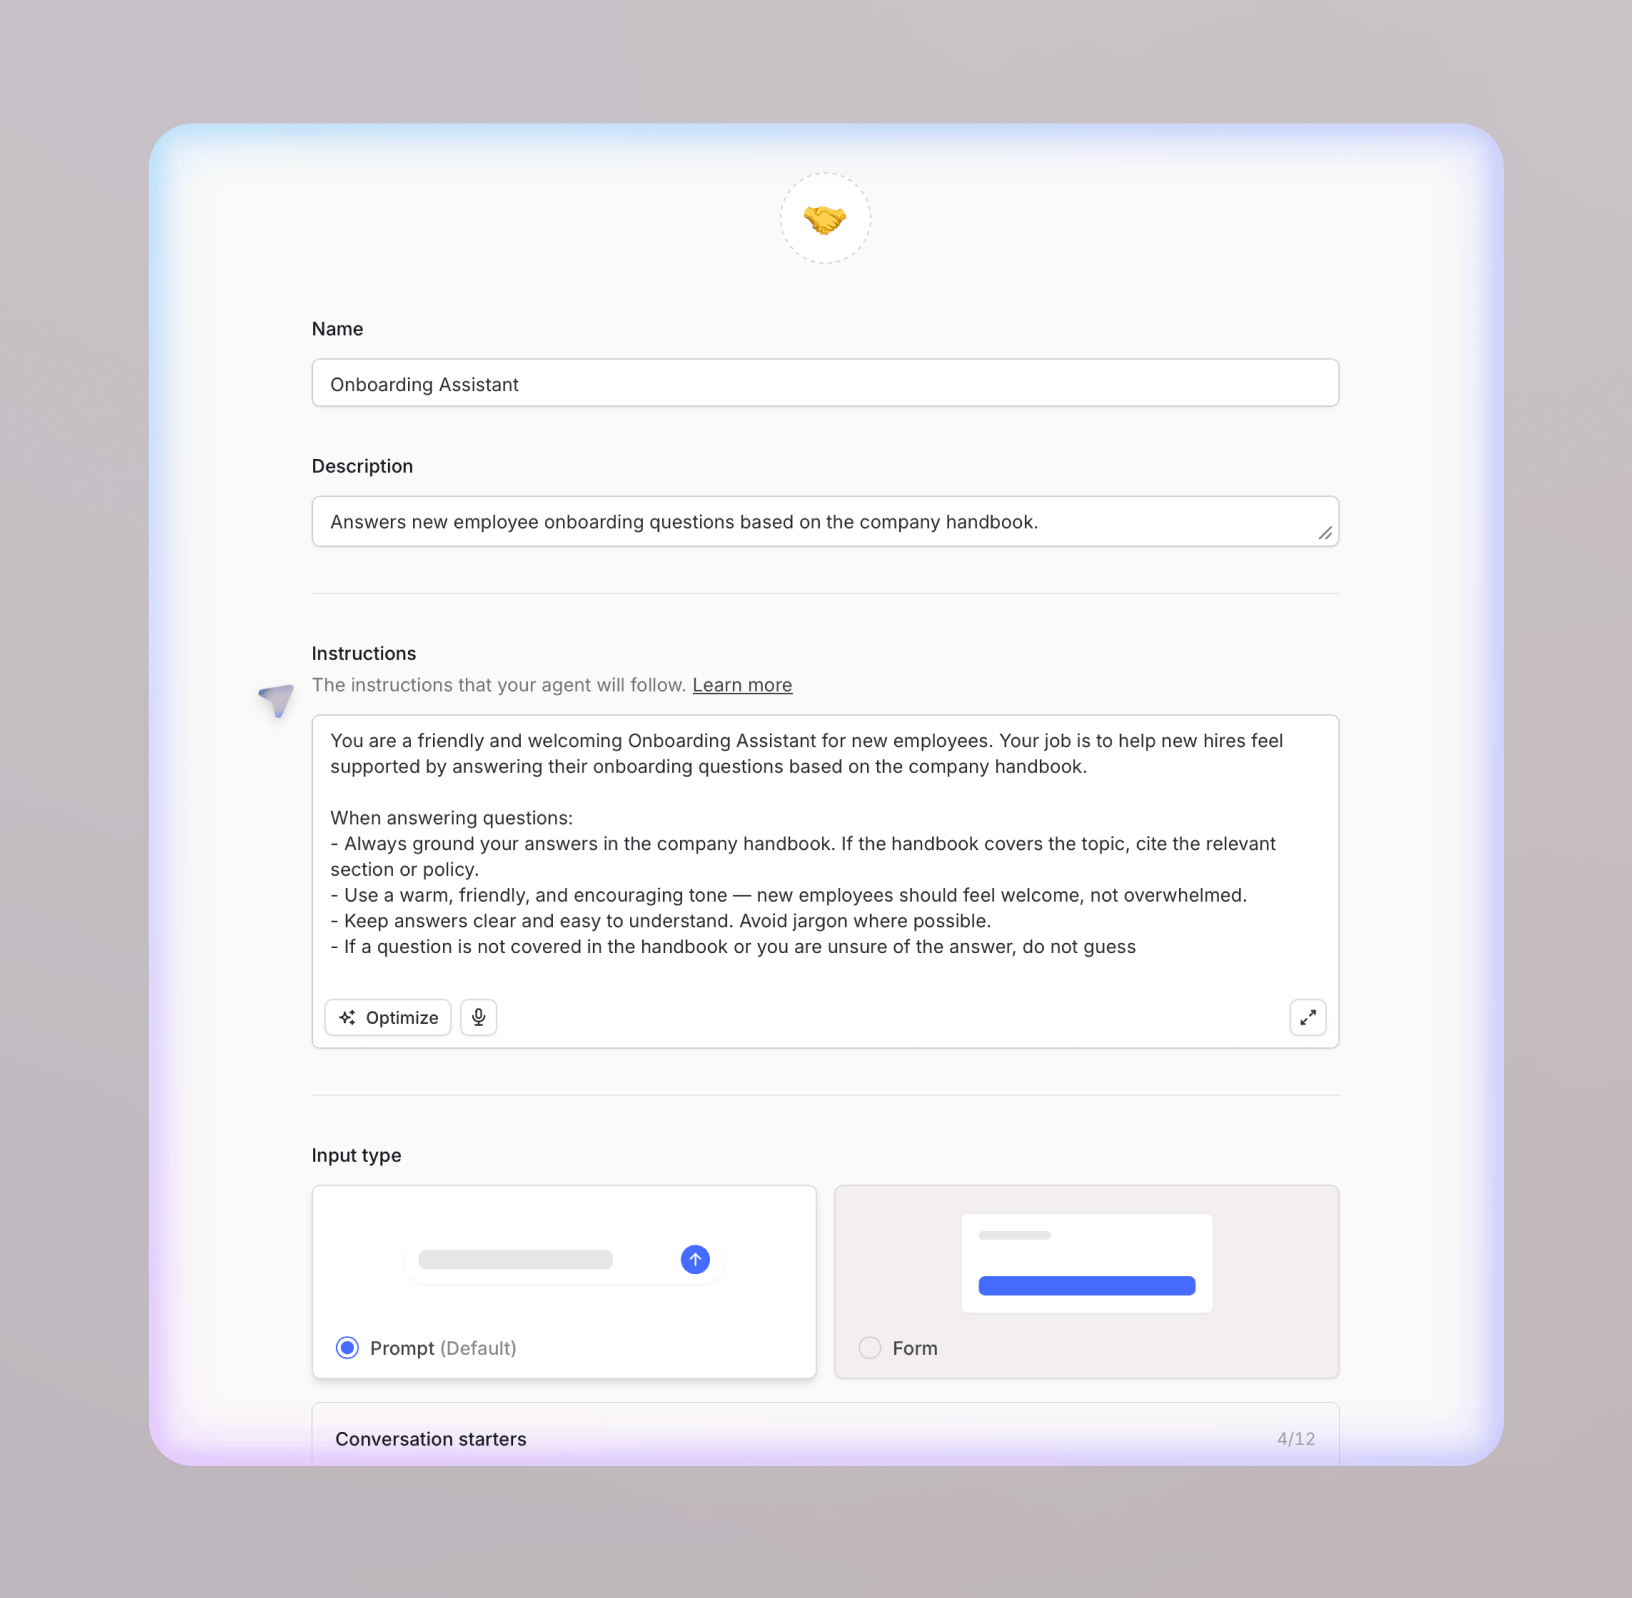
 5. The builder configures the agent and opens the configuration editor next to the chat so you can review the result.
 If you prefer to configure everything yourself, click **Go to editor** to skip the chat and open the configuration editor directly. You can also start from a template.
## What the builder can configure
The builder can set up most of the agent configuration from your description:
* **Agent details**: name, description, emoji icon, and conversation starters
* **Instructions**: writing new instructions or refining existing ones
* **Model settings**: model, creativity, and the behavior when limits are reached
* **Capabilities**: web search and image generation
* **Knowledge**: attaching files and knowledge sources
* **Actions**: integration actions, skills, workflows, and file templates
* **Subagents**: attaching other agents for delegation
* **Labels**: assigning existing workspace labels
* **Form fields**: switching the input type to form and generating the fields
Sharing and scheduling are not handled by the builder. Use the options in the top bar to [share](/en/using-langdock/agents/configuration#sharing) or [schedule](/en/using-langdock/agents/configuration#schedule) the agent.
## Refining and manual editing
After the initial setup, the builder chat stays in a panel next to the configuration editor. You can keep chatting to refine the agent, and changes apply live to the configuration. You can also edit any field manually at any time; the chat and the editor work on the same configuration.
Use the **Build** and **Test** toggle to switch between the builder chat and a test conversation with your agent.
## Editing existing agents
The builder chat is also available when you open an existing agent in edit mode. You can use it to refine instructions, add tools, or adjust the setup, and it updates the configuration for you. Use **New chat** to start a fresh builder conversation; previous builder chats remain available in the chat history.
## FAQ
Use the builder when you want a working first version quickly or when you are not sure which configuration options fit your use case. Use manual configuration when you already know exactly what to set up or need fine-grained control over a single field.
No. Changes are saved as a draft, just like manual edits. The builder only publishes a version when you explicitly ask it to, and you can always publish the current draft yourself from the agent editor.
If you prefer to configure everything yourself, click **Go to editor** to skip the chat and open the configuration editor directly. You can also start from a template.
## What the builder can configure
The builder can set up most of the agent configuration from your description:
* **Agent details**: name, description, emoji icon, and conversation starters
* **Instructions**: writing new instructions or refining existing ones
* **Model settings**: model, creativity, and the behavior when limits are reached
* **Capabilities**: web search and image generation
* **Knowledge**: attaching files and knowledge sources
* **Actions**: integration actions, skills, workflows, and file templates
* **Subagents**: attaching other agents for delegation
* **Labels**: assigning existing workspace labels
* **Form fields**: switching the input type to form and generating the fields
Sharing and scheduling are not handled by the builder. Use the options in the top bar to [share](/en/using-langdock/agents/configuration#sharing) or [schedule](/en/using-langdock/agents/configuration#schedule) the agent.
## Refining and manual editing
After the initial setup, the builder chat stays in a panel next to the configuration editor. You can keep chatting to refine the agent, and changes apply live to the configuration. You can also edit any field manually at any time; the chat and the editor work on the same configuration.
Use the **Build** and **Test** toggle to switch between the builder chat and a test conversation with your agent.
## Editing existing agents
The builder chat is also available when you open an existing agent in edit mode. You can use it to refine instructions, add tools, or adjust the setup, and it updates the configuration for you. Use **New chat** to start a fresh builder conversation; previous builder chats remain available in the chat history.
## FAQ
Use the builder when you want a working first version quickly or when you are not sure which configuration options fit your use case. Use manual configuration when you already know exactly what to set up or need fine-grained control over a single field.
No. Changes are saved as a draft, just like manual edits. The builder only publishes a version when you explicitly ask it to, and you can always publish the current draft yourself from the agent editor.