> ## Documentation Index
> Fetch the complete documentation index at: https://docs.langdock.com/llms.txt
> Use this file to discover all available pages before exploring further.
# Shopify Admin
> Set up the Shopify Admin integration in Langdock using your own Shopify app.
Connect Shopify stores to Langdock with your own Shopify app. Create the app in the [Shopify Dev Dashboard](https://dev.shopify.com/dashboard). Paste the Client ID and Client Secret into Langdock. Shopify Admin uses [Bring Your Own OAuth Client](/en/admin/manage-integrations/bring-your-own-oauth). Keep the Client Secret in workspace admin settings, not in chat.
This connection uses [application-level permissions](/en/using-langdock/integrations/connections#custom-scopes-and-application-level-permissions). Requests use the app's Admin API scopes, not the Shopify role of the person who installed the app.
You need:
* Access to the [Shopify Dev Dashboard](https://dev.shopify.com/dashboard). You need the **App development → Develop** permission if you do not own the store.
* Permission to install apps on the store you want to connect
* Workspace admin access in Langdock
## Setup
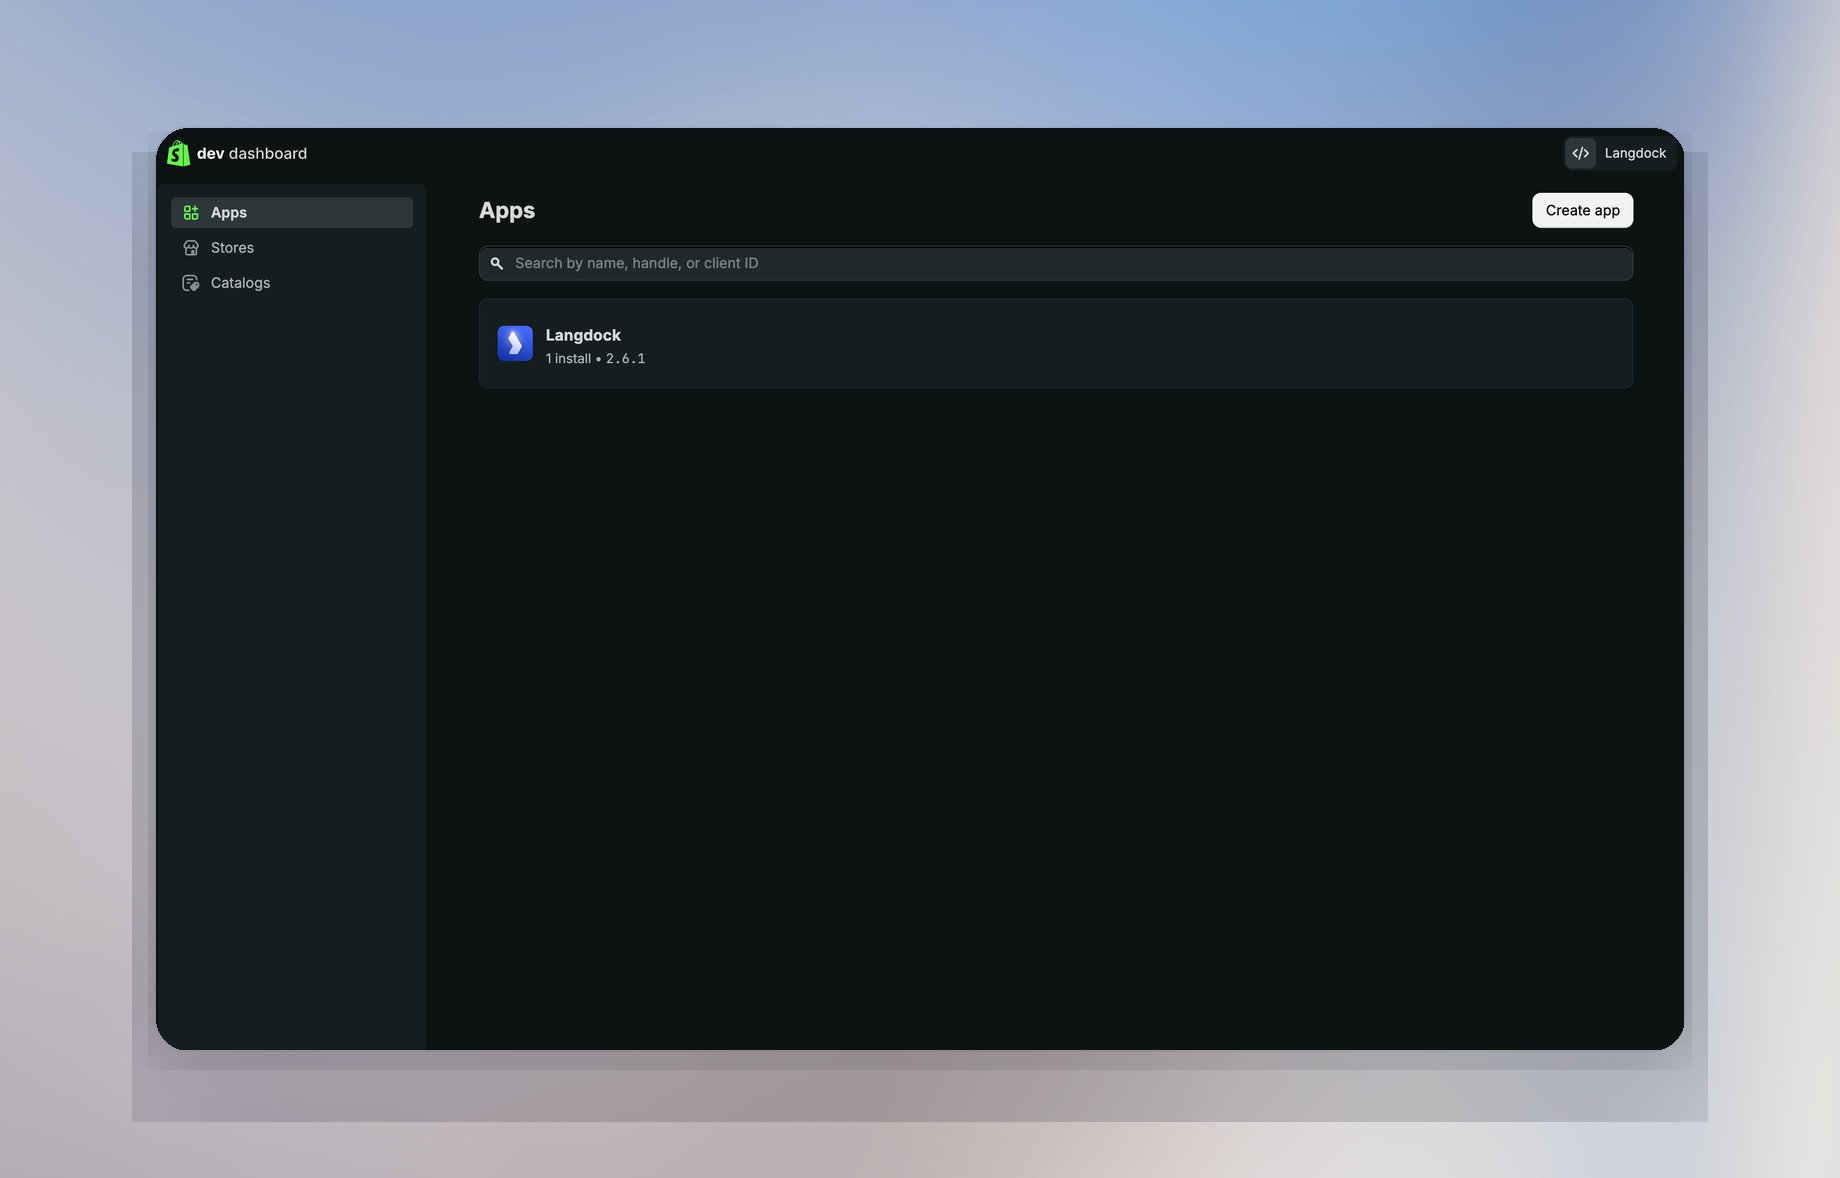
Open the [Shopify Dev Dashboard](https://dev.shopify.com/dashboard). Click **Create app**.
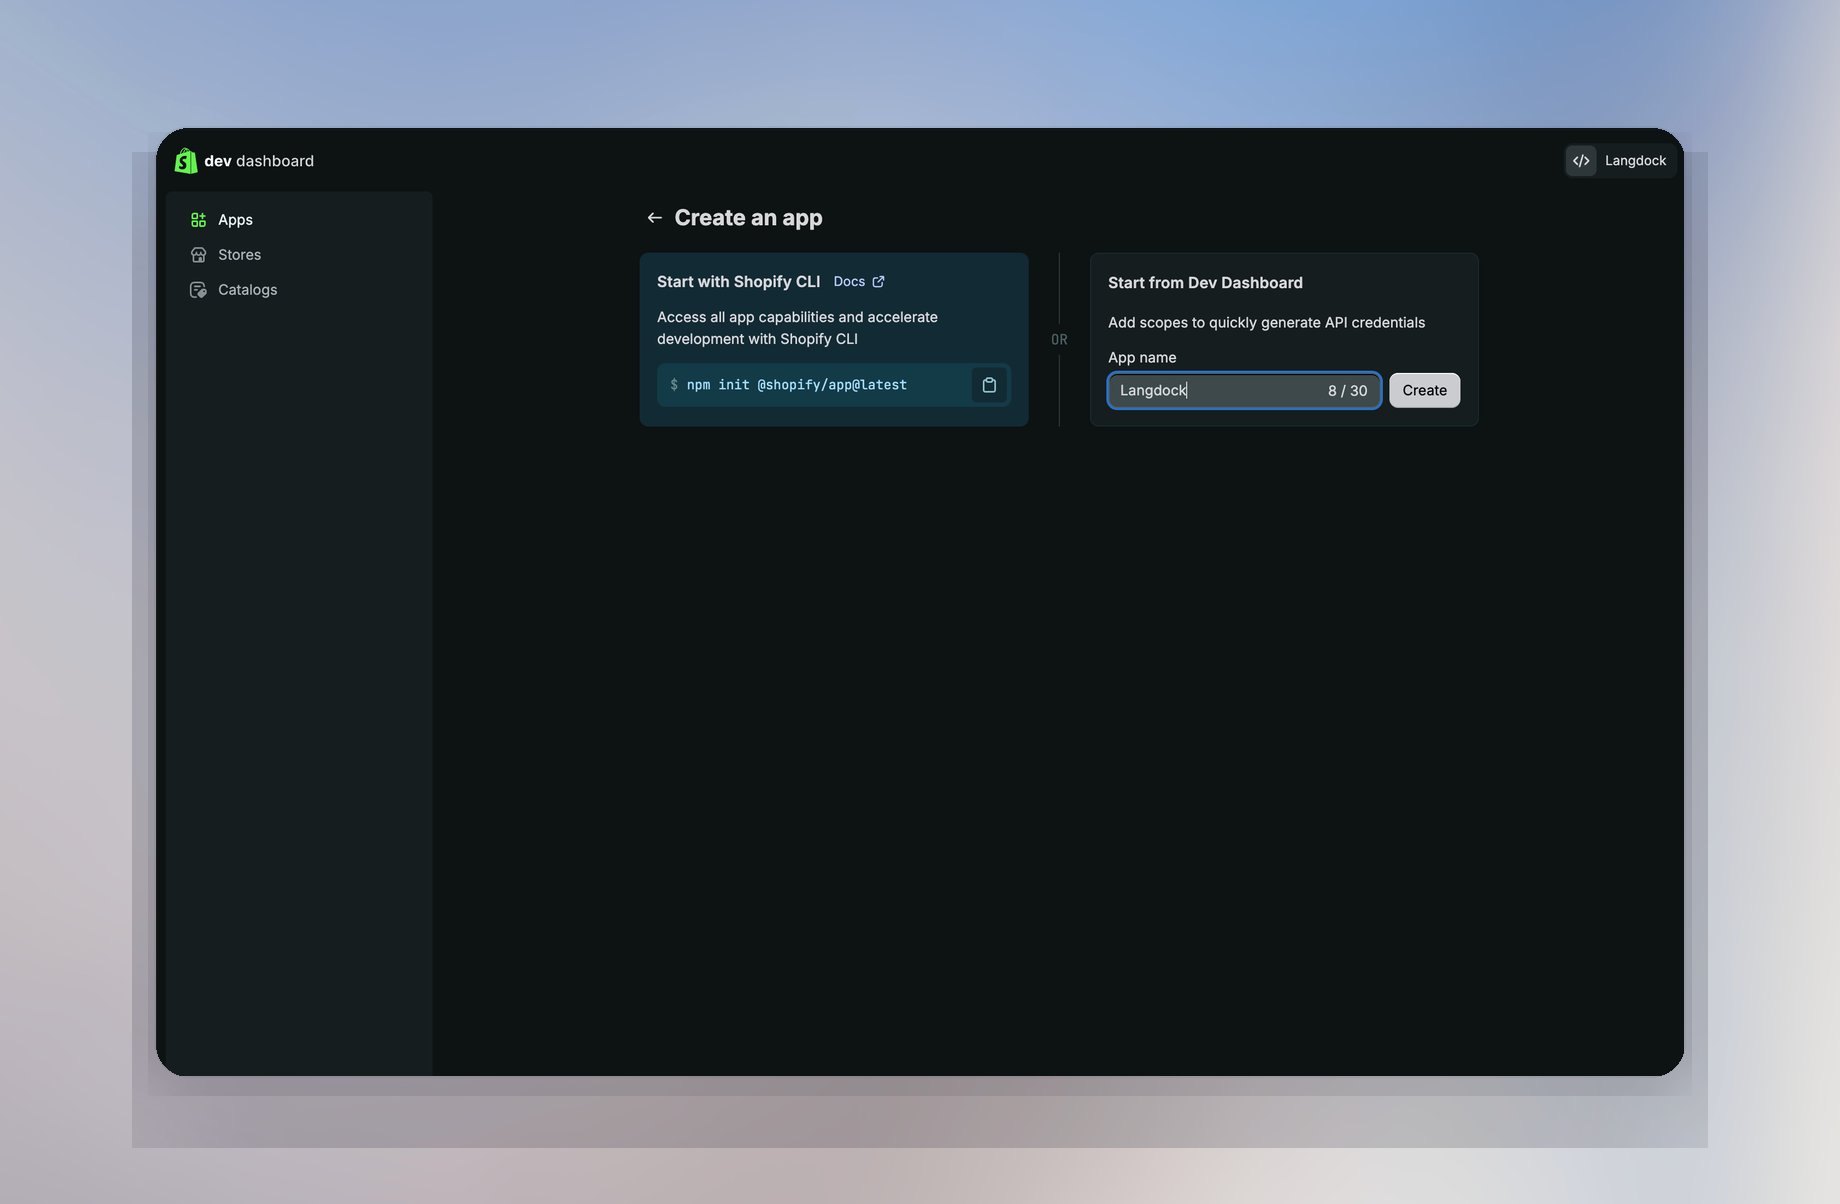
 Enter **Langdock** or another name people will recognize. Use **Start from Dev Dashboard**, not Shopify CLI. Click **Create**.
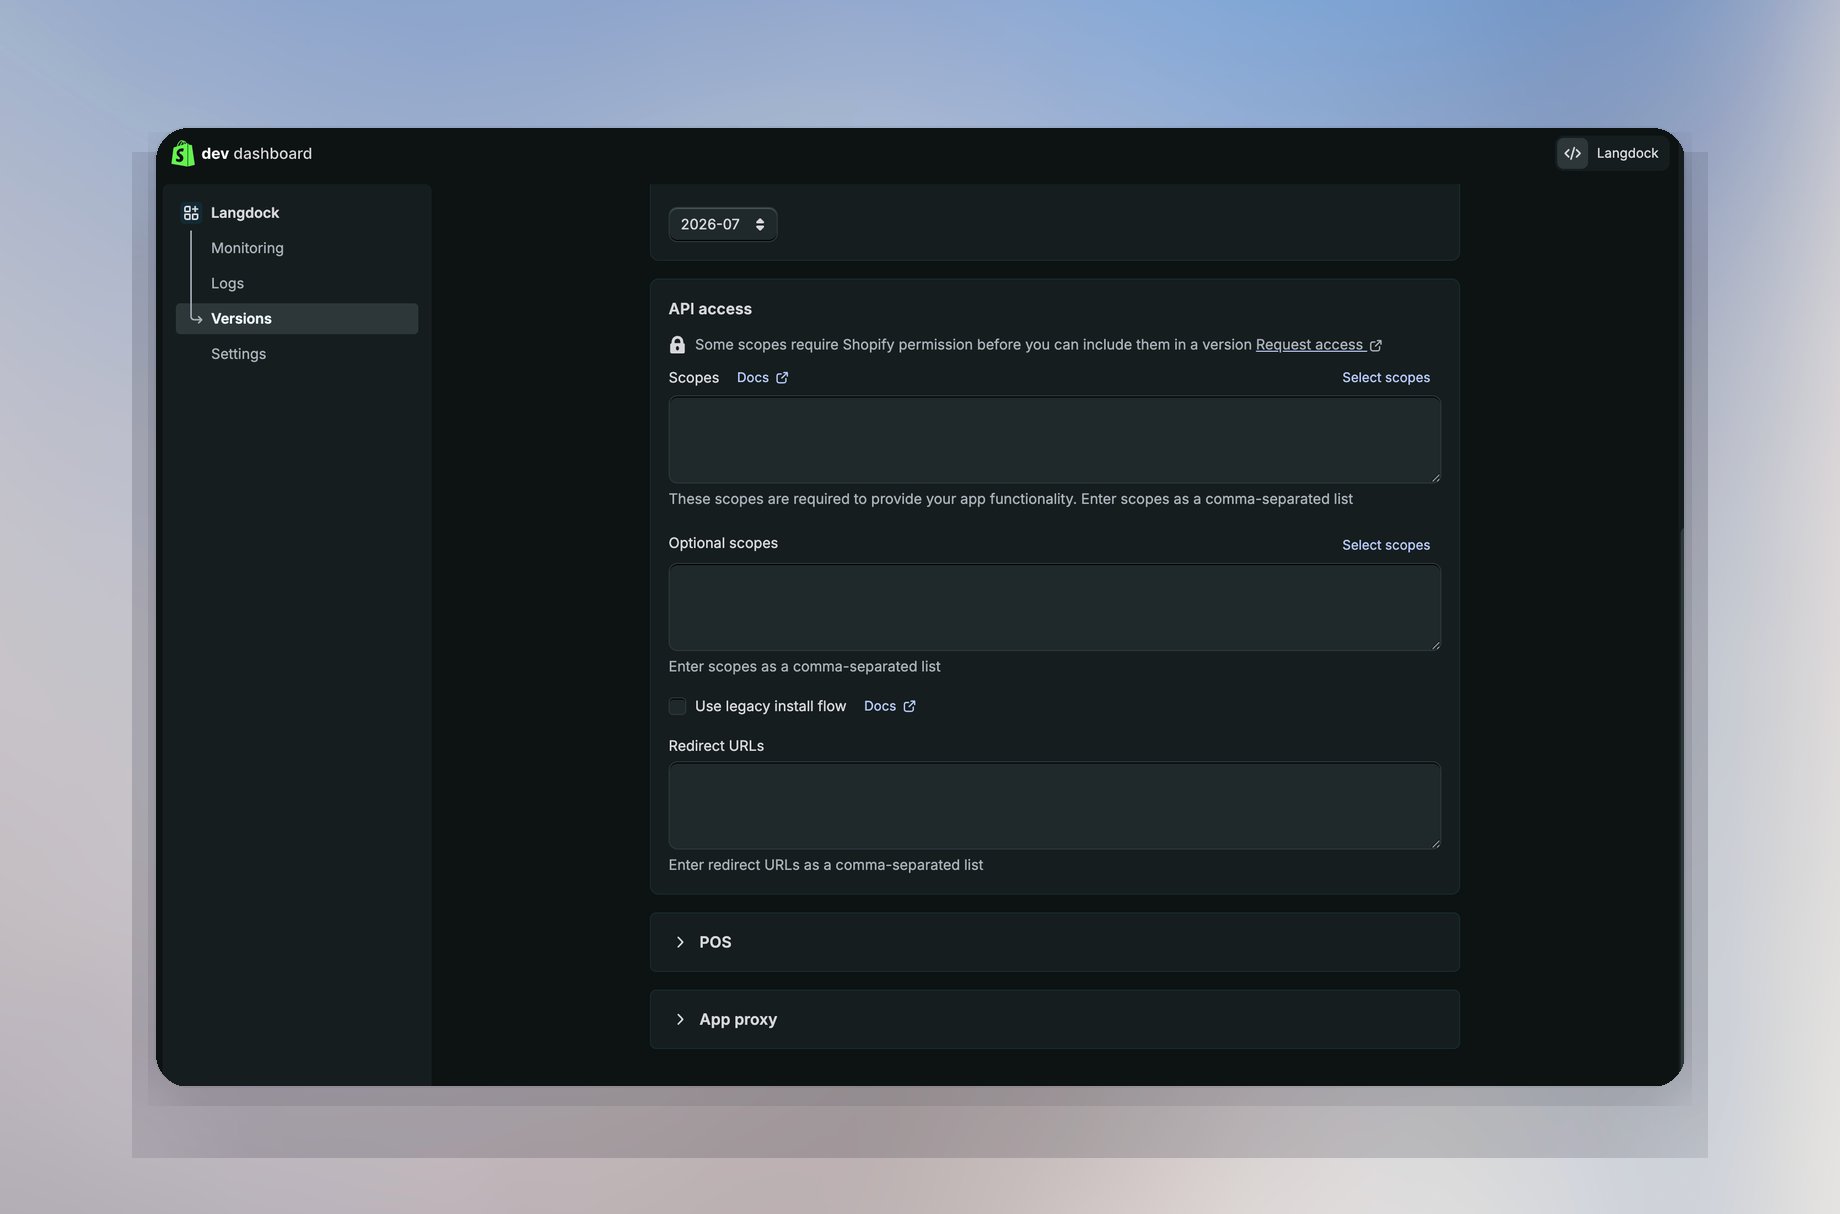
 Open the app version. Open **API access**. Under **Scopes**, paste this comma-separated list.
```
read_discounts,read_inventory,read_locations,read_orders,read_products,write_discounts,write_files,write_inventory,write_merchant_managed_fulfillment_orders,write_products
```
In Langdock, go to **Admin → Integrations → Shopify Admin**. Create the custom OAuth client. Copy **Redirect URL** from Langdock. Paste it under **Redirect URLs** in Shopify. The domain depends on your deployment.
```
https://app.langdock.com/api/integrations/{integration-id}/callback
```
Save the scopes and redirect URL. Release the app version.
Open the app version. Open **API access**. Under **Scopes**, paste this comma-separated list.
```
read_discounts,read_inventory,read_locations,read_orders,read_products,write_discounts,write_files,write_inventory,write_merchant_managed_fulfillment_orders,write_products
```
In Langdock, go to **Admin → Integrations → Shopify Admin**. Create the custom OAuth client. Copy **Redirect URL** from Langdock. Paste it under **Redirect URLs** in Shopify. The domain depends on your deployment.
```
https://app.langdock.com/api/integrations/{integration-id}/callback
```
Save the scopes and redirect URL. Release the app version.
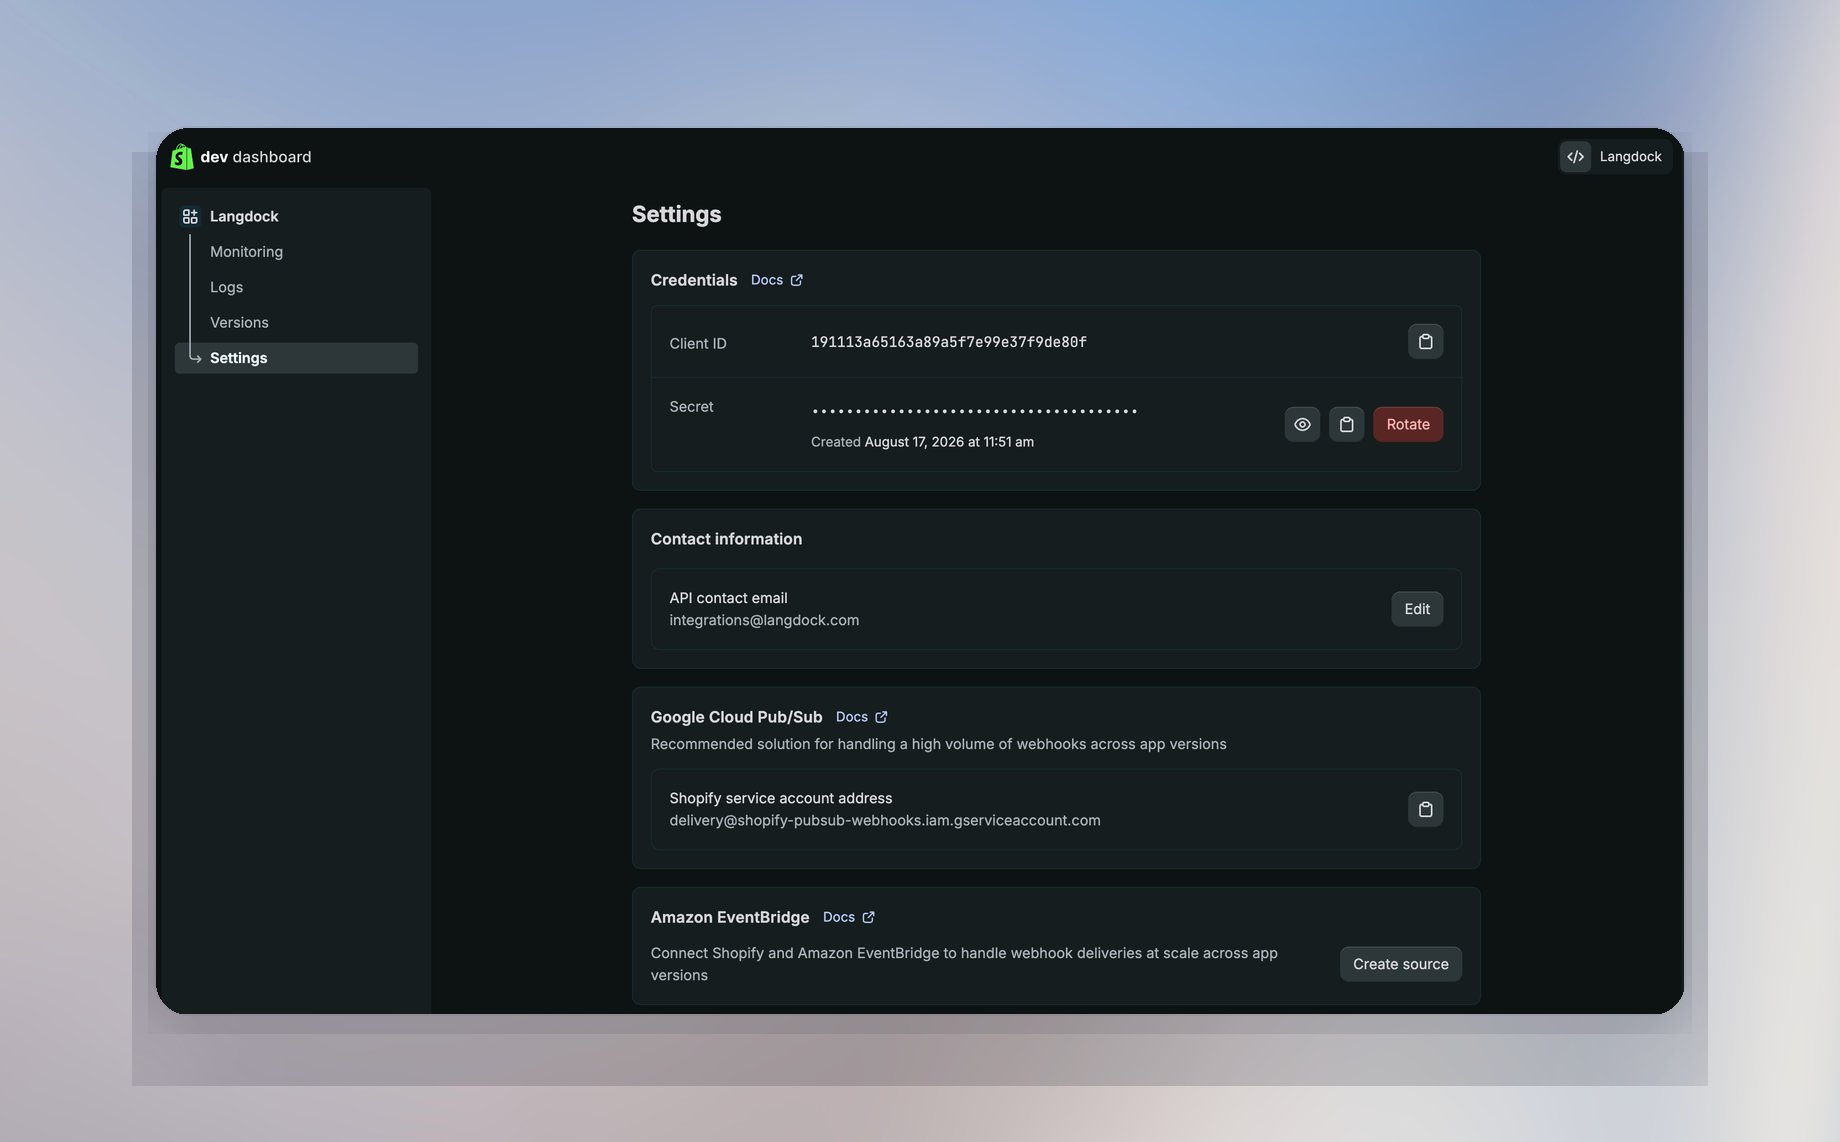
 In the Dev Dashboard, open **Settings**. Copy **Client ID** and **Client secret**.
In Langdock, paste them into the custom OAuth client for Shopify Admin. Save.
Connect a store. Enter a custom domain like `shop.acme.com`, a `*.myshopify.com` domain, or the store handle. Complete Shopify's install screen. The app then has the Admin API scopes from step 3.
In the Dev Dashboard, open **Settings**. Copy **Client ID** and **Client secret**.
In Langdock, paste them into the custom OAuth client for Shopify Admin. Save.
Connect a store. Enter a custom domain like `shop.acme.com`, a `*.myshopify.com` domain, or the store handle. Complete Shopify's install screen. The app then has the Admin API scopes from step 3.
 Each Langdock connection is one shop. Connect every store separately. You can reuse the same custom OAuth client. You still need permission to install apps on each shop.
## What you can do after setup
You can look up and update products, inventory, locations, orders, fulfillments, discounts, and files in the connected store.
## Troubleshooting
**Invalid redirect URI**
The Redirect URL in Shopify must match Langdock's **Redirect URL** exactly. Include `https` and `/callback`.
**OAuth client is not configured**
Save Client ID and Client Secret under **Admin → Integrations → Shopify Admin** before you connect a store.
**Access denied / forbidden**
The app version must include the scopes above. Complete the Shopify install screen with an account that can install apps.
**Invalid store domain**
Enter the domain you use for the store, the `*.myshopify.com` domain, or the store handle. Strip `https://`.
Each Langdock connection is one shop. Connect every store separately. You can reuse the same custom OAuth client. You still need permission to install apps on each shop.
## What you can do after setup
You can look up and update products, inventory, locations, orders, fulfillments, discounts, and files in the connected store.
## Troubleshooting
**Invalid redirect URI**
The Redirect URL in Shopify must match Langdock's **Redirect URL** exactly. Include `https` and `/callback`.
**OAuth client is not configured**
Save Client ID and Client Secret under **Admin → Integrations → Shopify Admin** before you connect a store.
**Access denied / forbidden**
The app version must include the scopes above. Complete the Shopify install screen with an account that can install apps.
**Invalid store domain**
Enter the domain you use for the store, the `*.myshopify.com` domain, or the store handle. Strip `https://`.